|
|
Post by curufin on Nov 13, 2018 20:12:39 GMT
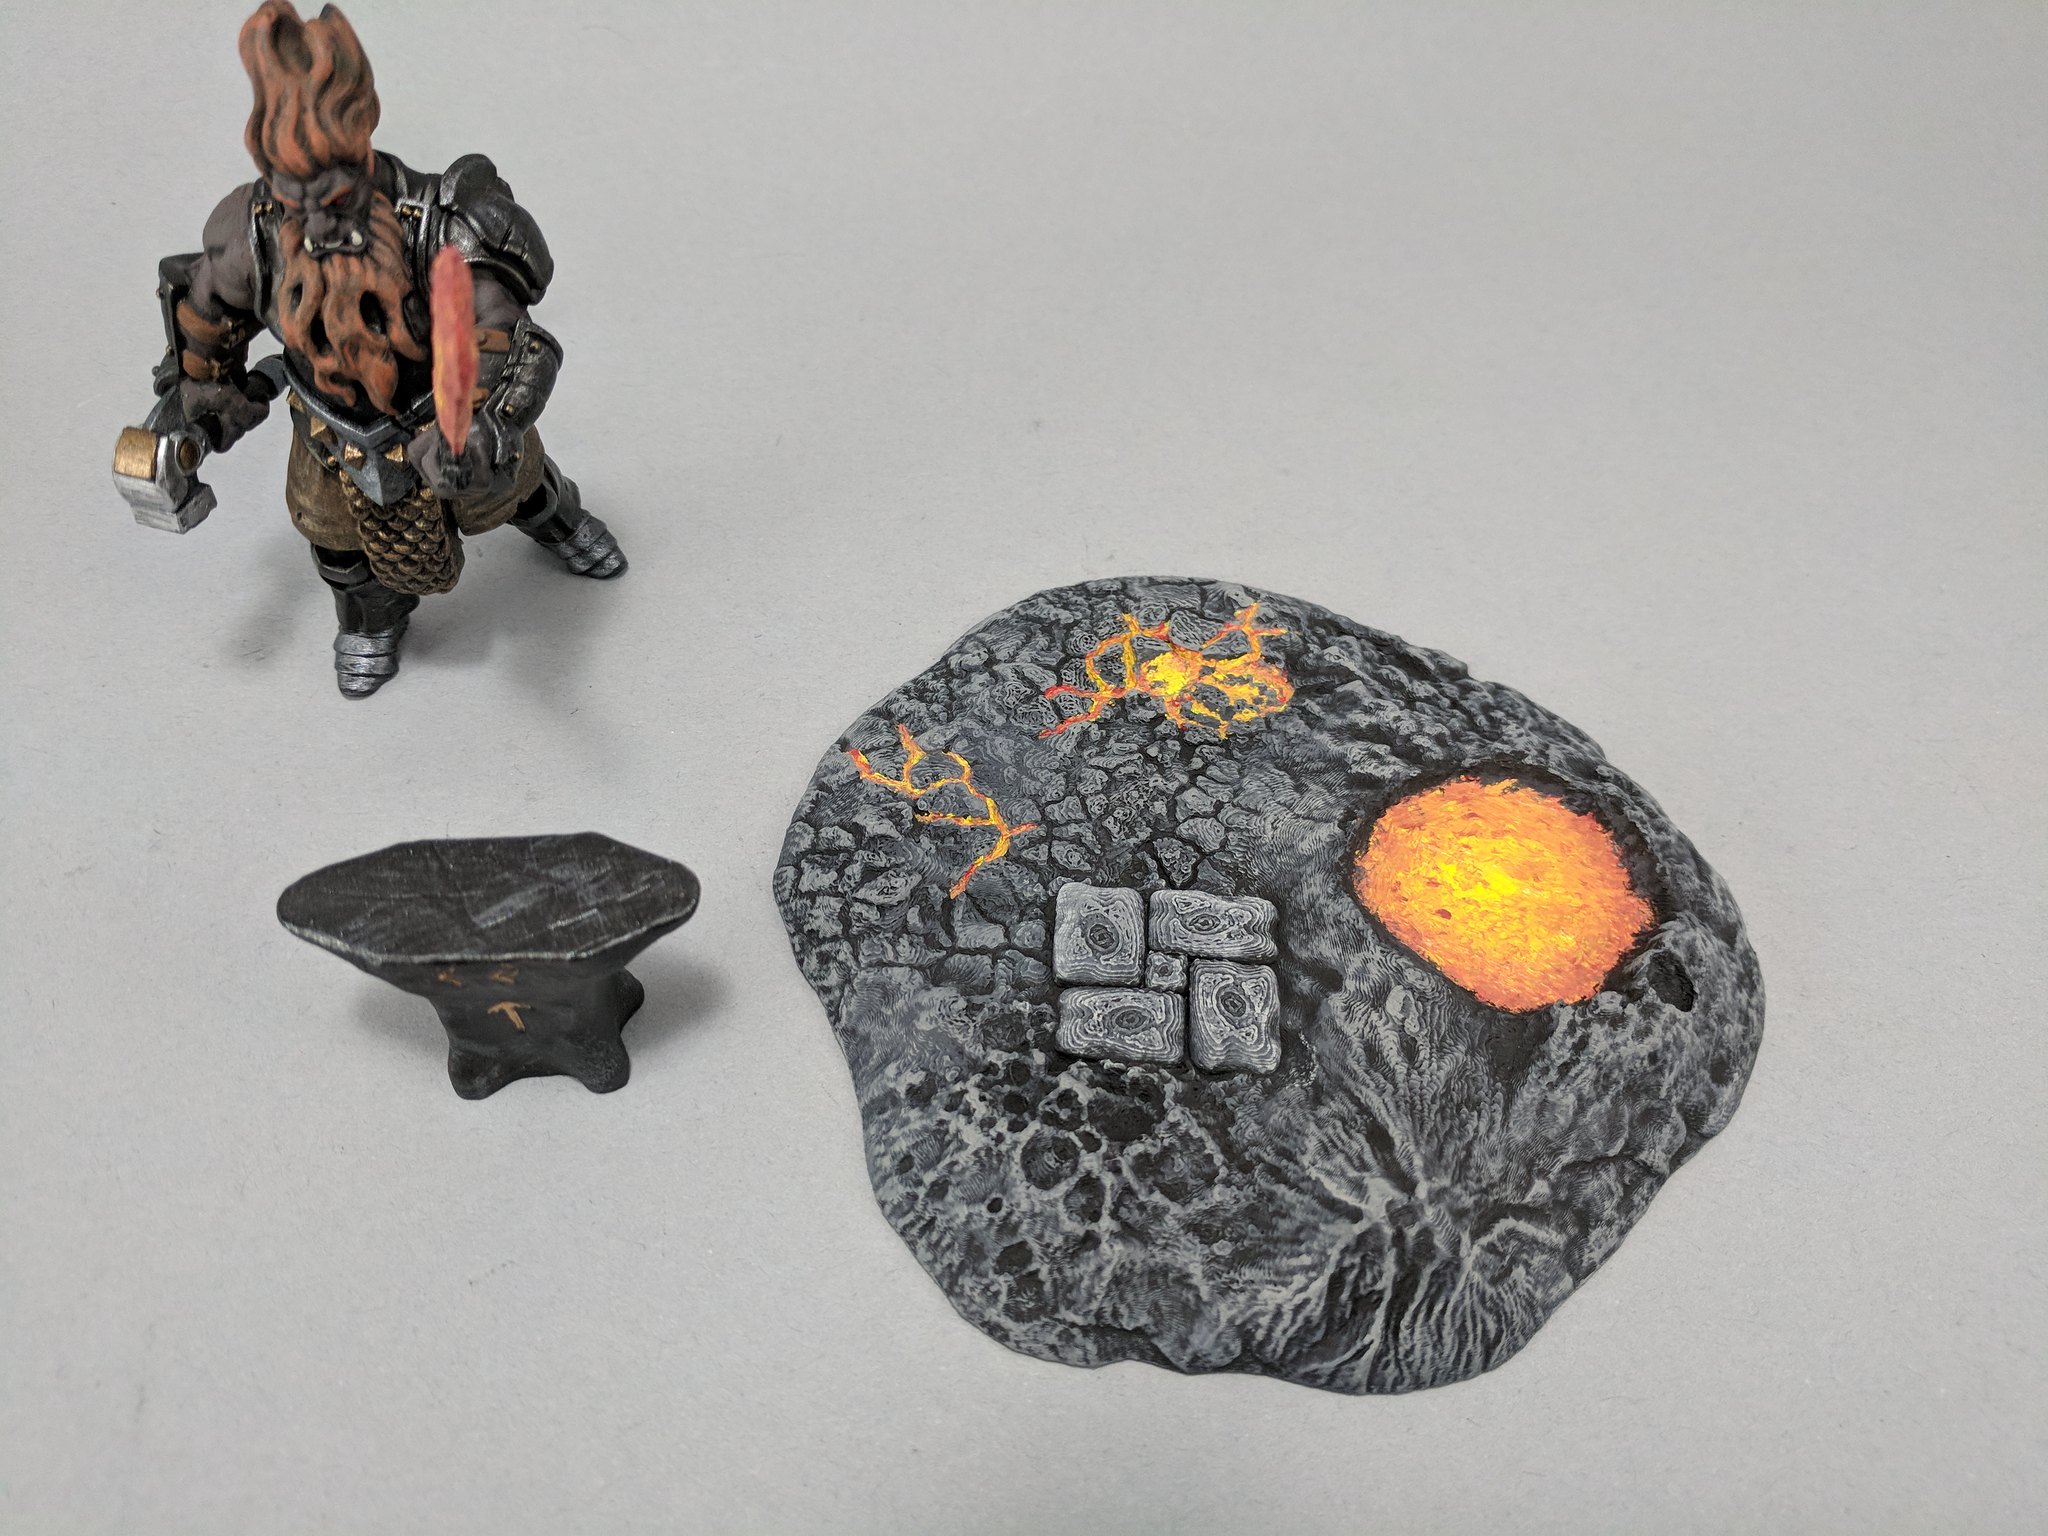
Thanks for the report, and the beautiful pics! I would absolutely love seing more of this format. I'm still not into 3D printing, but seing your stuff always makes my fingers itch.  What are those XP cards in the last picture? Looks like a fun concept... Thanks, tauster! I think if you turn to the darkside and get a 3D printer, you will crush the rebellion.  The XP cards are little D&D Achievements. I found them online: link I printed them out and added a little xp to them. There were about 150 in the download and then I added about a 100 more. Anytime a player gets an achievement, they also get an inspiration card (I got from a kickstarter a year or two ago) that has a small one-time bonus on it. |
|
|
|
Post by curufin on Nov 13, 2018 17:26:18 GMT
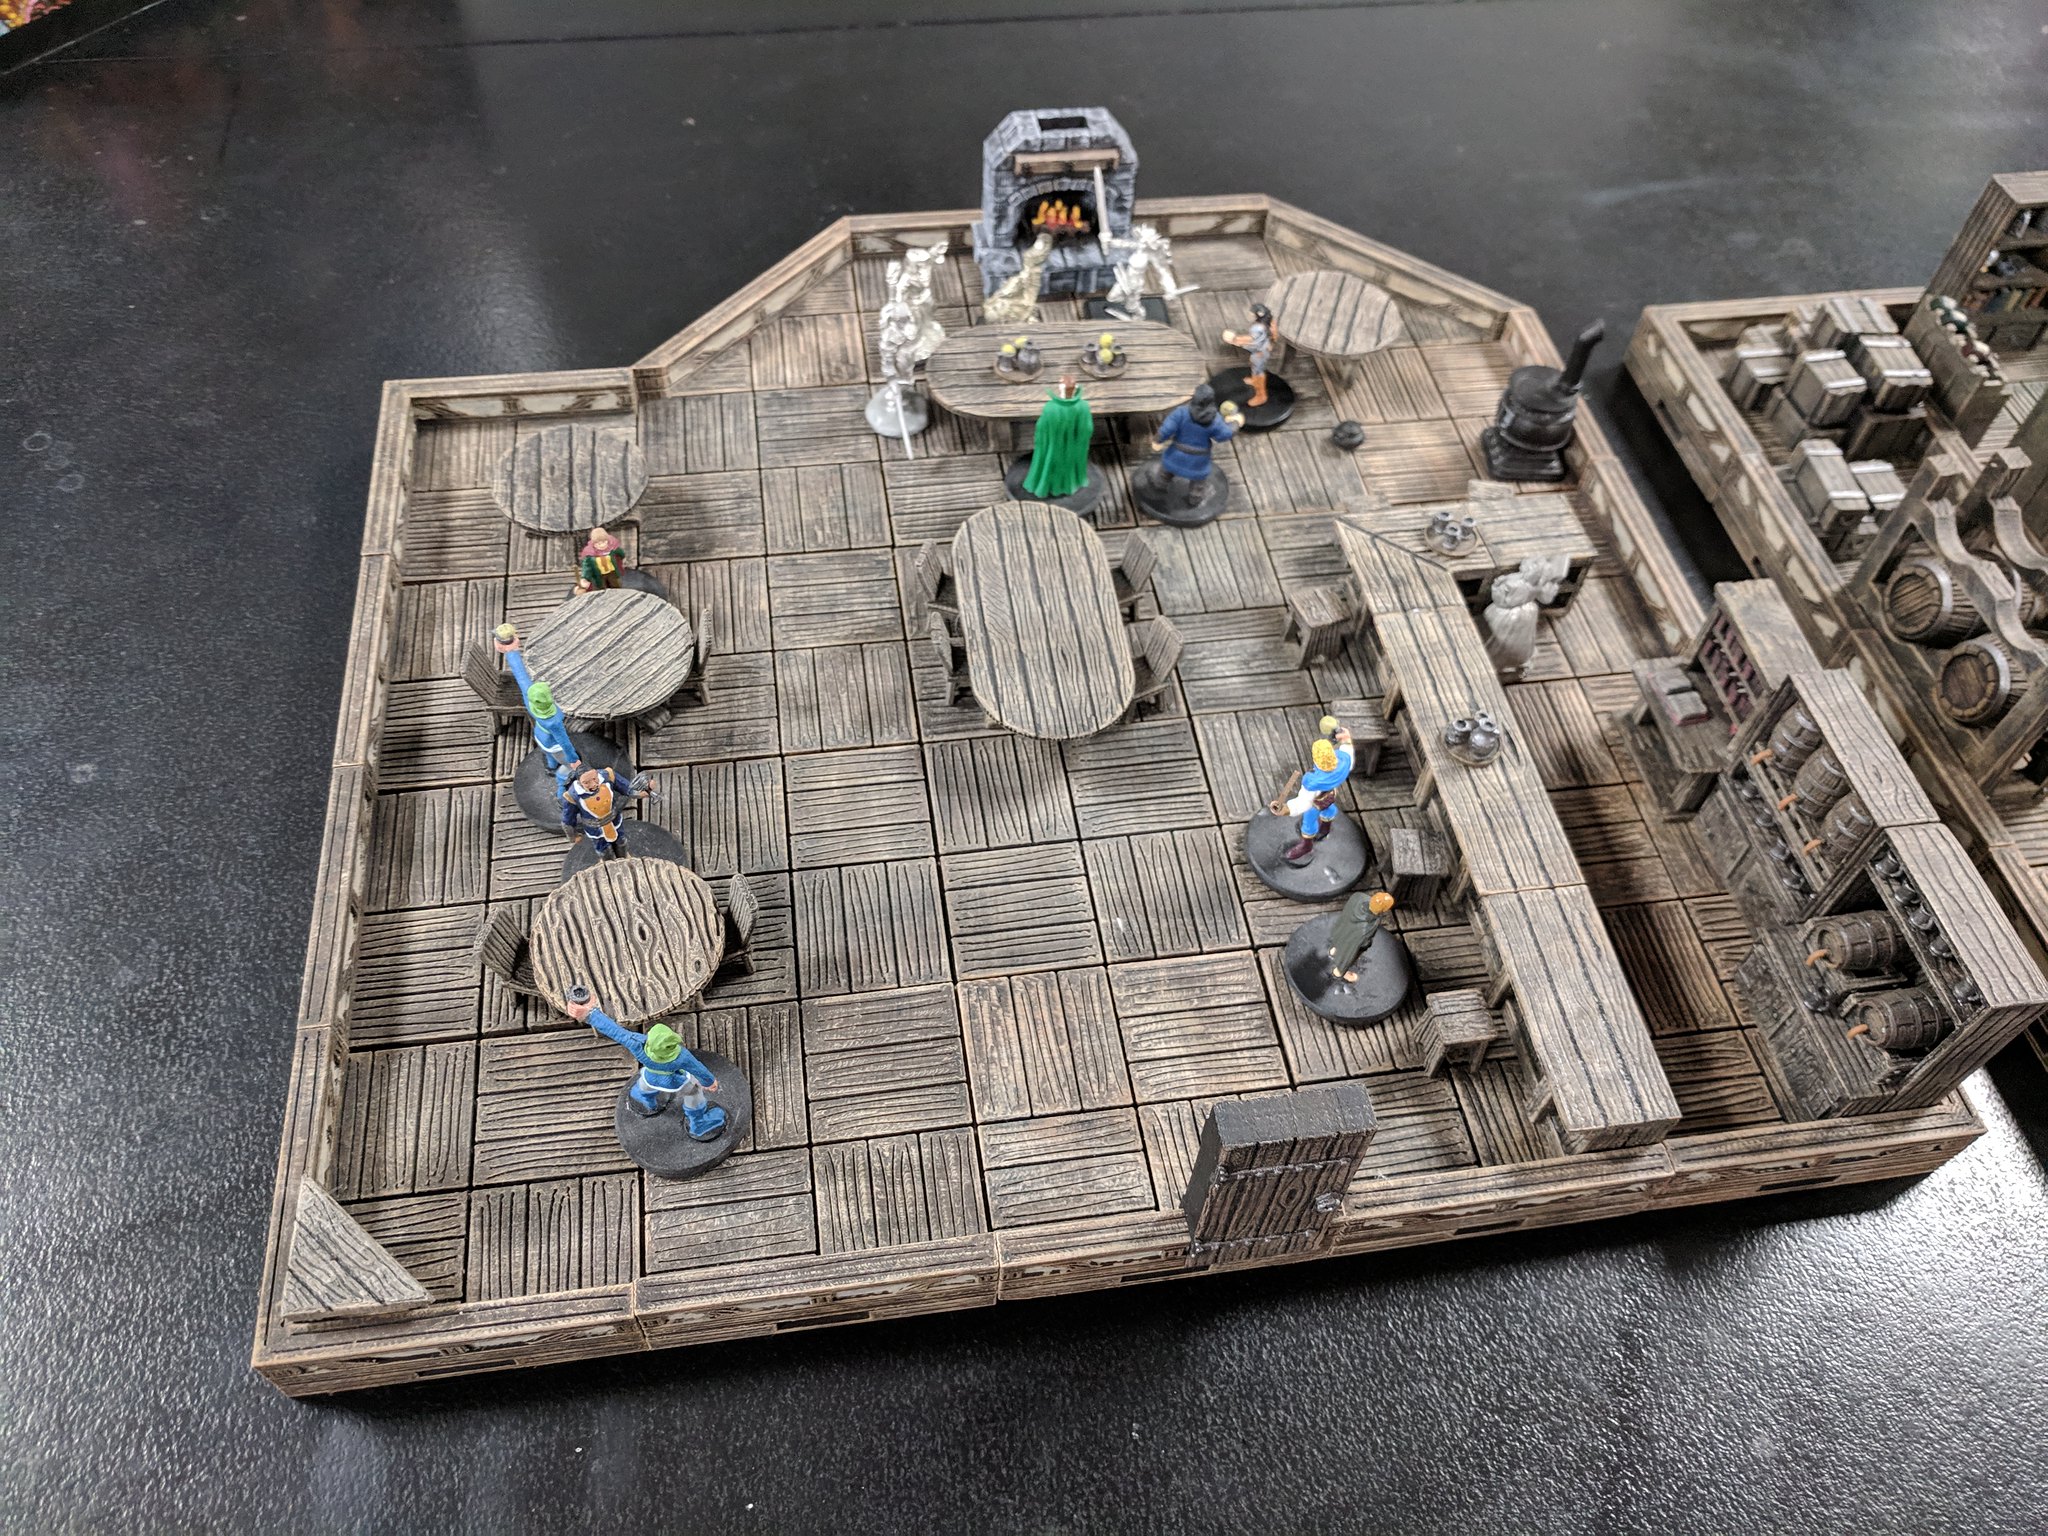
Curufin's CampaignOver the weekend I got to start up and run a new D&D campaign. The game is starting fresh from 1st level and has 5 players. 3 of the players are long-time gamers that I have known forever and 2 of them are brand new to RPGs. 1 of the veteran players lives about 700 miles away and is playing remotely with us (more on this setup below).
Historically, I have been awful at taking in-game photos of the stuff I have crafted over the years and I am going to make a conscious effort to change that. When there are crafts that I have done in the in-game photos, I will try to link them to the original walkthrough post here.
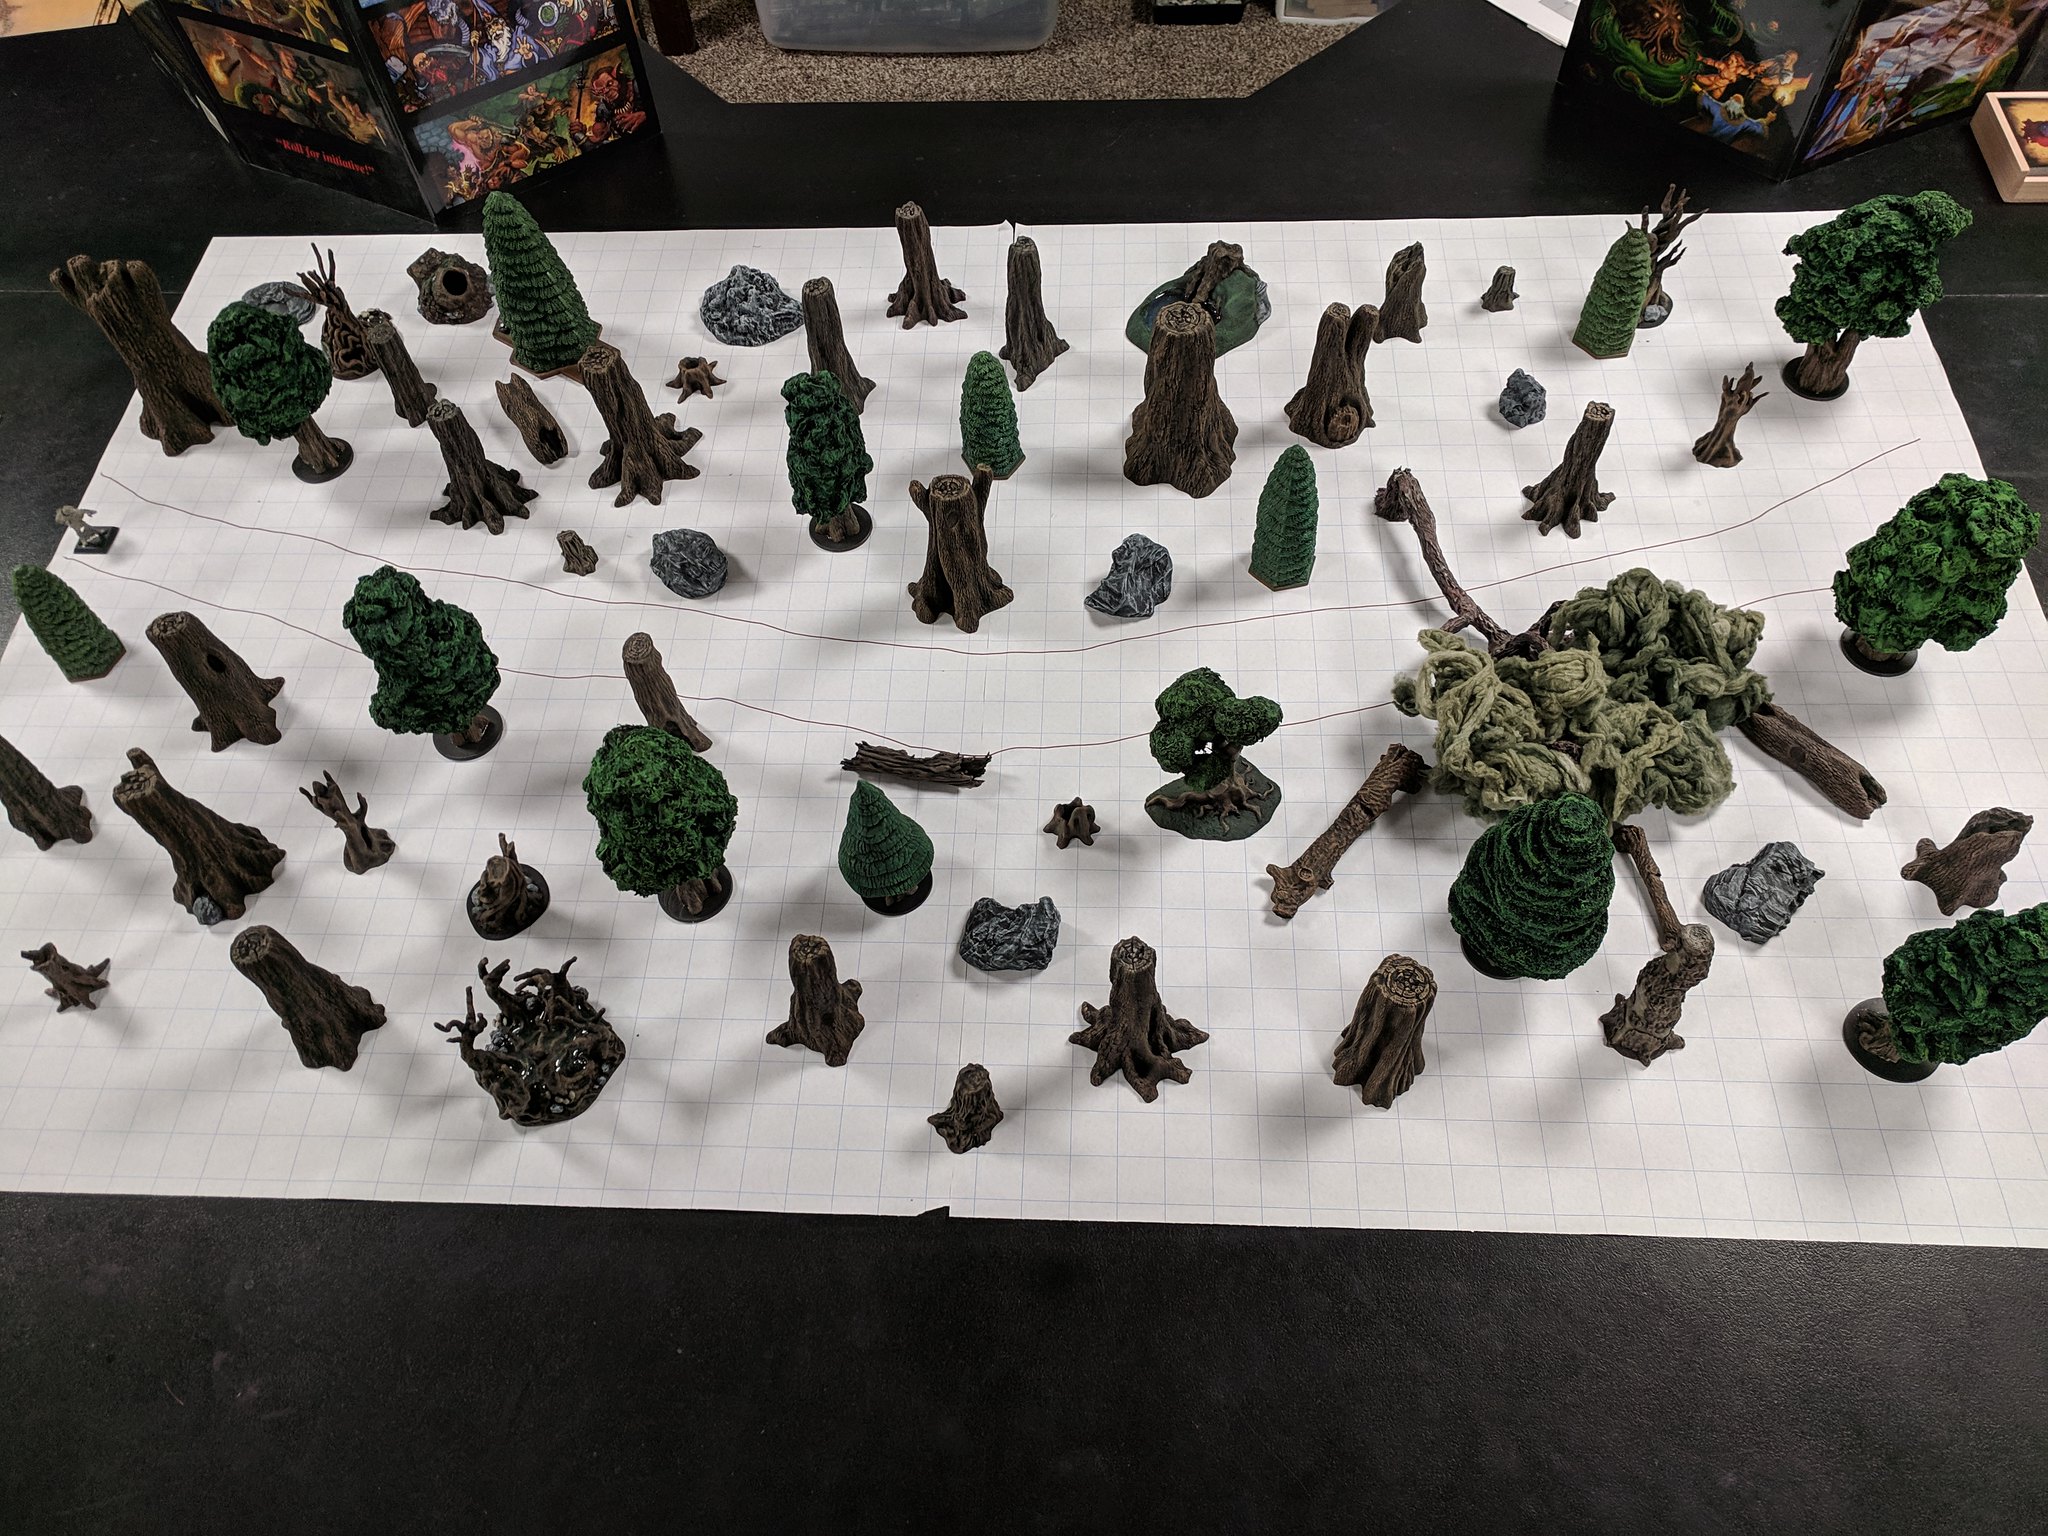
The games started with the party traveling through a forest and encountering a goblin ambush on a halfing merchant wagon. The goblins had cut down a tree to block the road. The players killed the goblins and escorted the merchant wagon to the nearby town of Barrow's Edge.
Entering the small town of Barrow's Edge.
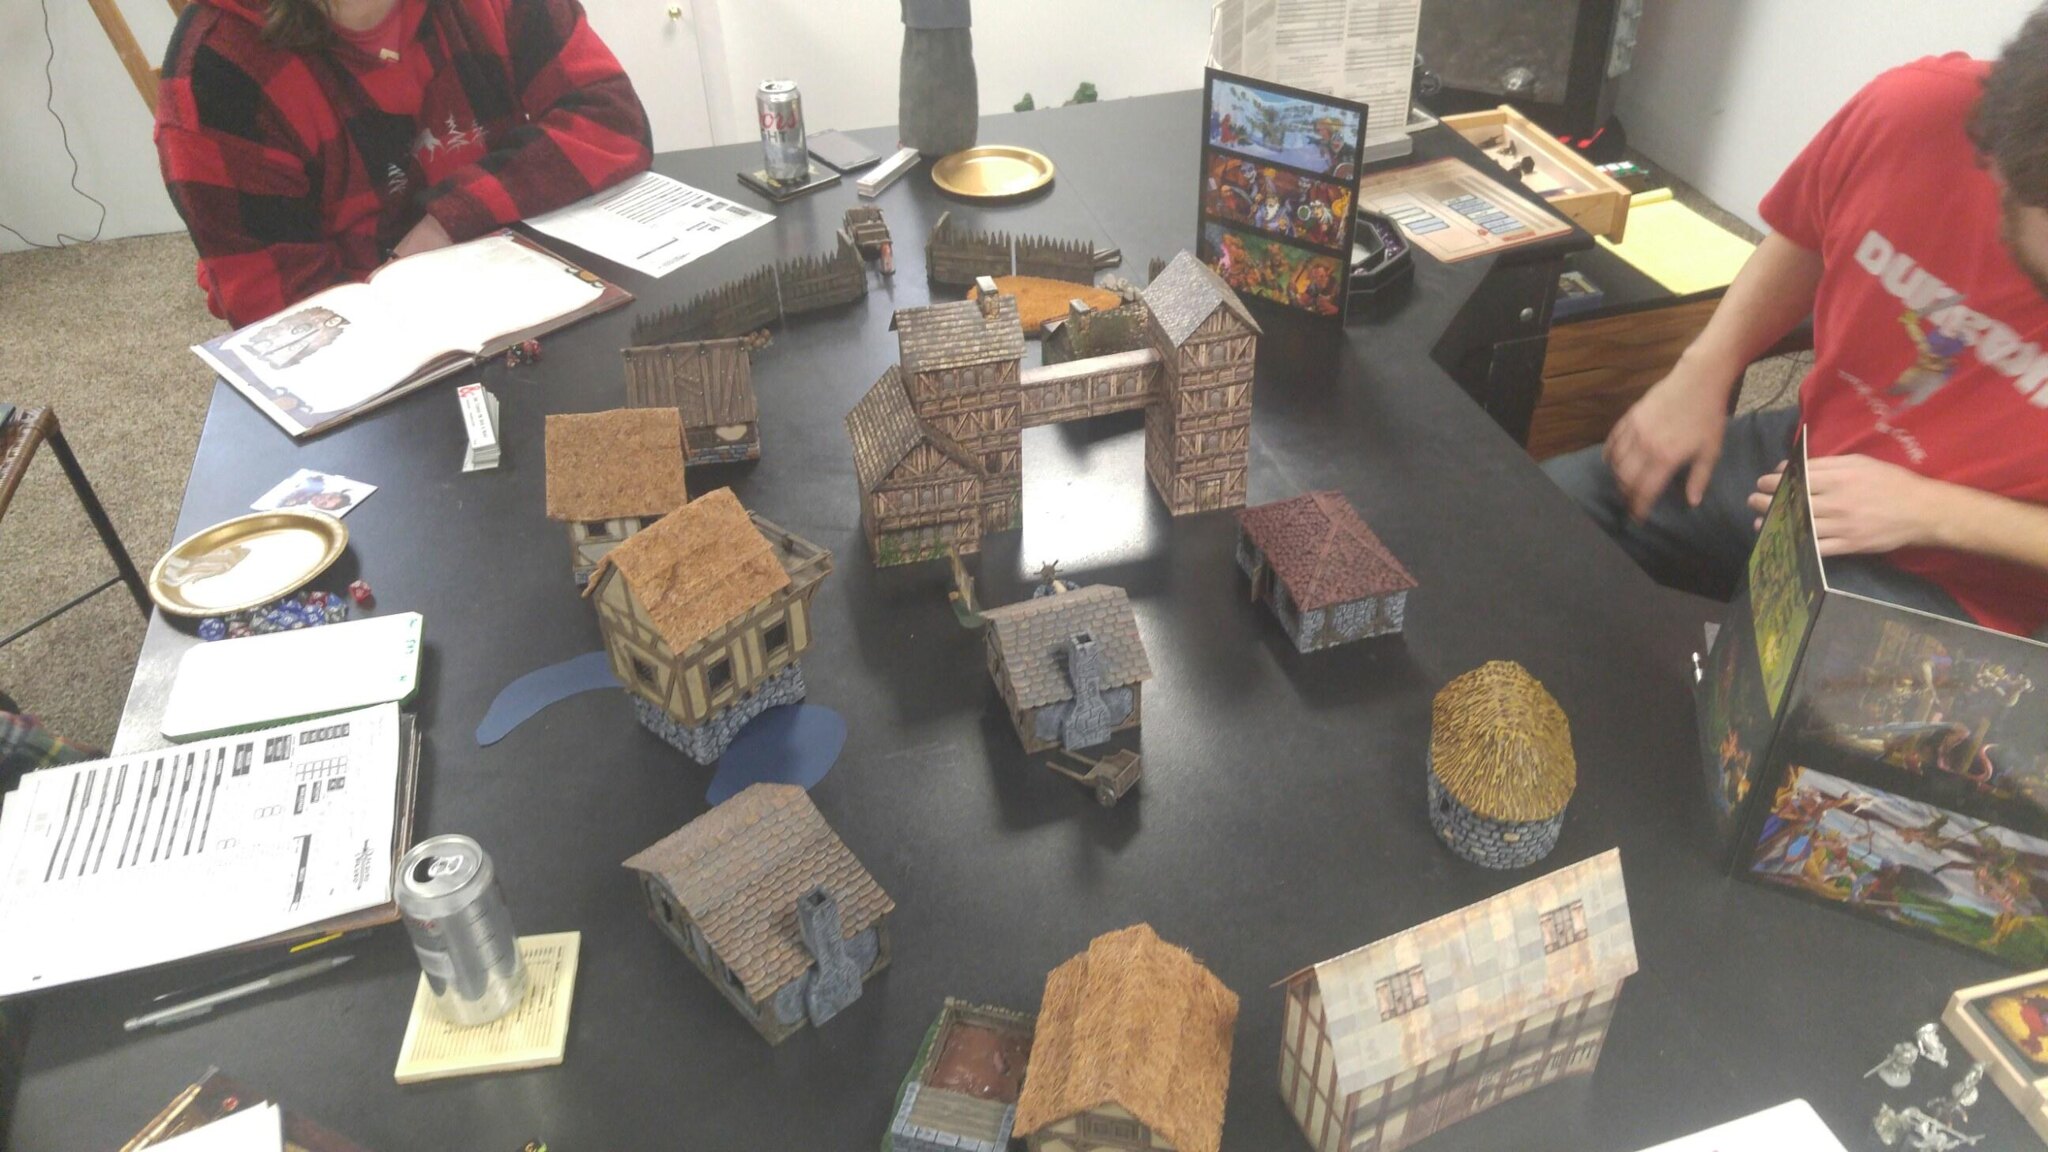
The players got the merchant wagon the the general store safely and helped unload it into the store. They learned that the town has been having problems with goblin raids at night.
So, you can clearly see in this picture that we have one remote player. This was one of our biggest concern: making sure that the remote player could see us, hear us, see what was going on in the game in terms of miniature location, movement on a grid, and relevant scatter terrain. We really wanted him to feel like he was at the table with us. For the general communication, we used Skype and set up a laptop at the table so we felt like he was sitting at the table and the laptop's webcam was on me (the DM) so he could see me. We also set up 3 PTZ (Pan, Tilt, and Zoom) cameras so he had full control of what he could see. One camera was set up directly over the table for a bird's-eye-view of the entire table top, with the ability to fully pan, tilt, and zoom in on a single room to see the grid and miniatures. We set up a second camera above the laptop for a three-quarter view of the table from his relative position. A third camera was set up against the wall so he could see all the player at the table. It worked perfectly. In a 11 hour session, we never had to tell him where his character was or how far away from anything he was. It was really magical. It really felt like he was at the table with us.
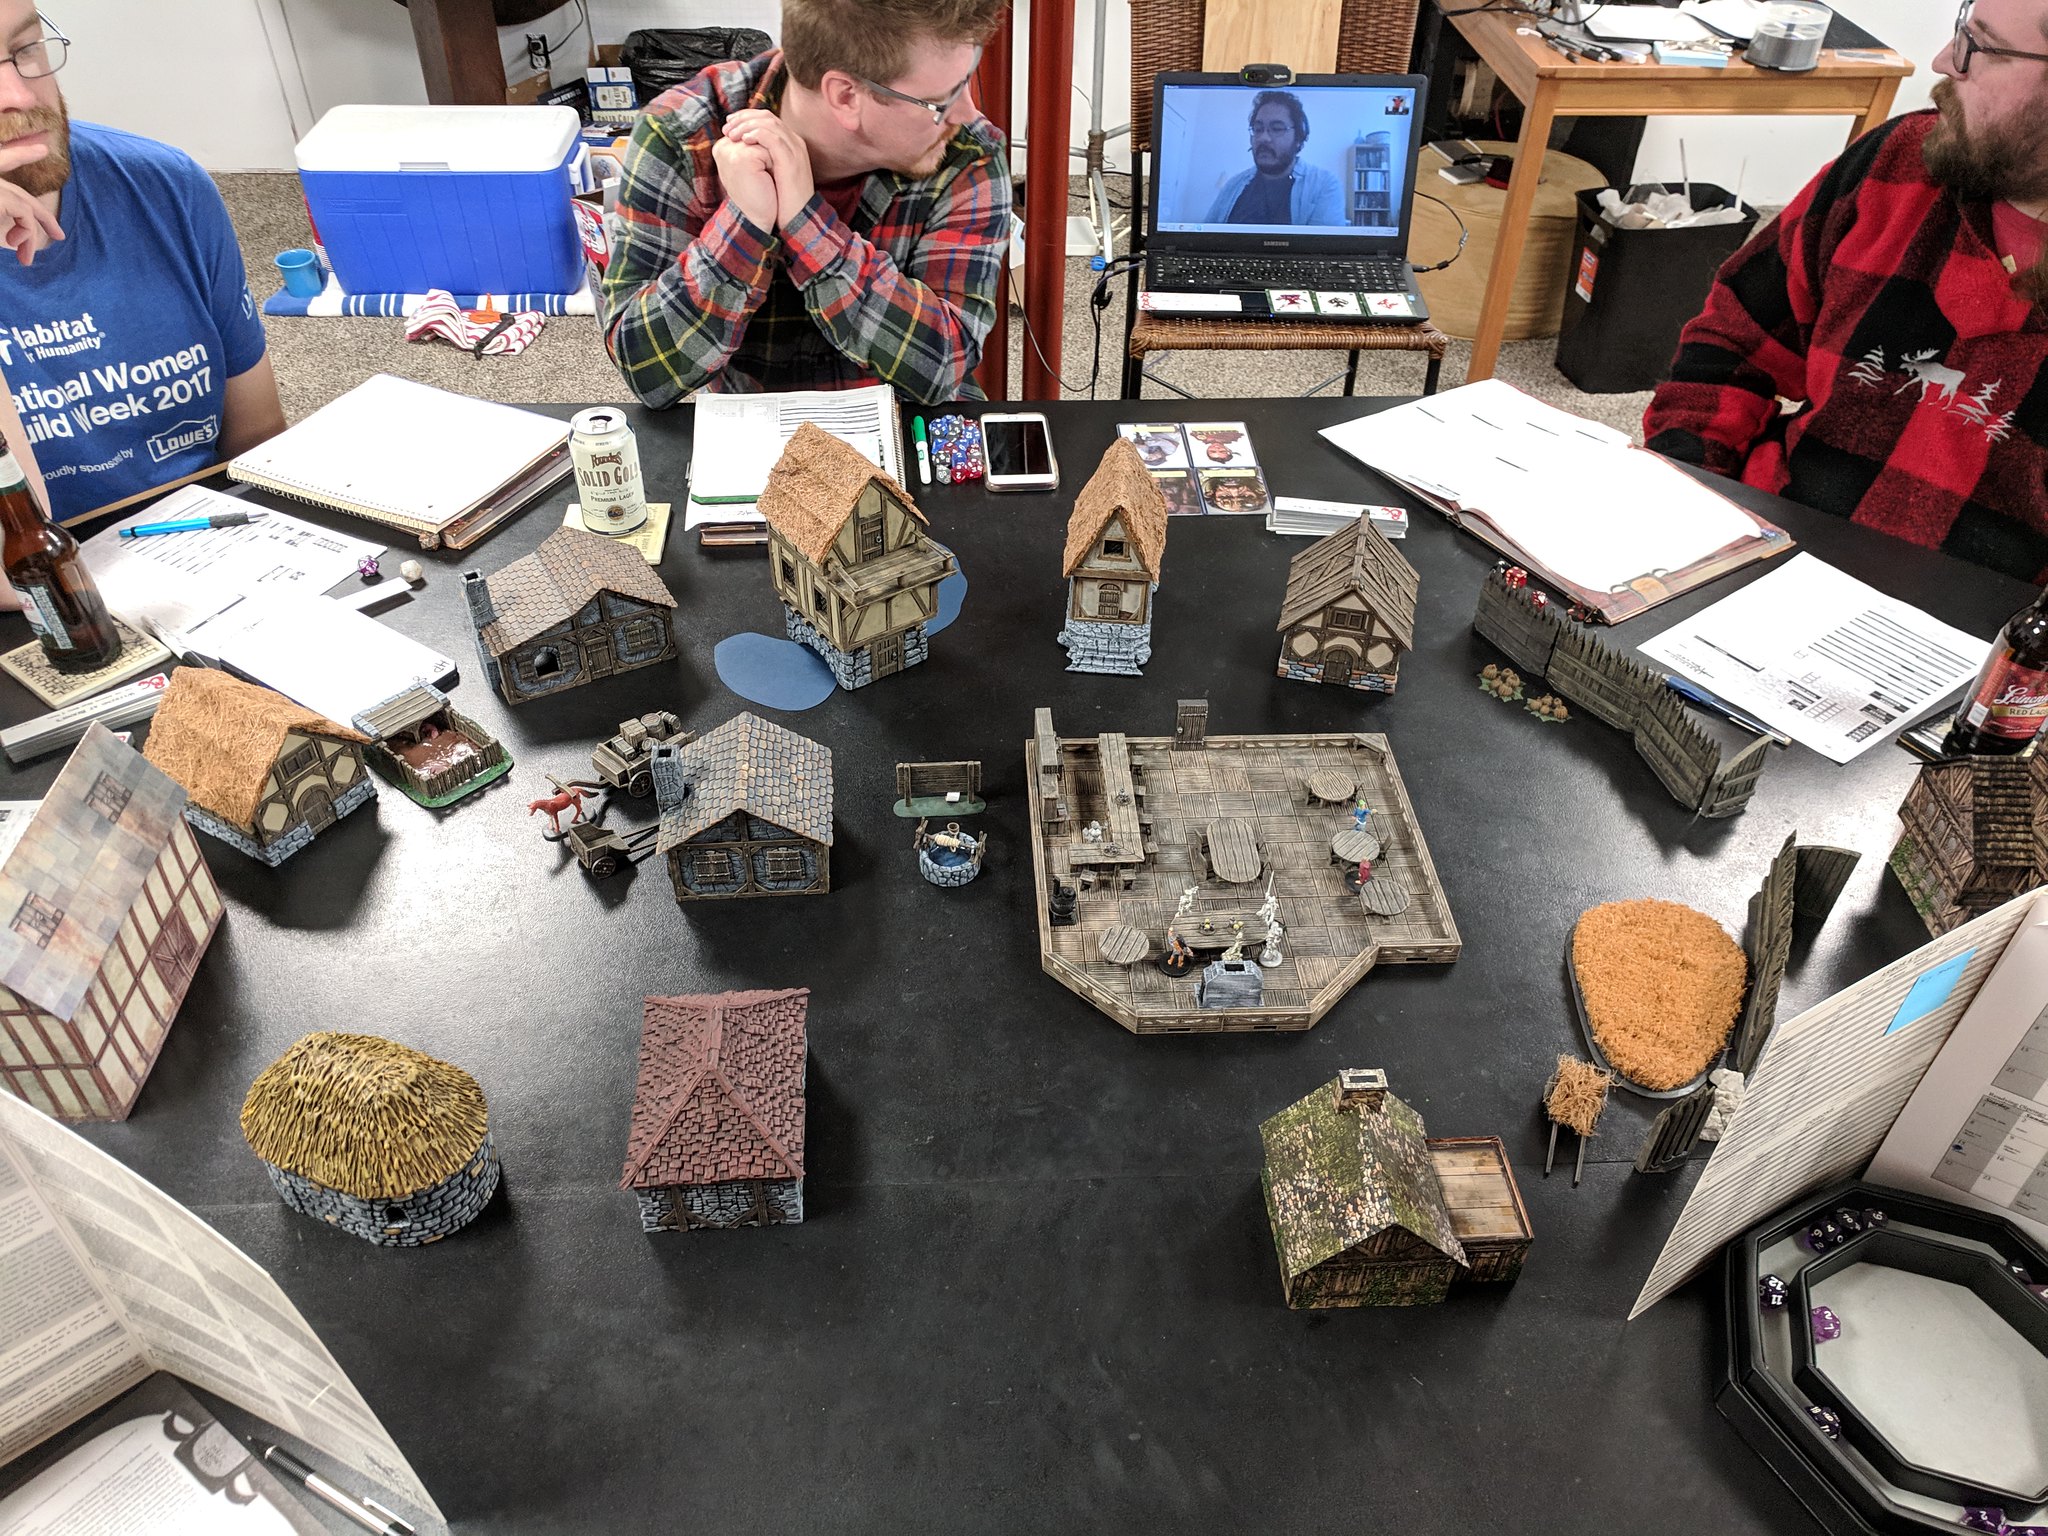
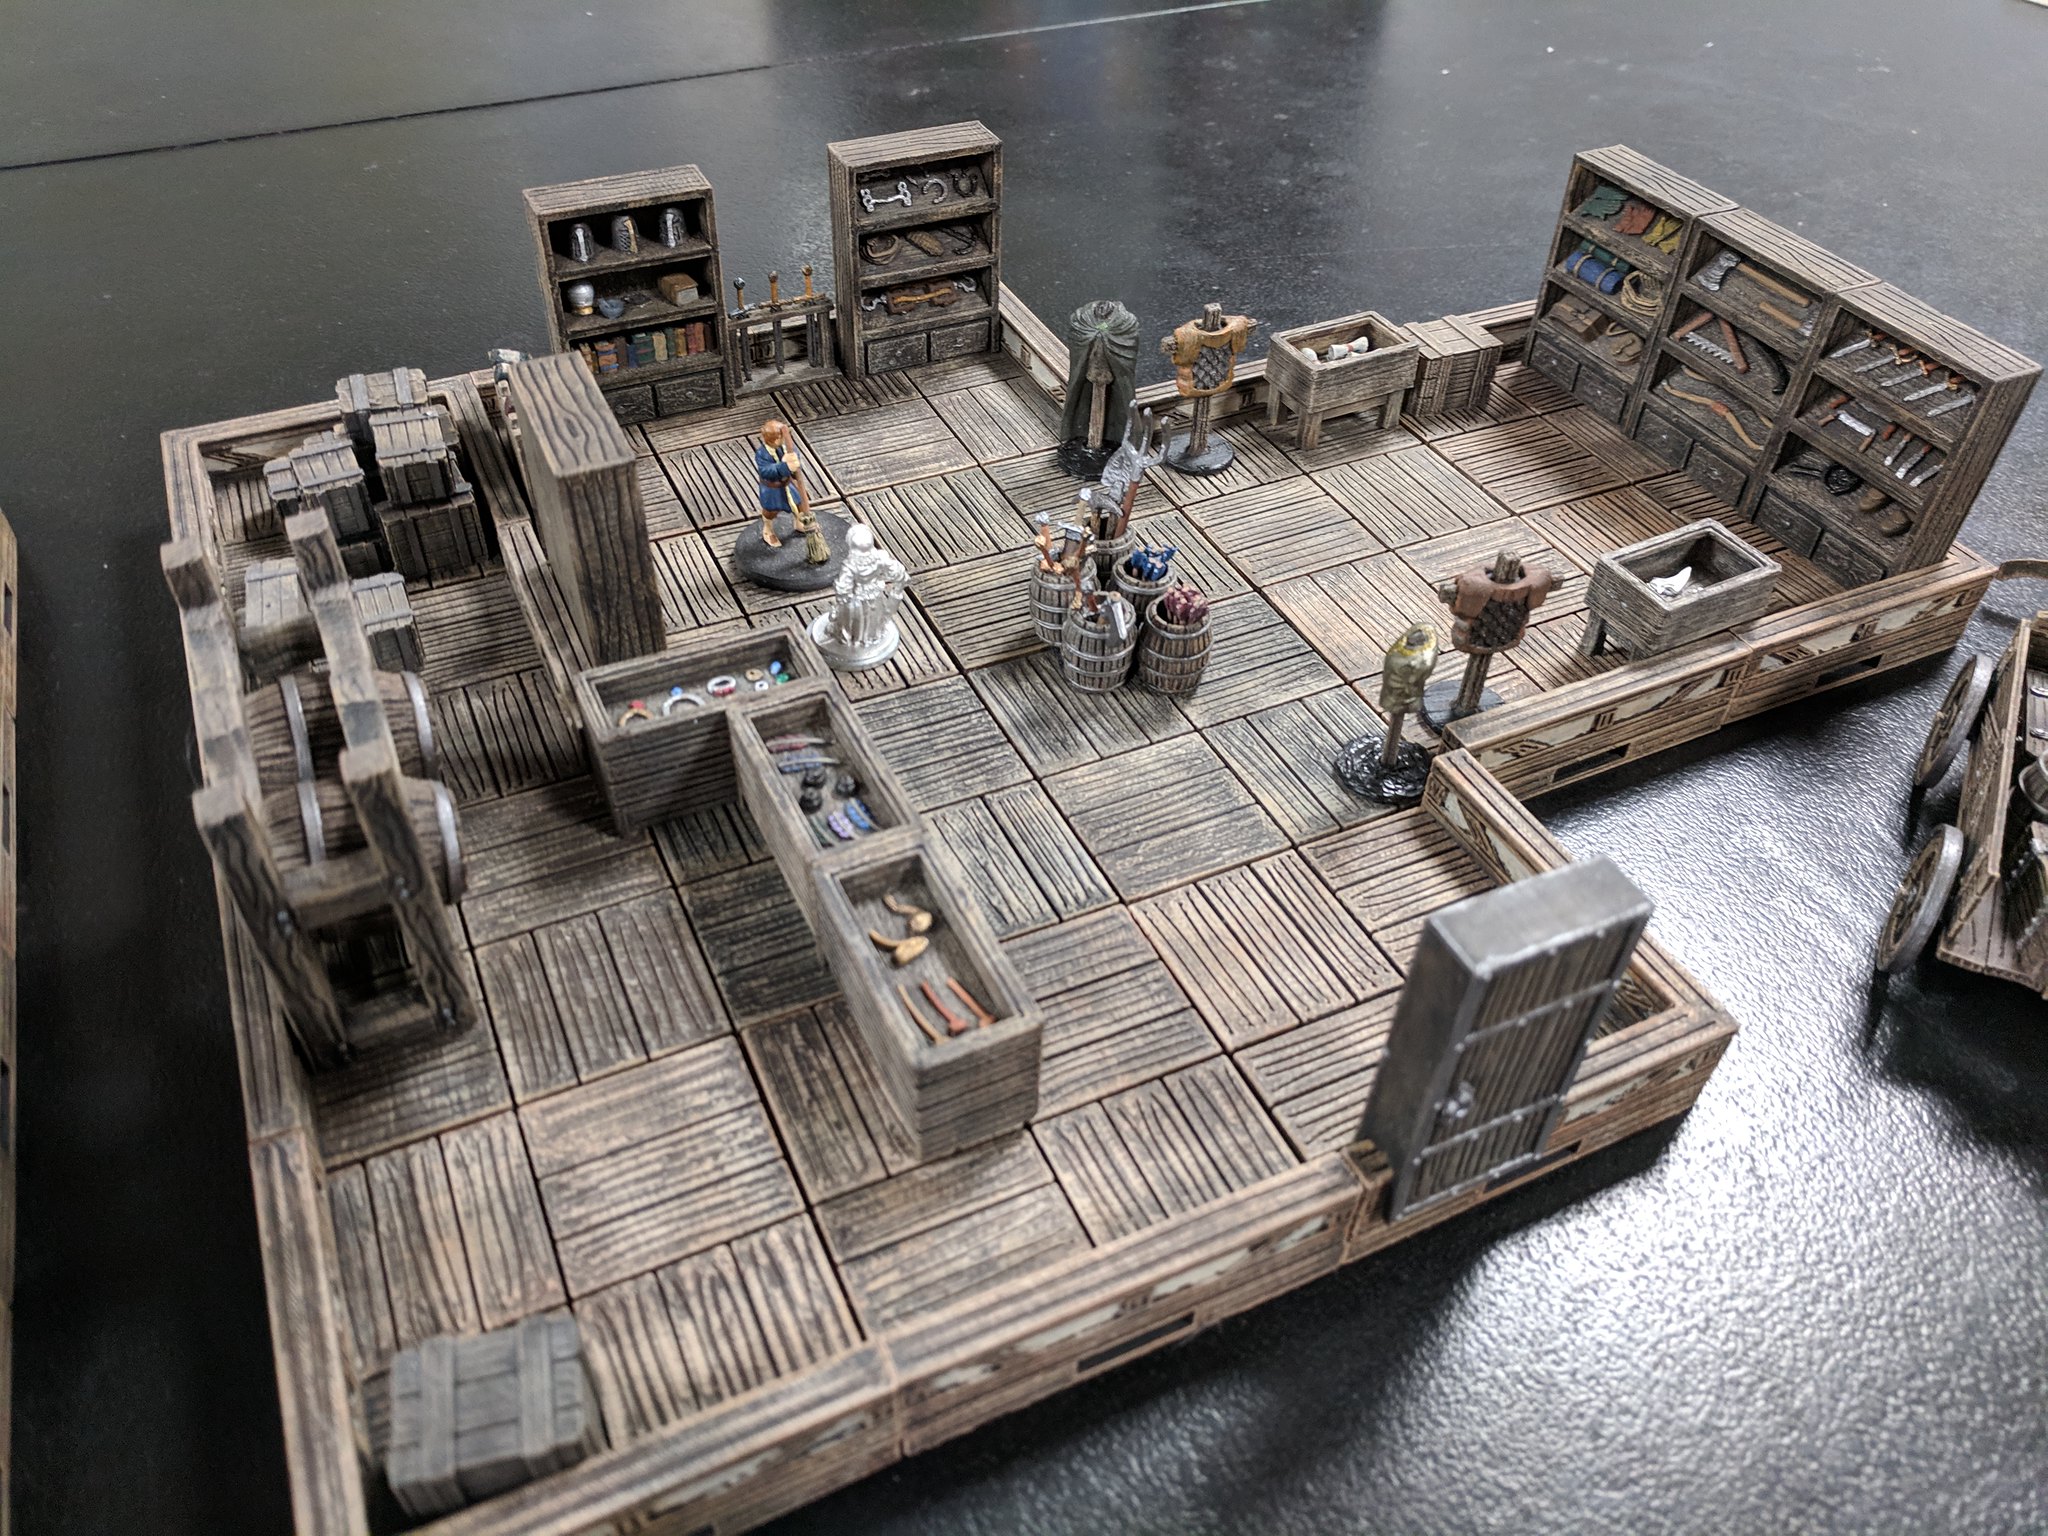
The player go to the general store and buy some gear.
Next they head to the inn to find out more about what is happening with the goblins and the town.
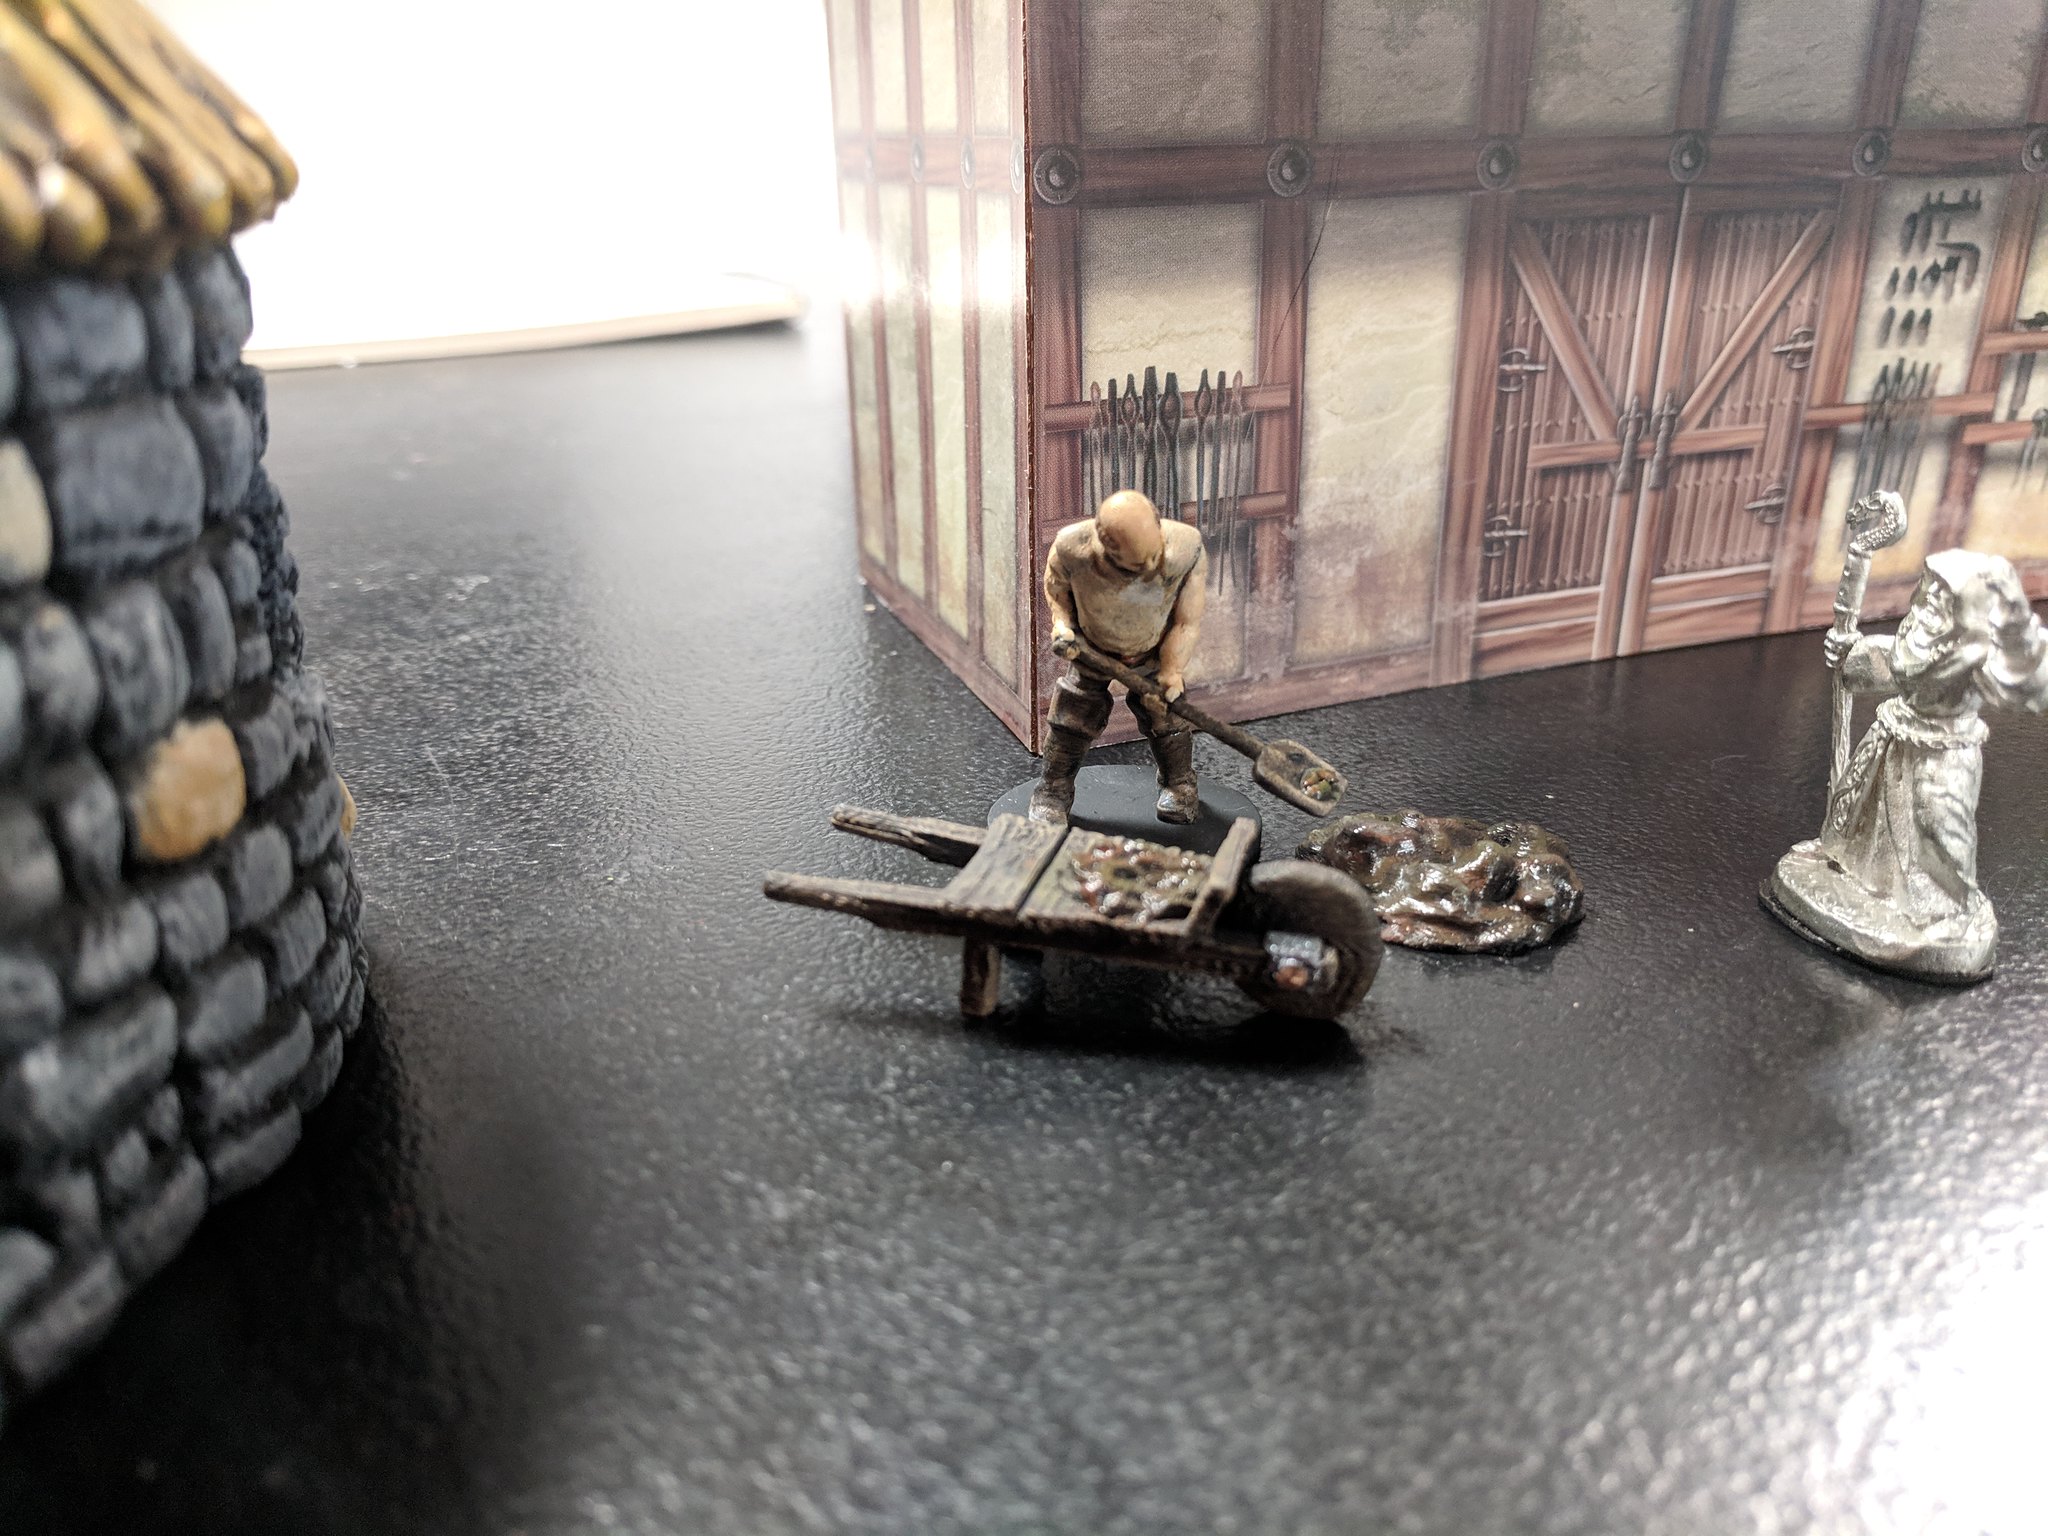
On the way out of town to track where the goblin are coming from, they see a dung sweeper dealing with a huge pile of dung. After a 20 minute discussion about dung...and what kind of creature could have produced it, they started fearing that a dragon might live near the town too.
A little woodland tracking brought them to a cave mouth. They explored the dungeon.

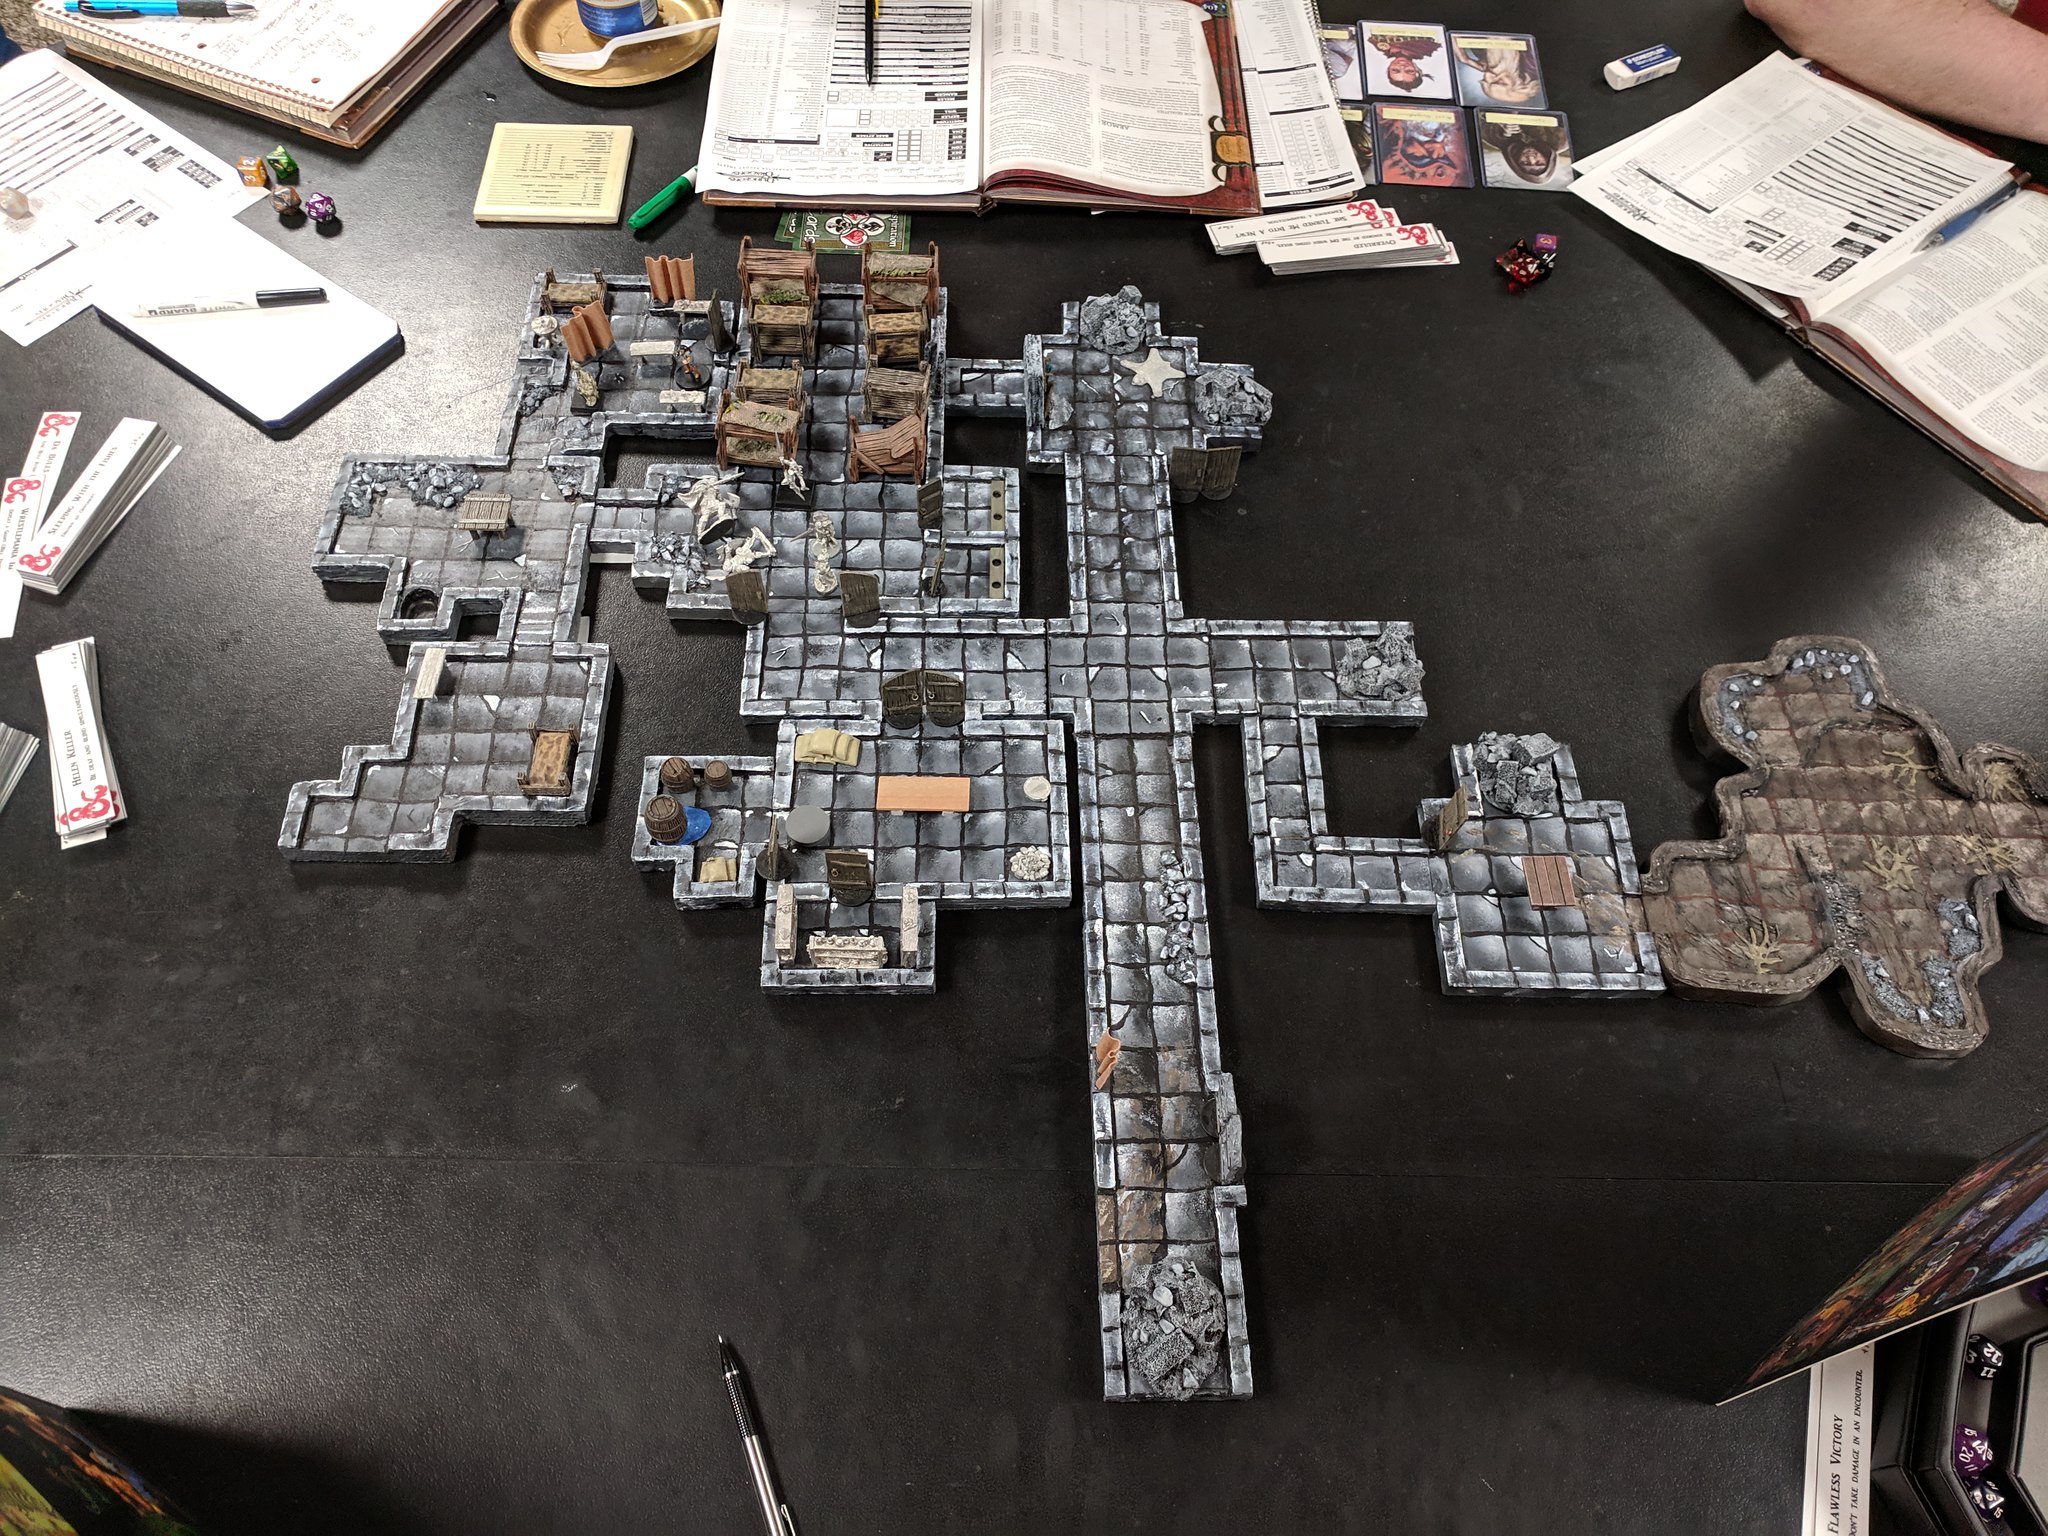
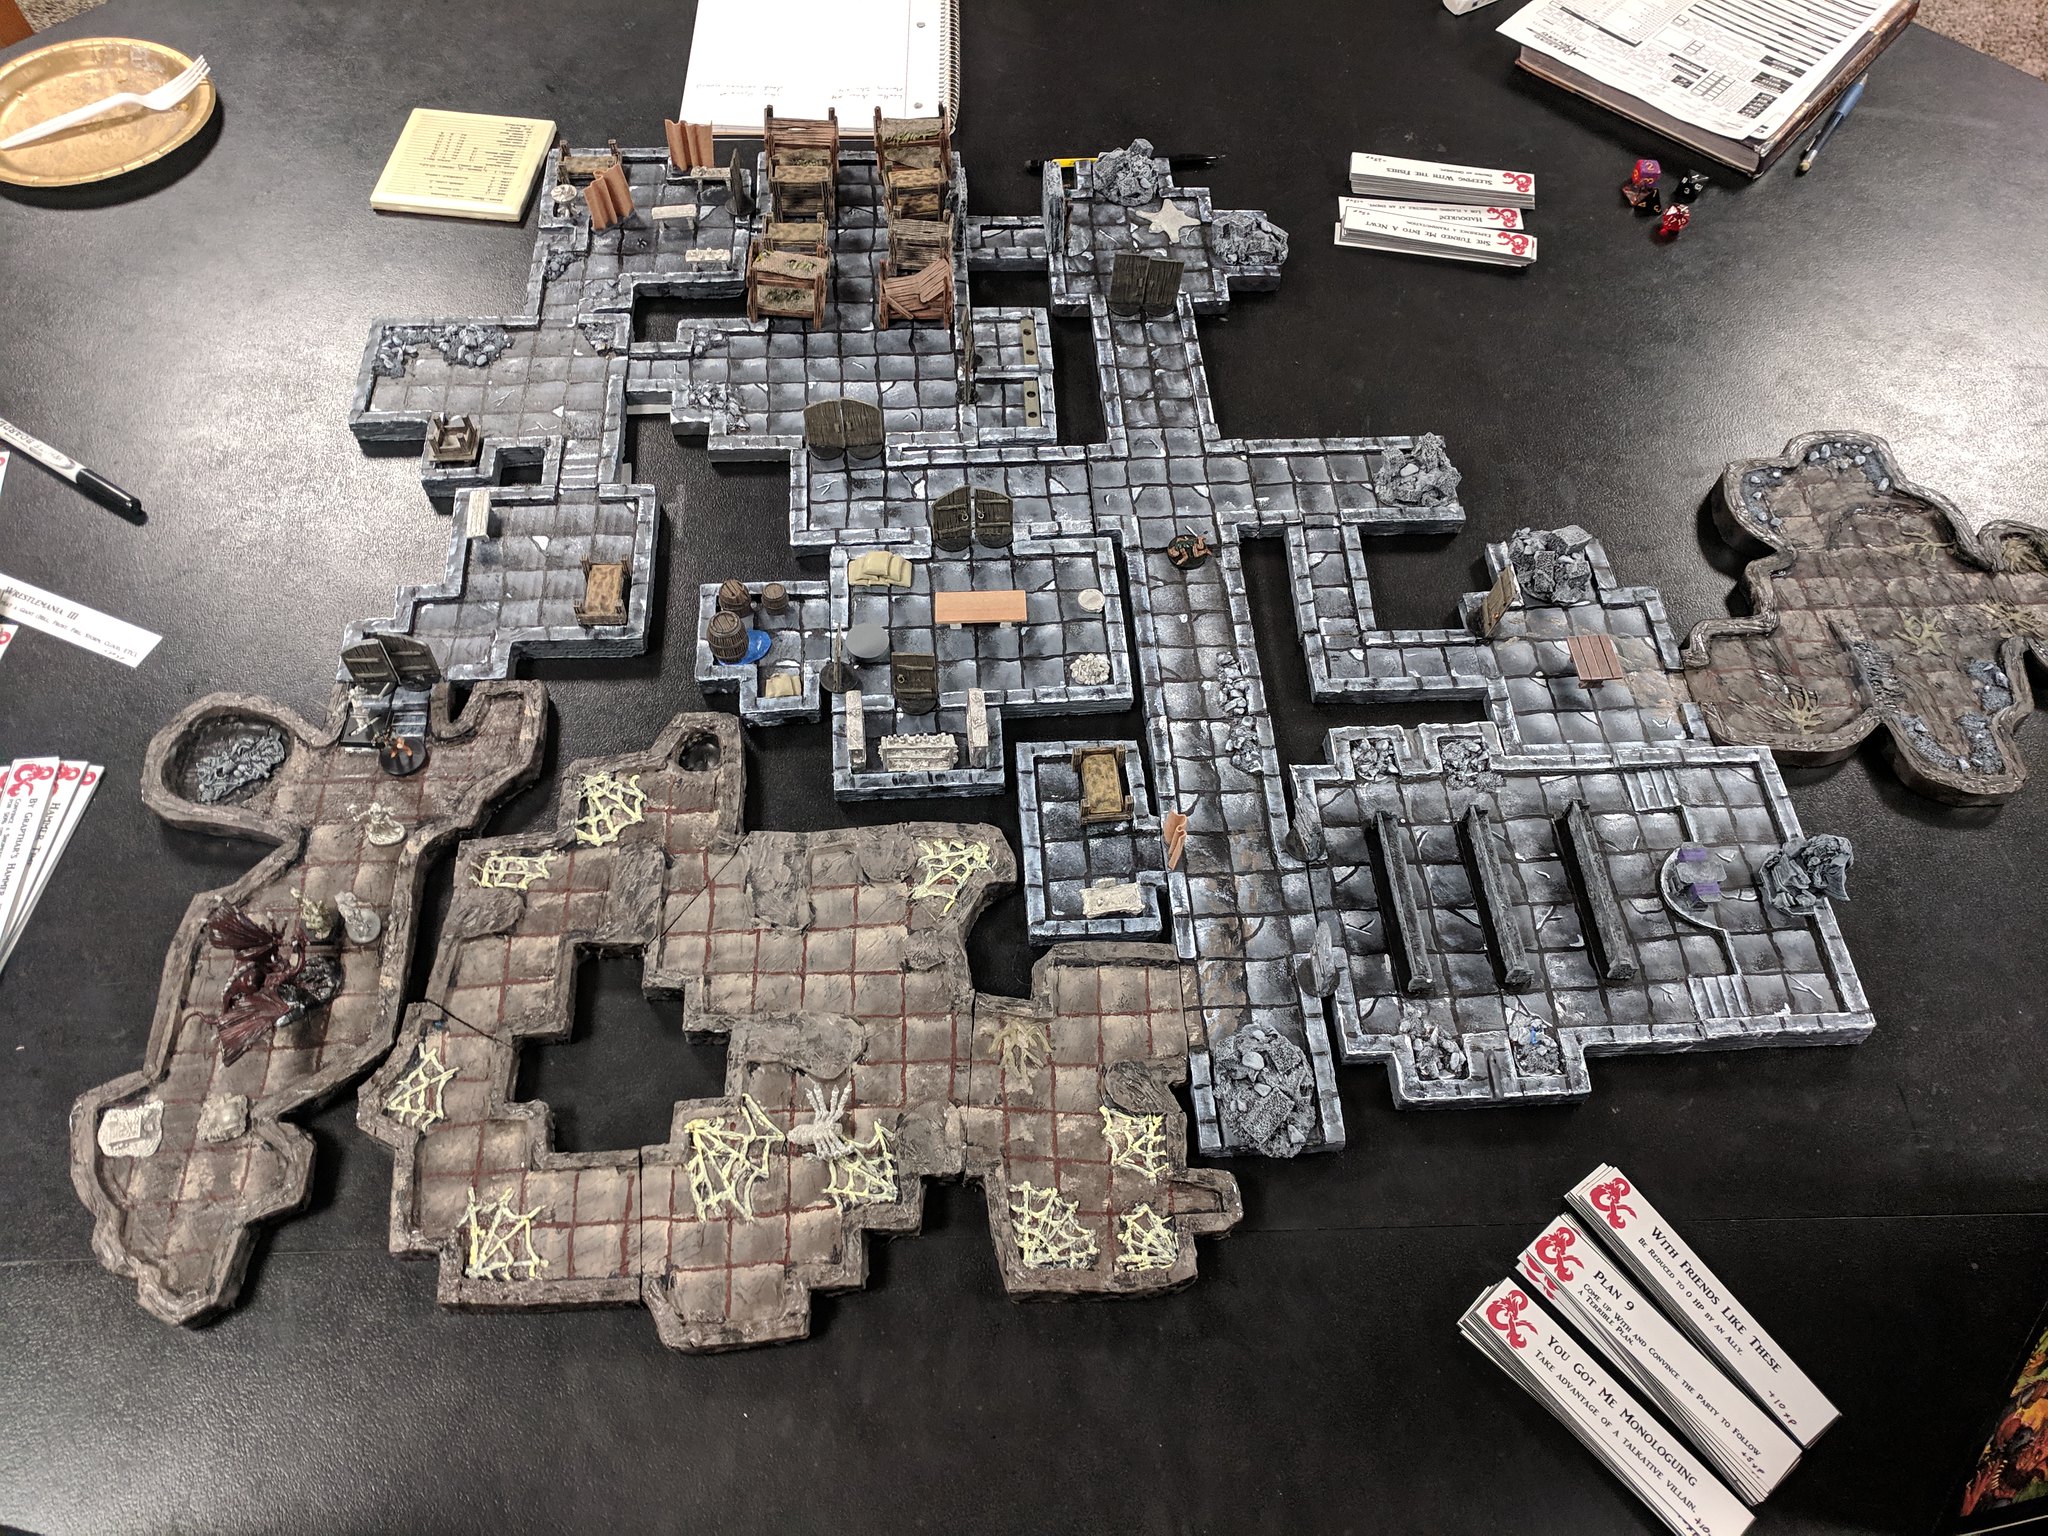
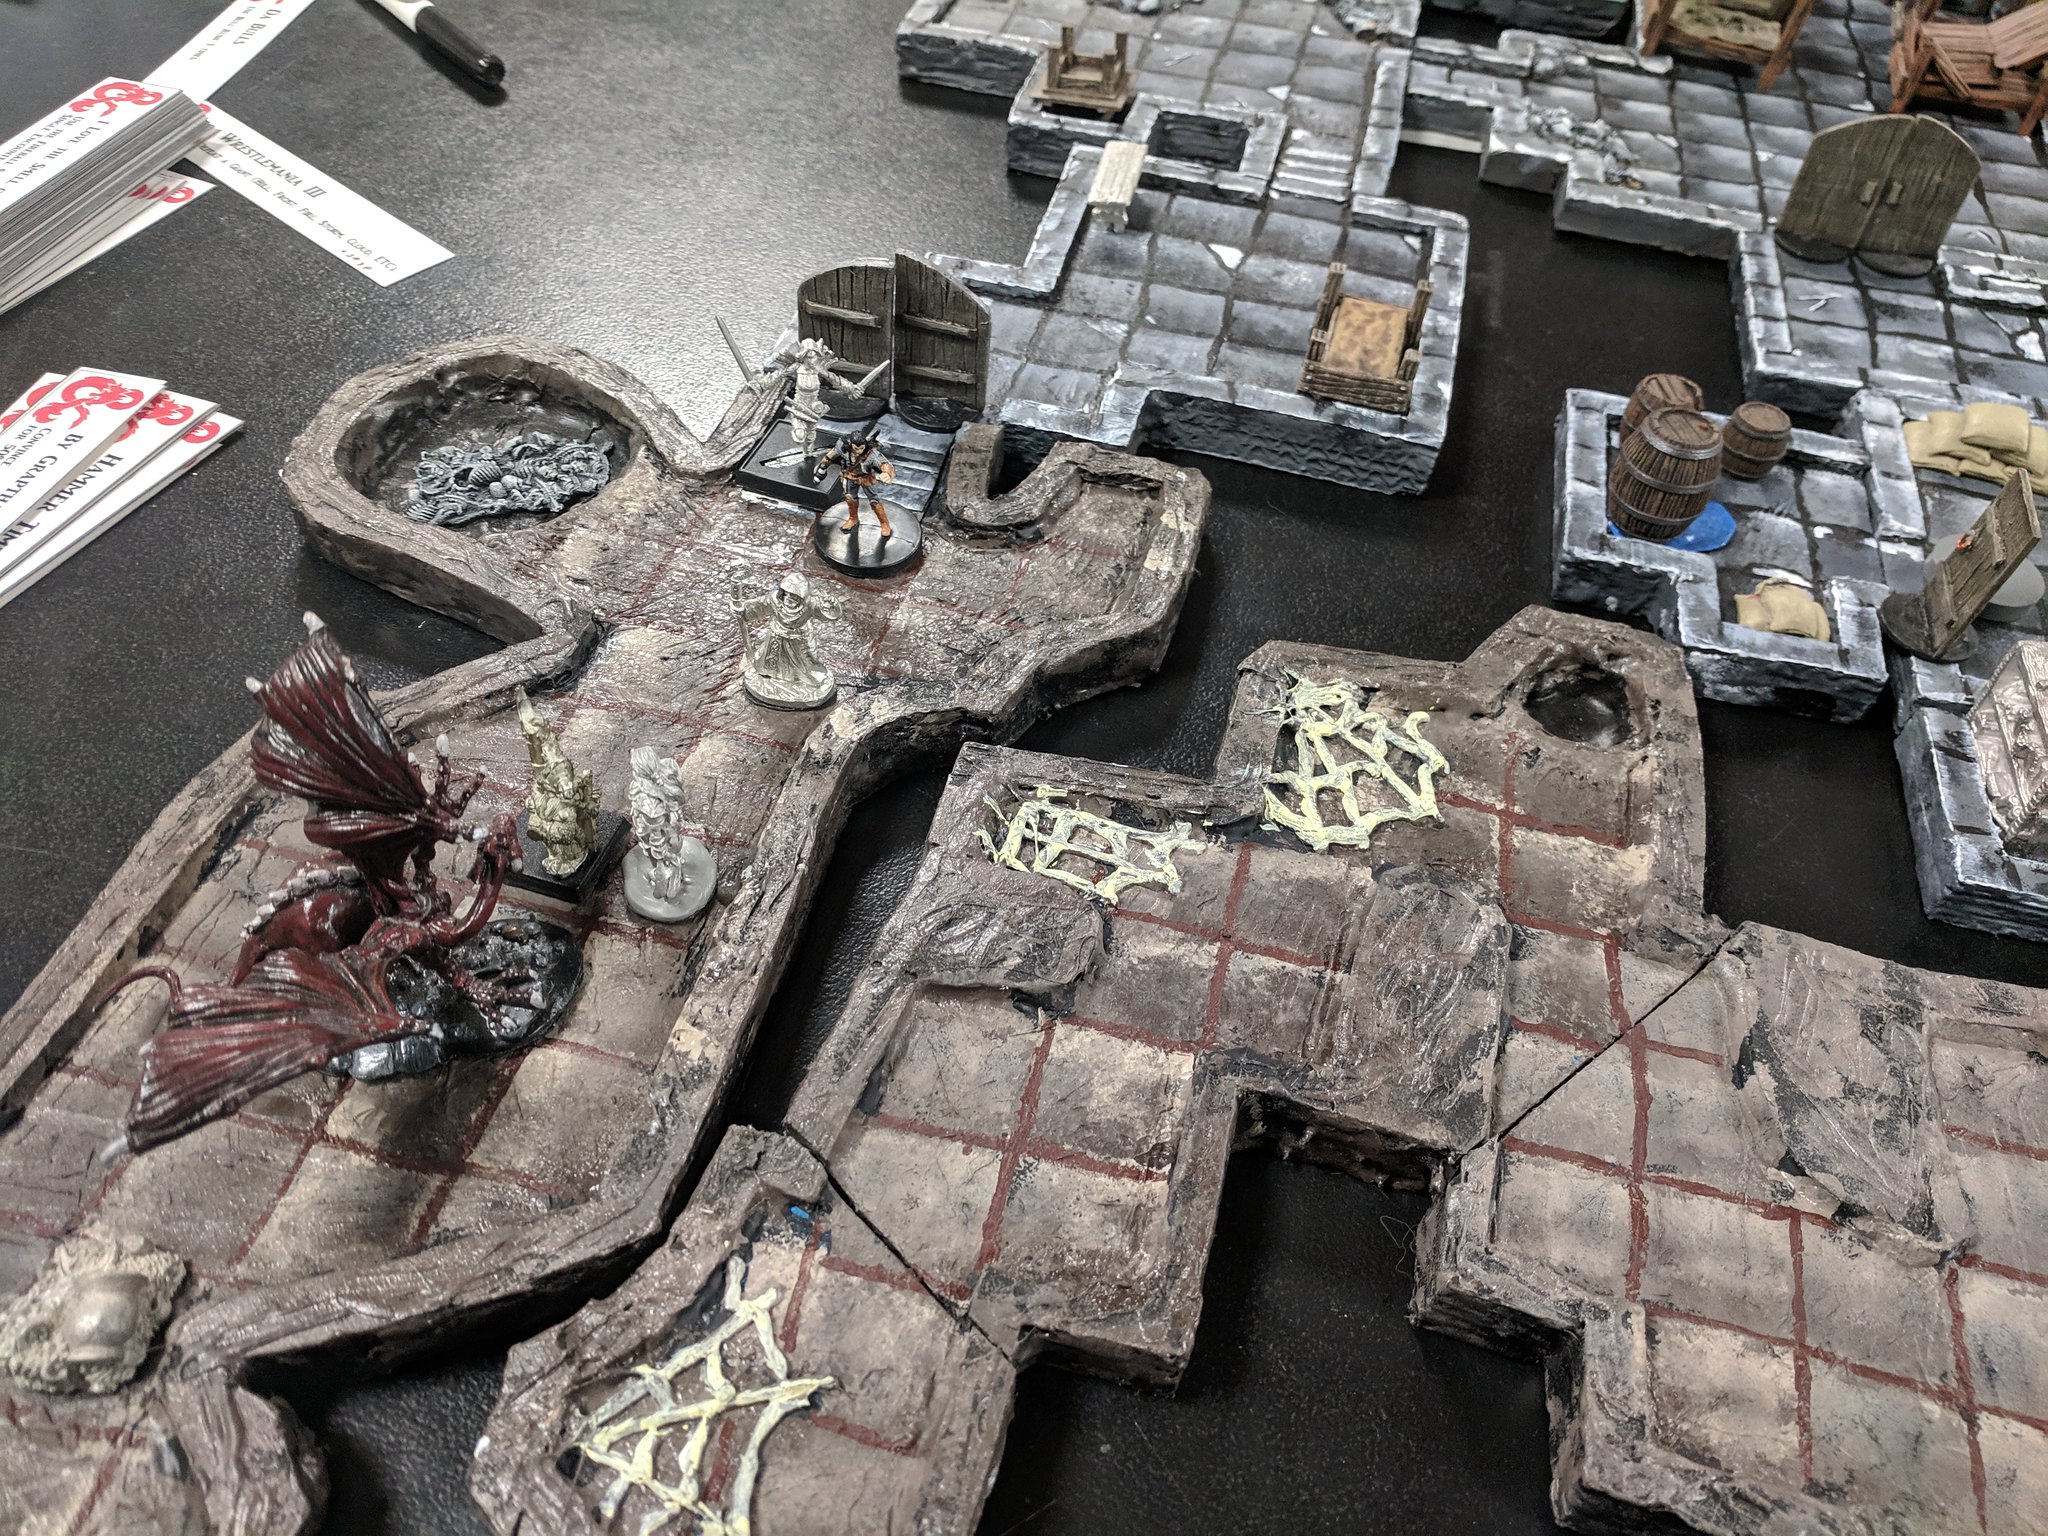
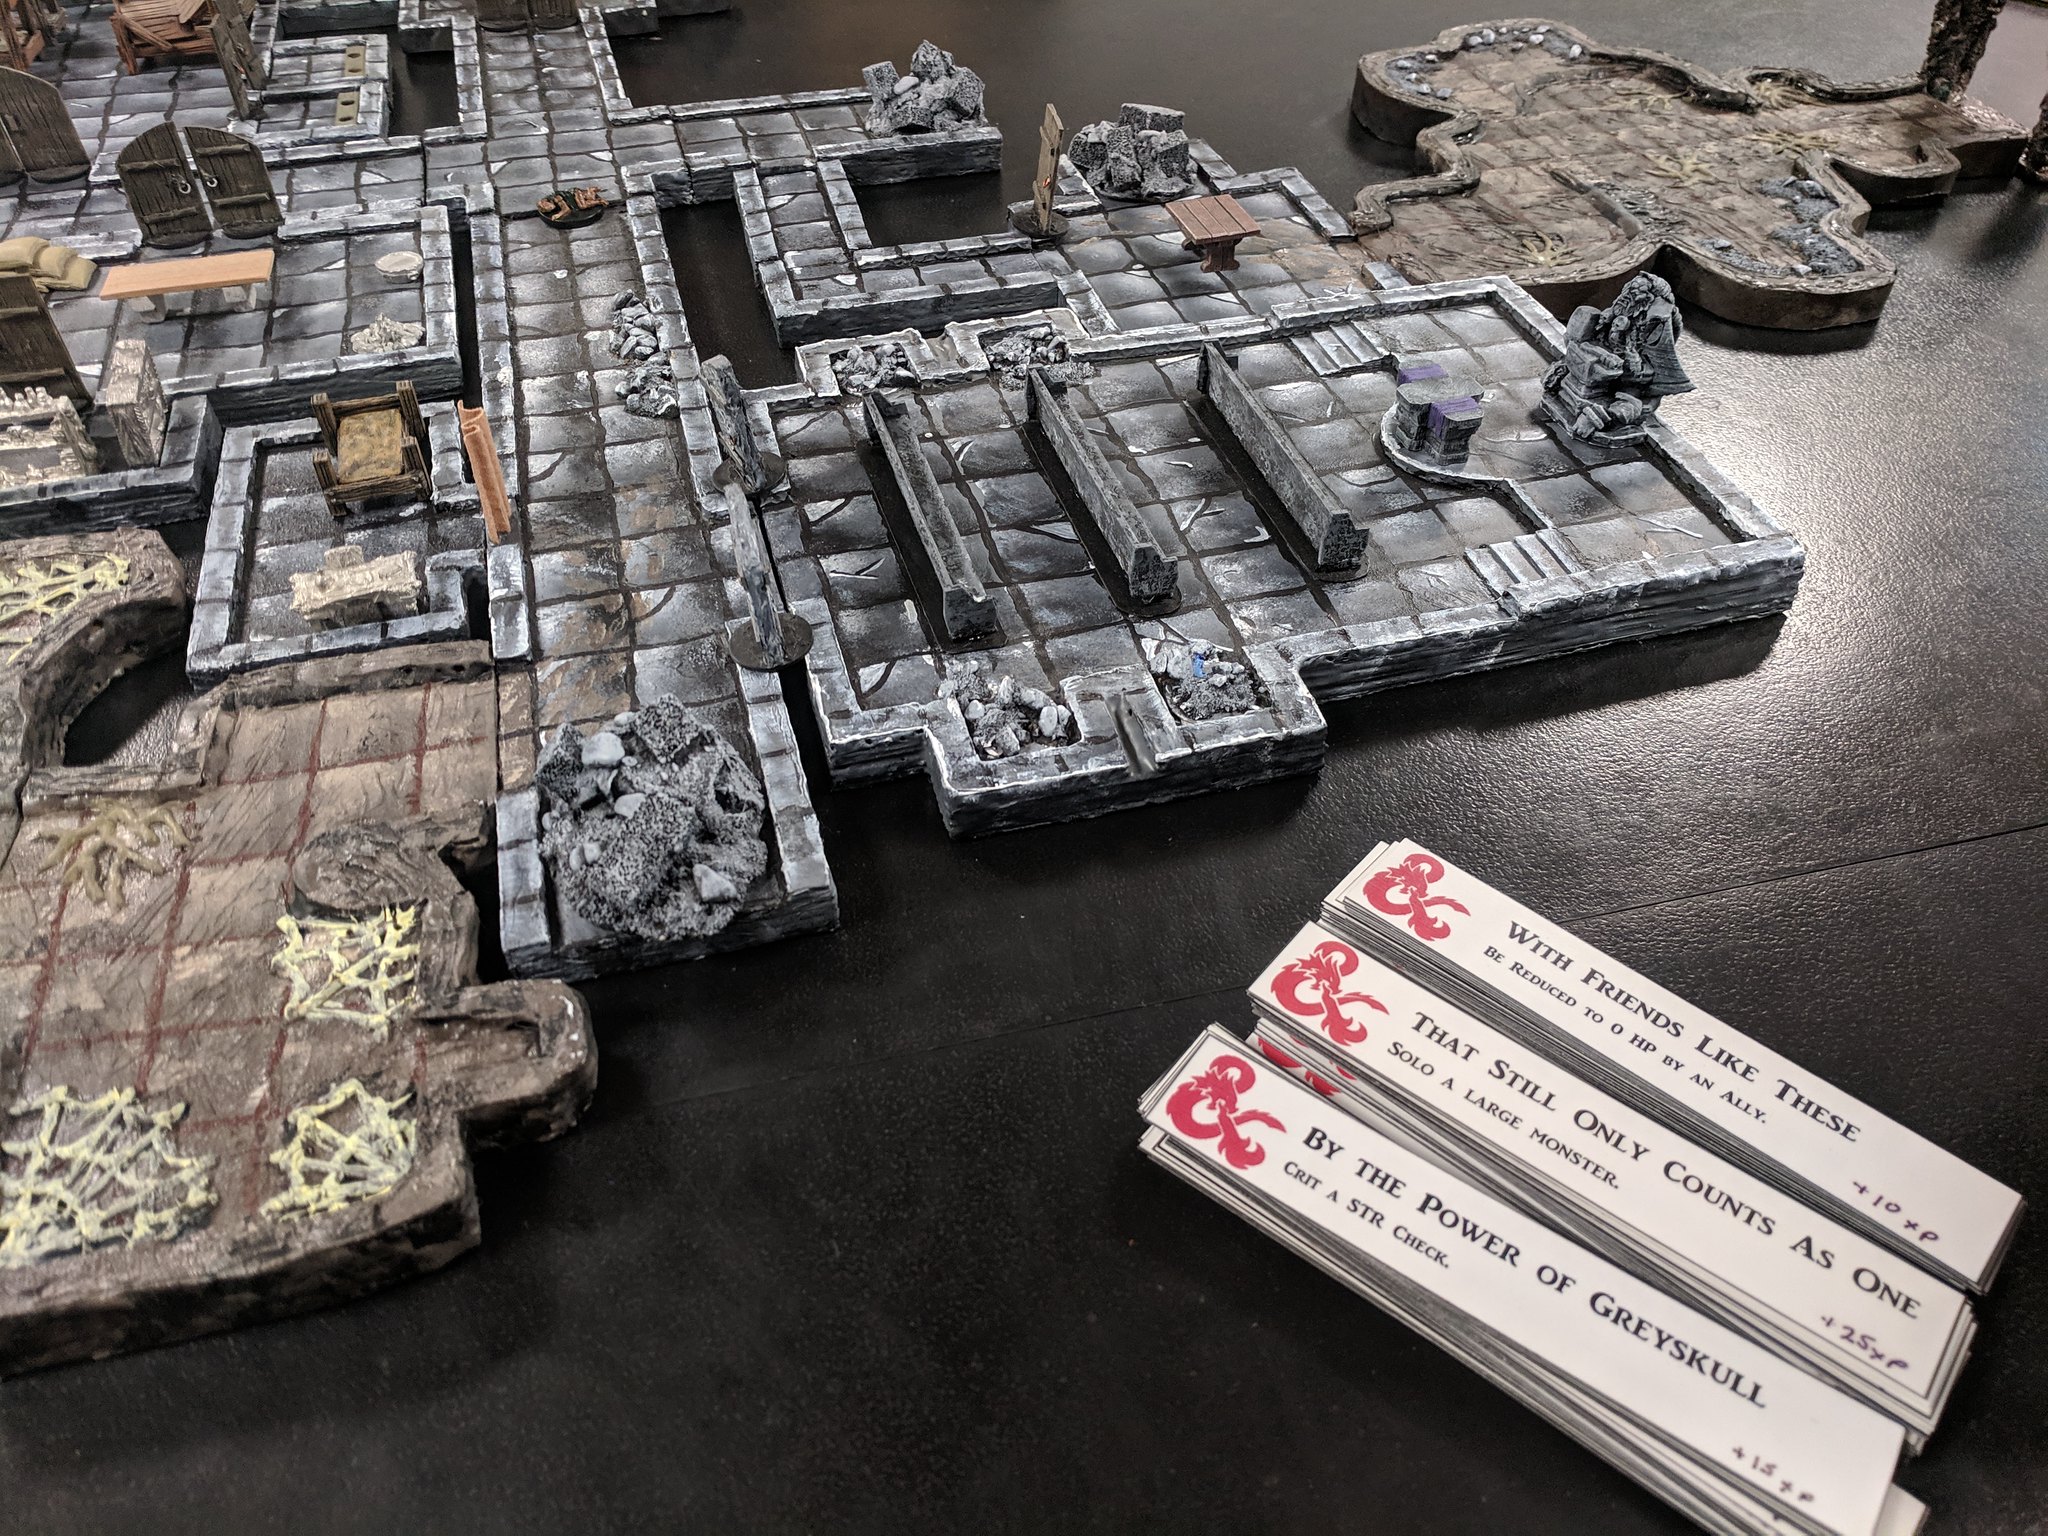
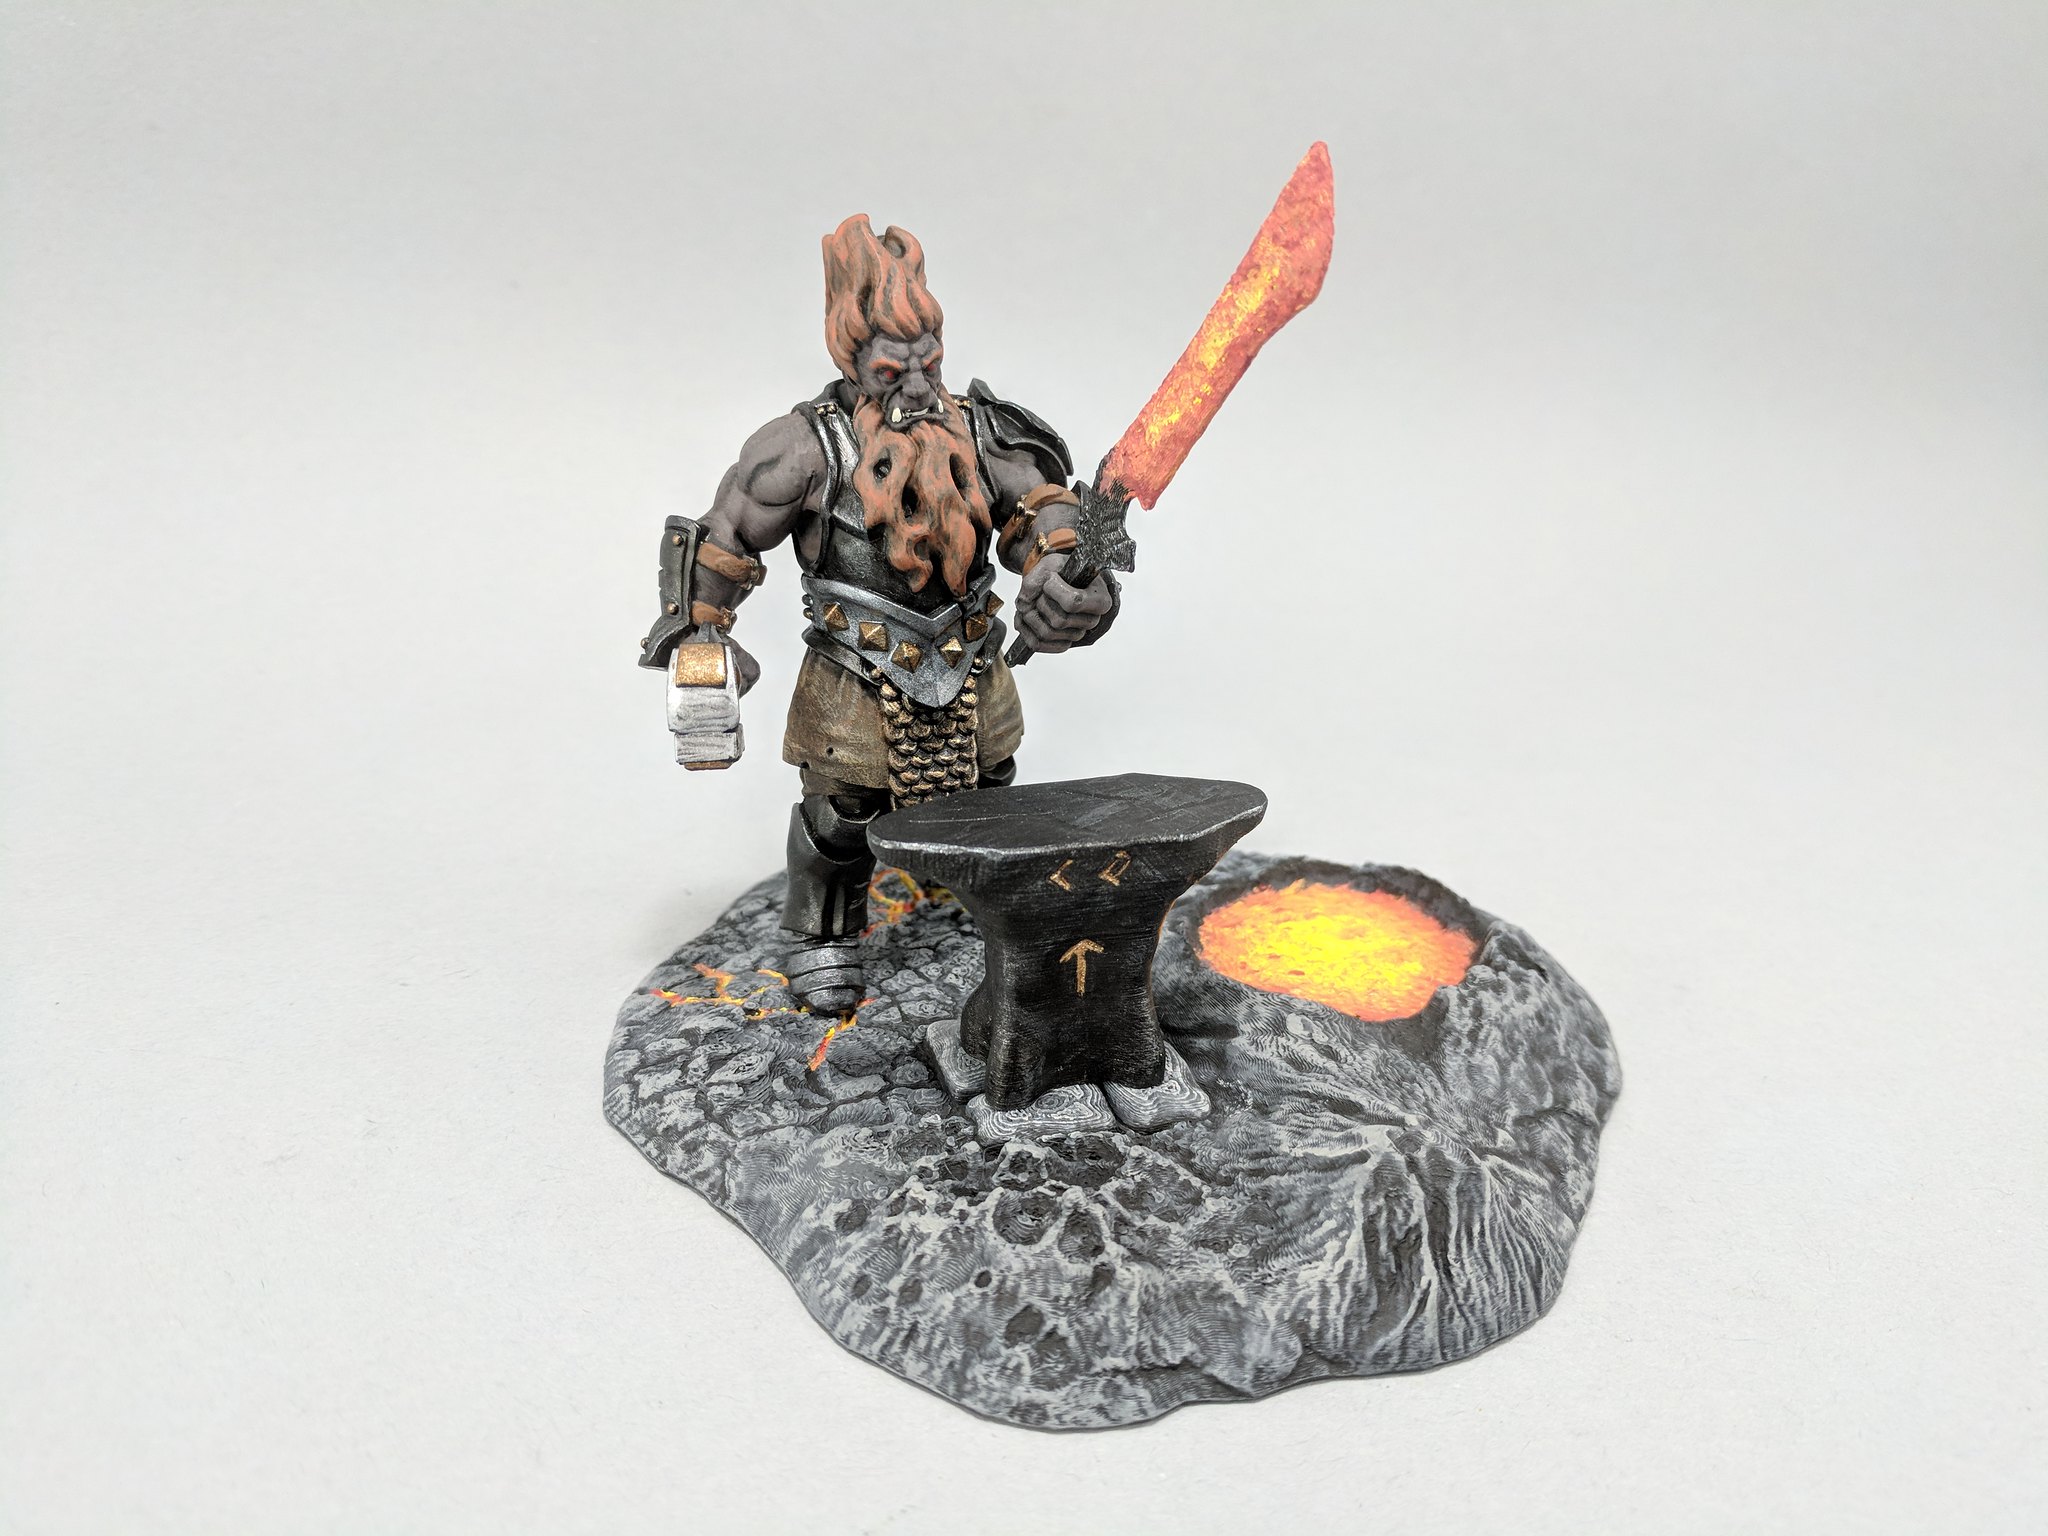
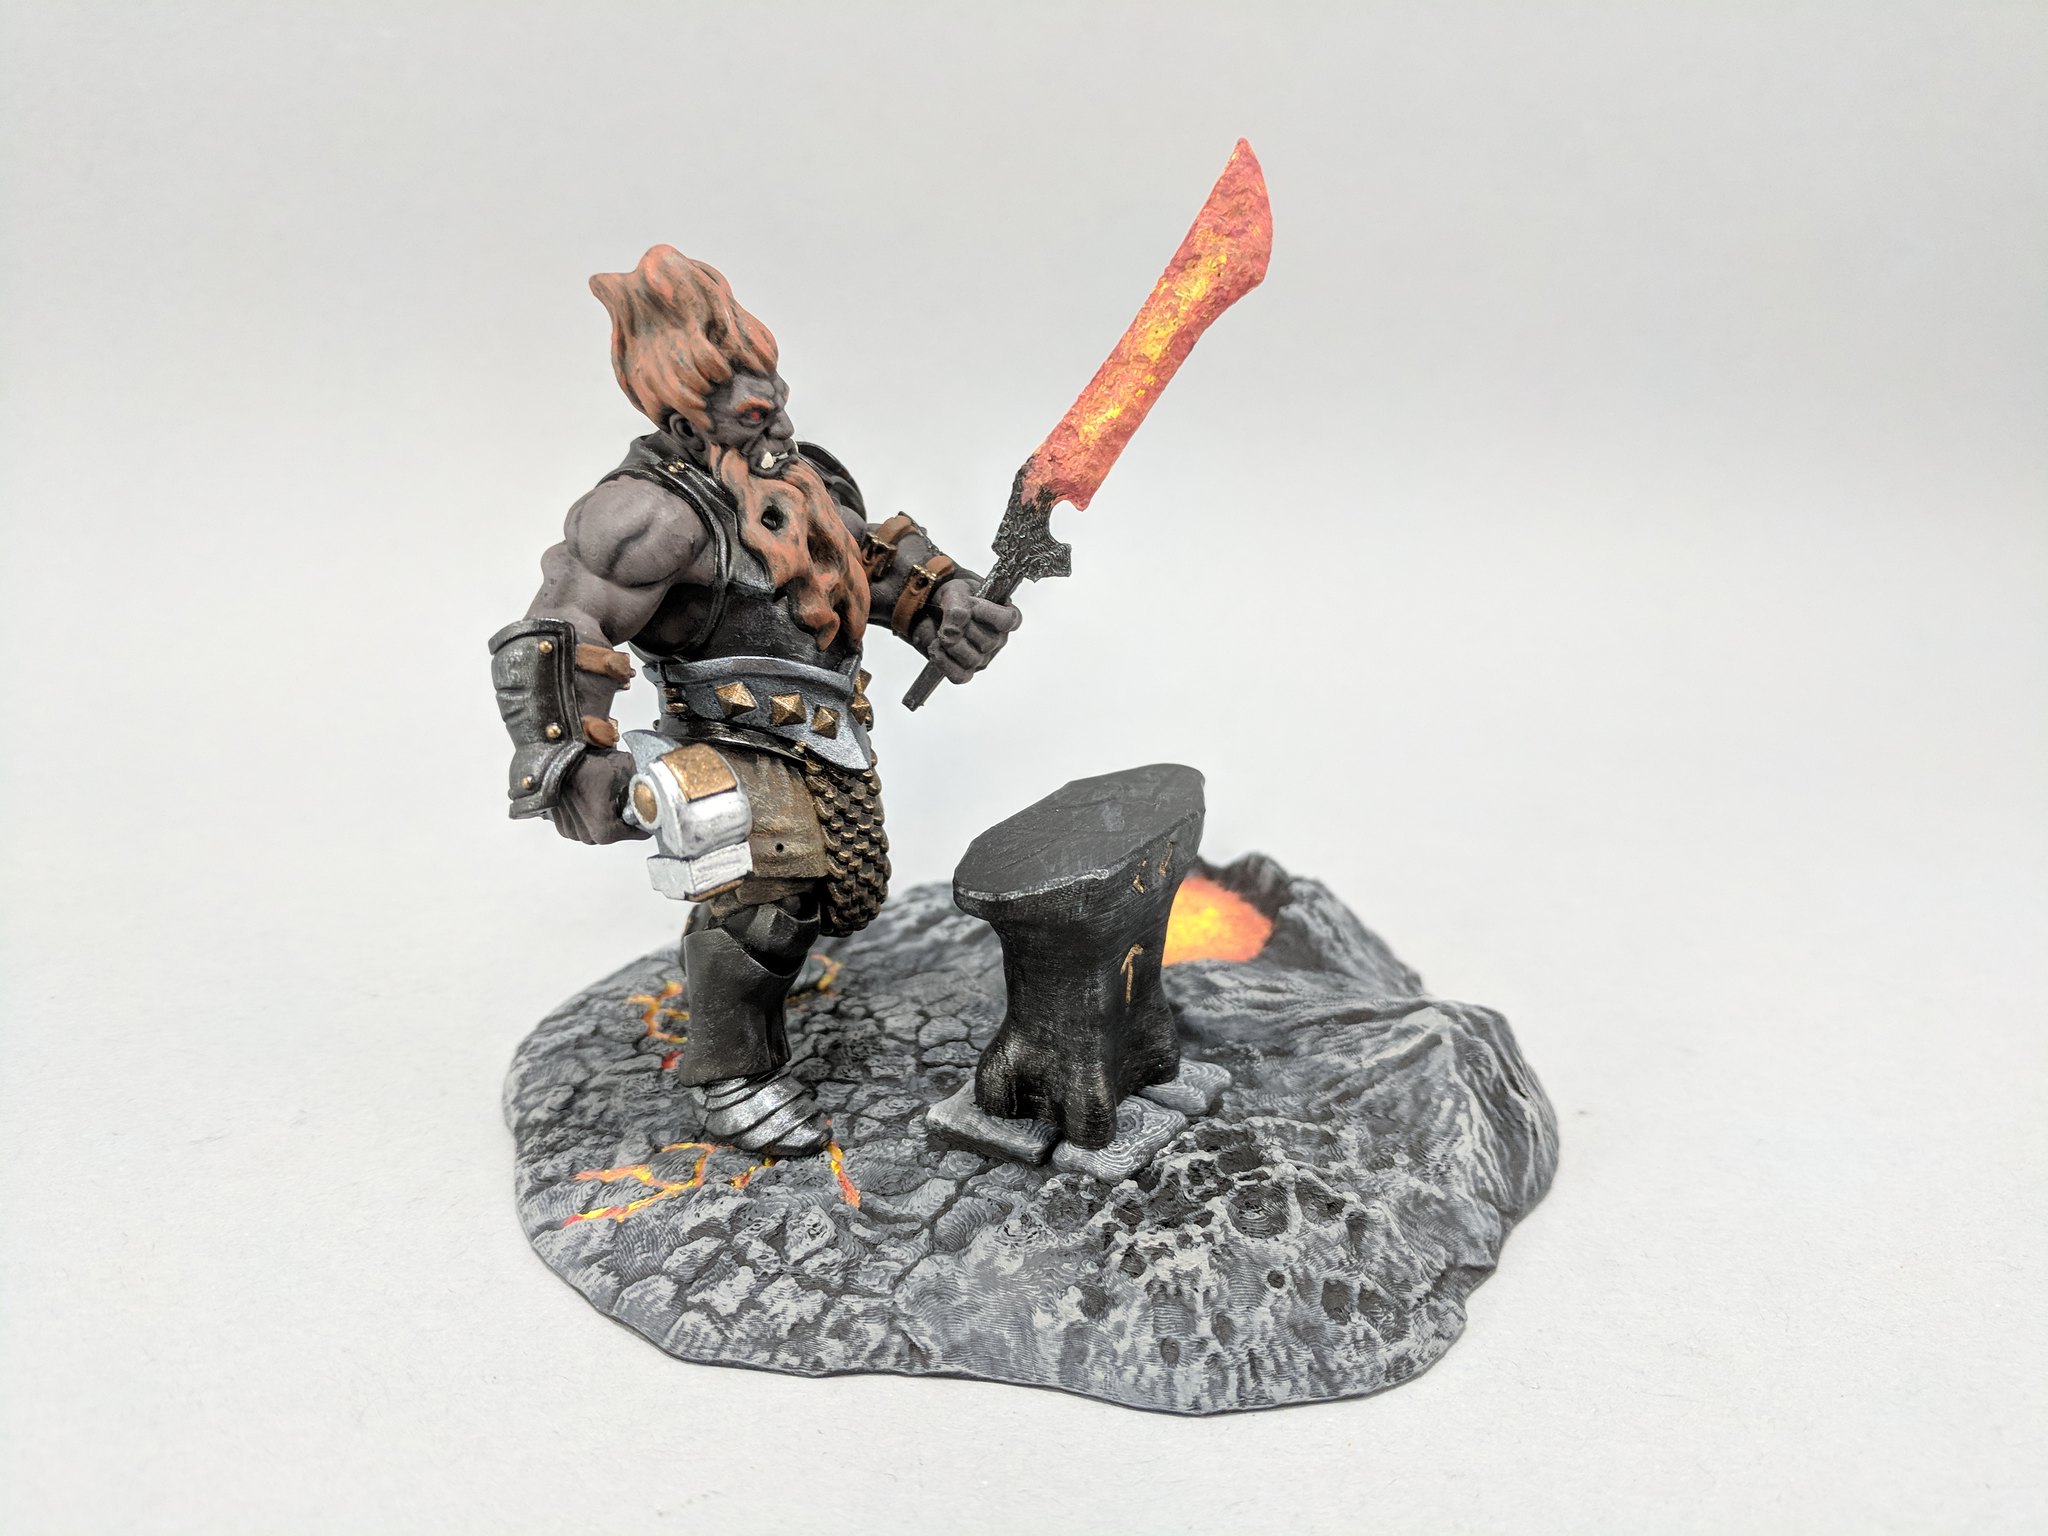
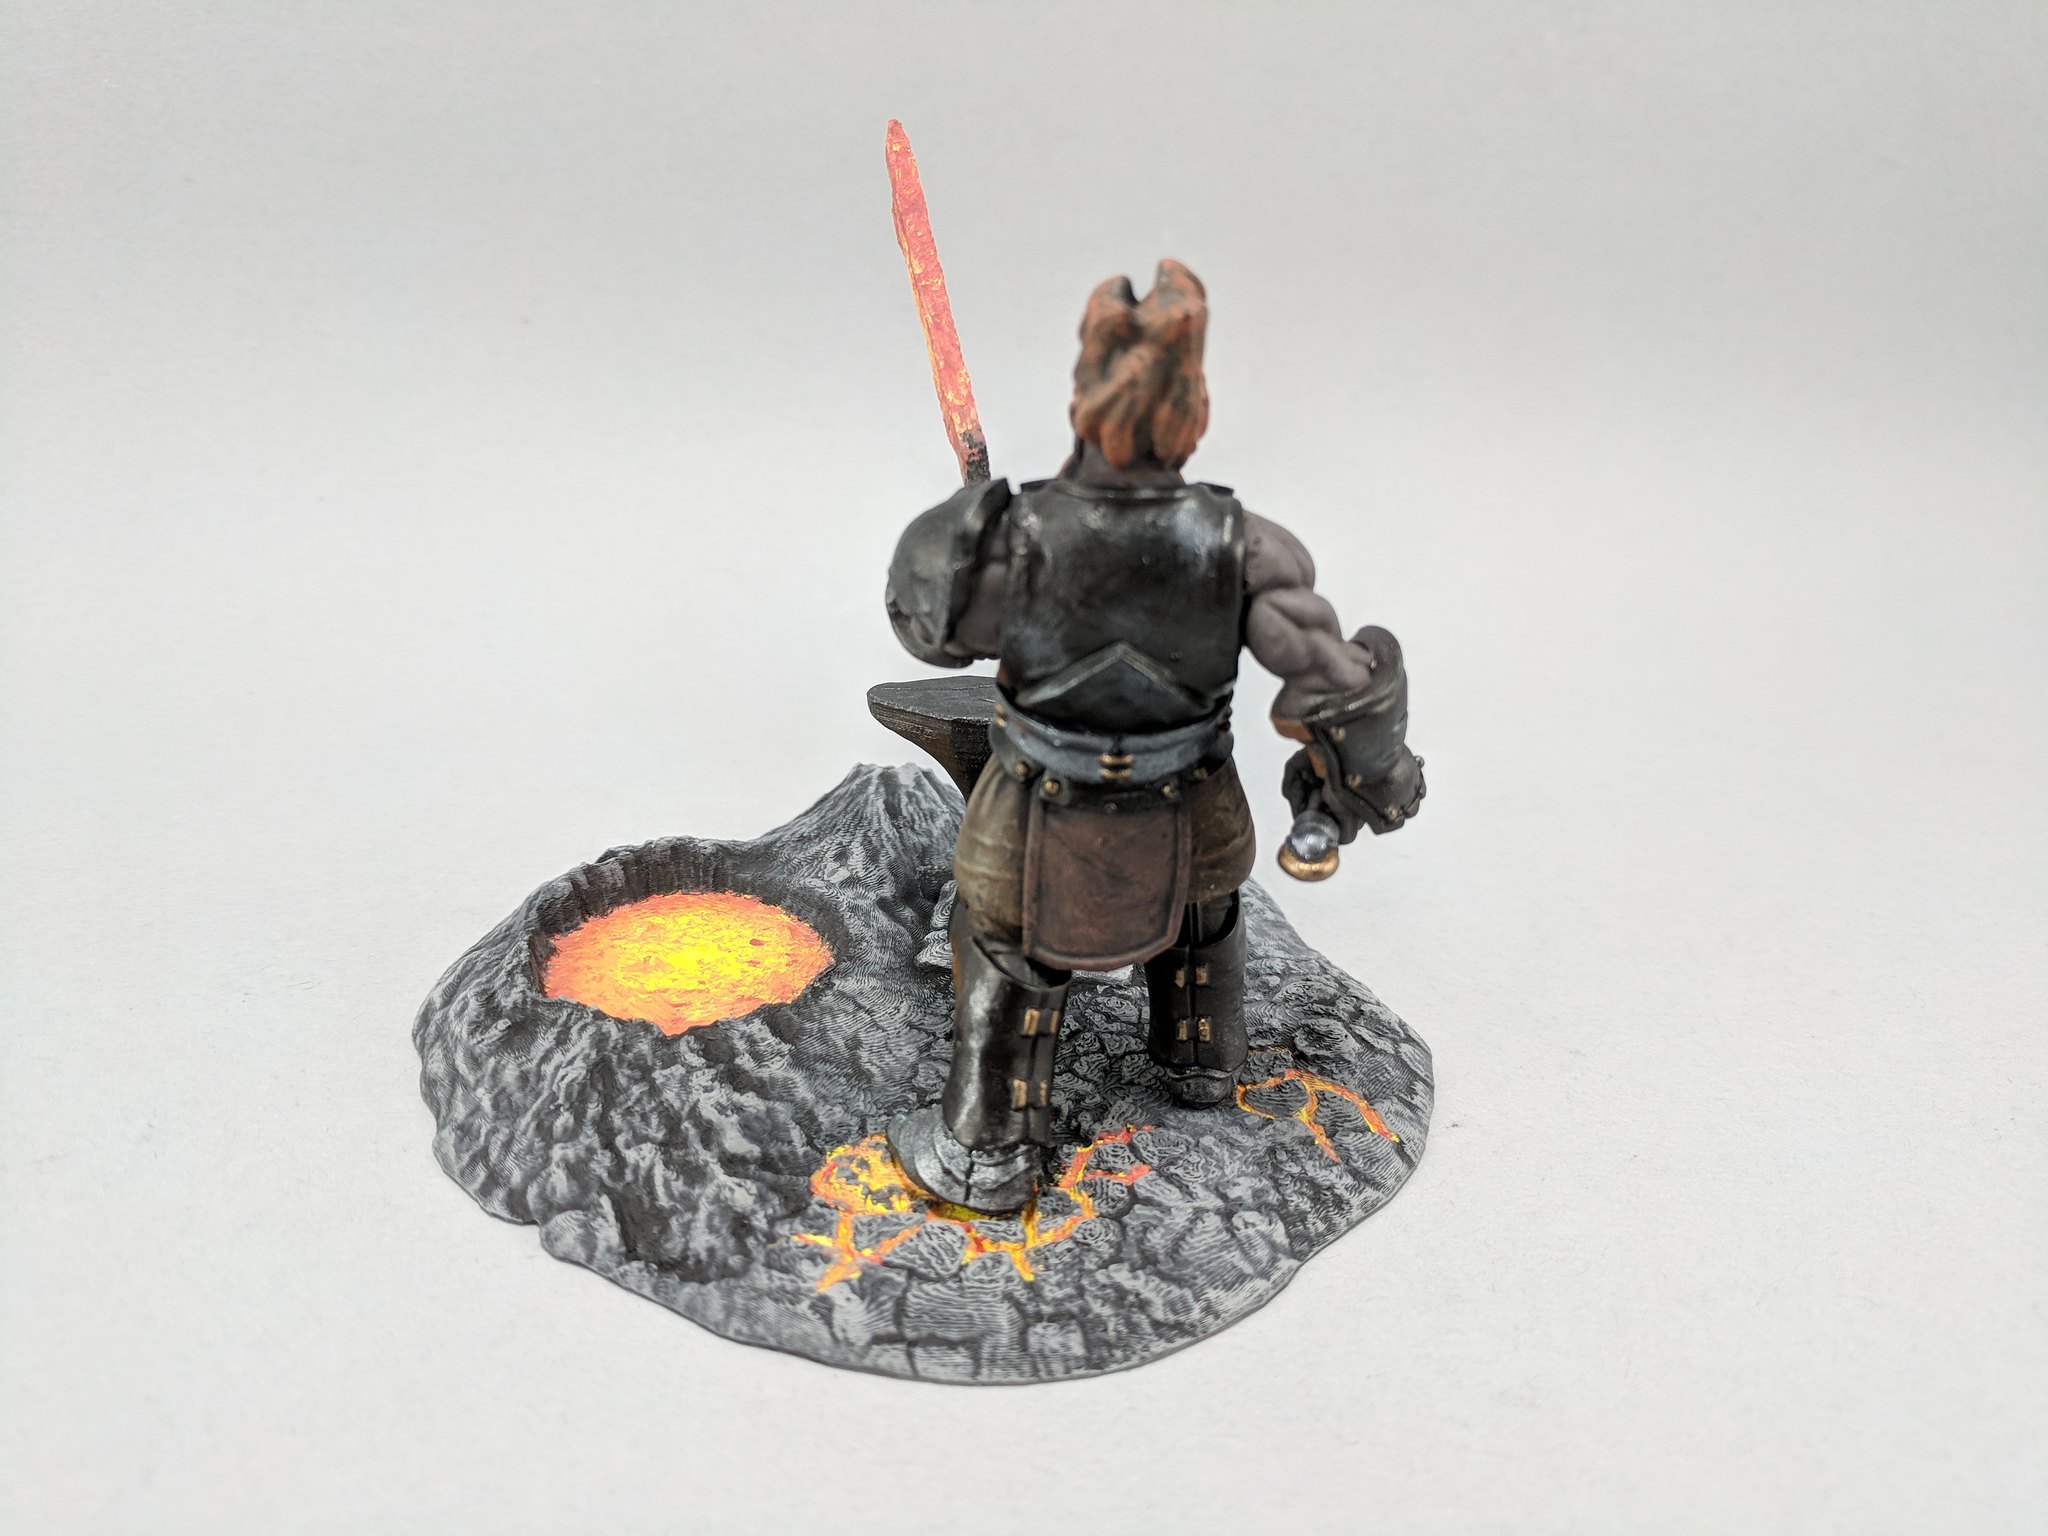
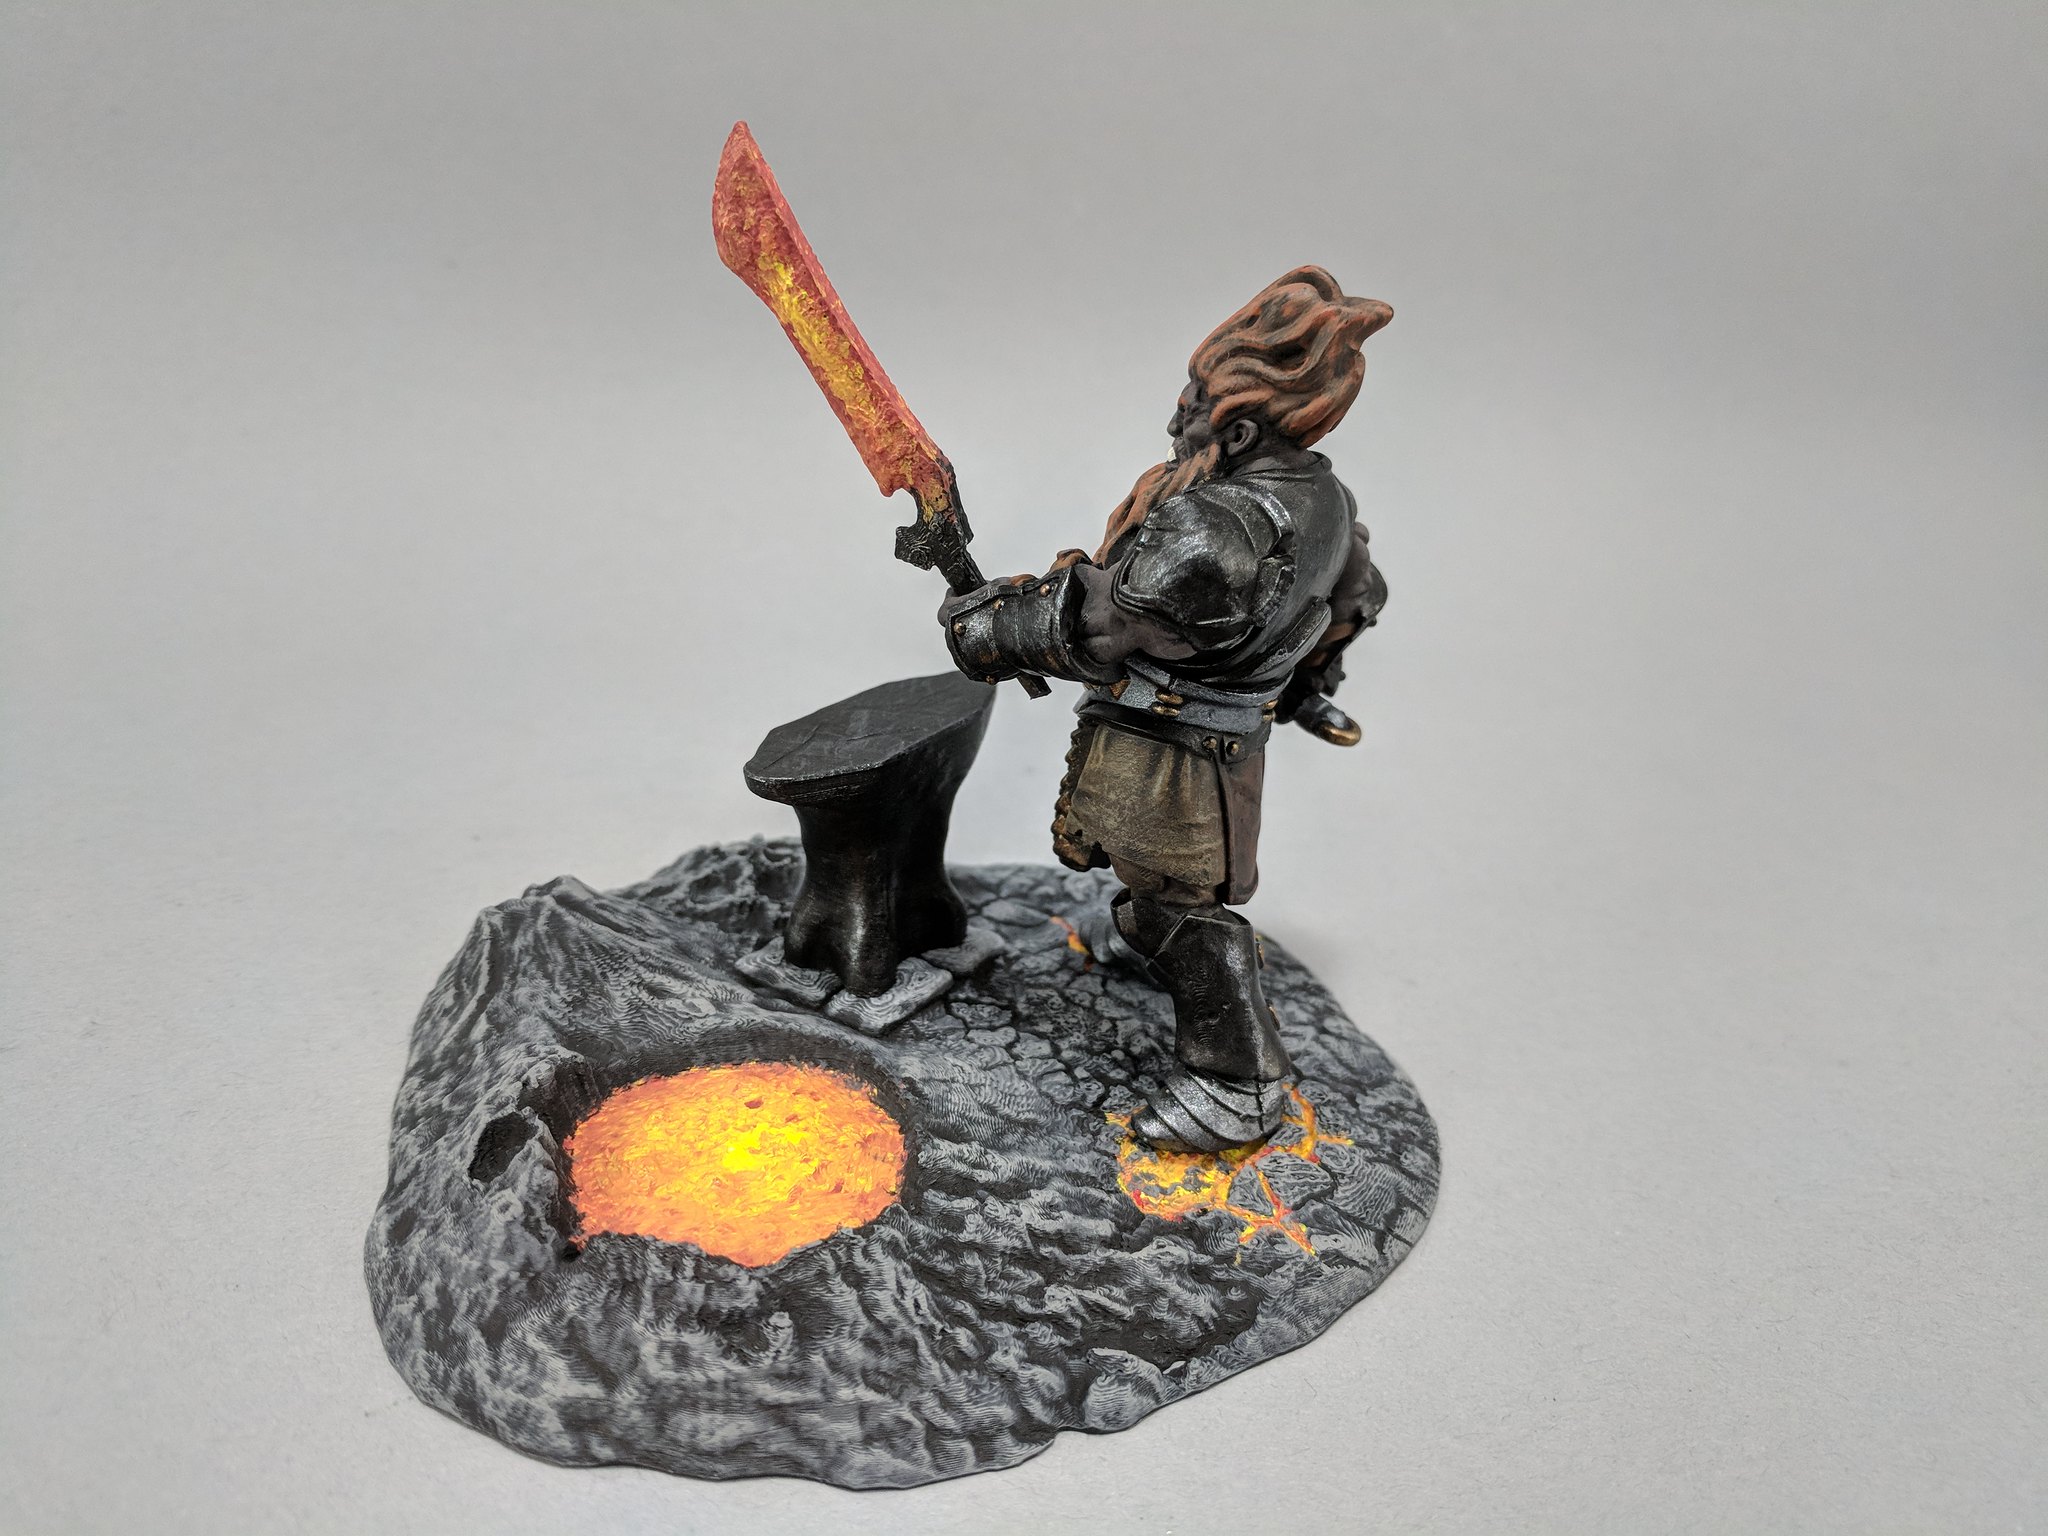
At the end, they dispatched the goblins and killed a tiny dragon. There are a number of avenues they can take next.
I'm not sure how often we will meet up to game. I'm hoping for at least once a month, but we are also heading into holiday season. I will post updates when I can. |
|
|
|
Post by curufin on Oct 20, 2018 13:34:10 GMT
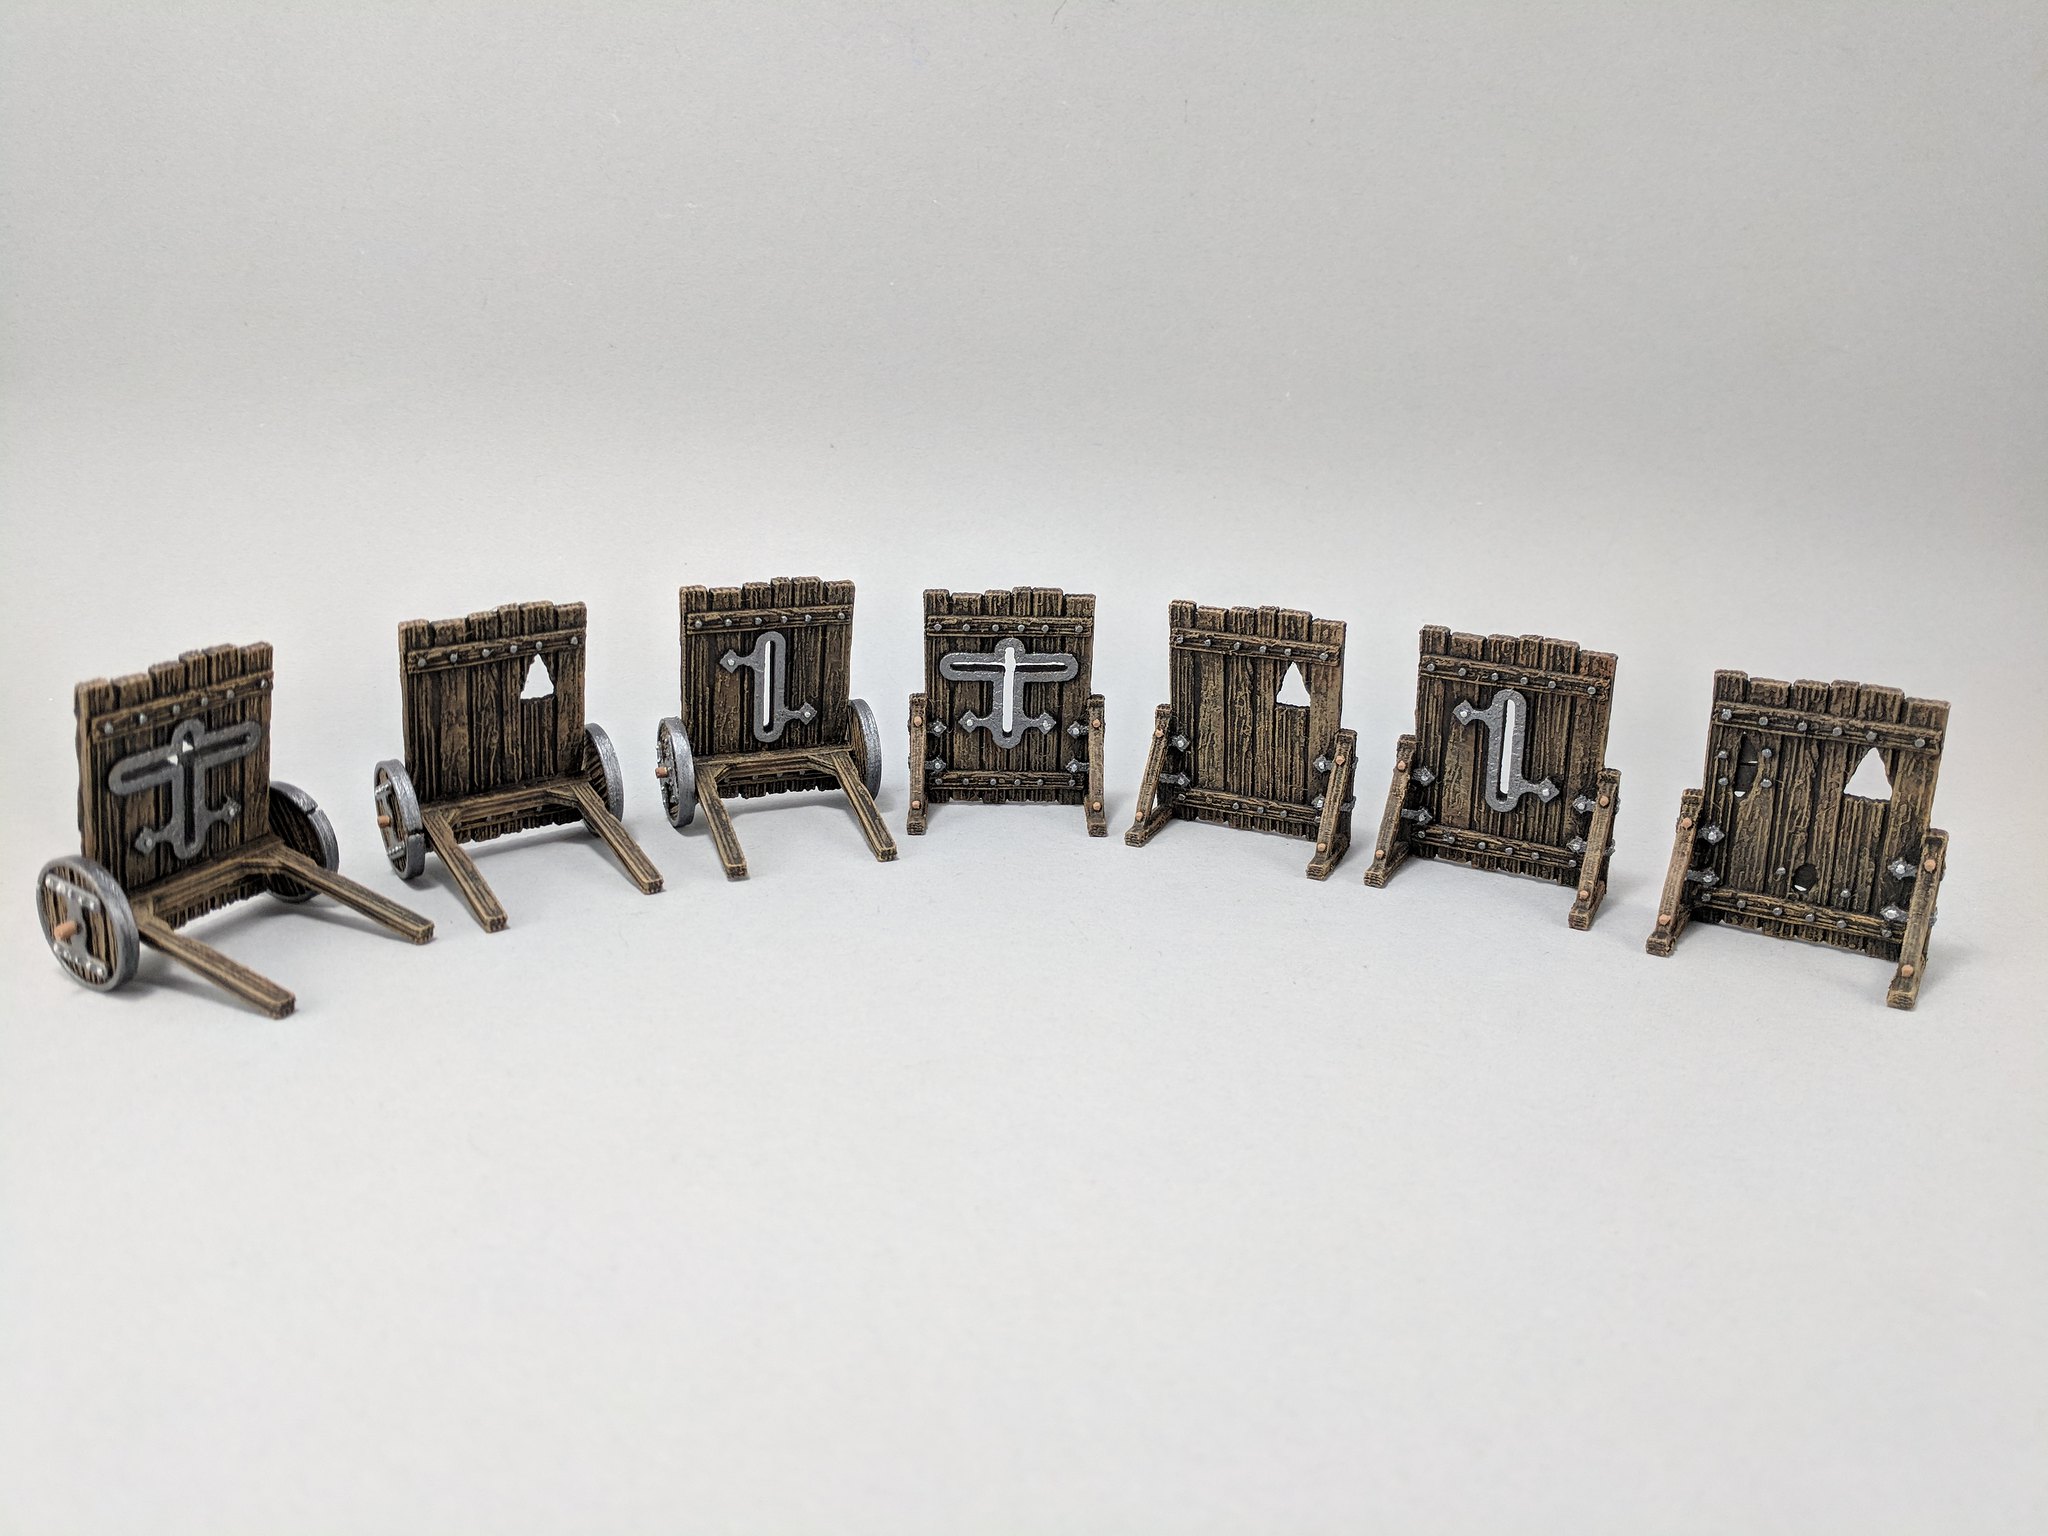
curufin , are you willing to sell those? I would be interested, depending upon price. Don't have a 3D printer, not planning to get one any time soon. Definitely have a desire for mantlets, for my 25-28mm armies. Cheers! I could probably do that for you. |
|
|
|
Post by curufin on Oct 15, 2018 14:46:22 GMT
|
|
|
|
Post by curufin on Oct 15, 2018 14:41:23 GMT
|
|
|
|
Post by curufin on Oct 8, 2018 14:38:47 GMT
Back in 1981(?), I ran S1 Tomb of Horrors, at the local gaming store. One of the players got to the sight where that image comes from. Him: "I wrap myself tightly, in my +1 Cloak of Protection, and dive in, head first... What happens?" Me: "Come with me..." I led him out of earshot of the other players, I then explained to him that the mouth of the figure on the wall, was a fixed, Sphere of Annihilation, and that his character was dead, of course, and the game, for him, was over. I love that you pictured a black cat in the mouth -- priceless! Cheers! Yeah, that module is a real killer....but awesome. The little black cat in the picture is a hell-spawn. She lives to watch the world burn and destruction follows in her wake. I highly doubt a Sphere of Annihilation would have any effect on her. But she is so soft and fluffy. |
|
|
|
Post by curufin on Oct 8, 2018 14:32:08 GMT
This pic has the potential to go viral.  It is going around. Sean K. Reynolds saw it, messaged me, and shared it with his fans. I was pretty stoked about that. |
|
|
|
Post by curufin on Oct 7, 2018 14:21:54 GMT
For the last few months I have been working on converting a room at my place into a dedicated game room. I have done the electrical, drywall, drop ceiling, lighting, paint, and carpet so far. I decided I should add a special cat door in the wall just in case the cat gets locked in the game room. I also figured if it is a real game room, it should probably have a game inspired cat door. This is what I came up with. 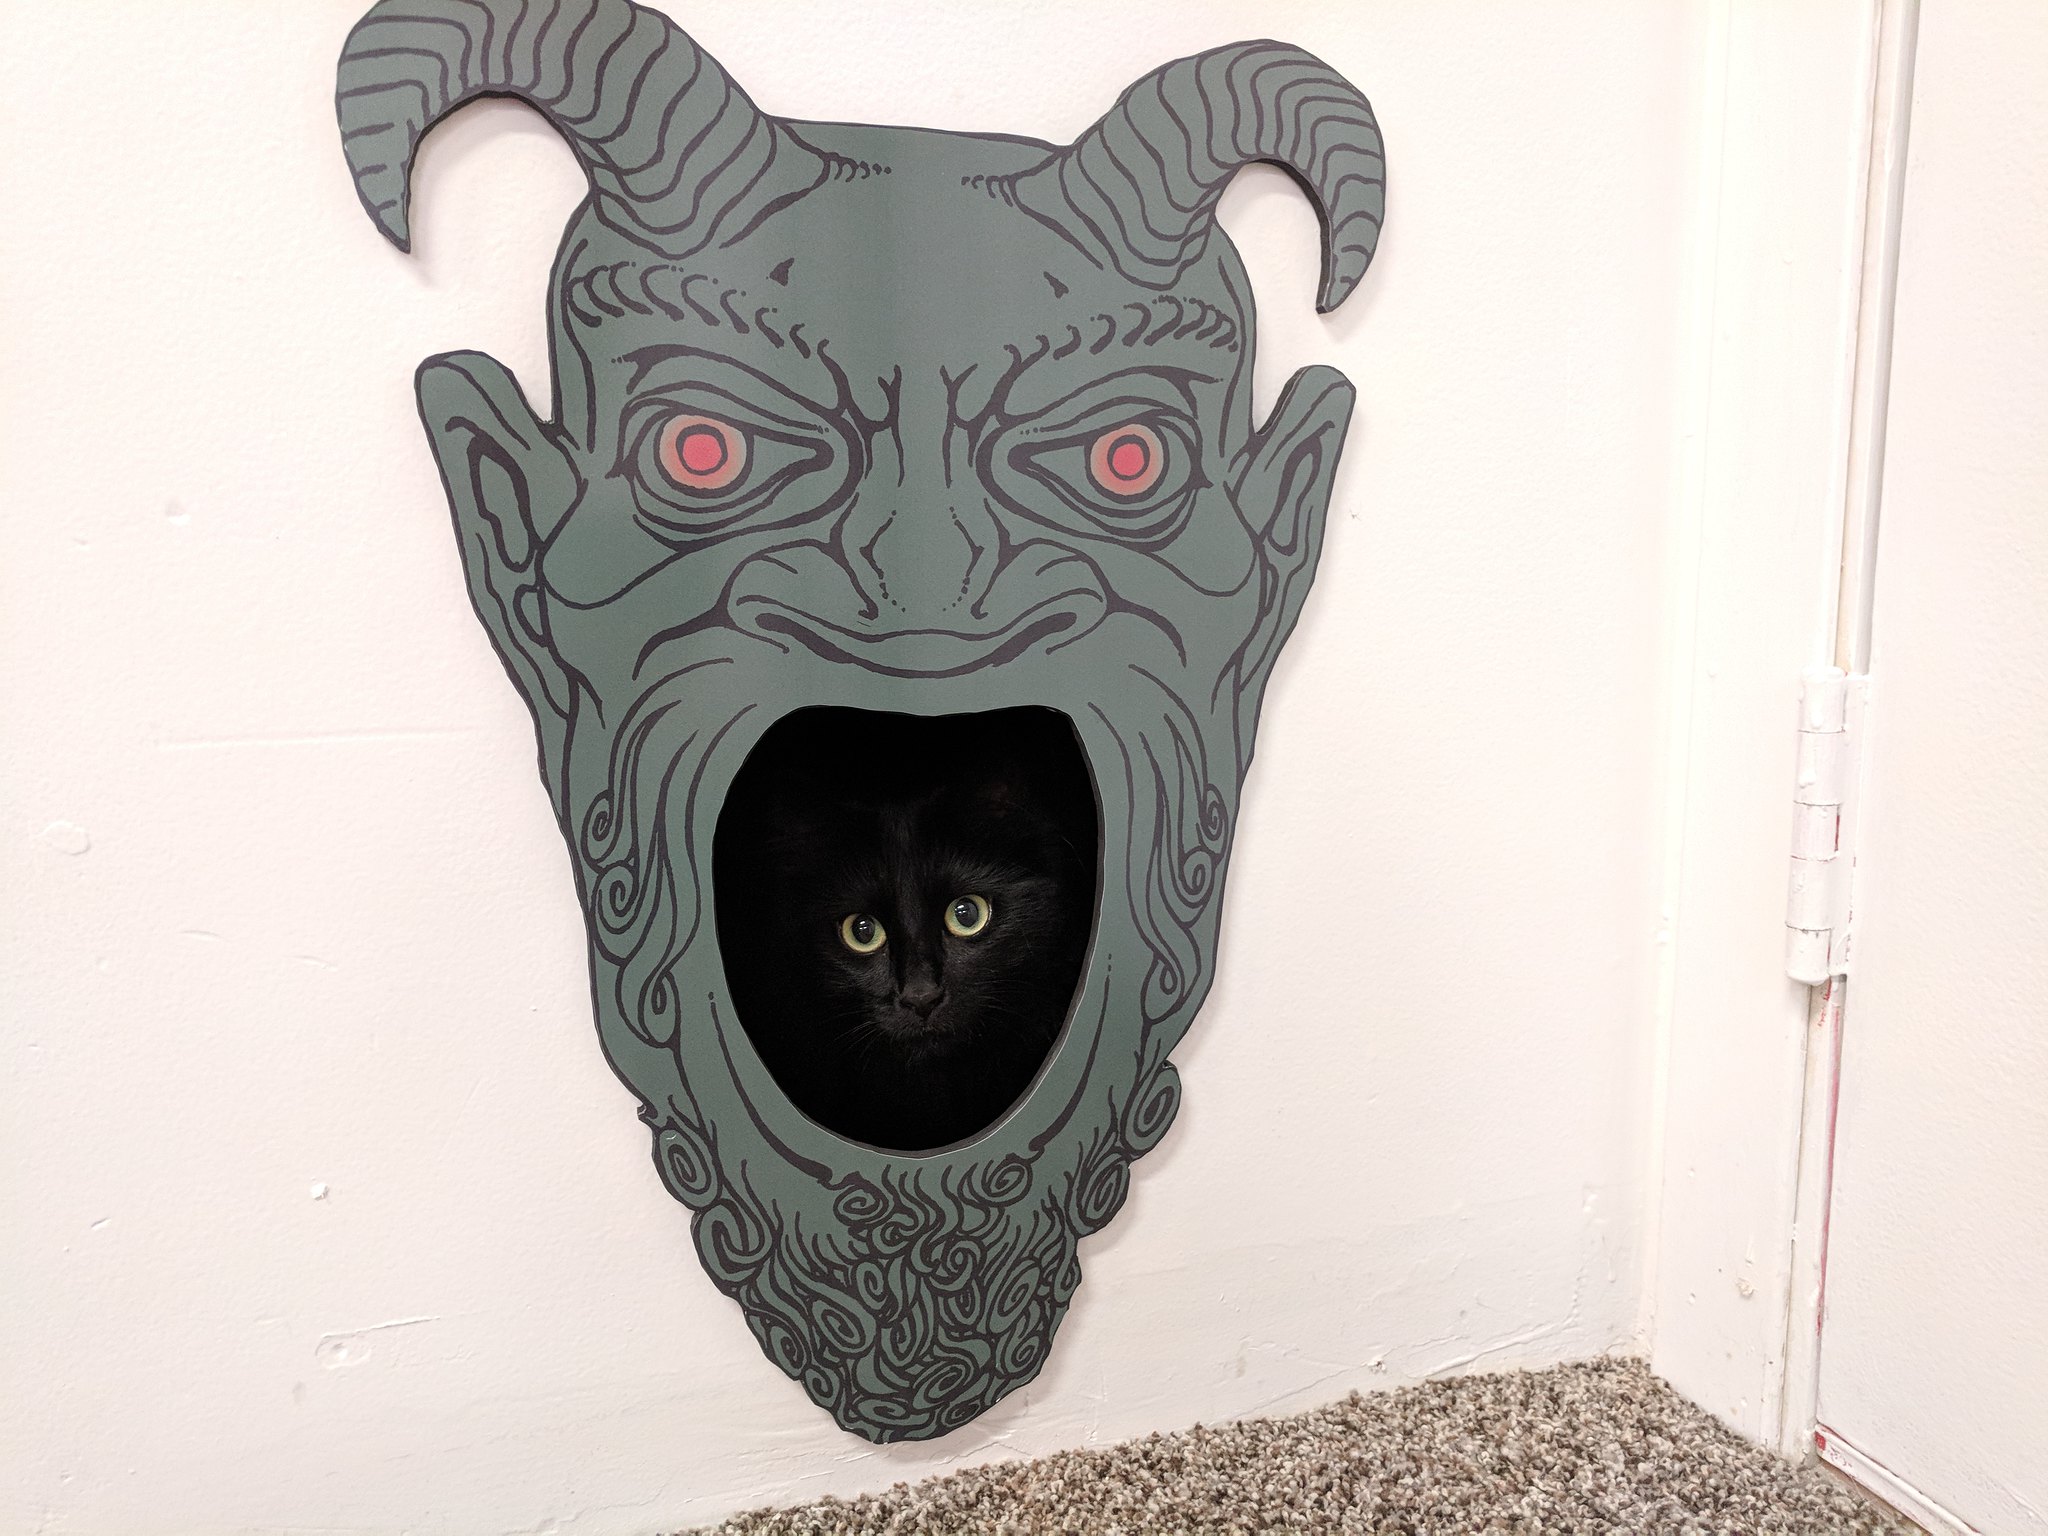 I printed the image in vinyl and then mounted it on 1/4 inch (6.35mm) thick black plastic and then used a router to cut it out. |
|
|
|
Post by curufin on Aug 25, 2018 0:31:08 GMT
|
|
|
|
Post by curufin on Aug 8, 2018 12:58:50 GMT
Really fantastic stuff as always, Kris!
|
|
|
|
Post by curufin on Aug 8, 2018 1:19:15 GMT
|
|
|
|
Post by curufin on Jul 24, 2018 13:28:15 GMT
Meph, Those Tavern Tiles were a test set to see how the new locking clip would work. We ended up going to OpenLOCK. If there is anything you are looking for, just let me know. So looking through my stuff I was thinking about printing the water tiles. Now that you went to openlock did you end up upgrading all the tile sets or how does it work. I still have all the original STL files from the TT set. We haven't upgraded the Water set. The water tiles don't have enough 'base thickness' to add an OpenLOCK clip to them. The Wall clips still work an all the tiles (original and OpenLOCK). In the last year we have seen an insane amount of new gaming models on the market (both free and paid files). There are tons of new designers and companies that are doing brilliant work for the community. It really is an awesome time to have a 3d printer. |
|
|
|
Post by curufin on Jul 23, 2018 15:31:06 GMT
Meph, Those Tavern Tiles were a test set to see how the new locking clip would work. We ended up going to OpenLOCK. If there is anything you are looking for, just let me know.
|
|
|
|
Post by curufin on Jul 20, 2018 12:37:12 GMT
sgtslag, I did create more hallways and few small square rooms using this method. I even tried using a router table to add the grid lines. Worked like a charm. Thanks for the tip! I got a chance to use them in a game, but I ended up giving them (along with a bunch of other crafts) to the local game shop that allows people to run games for free. For me personally, the PROs are: -They are heavy tiles, so they are much harder to knocked around on the table. -There is no gluing. Everything is just peel-n-stick -There is no painting. This is the biggest pro for me. Painting is my biggest bottleneck and I am easily a full year behind in just painting terrain. -They look great and there are tons of different patterns you could choose. -Very fast to put together. CONs: -If you want grid lines you will likely need to add them, which can be difficult and time consuming without special tools. -They cost more that cardboard tiles. -It is very difficult to create irregular shaped tiles.
|
|
|
|
Post by curufin on Jul 3, 2018 14:47:08 GMT
|
|
|
|
Post by curufin on Jul 3, 2018 14:39:33 GMT
|
|
|
|
Post by curufin on Jun 16, 2018 11:17:06 GMT
Been a while coming now but i'm planning my return to gaming this fall with some of my old group. Looks like i'm going to return to 5th Edition and decided I am going to spend the summer working on a new campaign and some new crafts. I decided to jump right back into the fray last night curufin with a late pledge in the Forest of Oakenspire Kickstarter for everything =) Modular trees, Airships, stretch goals and all of the EC3D stuff on Hero's Hoard. Next up I need to see what I dont have of your stuff and fill in the blanks. Should be a fun summer and can't wait to see all the stuff I missed. Cool! I hope you can work some of that into you game. Be sure to hit up Evan's and my thingiverse too, we have lots of new stuff...and a lot more being released soon. Devon Jones, Evan Carothers' and I are working on rounding out a siege warfare collection of thingiverse too. And let me know if there is anything particular you need for your game. Glad to see you back in the saddle! |
|
|
|
Post by curufin on Jun 3, 2018 12:46:40 GMT
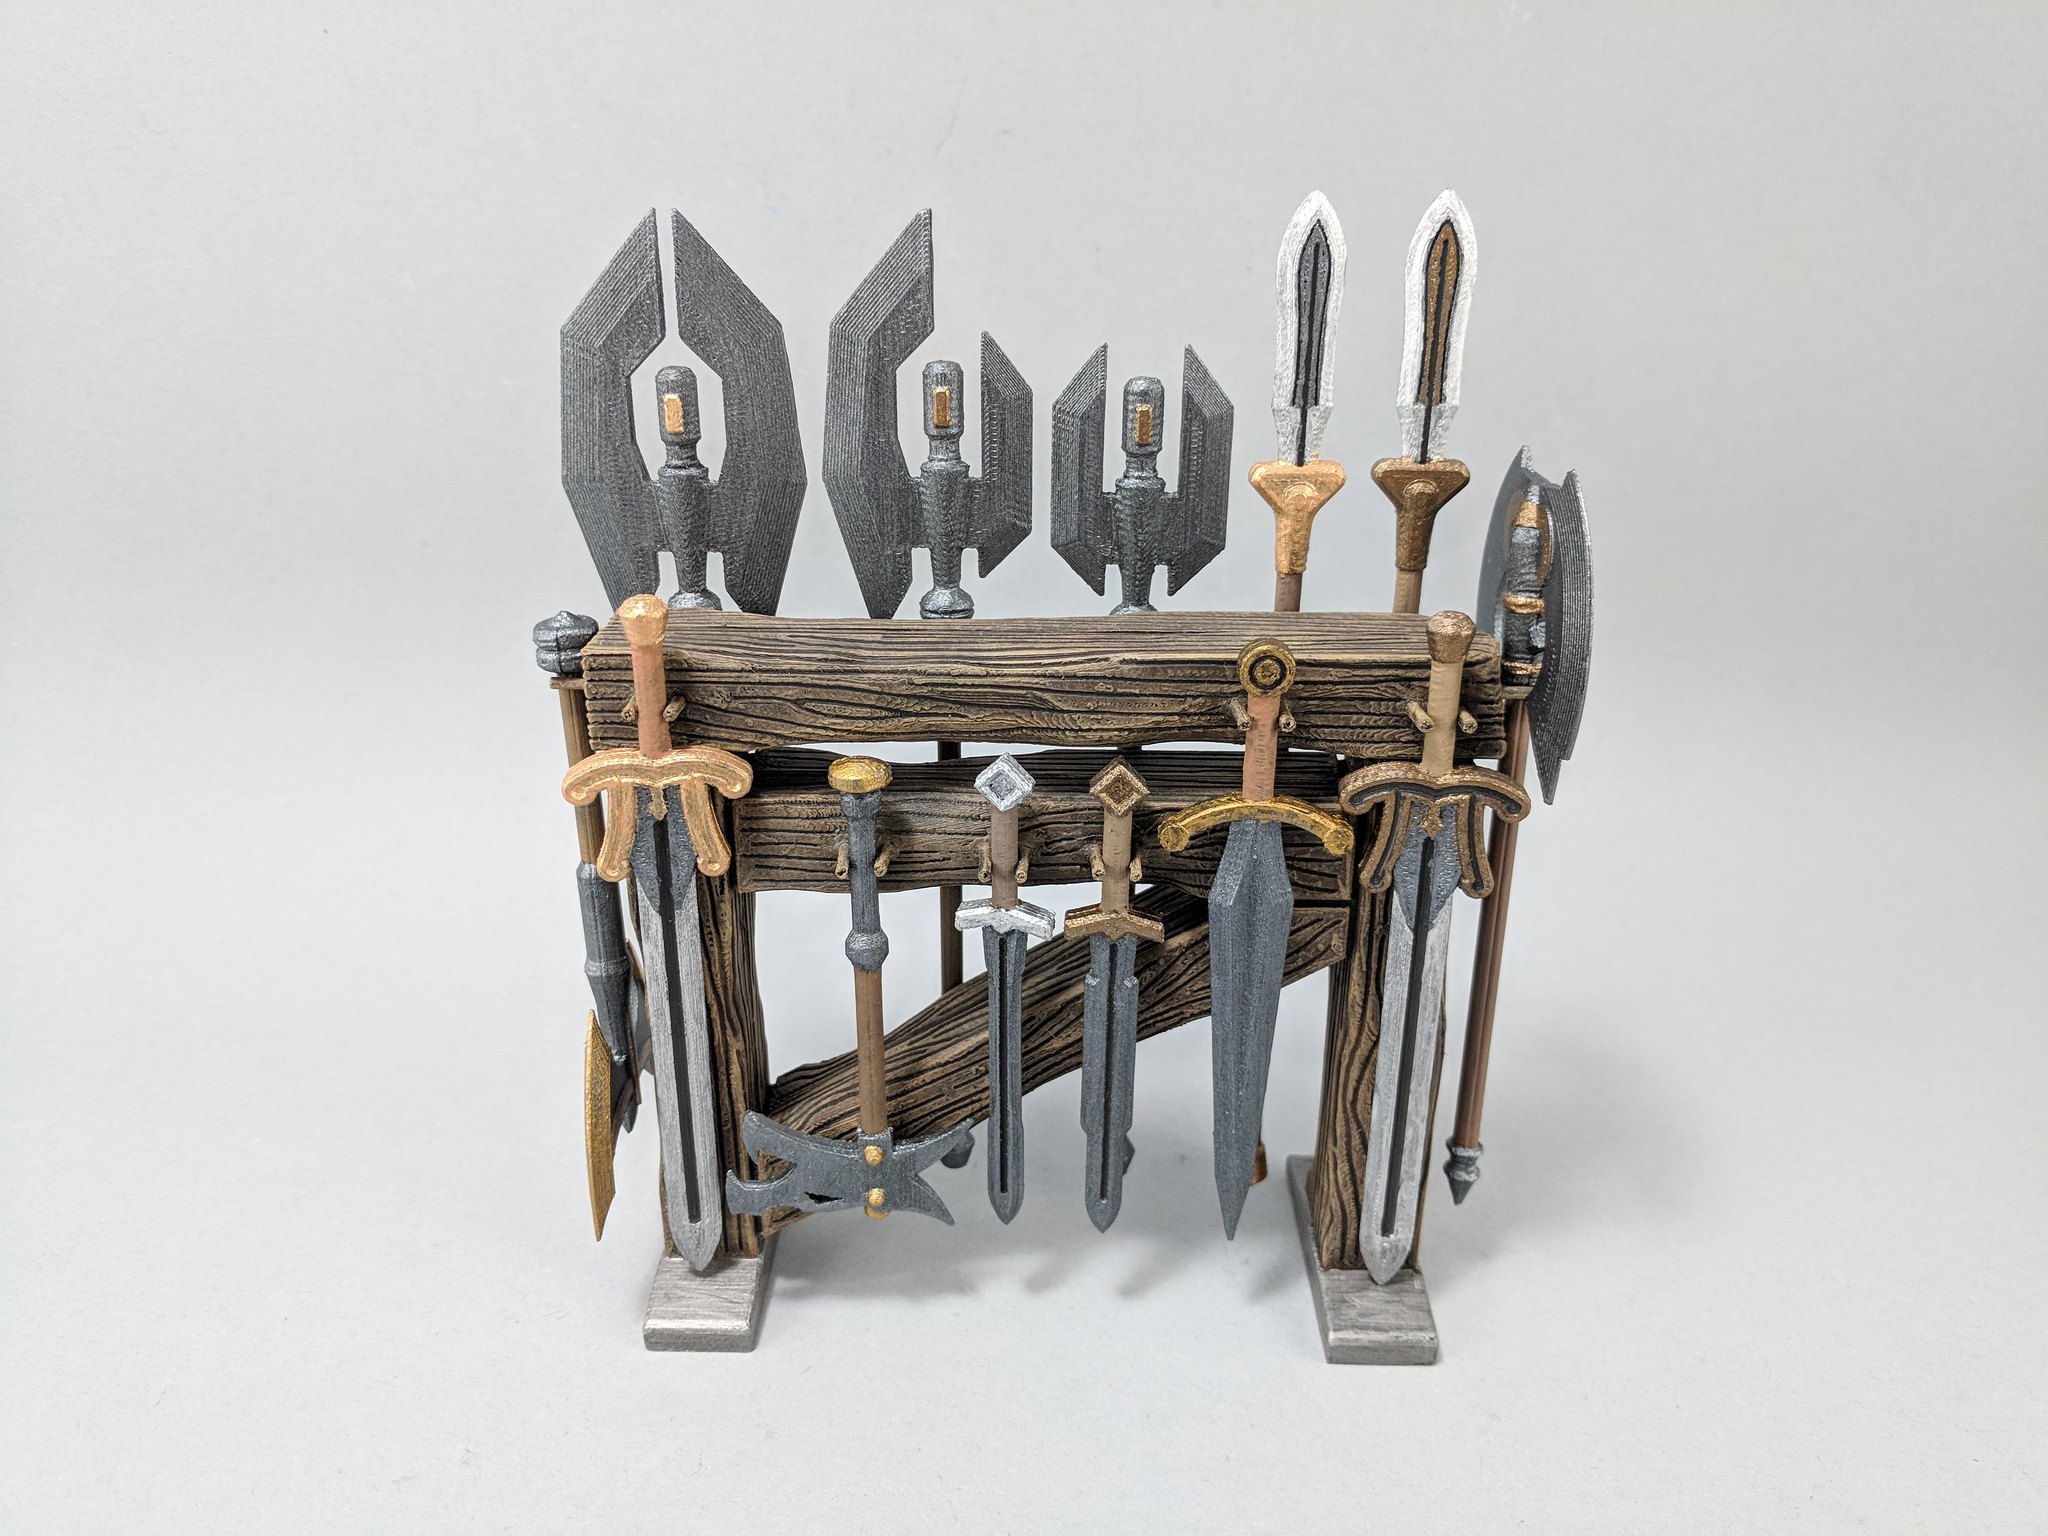
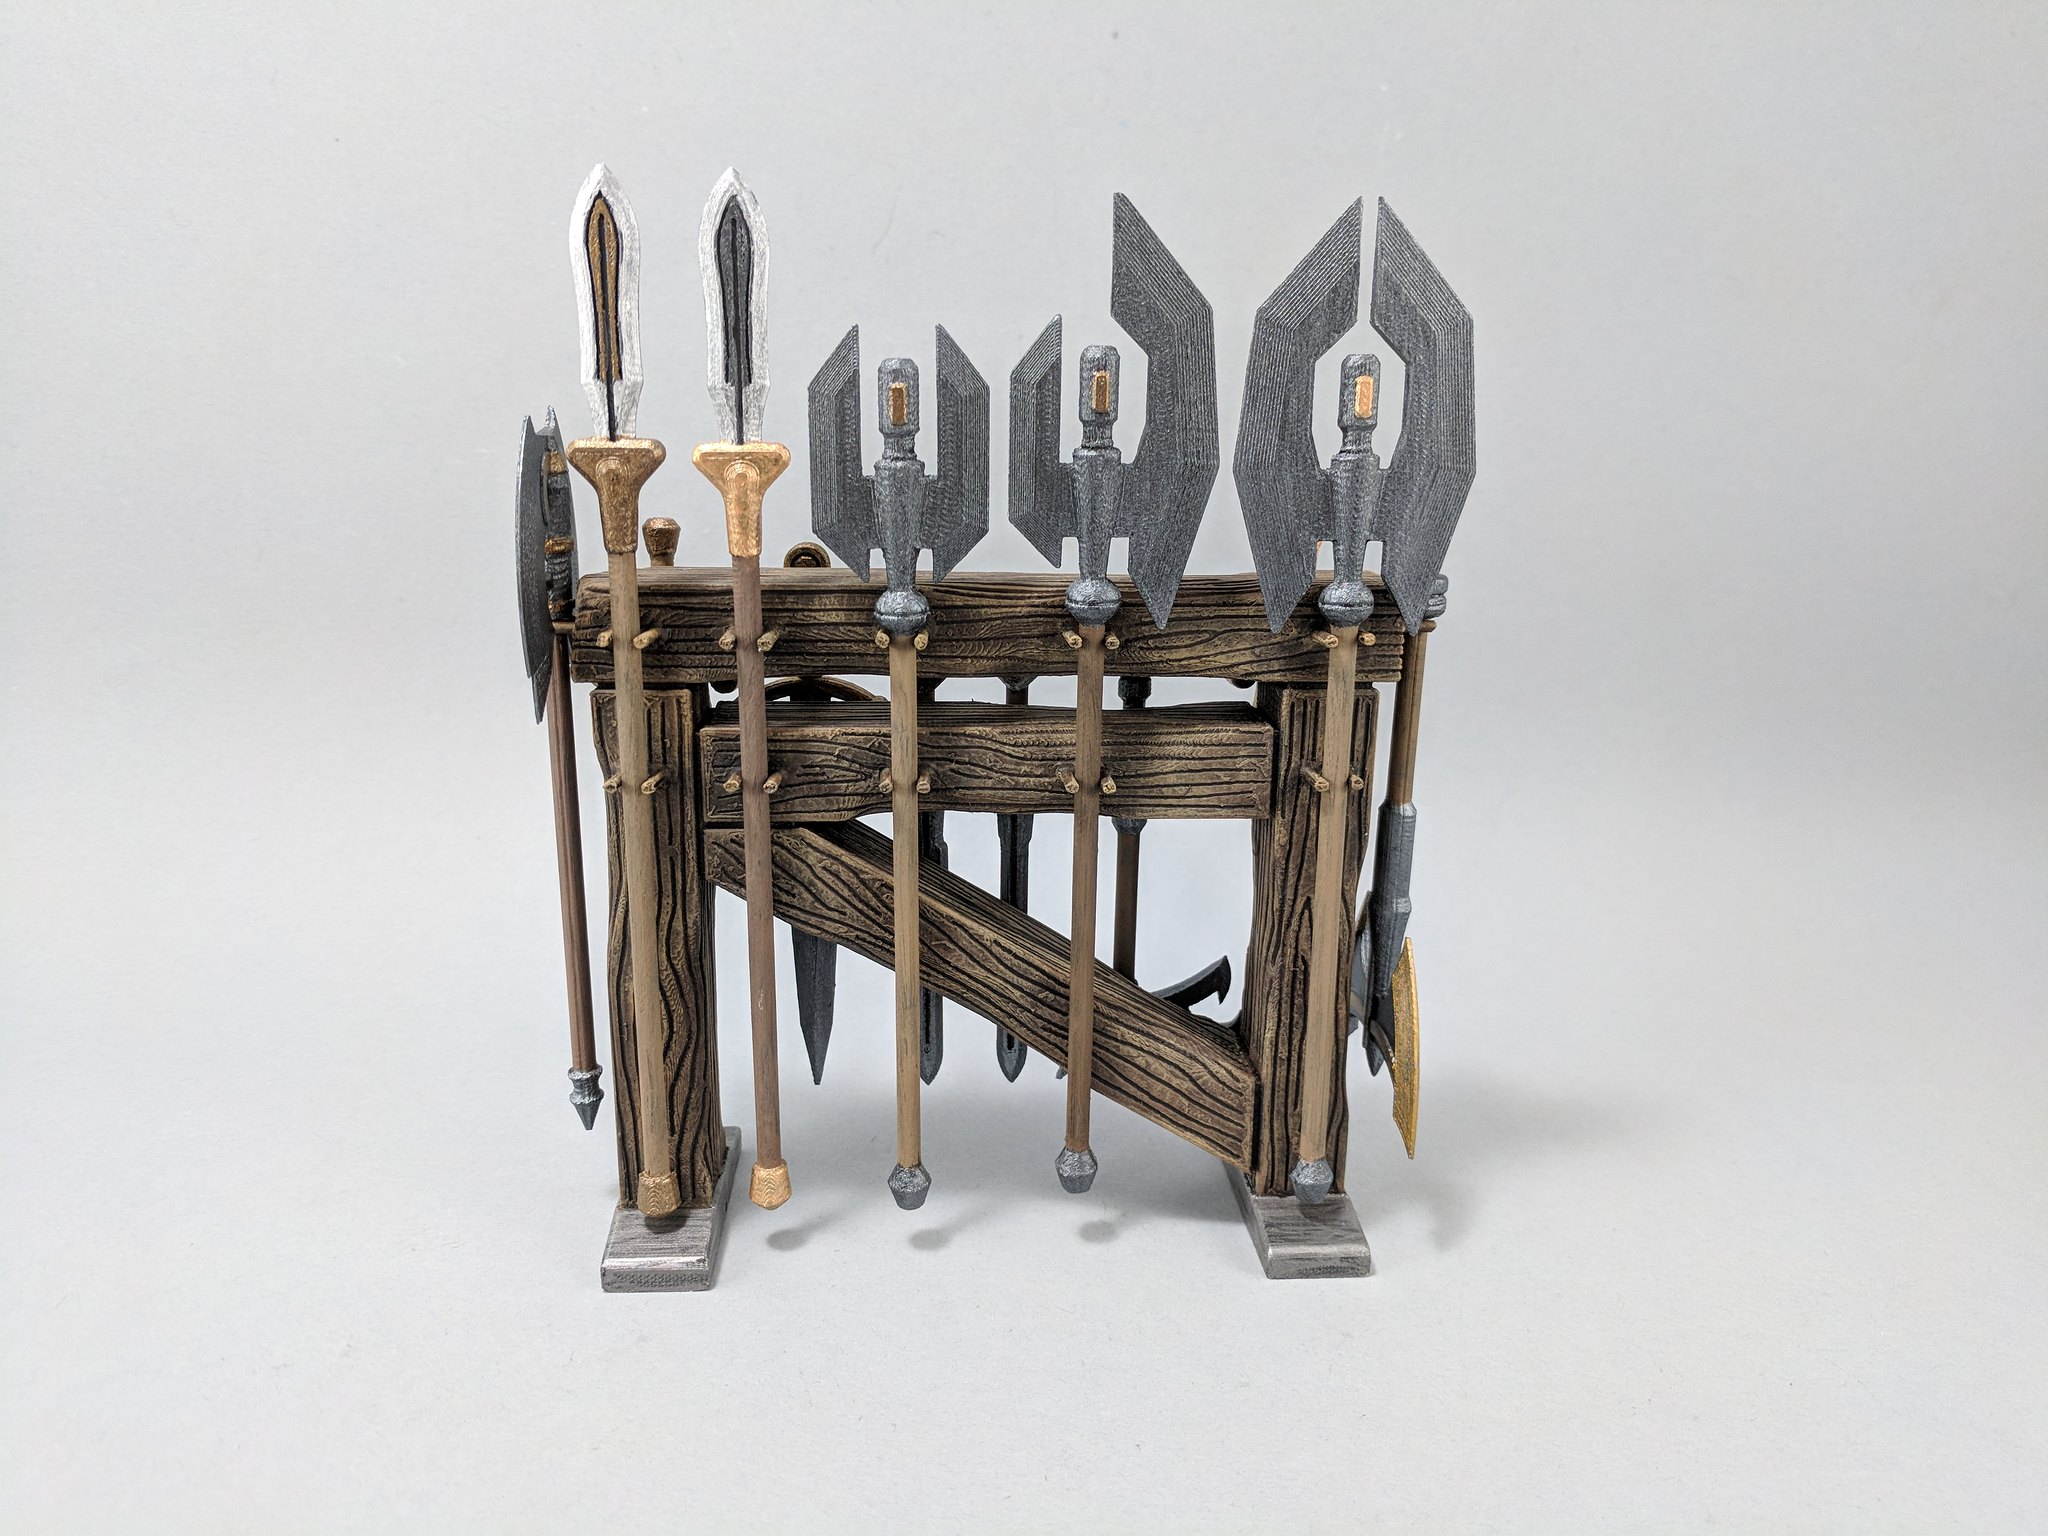
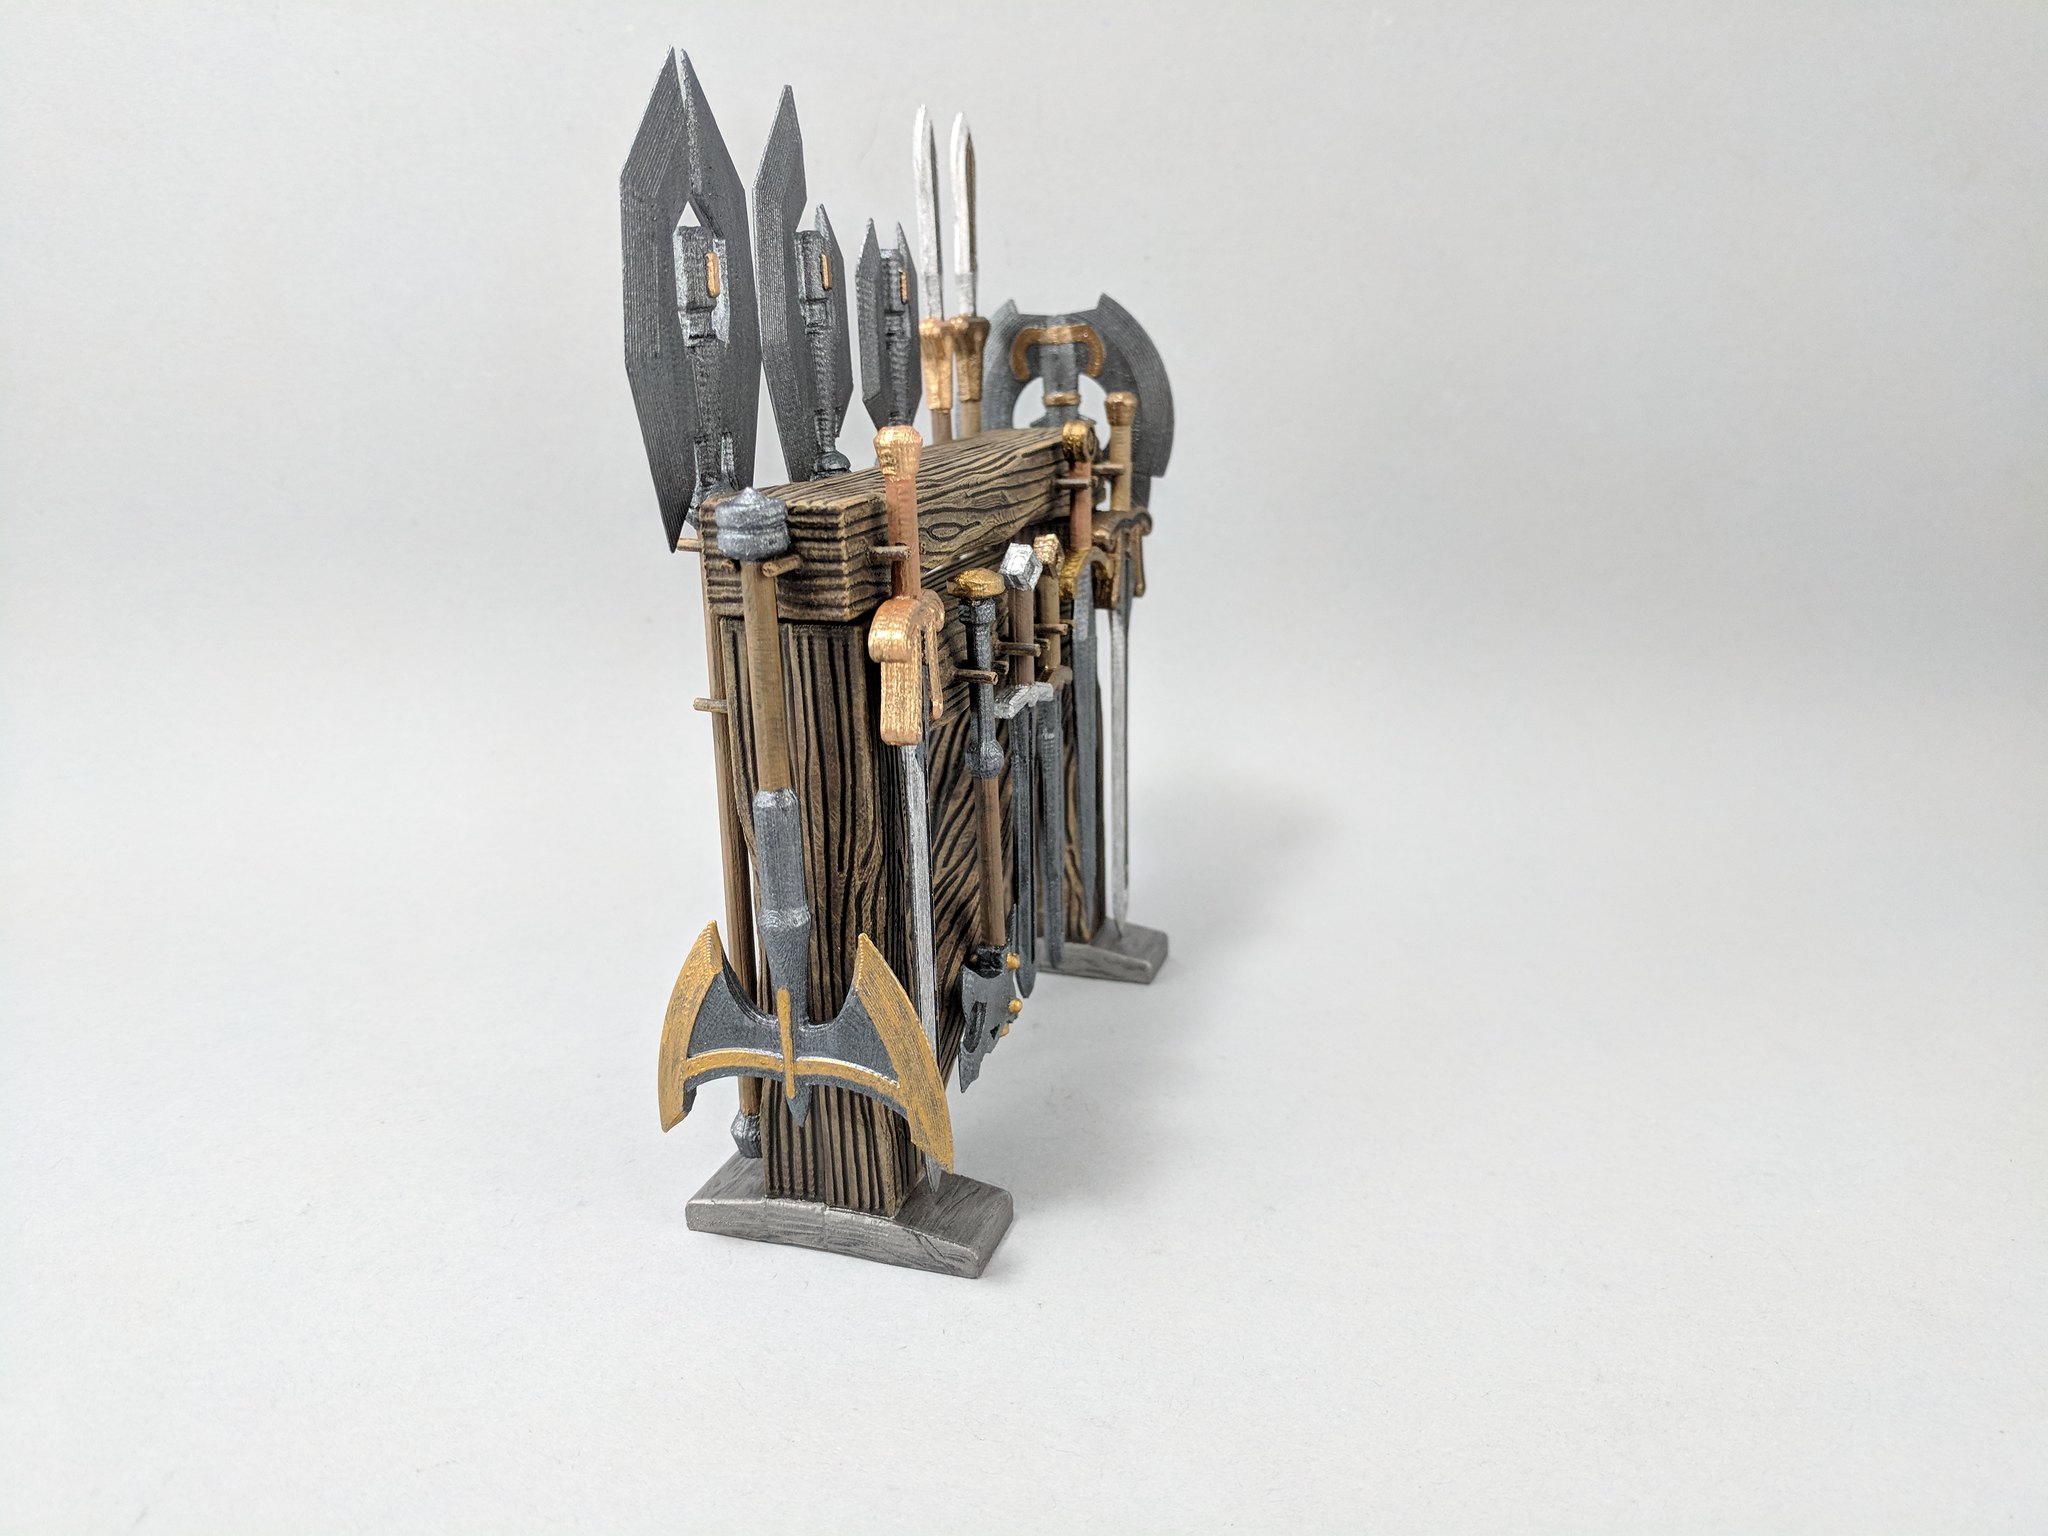
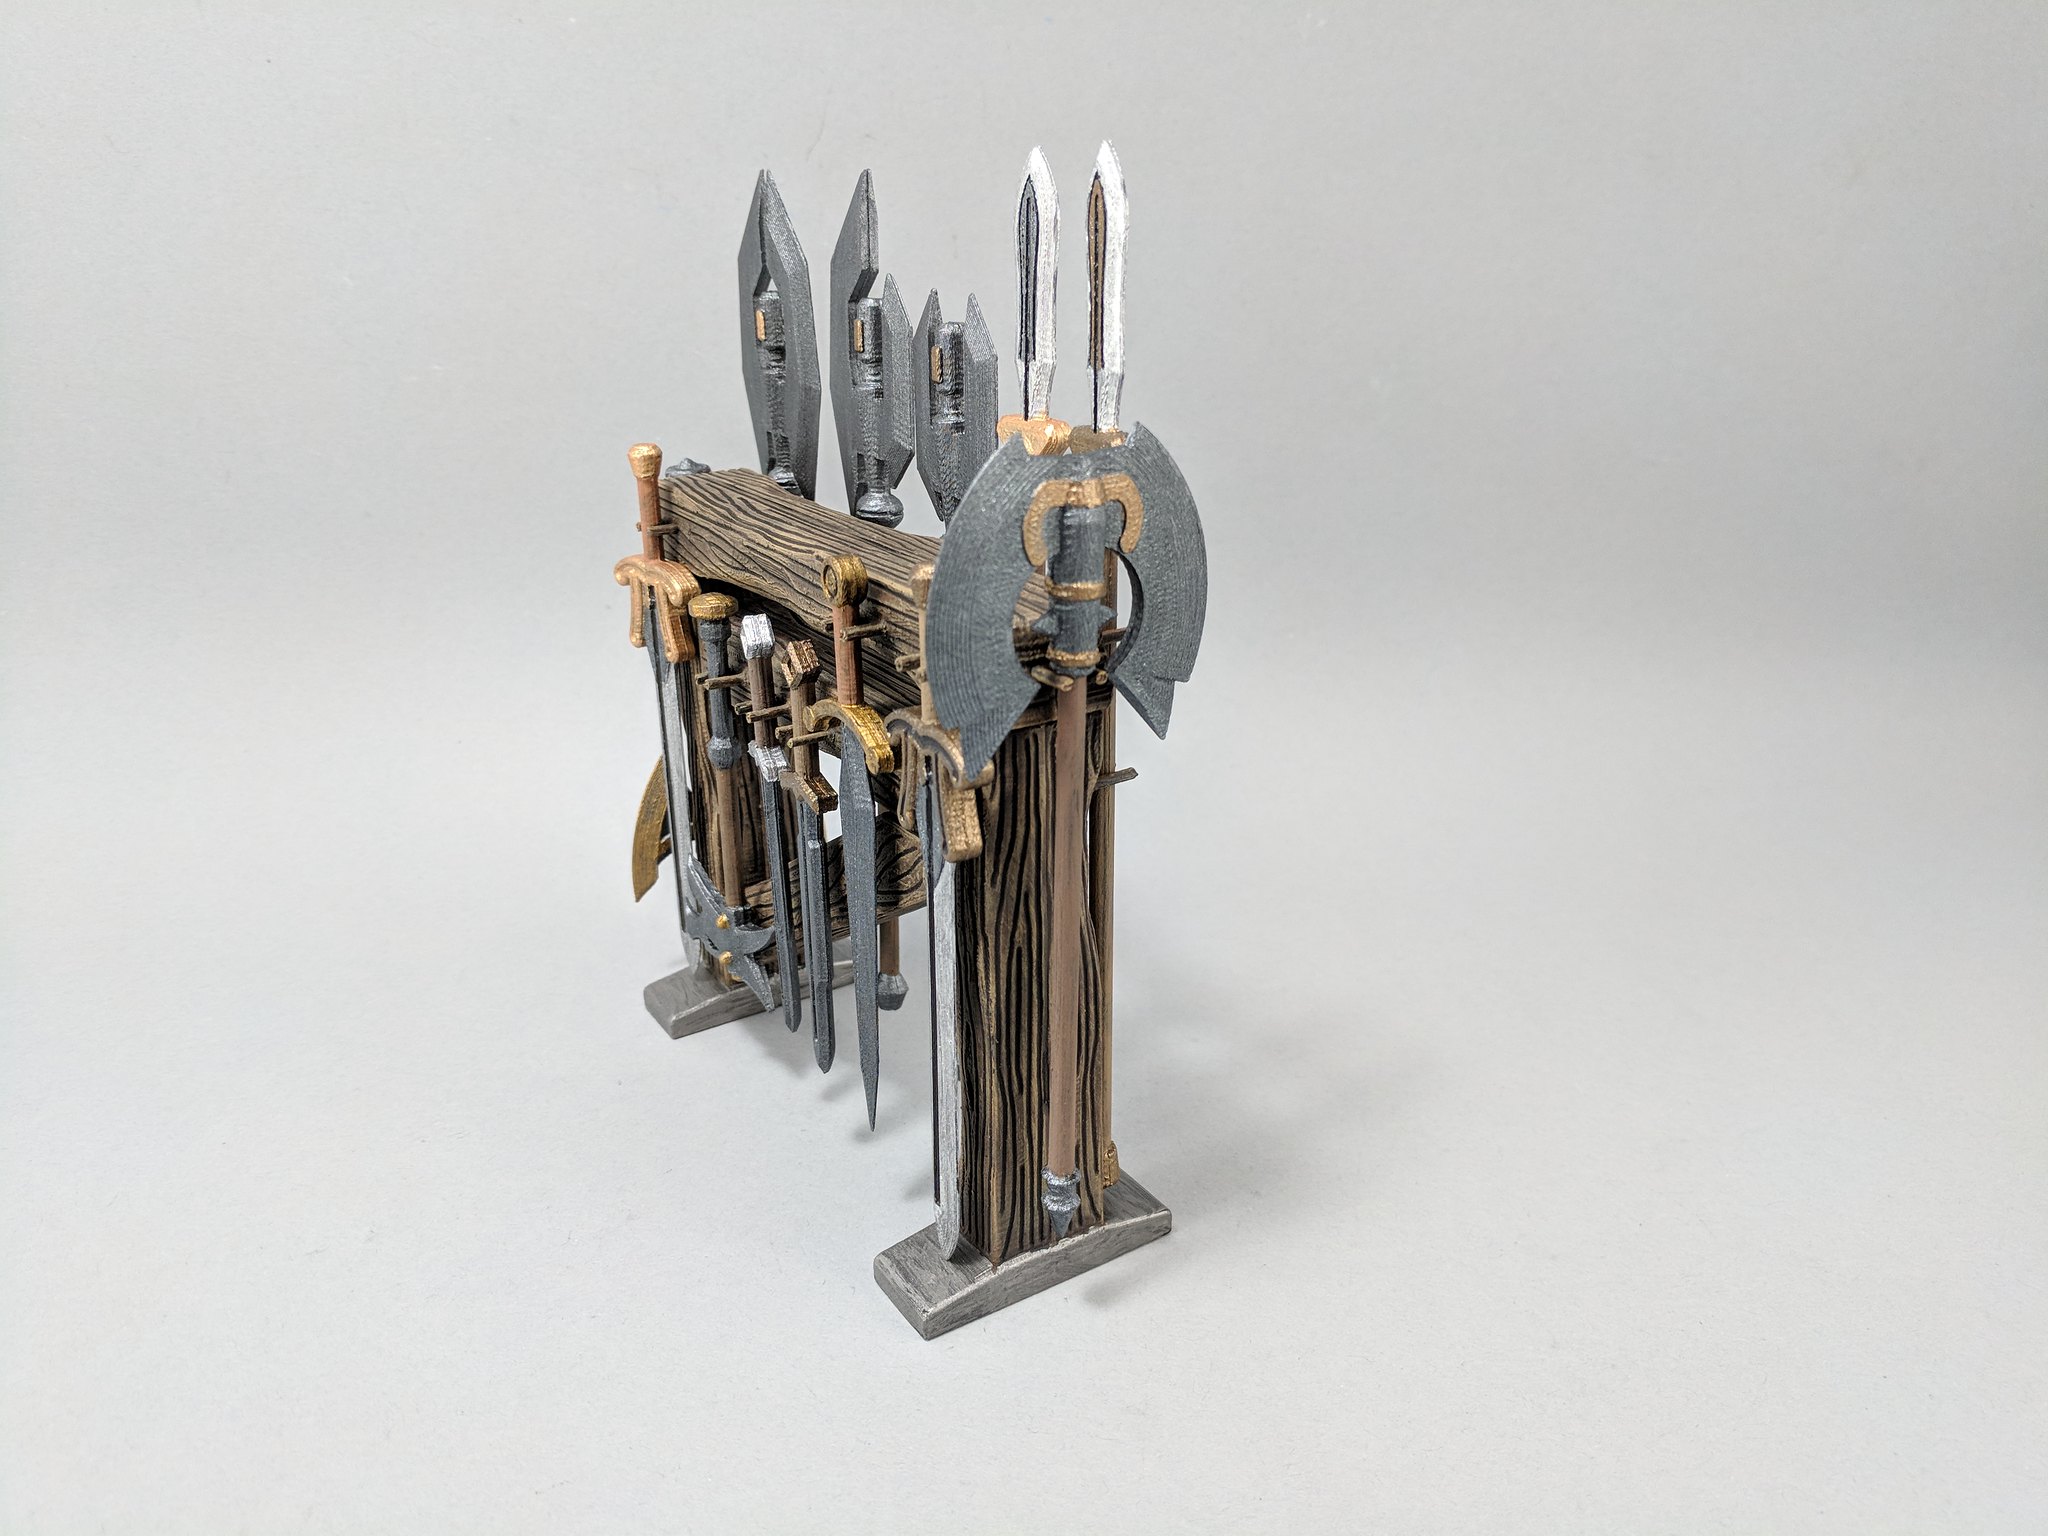
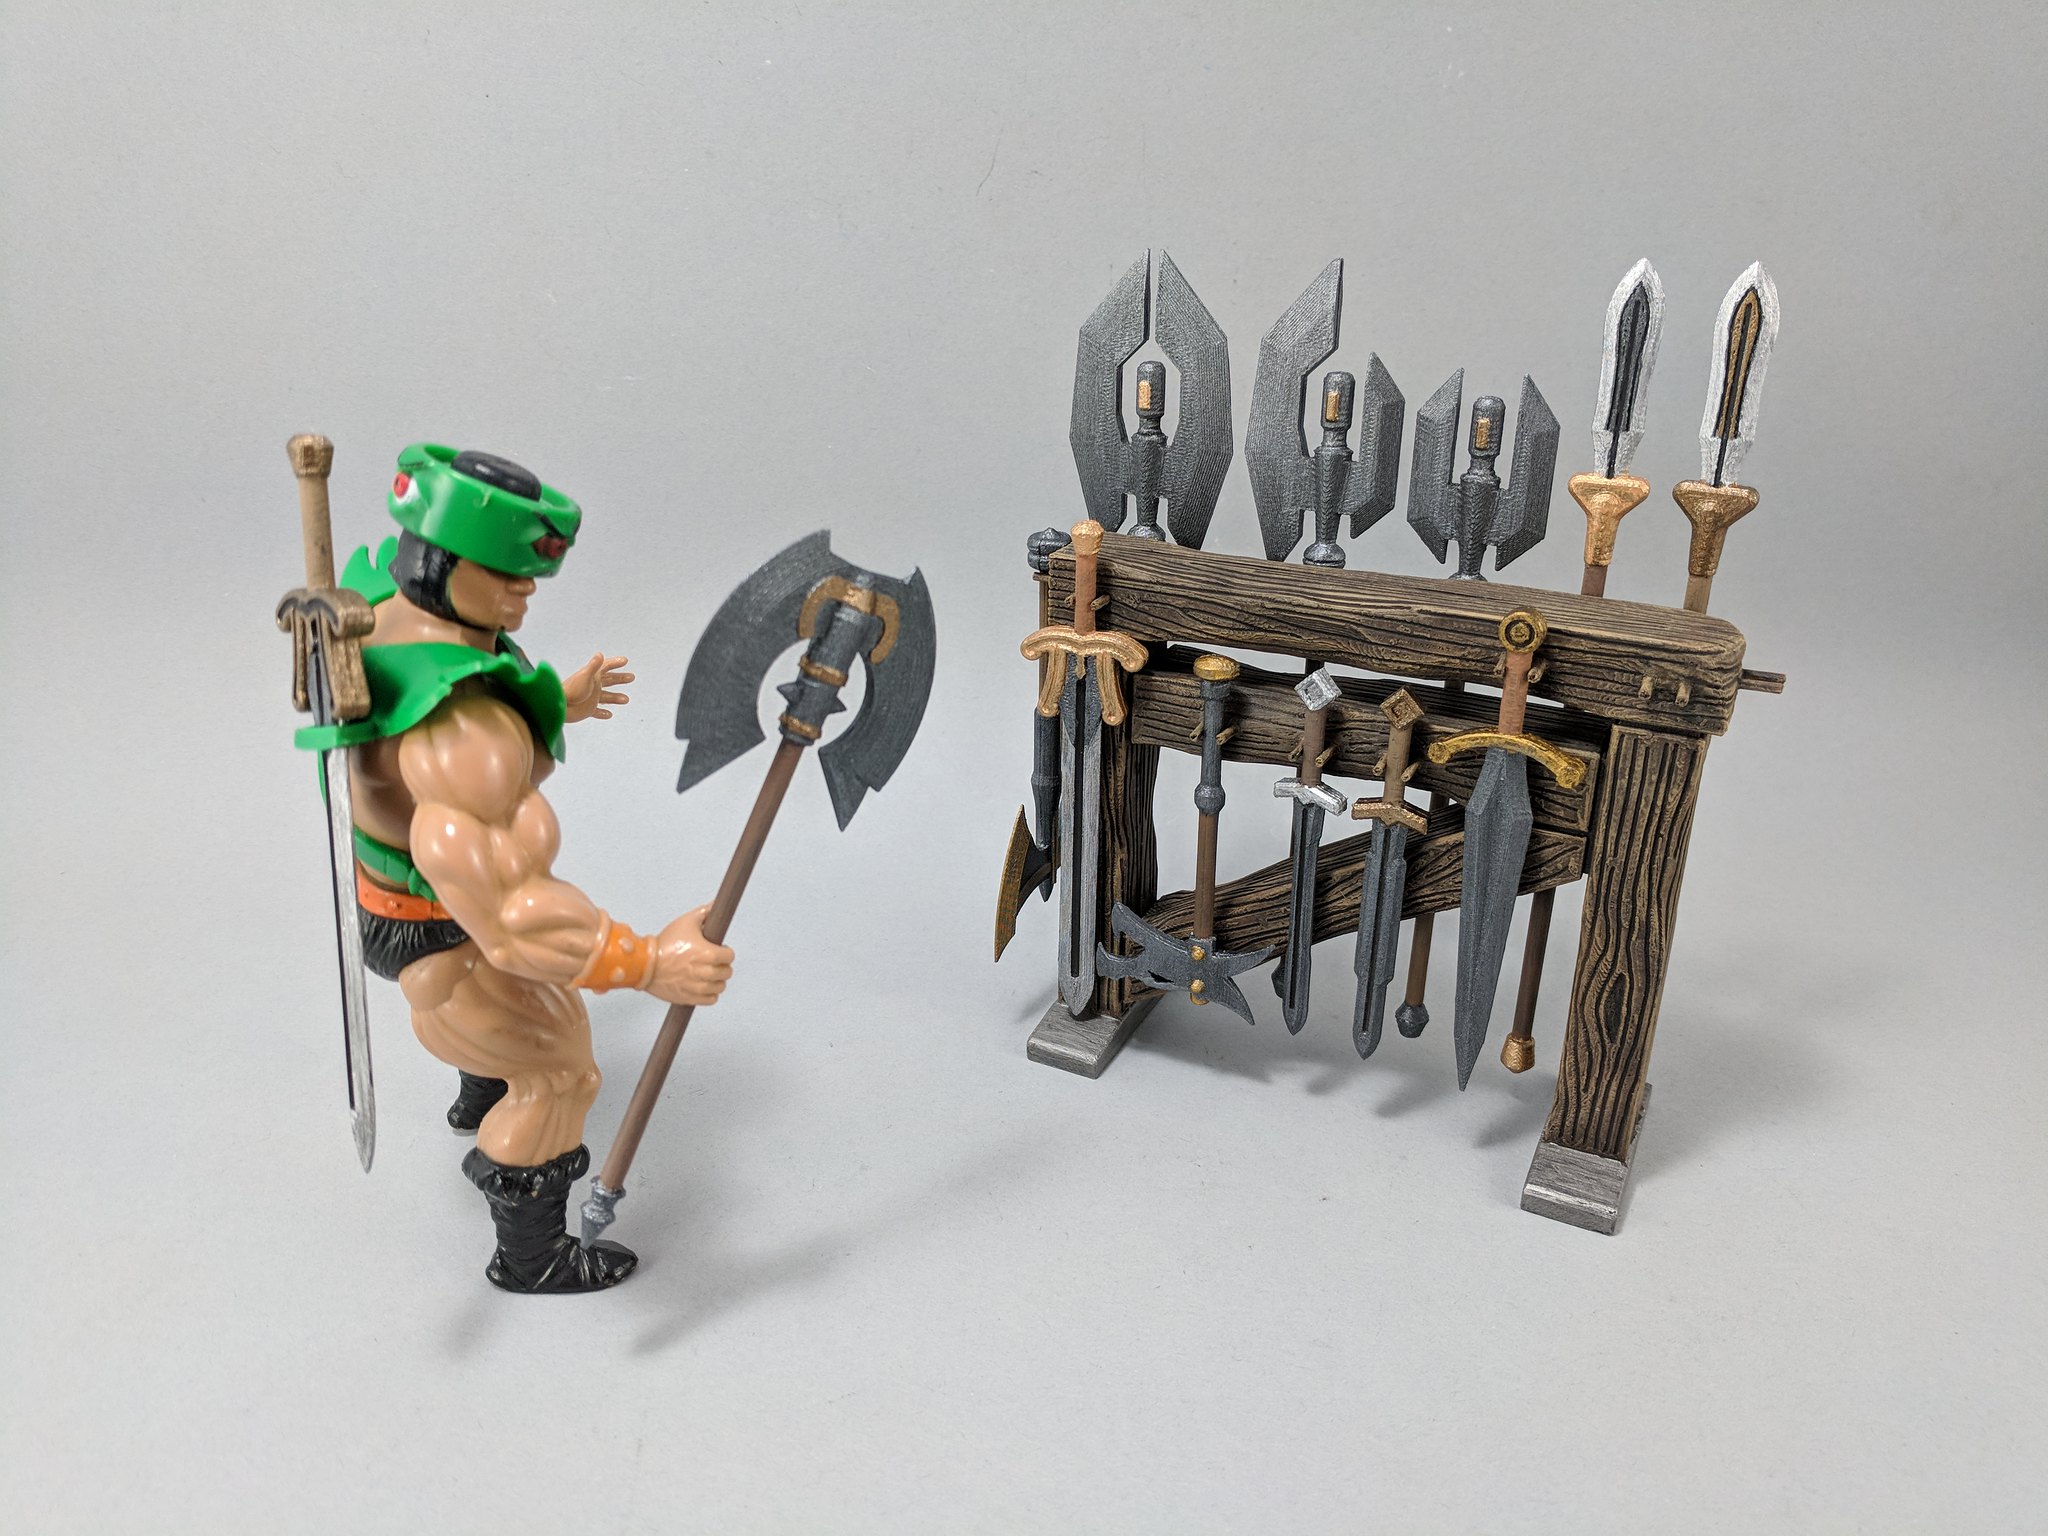
What's the preferred method again for glueing Heroe's Hoard accessories? e.g. tavern pieces, torture chamber accessories? Was it loc tite super glue? Do you ever use e6000? For woodgrain accessories you print black, then do espresso, burnt umber then fawn? If I recall correctly. About to assemble and paint a torture chamber set now. I mainly use Gorilla Super Glue. For the wood, I print in whatever color I have, then spray paint flat black. Burnt umber, cocoa, then fawn. |
|
|
|
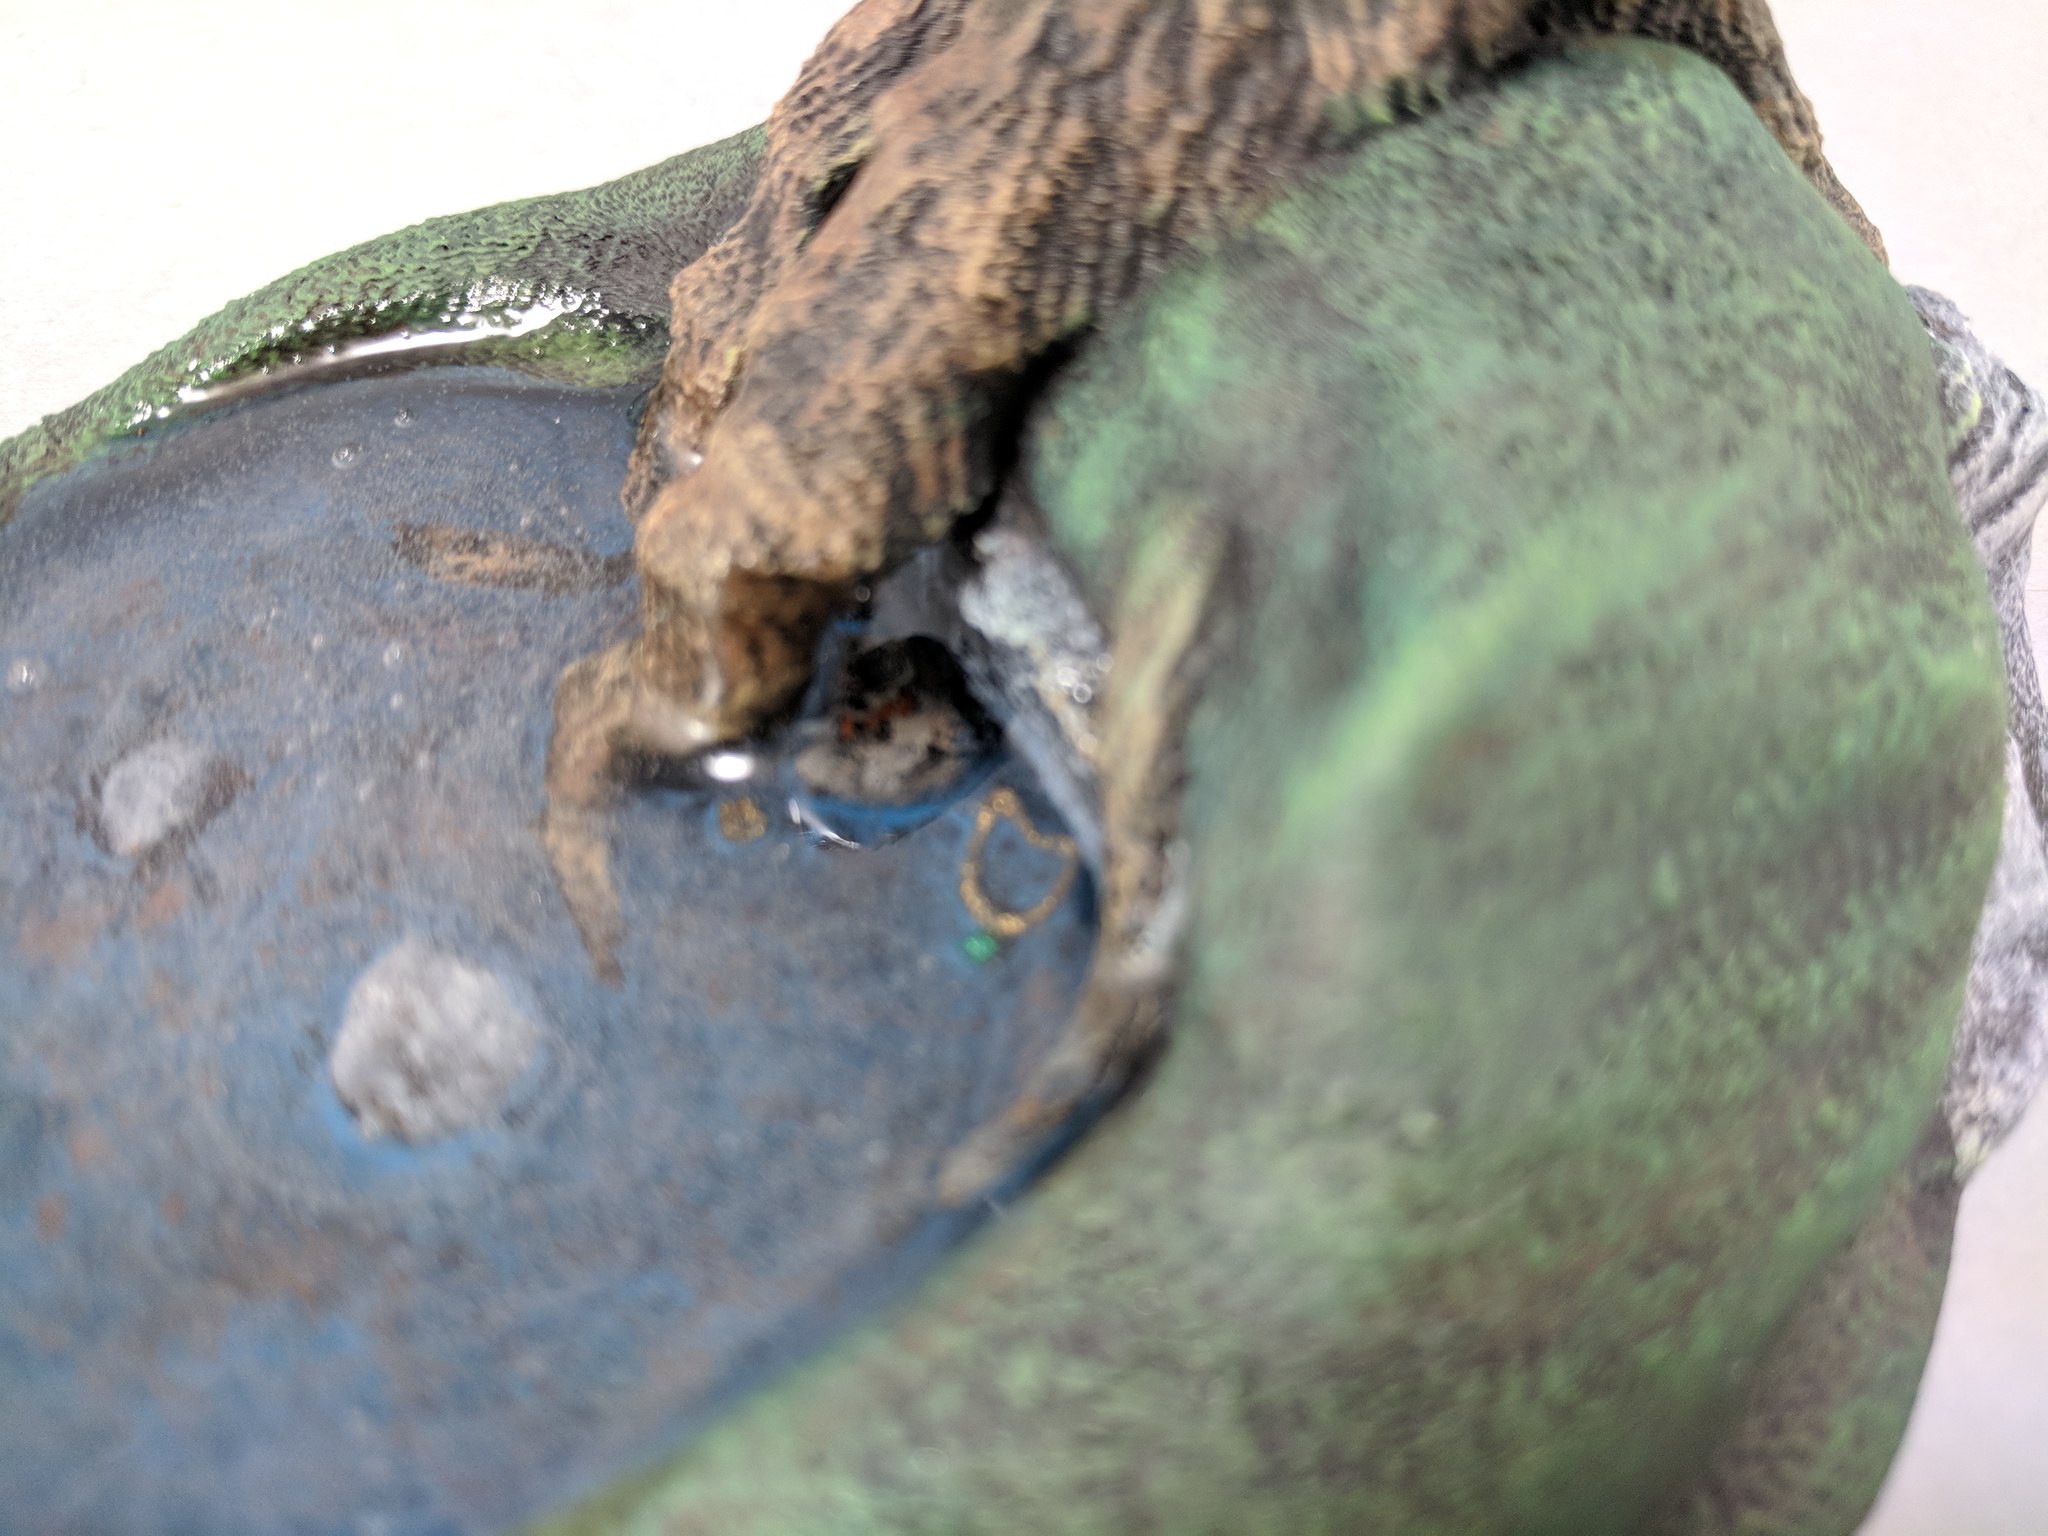
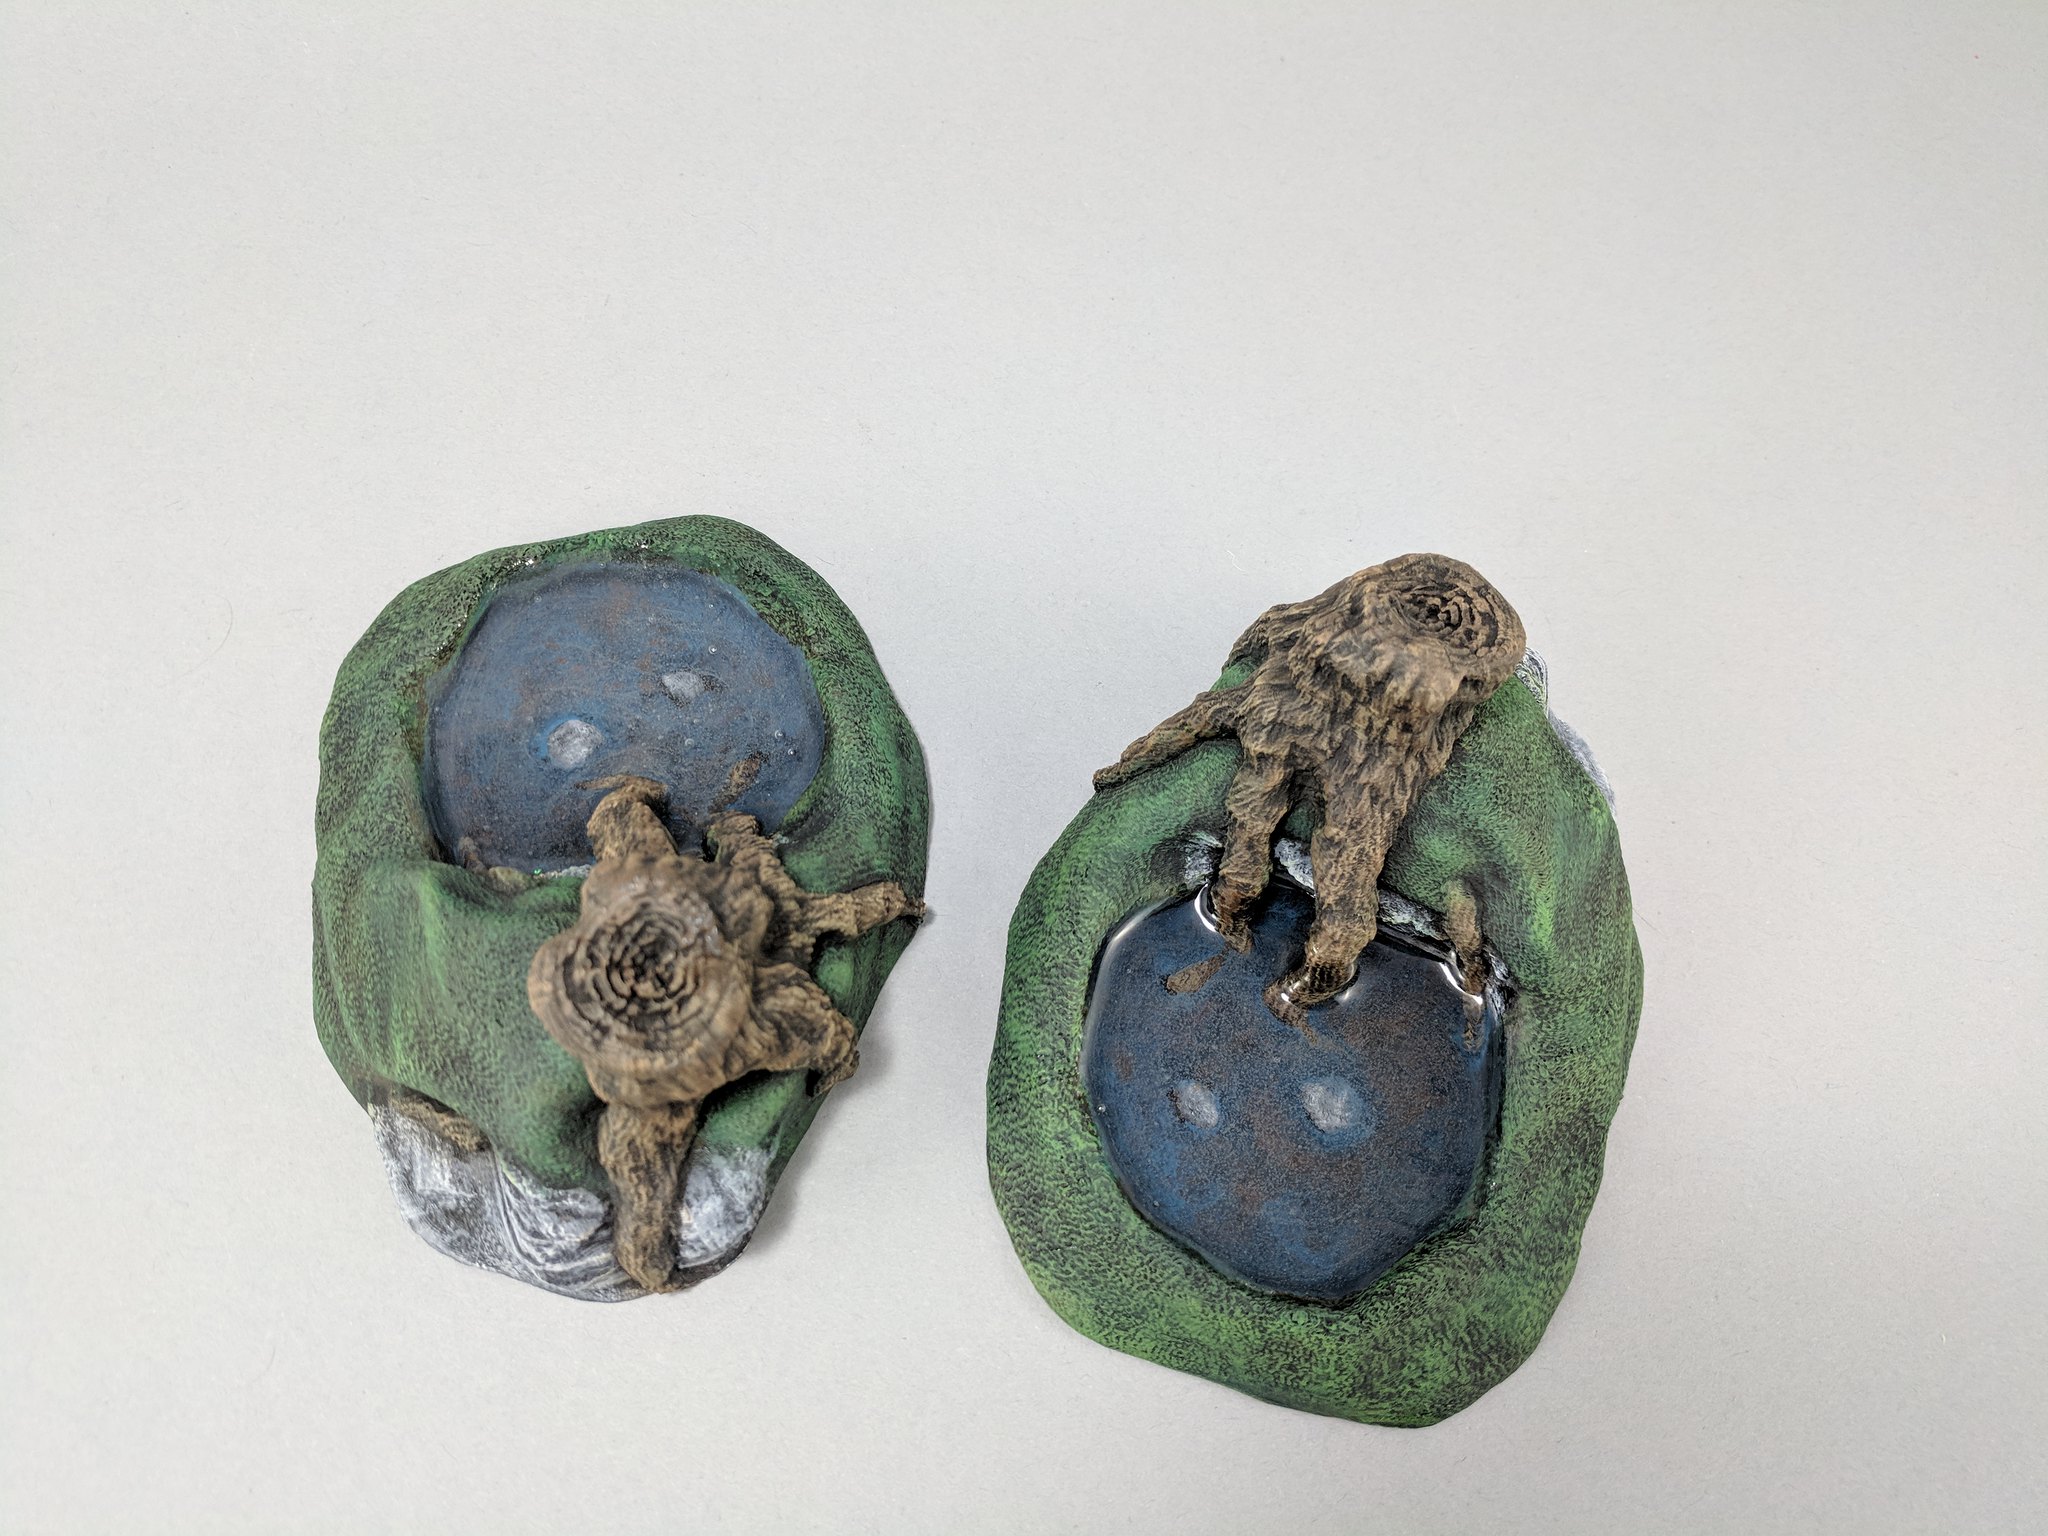
Post by curufin on May 18, 2018 13:04:19 GMT
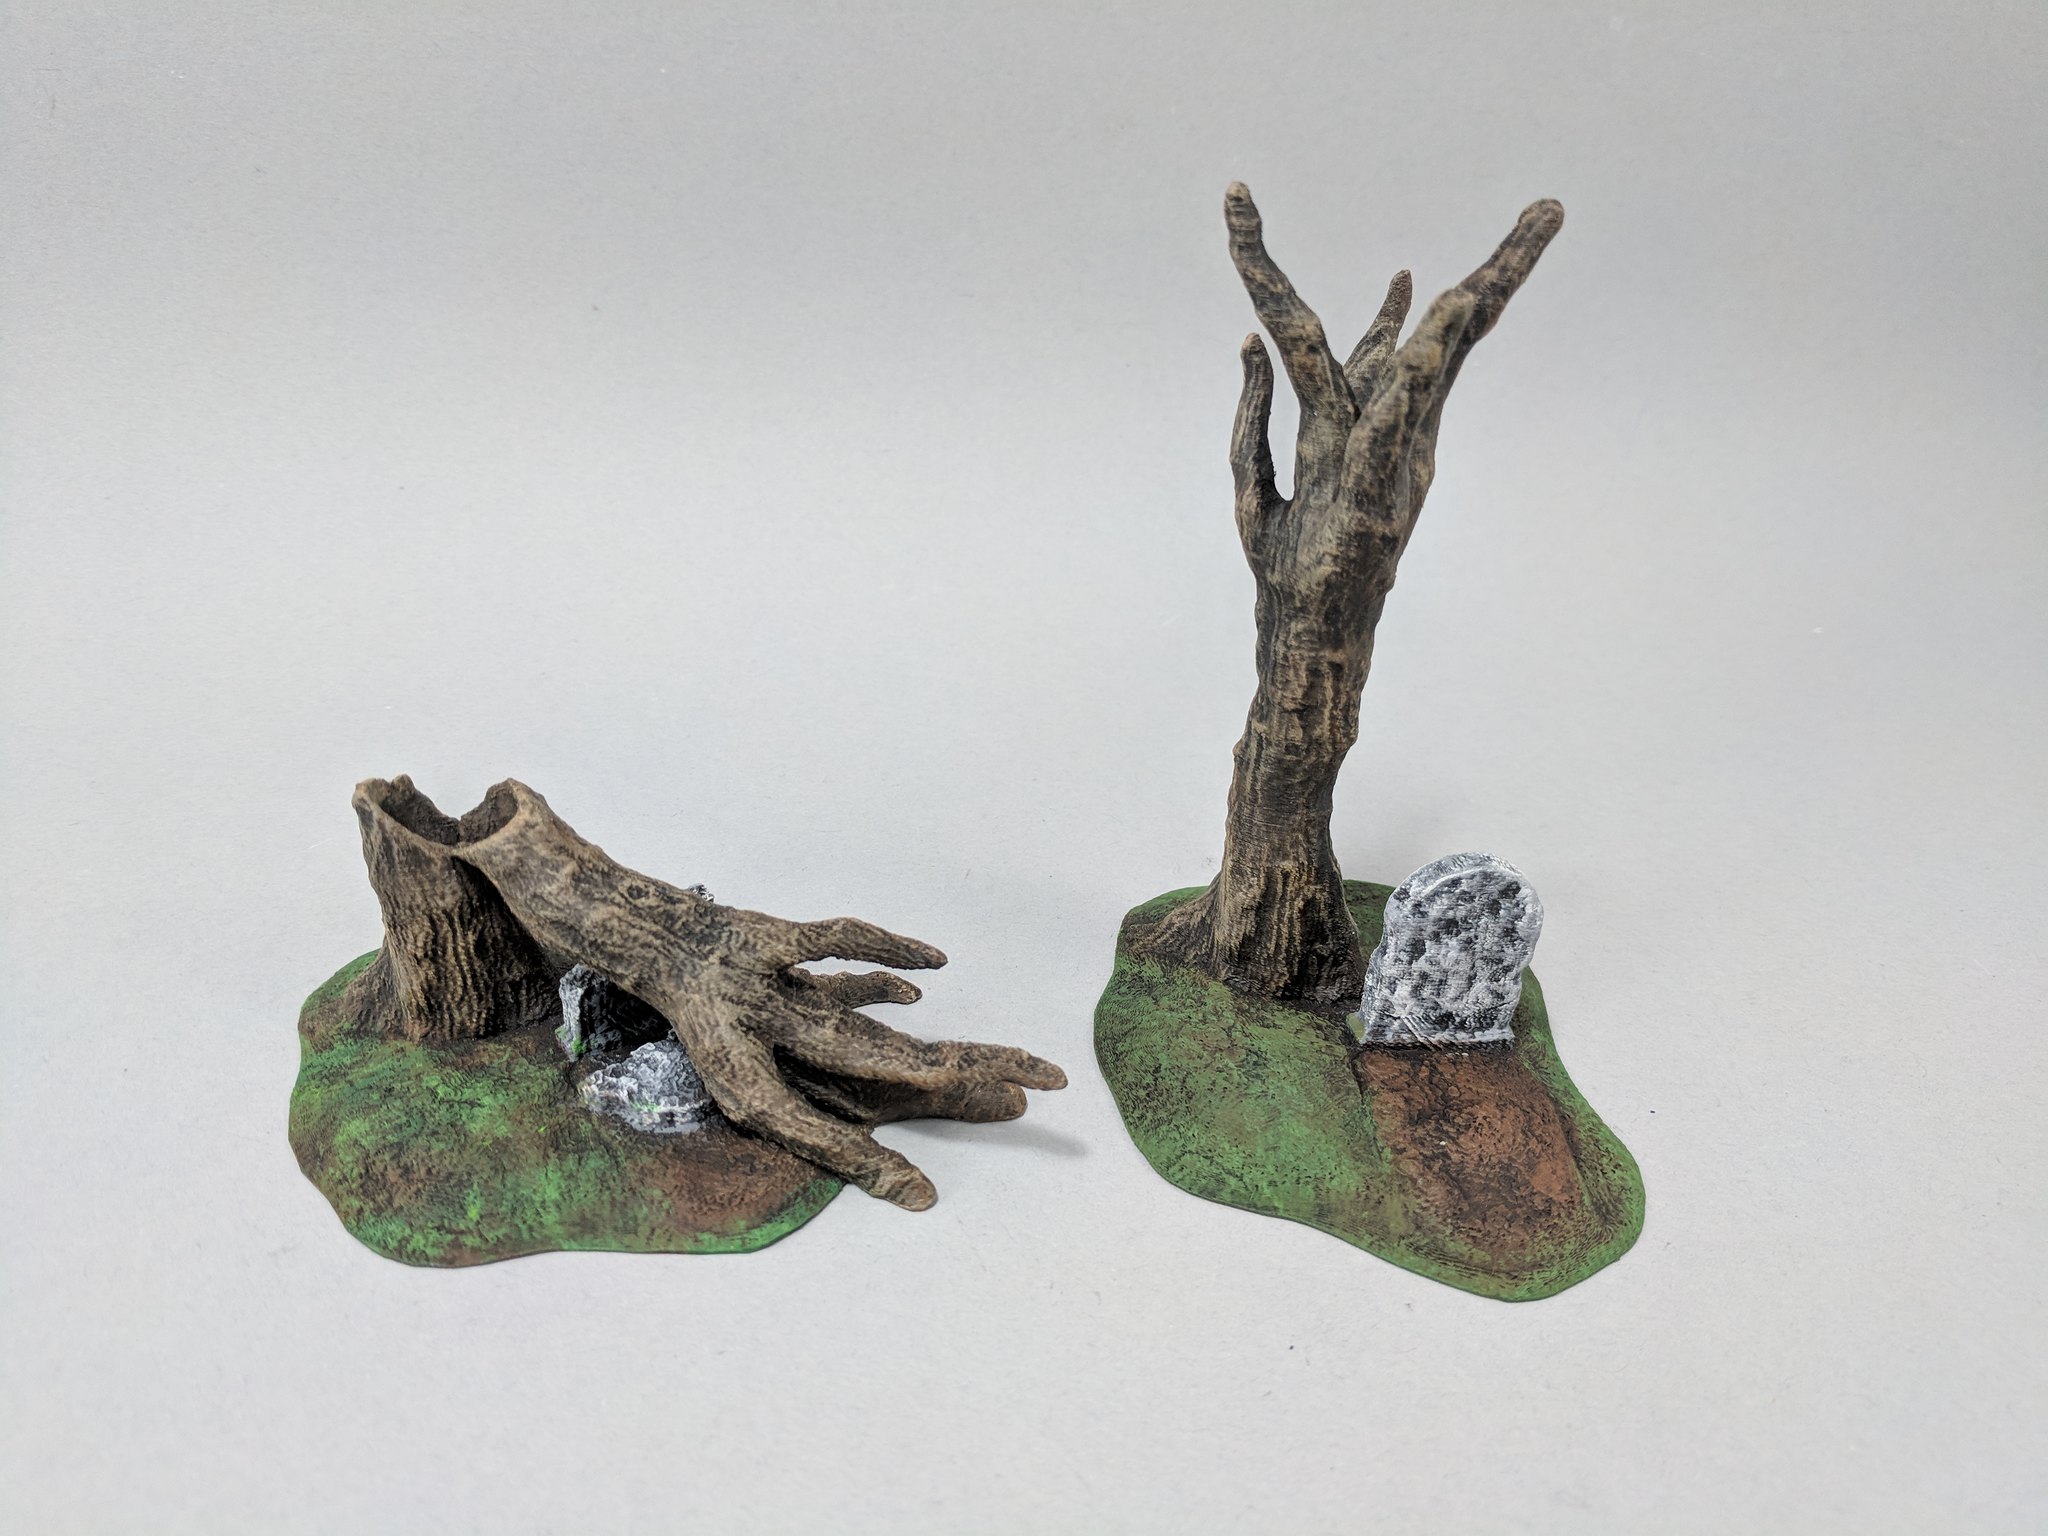
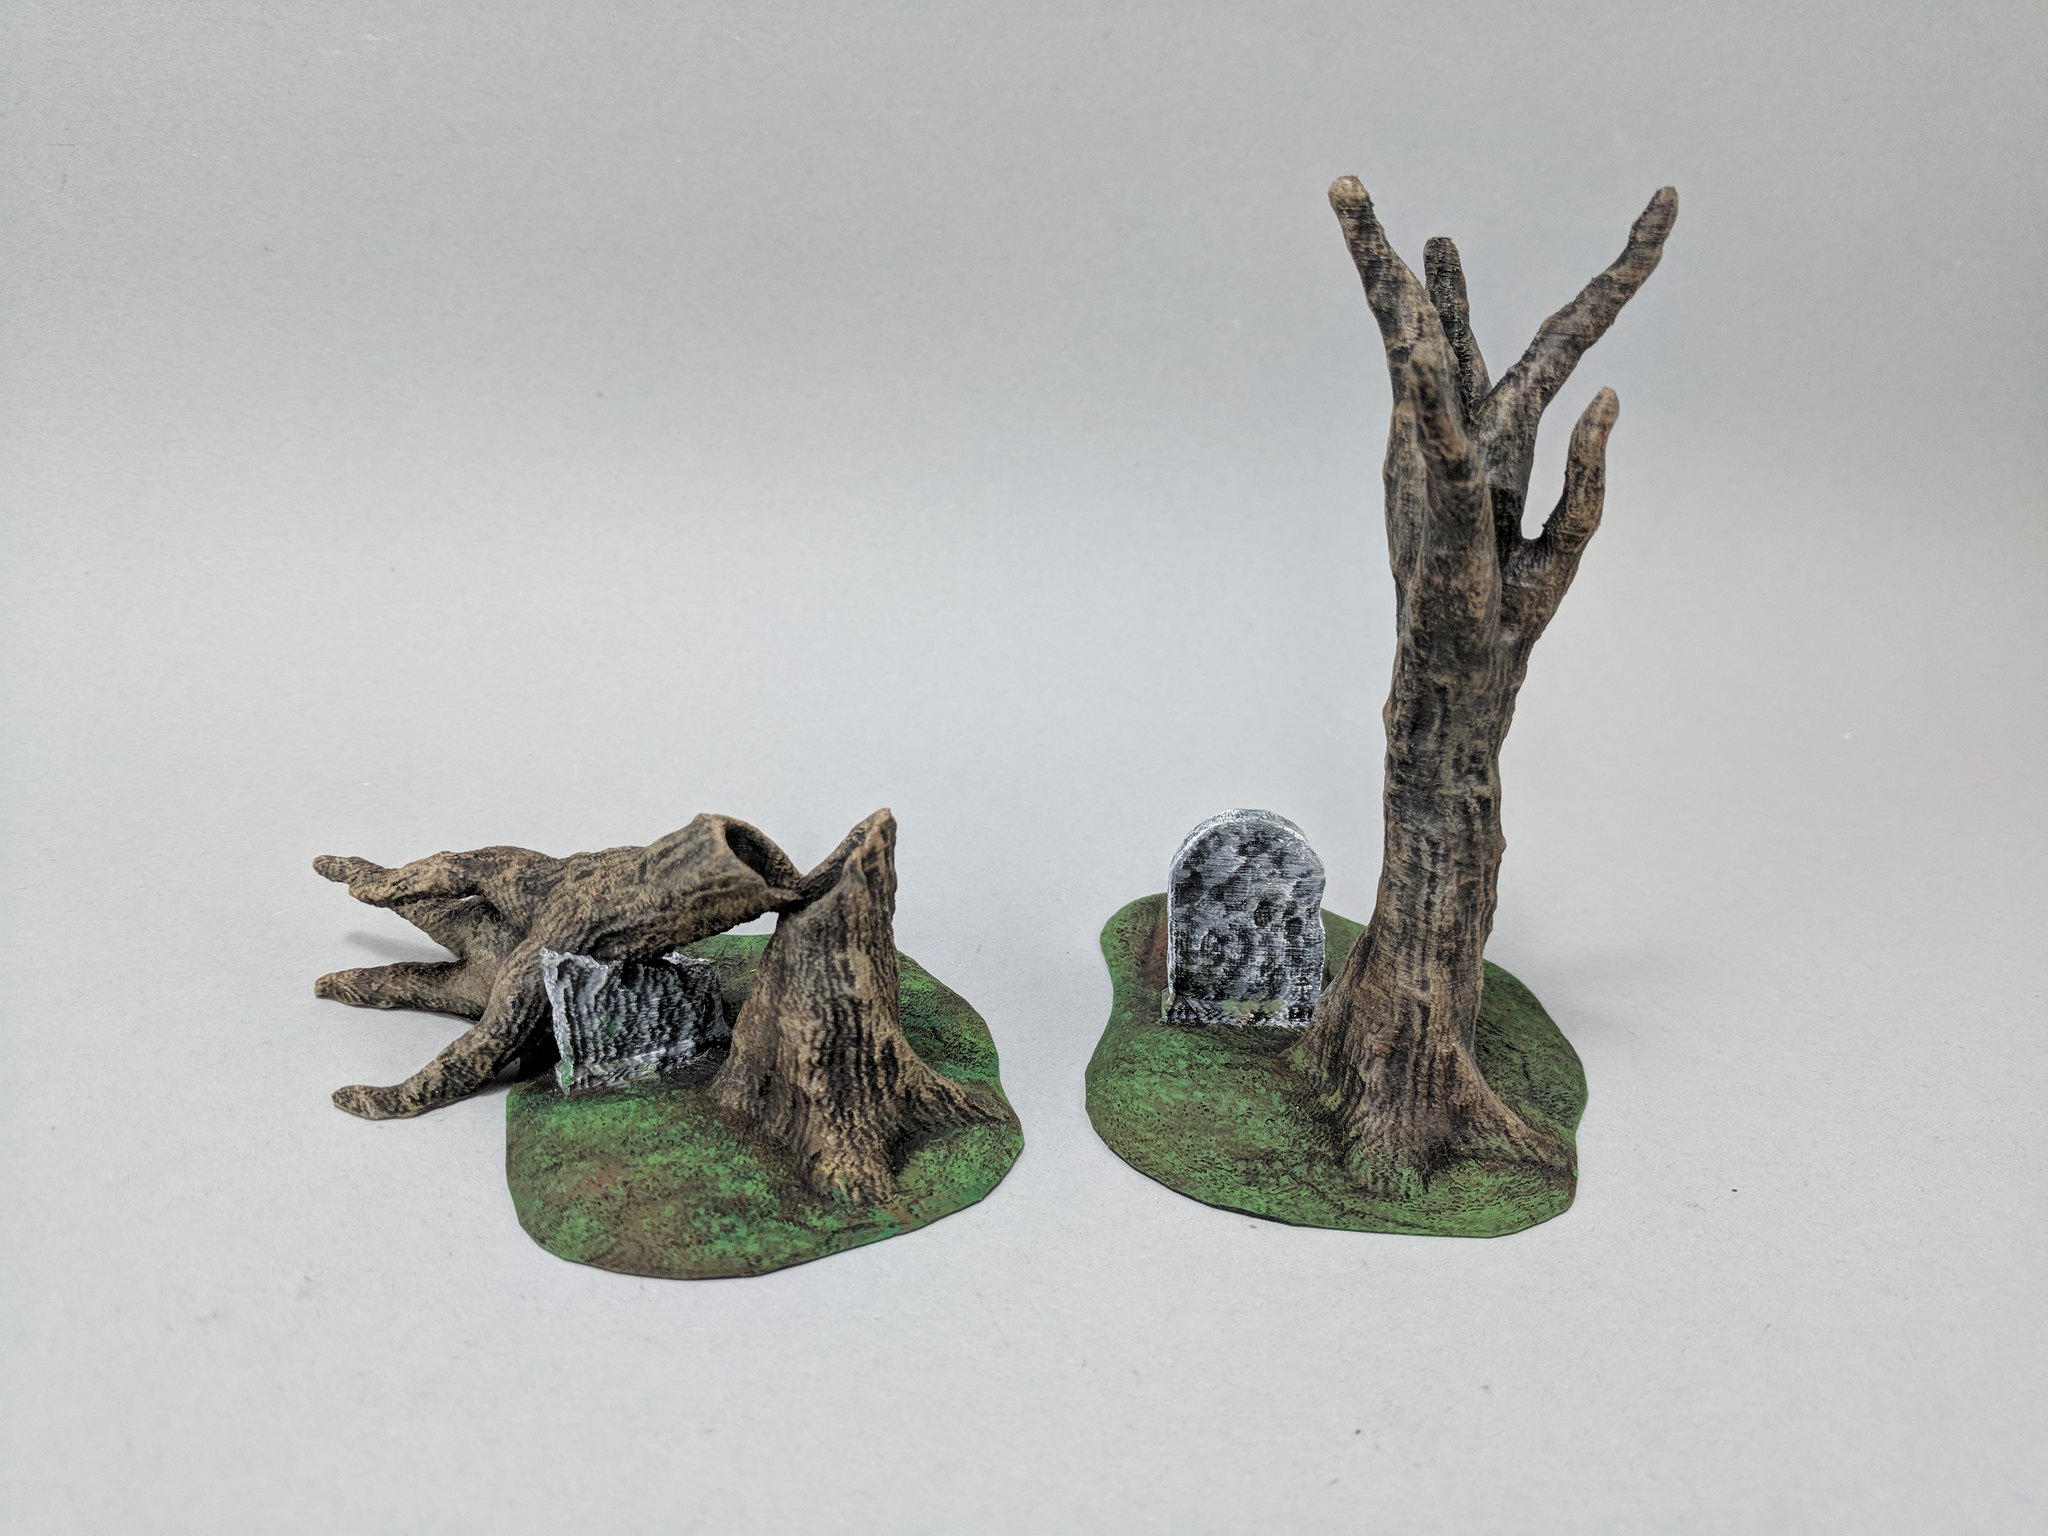
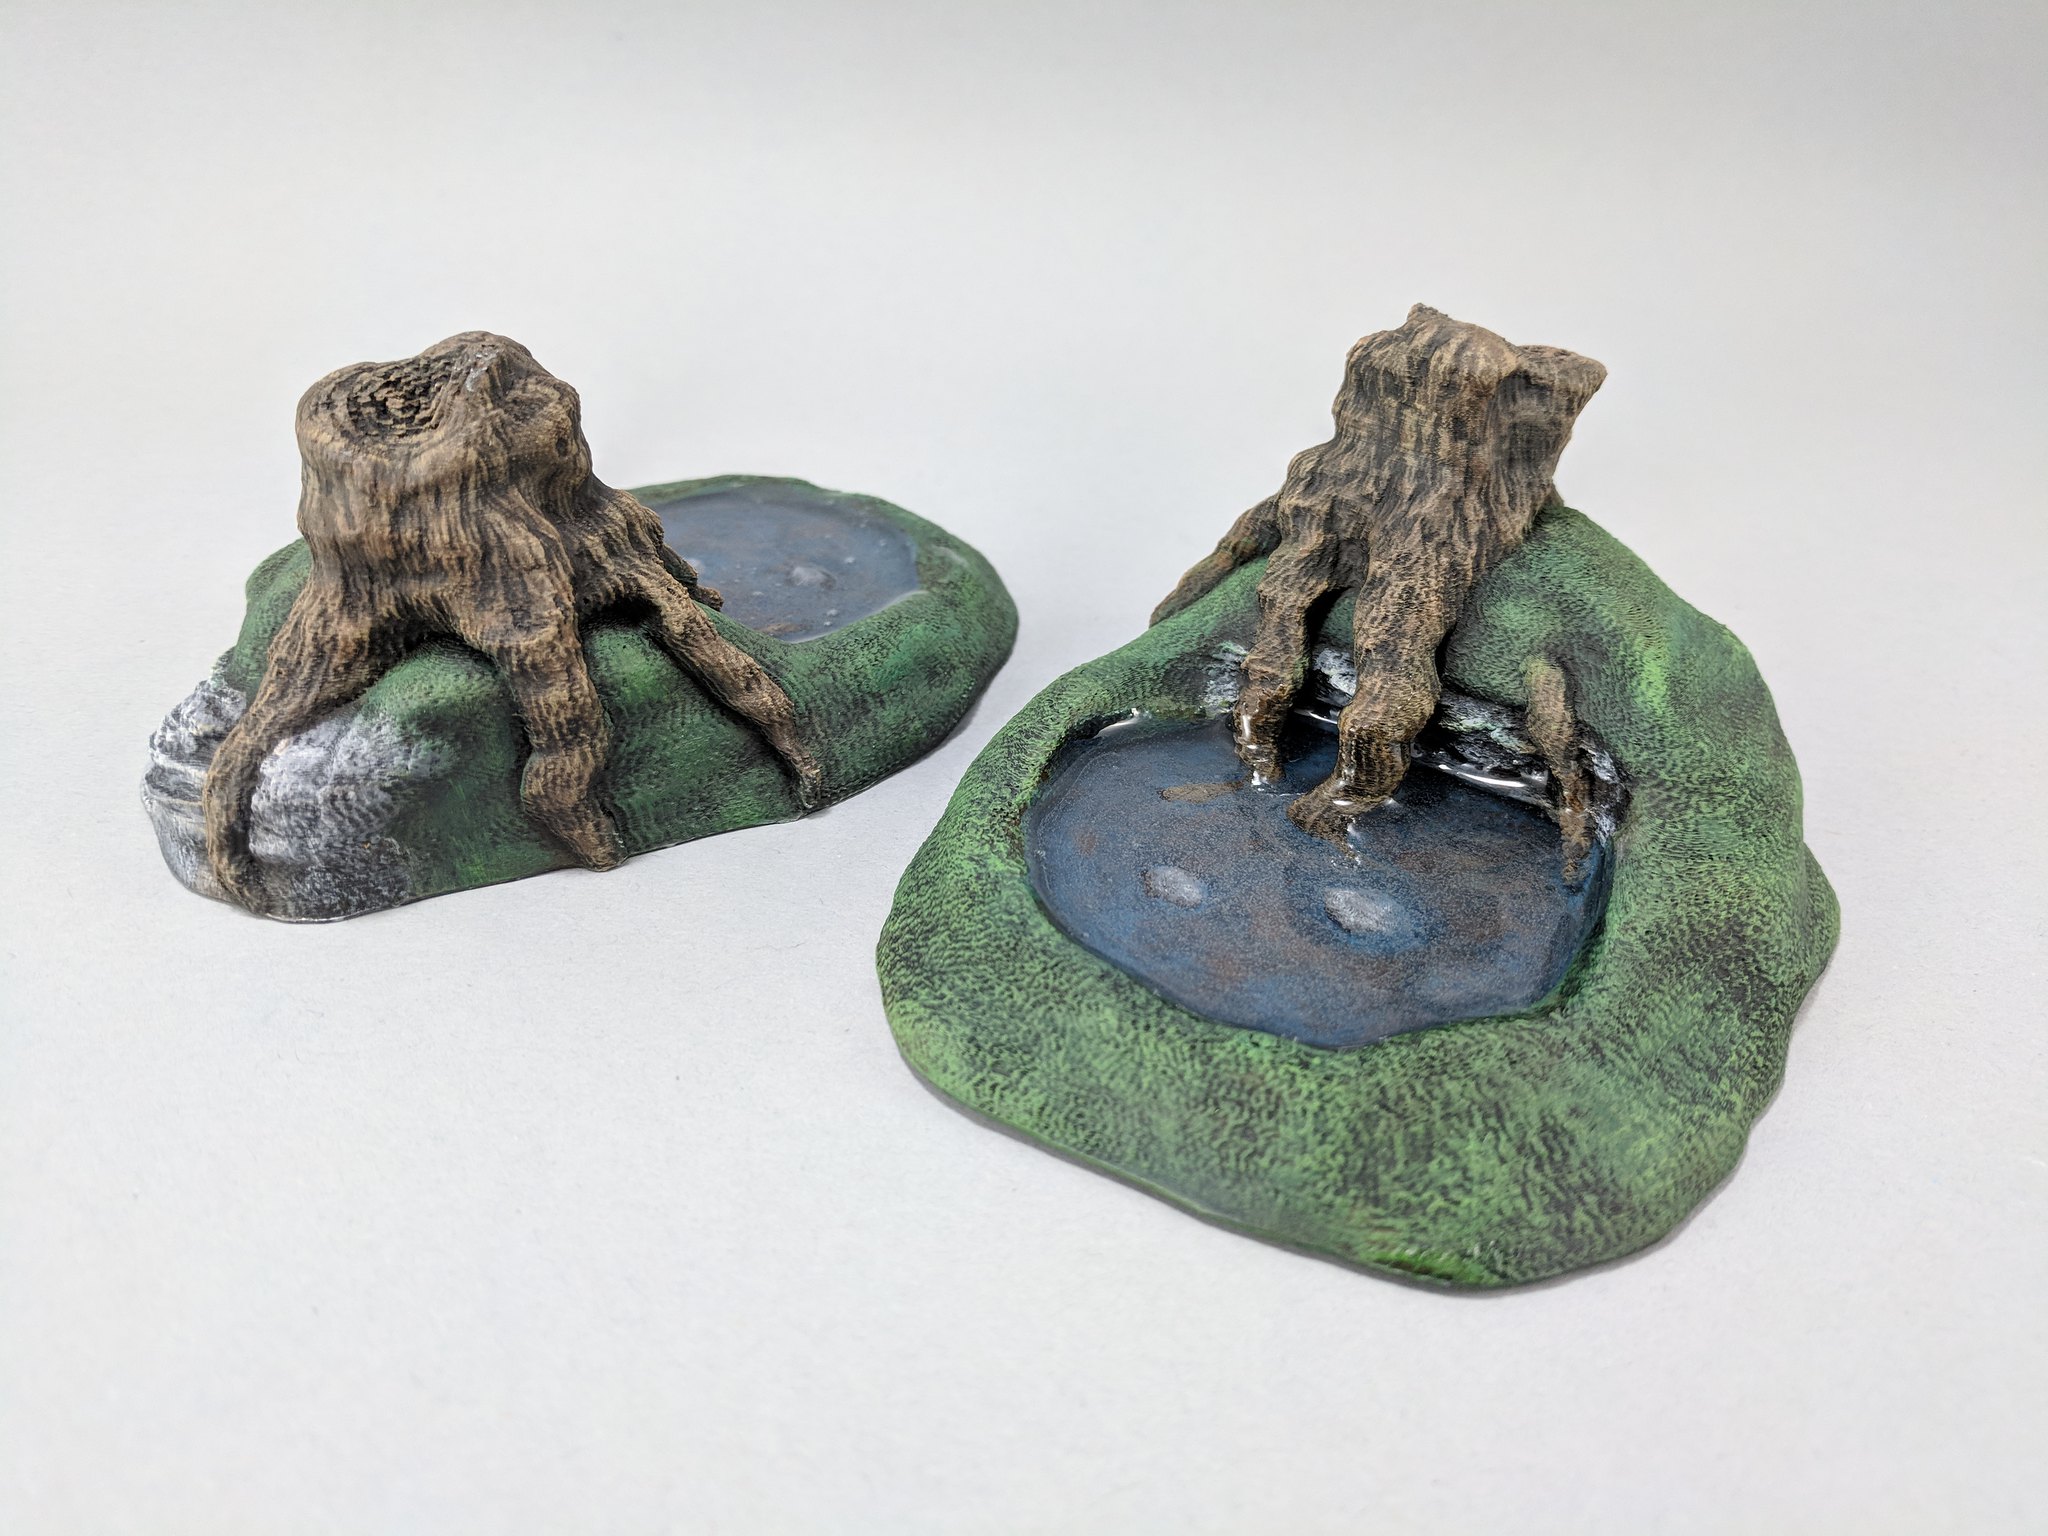
Hey Curufin, I just bought your Hero's Hoard Tree stump set. I opened up one of the stl in cura and it like fills the entire build plate, with 96 hour print time lol. What should I scale these down to? What did you scale yours down to in the photo you took demonstrating them? Is that Tree 1? Yeah that is a big one. I think I scaled it down until it was roughly 100mm tall. |
|
|
|
Post by curufin on May 13, 2018 13:03:35 GMT
|
|


 Cheers!