|
|
Post by curufin on Feb 16, 2016 19:21:53 GMT
Yesterday, sgtslag planted a seed in my head about using peel-and-stick vinyl floor tiles to make 2.5D tiles. I managed to make it out to the home improvement store and I picked up 3 different peel-and-stick tiles. One grey with stone texture, one lighter grey with a different stone texture, and one junky black marble. I cut the grey and black marble tiles as you would any cardboard version. I peeled the paper off both of them and and then stuck them together back to back. I used the lighter grey for the walls. Cut and stick. Done. I really like that this is incredibly fast to do. No gluing, no painting. Cut. Stick. Done. These tiles are likely 5 times the weight of an equivalent cardboard versions, but I think that is a good thing, the tiles I less likely to slide around gaming table. Of course, this is a down side: These are more expensive to create. I haven't looked hard, but I believe you could knock down the price by shopping around, or waiting for sales. Here is a gridless and gridded hallway. I cut the grid lines in with a small round chisel. 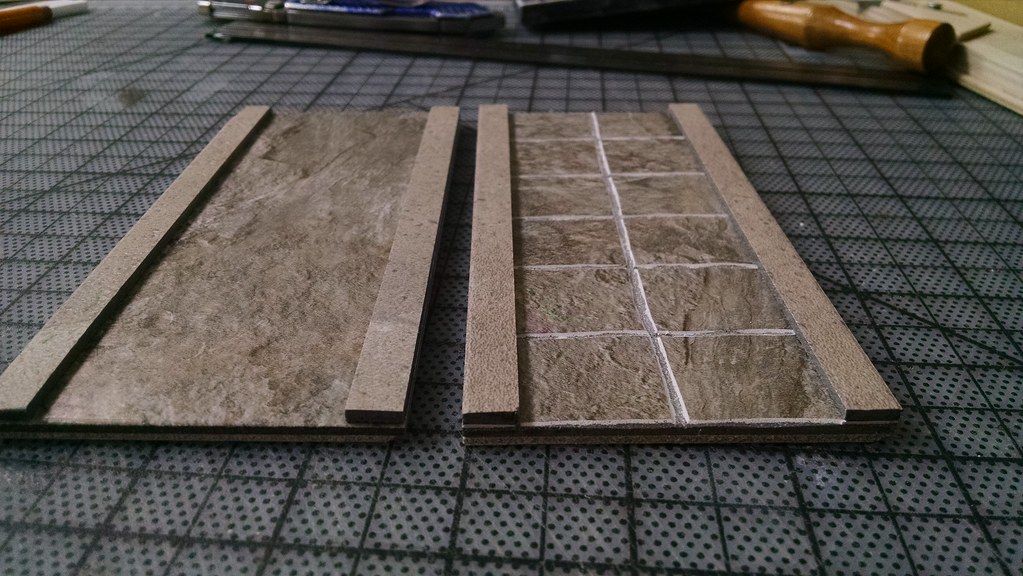 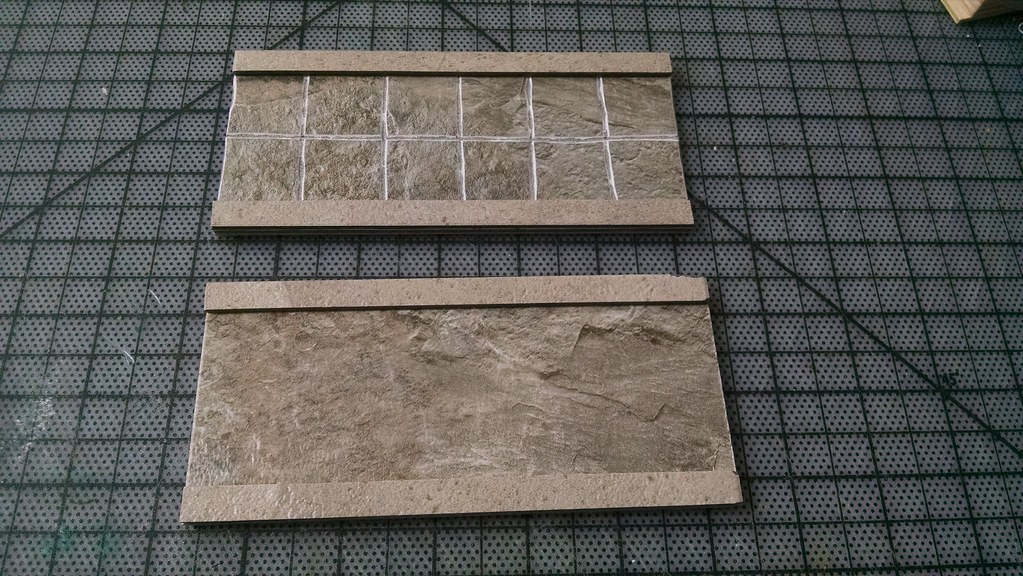 Serendipitously, these are the exact same height as a single layer of cardboard.... making them flow with other 2.5D works. 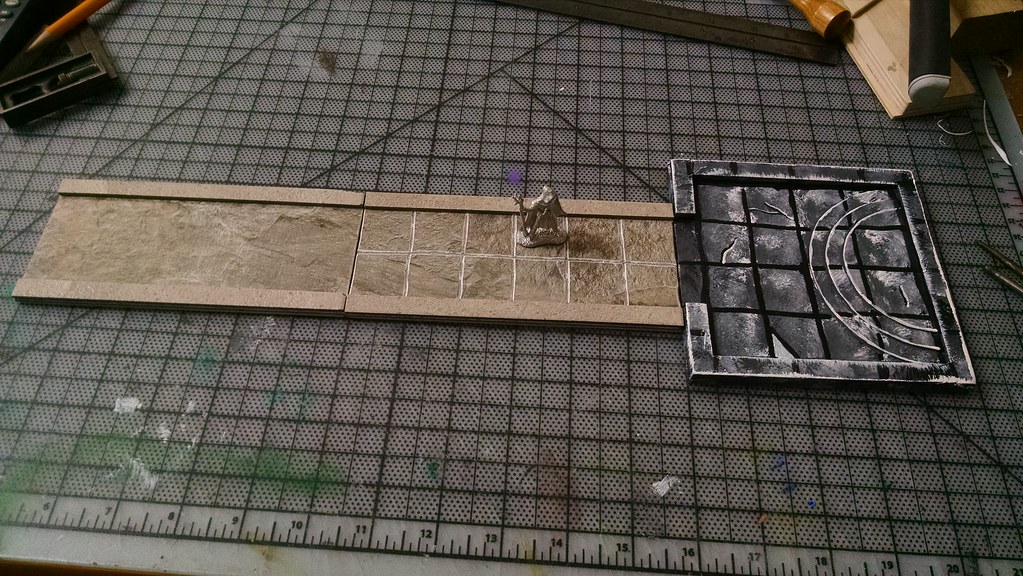 |
|
|
|
Post by jennifer on Feb 16, 2016 19:43:48 GMT
Hey that looks awesome! Really looks like slate.
|
|
|
|
Post by Meph on Feb 16, 2016 19:49:43 GMT
They look great. I bought some cheaper ones at $0.39 each and am going to try the other way, using the sticky backing to add laser printed tiles. I am looking at the fastest, easiest way to create a large space.
|
|
|
|
Post by jennifer on Feb 16, 2016 20:09:50 GMT
They look great. I bought some cheaper ones at $0.39 each and am going to try the other way, using the sticky backing to add laser printed tiles. I am looking at the fastest, easiest way to create a large space. I wish the printer could of done 6x6 tiles but can't print that big. So I had to hand craft a compatible 6 x 6 weighted tile with 2 sheets of medium weight chipboard and 1 layer of cardboard. |
|
|
|
Post by Wyloch on Feb 16, 2016 21:19:02 GMT
|
|
|
|
Post by curufin on Feb 16, 2016 21:24:18 GMT
Yes. 12" x 12" vinyl floor tile. Only the one I found was a solid print, not with a stripe down the middle. |
|
|
|
Post by jennifer on Feb 16, 2016 22:43:34 GMT
Would make for some nice cavern tiles 2.5D next style!  or even Tilescapes? |
|
|
|
Post by DnDPaladin on Feb 17, 2016 2:46:50 GMT
the only thing im wondering is the warping. do they warp ?
i have to transport a lot of my thing and thus they get easily warping stuff in there cause fo the sheer amount of stuff in one single box.
|
|
|
|
Post by sgtslag on Feb 17, 2016 14:31:44 GMT
Yes,Virginia, they do warp... However, it takes roughly 1/2-second to warp them in the opposite direction, as you lay them out, to bring them back to flat. The vinyl is very flexible, but still somewhat stiff. The small warpage is easy to 'repair', without harm to the vinyl. [NOTE: I am referring to single layer vinyl tiles. Not sure how susceptible these double-layered tiles will be to warping... Back to our regularly scheduled forum now. ]With regards to how they look, curufin , FANTASTIC! I'd suggest using a router table to make the grid patterns, if you have access to one: faster, easy to make a uniform grid pattern, easy to control the depth -- and did I mention, it would be faster?  We installed some new flooring in our house, and we chose what looks like tan stone tile, without the grout. They're snap-together pieces, 100% waterproof... They would make a perfect, incredibly durable, cavern floor to put my modular cavern pieces on top of (carved, covered, insulating foam)... The price, however, stopped me cold: $70/box of 32-square feet. My rubber mats, painted with sponges, as per DM Scotty's technique, cost me around $20, for two sets of mats, and they are much lighter, and easier to transport. There are many ways to make your own dungeon/cavern tiles. The limiting factor is mostly cost. My floor tile of choice, is usually $0.39/square-foot tile. I don't care what the tile looks like, as I am putting that side down. To use tiles like curufin , I would need to shell out around $.69-$1.00+/square-foot tile. The laser printed dungeon tiles from Fat Dragon Games, stuck to the glue-side of my $0.39 tiles, has a nice price-point which I can live with. They also look great, IMO. It is all about what your personal preferences are. Cheers! |
|
|
|
Post by jennifer on Feb 17, 2016 14:42:39 GMT
I kinda like the look of hand carved lines. The slight imperfections and/or waviness give it character.
|
|
|
|
Post by curufin on Feb 17, 2016 15:22:43 GMT
Warping is not an issue. If they do bend a little, you can very easily bend them back. These vinyl tiles simply want to lay flat.
Thanks, Slag! Good thought on the router table.
This is just one more option to create 2.5 tiles. Looking at peel-and-stick tiles on Amazon, there is a myriad of interesting stone textured tiles for $10 (20 pack) with prime. You also wouldn't have to use a tile for the base either, you could easily use card stock or paper. I think I'll play around with these vinyl tiles a little more...
|
|
|
|
Post by jennifer on Feb 17, 2016 15:33:36 GMT
Warping is not an issue. If they do bend a little, you can very easily bend them back. These vinyl tiles simply want to lay flat. Thanks, Slag! Good thought on the router table. This is just one more option to create 2.5 tiles. Looking at peel-and-stick tiles on Amazon, there is a myriad of interesting stone textured tiles for $10 (20 pack) with prime. You also wouldn't have to use a tile for the base either, you could easily use card stock or paper. I think I'll play around with these vinyl tiles a little more... I am thinking tilescape / 2.5D Next caverns That simulated slate would make for a good texture for a cavern floor no? I am assuming I can prime the vinyl and paint to my liking? |
|
|
|
Post by curufin on Feb 17, 2016 17:19:14 GMT
That simulated slate would make for a good texture for a cavern floor no? I am assuming I can prime the vinyl and paint to my liking? I suppose you could. While there is a topography stamped into the vinyl, it is shallow. Most of the "depth" is created from the colors printed on the vinyl. For me, not painting anything was the real attraction to using these vinyl floor tiles. There is a plethora of colors and textures, both light and dark, you may find something very close to what you are looking for. Just thoughts. |
|
|
|
Post by sgtslag on Feb 17, 2016 21:11:31 GMT
I agree with curufin. While I use vinyl floor tiles for a variety of applications, my thoughts are, if you can find one that comes out of the box, ready to use, sans painting, I'd go that route. Cheers! |
|
|
|
Post by sgtslag on Jul 17, 2018 17:52:38 GMT
curufin, can you update us on this floor tile project? It's been more than two years. What did you like/dislike about it? How long did you use it? Are you still using it? Did you make a dungeon version, or just use it for caverns? Inquiring minds -- like mine! -- want to know! Photo's very much appreciated, too. Cheers!
|
|
|
|
Post by curufin on Jul 20, 2018 12:37:12 GMT
sgtslag, I did create more hallways and few small square rooms using this method. I even tried using a router table to add the grid lines. Worked like a charm. Thanks for the tip! I got a chance to use them in a game, but I ended up giving them (along with a bunch of other crafts) to the local game shop that allows people to run games for free. For me personally, the PROs are: -They are heavy tiles, so they are much harder to knocked around on the table. -There is no gluing. Everything is just peel-n-stick -There is no painting. This is the biggest pro for me. Painting is my biggest bottleneck and I am easily a full year behind in just painting terrain. -They look great and there are tons of different patterns you could choose. -Very fast to put together. CONs: -If you want grid lines you will likely need to add them, which can be difficult and time consuming without special tools. -They cost more that cardboard tiles. -It is very difficult to create irregular shaped tiles.
|
|
|
|
Post by sgtslag on Jul 20, 2018 14:44:58 GMT
Thank you, curufin , for the update! You came up with a solid system, with fantastic visual appeal. They're great looking, but as with any such system, there is the time and effort required to deploy them in a game session, which is always a deterrent for me. As already stated, I have quite a set of the FDG Dungeon sets with vinyl tile backing. They look superb! Unfortunately, I find my battlemat, and wet-erase pens, far more usable in my games... It boils down to speed of use, and convenience: using the vinyl FDG tiles takes considerably more time to use; a battlemat, with wet-erase pens, allows for immediate, impromptu use, without searching for the needed tile types, for the dungeon layout. I am heavily into improvisational DM'ing, so the battlemat wins, hands down, for me. I've discussed it with my players, and they prefer the battlemat. I occasionally play 2e BattleSystem Skirmish, which is a miniatures game, with a thin veneer of 2e AD&D RPG on top of it, but for these games, I will go either full 3D, 2.75D, or use the 2D FDG tiles. The BS Skirmish games are more scripted, so going deeper into terrain, makes sense. I am glad to hear that you donated your dungeon terrain to your local game store. I hope it sees a lot of table time! If I were gaming at said store, I would love to use your work in my BS Skirmish games. They look superb. I imagine the pieces you built after those pictured, are equal to, or superior, in quality to what you shared. Good for you -- great for the store! Cheers! |
|
|
|
Post by sgtslag on Jul 20, 2018 14:54:55 GMT
About creating irregular shapes with vinyl floor tiles... Use a heavy utility scissors to cut them! After sticking the two tiles together (use the cheapest tile you can get for the undersides -- I use tiles that cost $0.39 per 12"-square tile), cut out the desired shapes with your heavy scissors. Alternatively, use a bandsaw, or a jigsaw, to cut them. The pattern to be cut can be traced on the tile surface (preferably the top side, to avoid making mistakes by cutting the reverse pattern desired...) with a wet-erase pen (black seems to leave behind the least amount of ink, after cleaning). Cut the pattern out, then wipe with Windex, or such a cleaner, and a paper towel.
If you choose to put a second layer of vinyl tile around the edges, as curufin did in his project, to make a border, it would be best to trace, and cut those separately from the ground tiles. Once you peel and stick a tile on top of another, it likely won't come off without damaging the underlying tile (it usually tears the surface of the tile off, ruining the whole). To make an accurate trace of the irregular surface, lay a piece of white paper over the top, and use a #2 pencil to demark the edges, then measure the width of the border, and trace that, as well. Cut this out of the paper sheet, and tape it over the edging material tile, with cellophane tape, then cut the pattern in the tile. Peel and stick this to your floor surface tile. Cheers!
|
|
|
|
Post by erho on Jul 20, 2018 21:50:40 GMT
Home Depot in my town sometimes sells boxes of these for just a few bucks, usually when they discontinue a color and they just want to sell off the few they have left.
Dont be afraid to ask staff for such items, avoid the young employees with a blank stare!
|
|


 or even Tilescapes?


 Cheers!
 Cheers!