sotf
Advice Guru
 
Posts: 1,084 
|
Post by sotf on Mar 23, 2017 5:58:01 GMT
Still haven't gotten anything done on either roof, but I have painted up the tower, well, rocks, and the fern bases. I also started flocking them, so they're almost done save for the roofs...
|
|
sotf
Advice Guru
 
Posts: 1,084 
|
Post by sotf on Mar 26, 2017 15:18:24 GMT
|
|
|
|
Post by ageofgaming on Mar 27, 2017 8:30:29 GMT
!!!!....That watchtower is awesome!!! The well is also very nice....I plan on doing some town/village pieces soon and may attempt one myself.
|
|
sotf
Advice Guru
 
Posts: 1,084 
|
Post by sotf on Mar 27, 2017 22:08:46 GMT
!!!!....That watchtower is awesome!!! The well is also very nice....I plan on doing some town/village pieces soon and may attempt one myself. A watchtower of some kind is something you pretty much want to have with most miniature games because it's a very common piece of terrain for it. |
|
sotf
Advice Guru
 
Posts: 1,084 
|
Post by sotf on Mar 31, 2017 8:43:15 GMT
Okay, ended up wasting most of a weeks work on the roof for watchtower.
Initially, I tried to line everything up perfectly with just some rougher cuts for the individual shingle demarcation for the strips of card I was using. I'd actually finished attaching them yesterday and something felt off, but this morning when I was positioning the pieces to cover the corners of the roof, well, I kind of realized what looked so wrong about it...
For a more rustic setting like one where this type of construction would be used, they can't be perfect. Neither could they be haphazard as some things would be, but would be more randomly laid out due to the time to make and place the slate tiles I'm trying to basically replicate the looks of.
So I pulled off the shingles and had to add a second layer of card down to have a surface that I can use before starting over where I'm judging by eye how they'd fit.
The main reason I'd tried to have everything "perfect" was because I wanted to be able to precut and measure the sides easily, namely the corners since it's a pyramidal hip roof where the angles for the ends of the strips might have been a pain, but I realized with the corner caps I'm going to put on, that doesn't matter since it's a basic situation of hiding the crimes as I make it. It is also going much faster in putting it together than the previous time.
However, I'm still unsure if I want to keep the roof removable or if I ought to just glue it in place and be done with it.
I've also considered adding a bit more to the tower with a relatively basic weather vane to it.
|
|
|
|
Post by margaret on Mar 31, 2017 16:13:40 GMT
A removable roof can be handy, but if you are never going to have an interior encounter, then I would make it more stable by glueing it on.
|
|
sotf
Advice Guru
 
Posts: 1,084 
|
Post by sotf on Apr 3, 2017 4:34:58 GMT
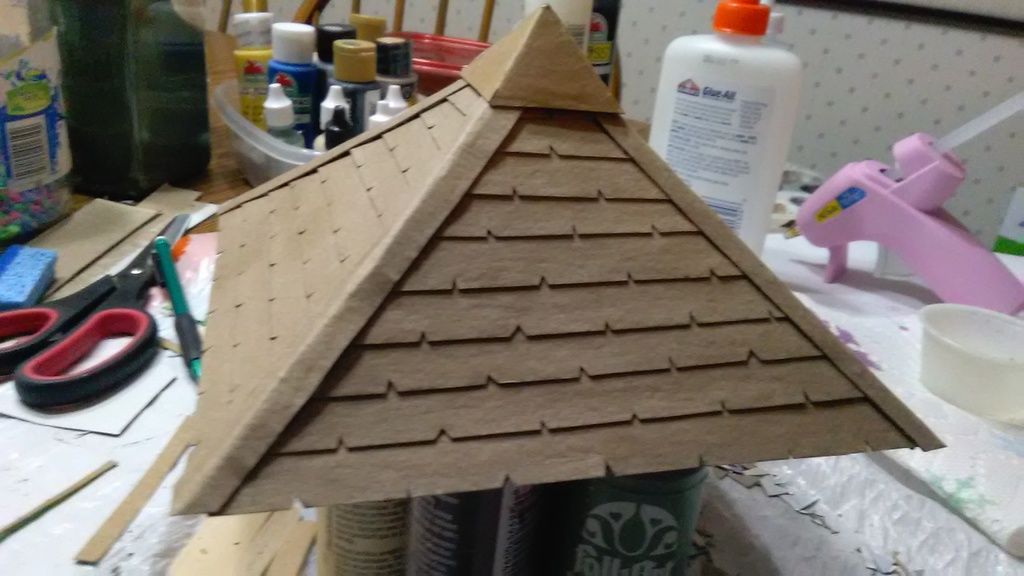
Tried making a weather vane for the tower, it looked decent until the roof slipped and the thing snapped into pieces and crumpled in other places while I was putting some white glue over the card most of the roof is made out of. Replaced the cap of the roof and doused the entire thing in glue to harden it and make painting easier when that dries. Only one pic this time, the rest of it looks the same, but this is the side that the glue is fully dried on, the other was done after it and is still got large white sections visible. The Watch Tower
|
|
sotf
Advice Guru
 
Posts: 1,084 
|
Post by sotf on Apr 4, 2017 23:09:09 GMT
Finished the roof, leaving it removable for now. Will probably have more pics of the tower at a later point since there were some lighting issues there... |
|
sotf
Advice Guru
 
Posts: 1,084 
|
Post by sotf on Apr 14, 2017 21:55:56 GMT
Kind of distracted from the settlment itself for a bit by way of beasts of war's hobby challenge for terrain that represents spring and came up with an idea for that.
Got the pieces I needed for my project, and noticed some things from the "fairy garden" stuff. Best thing found was some prepainted animals, I found a 2 pack that had a rabbit and a cat for $2.99 that I needed to find for a campaign I'm trying to start (One character has a rabbit familiar and one character is a tibbit). Pretty much just need to stick them to bases there.
There are also several rather cheap buildings and terrain pieces for a decent price that becomes a great one if you go piece by piece with the weekly coupon.
|
|
sotf
Advice Guru
 
Posts: 1,084 
|
Post by sotf on Apr 27, 2017 18:05:30 GMT
Well, got the rabbit and cat based... The Cat turned out to be a bit out of scale, but still useable despite that. The rabbit is actually to small for my camera to focus on it right, so that pics a bit blurry, but you should still be able to pick a few things out. |
|
woof
Cardboard Collector

Posts: 21 
|
Post by woof on Apr 27, 2017 21:50:17 GMT
Some really cool work in here sotf - some of which I think I'll have to steal. The watchtower in particular seems too good to go without trying to make one of my own! Love the attention to detail in the new roof - sometimes it's the little things that make a big difference. I like the idea of the removable roof for play reasons, but I can see it being a pain for getting lost in storage/knocked during play etc. Animals are looking good as well - since I picked up the hobby I'm always keeping an eye out in toy stores and dollar shops for more to add to the menagerie. Keep up the good work, I'll be following your updates!  |
|
sotf
Advice Guru
 
Posts: 1,084 
|
Post by sotf on Apr 27, 2017 23:09:49 GMT
Some really cool work in here sotf - some of which I think I'll have to steal. The watchtower in particular seems too good to go without trying to make one of my own! Love the attention to detail in the new roof - sometimes it's the little things that make a big difference. I like the idea of the removable roof for play reasons, but I can see it being a pain for getting lost in storage/knocked during play etc. Animals are looking good as well - since I picked up the hobby I'm always keeping an eye out in toy stores and dollar shops for more to add to the menagerie. Keep up the good work, I'll be following your updates!  There are a few other small animals there in the fairy garden section along with a few buildings that look like they'd work rather well. Some that actually look like they'd work well as an elven village piece if you added a few platforms to extend away from doors. I'd also seen a few decent animals and little terrain pieces in the dollhouse isle... |
|
sotf
Advice Guru
 
Posts: 1,084 
|
Post by sotf on Apr 28, 2017 22:49:06 GMT
Well, the local library just opened a rather interesting maker space thing with 3D Printers (And a scanner), soldering, laser cutter, CNC machine, and a pile of other things to play with. Stopped today in order to try it out and got the shambling mound mini made for me, there were a few things that were somewhat off, but not that bad and it took 4 hours to print...
|
|
|
|
Post by skunkape on May 1, 2017 14:46:52 GMT
CNC machine sounds great! I've been looking at a couple of home versions, but they're still really expensive, though not as much as an industrial one would be!
|
|
sotf
Advice Guru
 
Posts: 1,084 
|
Post by sotf on May 1, 2017 22:46:48 GMT
CNC machine sounds great! I've been looking at a couple of home versions, but they're still really expensive, though not as much as an industrial one would be! Yeah, just need to figure out what I want to use it for...and I'd need to time it so that I won't need to clean it out beforehand since there's someone who seems to like using it to carve up chocolate... At the moment, I'm thinking of a few gift items for family using the laser stuff since they have a few sample ideas laying about that are basically taking a photo and etching a greyscale version of them into plaques. |
|
|
|
Post by skunkape on May 2, 2017 13:28:36 GMT
If they're not cleaning out chocolate, I'm surprised there aren't bugs crawling all over the place!  |
|
sotf
Advice Guru
 
Posts: 1,084 
|
Post by sotf on May 2, 2017 19:39:21 GMT
If they're not cleaning out chocolate, I'm surprised there aren't bugs crawling all over the place!  They do clean it out, it's just that it might be near the end of the day when they clean everything in the place if it isn't needed for something right away. At the moment, there are three people working there total, and other than a few specific times of day where you might have two of them, there's only one on duty for about 20 stations. As a side note, I've gotten some other things ready to paint...namely the shambling mound, a few ghouls, and some dire wolves (Had the ghouls and wolves for a while, just didn't assemble them or get everything together for them due to lack of a direct need or, really, motivation since I had other things...the ghouls are leftovers from when I built a Vampire Counts army a long while back using, mainly, alternative miniatures [Army only had a few heroes that were actually GW minis], and the wolves were from about a year ago when I found a pack of the GW Fenrisian Wolves for around $5, unopened...) And at the moment, while they aren't painted, if anyone finds a decent deal on the Fenrisian Wolves, I'd recommend getting them because they are very good dire wolf options |
|
sotf
Advice Guru
 
Posts: 1,084 
|
Post by sotf on May 10, 2017 3:21:10 GMT
Okay, I've been painting some minis for use. Most of them are either PCs or ones for a run through Curse of Strahd that I had several players ask me to do...starting with Death House... So, the first thing I realized is that I didn't have any Shadows, and figured out a relatively simple method of making one. Shadow
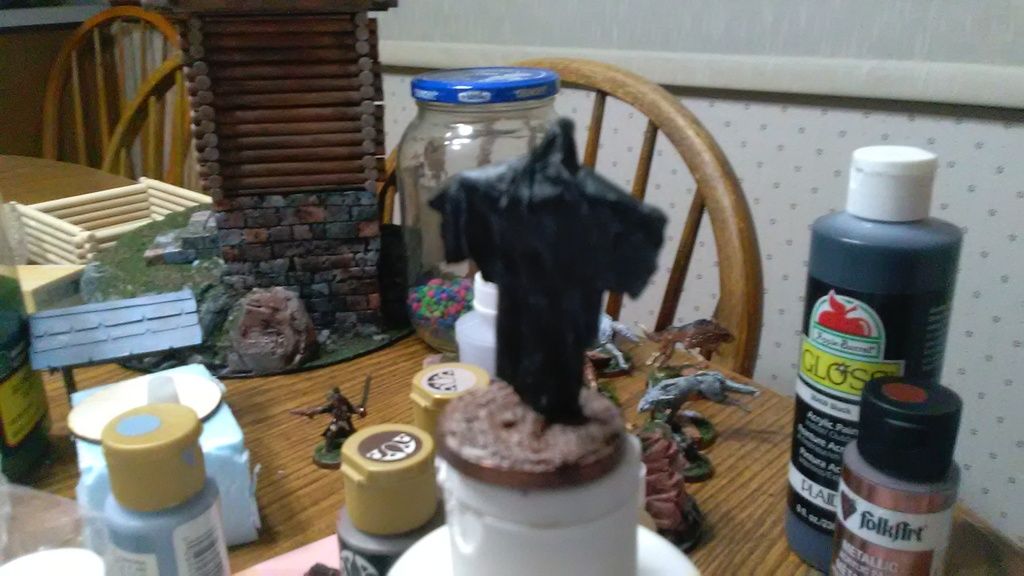
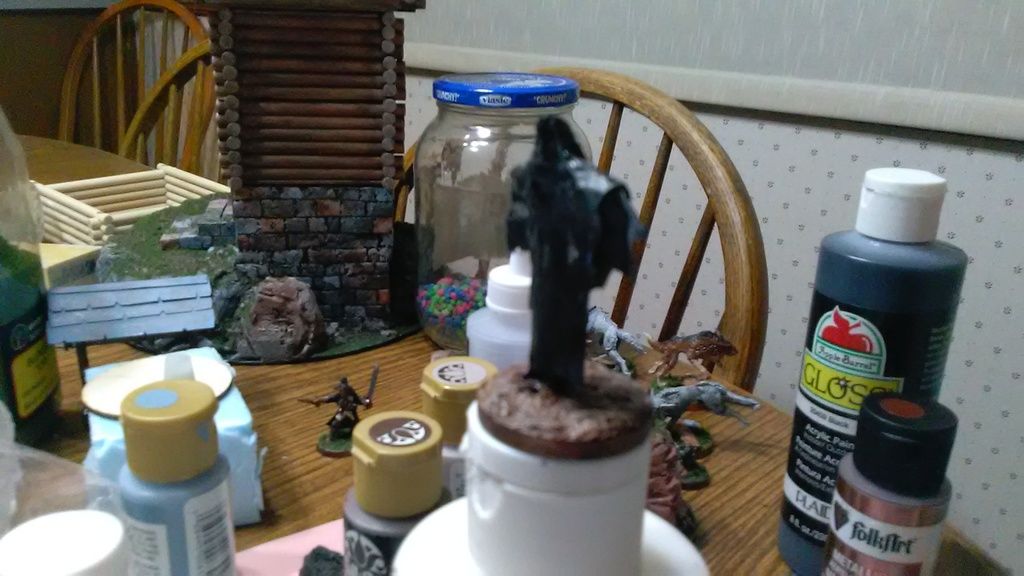
For how I made it, I started out with one of the thicker wooden discs you can find at pretty much any craft store. It's about the same size as a normal 1" round base. I used my hobby drill to go about 2/3 of the way through it from the center of the top. Then I took a toothpick and cut it a little bit longer than the normal based head height of a human mini. I also cut another one to a length about half that length.
Used a bit of hot glue on the base with the longer toothpick to hold it vertical, and let that cure. Then I guessed about shoulder height and glued the shorter toothpick across as the shoulders and arms. Tried bulking up the chest, head, and shoulders slightly with more hot glue along with an initial texture ontop of the base.
For this one I didn't, but for future ones, I plan on finding a head sized bead to top it, the head is a pain in the rear to get right in the end.
Then I used a thin layer of white glue to cover the base and a bit of fine sand to finish that and let it dry completely. This is important here, otherwise you end up with a mess later on.
For the rest, you need tissue paper. Not the toilet paper type, but the stuff that you find for packaging gifts or the like. The rougher paper works here while the others tends to create massive issues as you work with it.
Using strips and other pieces of the paper along with white glue, I started building up the shadow, for a hooded head and what looks like tattered robes. Just keep draping it over and wrapping it around the toothpicks and keep using enough white glue to both keep the pieces together and to essentially infuse the paper.
When possible, tear the strips rather than cutting them, the edges look far better.
At this point, if you've built it up enough, you can actually use your fingers to break the shorter toothpick in places within the mini and pose the arms.
When you're done draping the tissue over it, let it dry completely, and then work in an extra layer of glue brushed over it and let it dry again.
When it's completely dry, brush on a heavy layer of black paint, cheaper craft paint works very well for it, and it hardens it even more. A couple layers may be needed to get a full black coat.
Do not black bomb it with a spray or airbrush because you need to pay attention to the edges of it and keep them in position because the paint would create more issues in essentially gluing pieces together. On top of that, the glue can reactivate if you're not careful, and can cause more issues if you spray it.
After that, you can pretty much paint it however you want. I gave a heavy brush of a dark grey followed by a slightly lighter black one again to keep it as dark as possible while trying to show the cloth.
|
|
sotf
Advice Guru
 
Posts: 1,084 
|
Post by sotf on May 10, 2017 3:28:32 GMT
Now for some more monsters... Shambling Mound
I'm rather sure most people with access to a 3D printer at all know where this one came from. 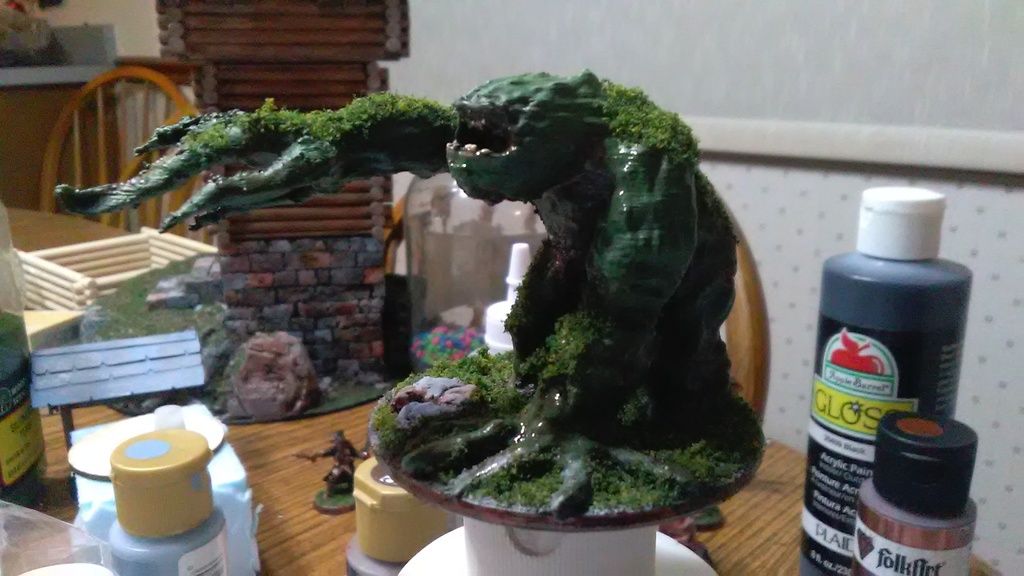 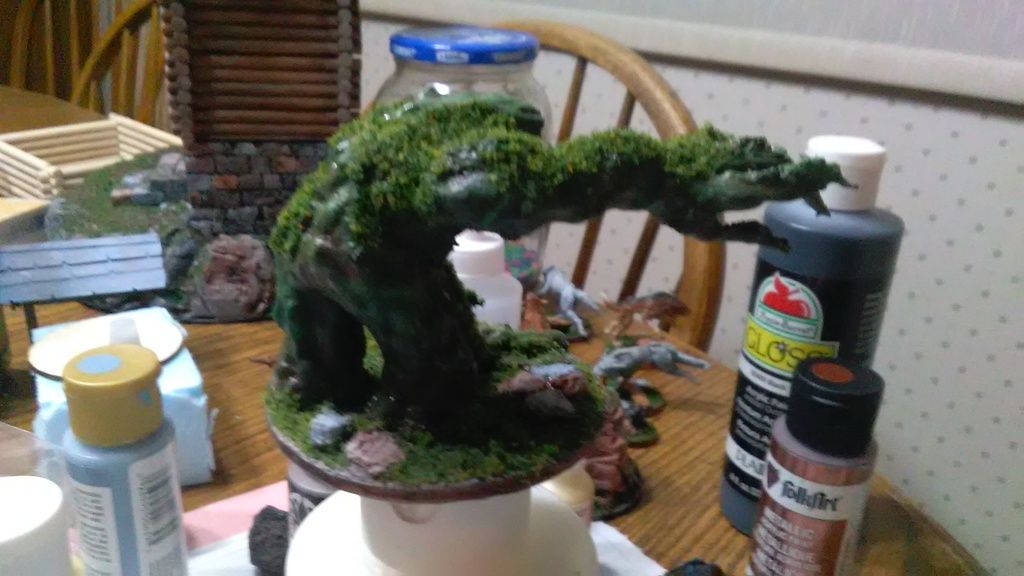 Ghouls Ghouls
Some Mantic Ghouls I had around , they're interesting but they are a bit fiddly with regard to the shredded clothes they have on. Decided to try basing them in a swampy mess type base...with a few heavy layers of gloss that had a bit of flock on between them when they were still wet...the end result is a rather muddy look. |
|
sotf
Advice Guru
 
Posts: 1,084 
|
Post by sotf on May 10, 2017 3:37:10 GMT
And some more...these ones are just ones I painted recently. Dryad
Not entire sure if I like the way her skin turned out, was trying to have a more bark like look. She's a Reaper Bones mini, and the tree is one I keep considering figuring out how to add more foliage to it. Dire Wolves
These are the Games Workshop Fenrisian Wolves that I stumbled on at a massive discount. I really liked painting them and am actually considering buying another box of them to expand my wolf pack and shuffling the heads around between them for the next set. |
|