sotf
Advice Guru
 
Posts: 1,084 
|
Post by sotf on Jan 27, 2017 23:30:56 GMT
I'm working on another of the cabin kits, though I'm working on this one as a smoke house rather than an actual cabin.
|
|
sotf
Advice Guru
 
Posts: 1,084 
|
Post by sotf on Jan 30, 2017 2:56:08 GMT
I was going to essentially do a photo "unboxing" (It's in a plastic bag sealed with a piece of card that has the instructions, I'm not entirely sure if unboxing is the right word for it), but the pics of the pieces didn't turn out and corrupted when I transferred them from my phone... I do have some pics of the basic structure with nothing added beyond the basics. Basic Cabin Form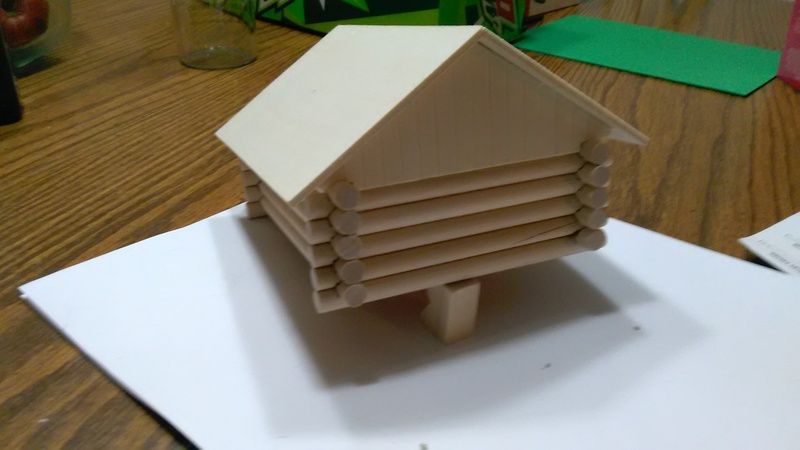 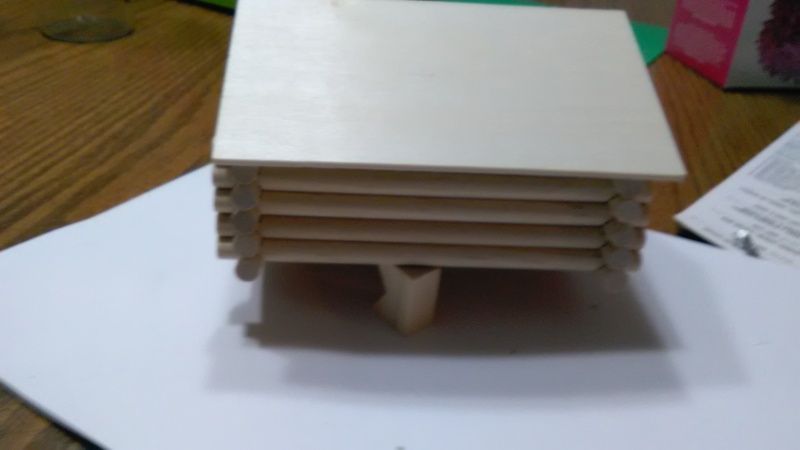 There are doors, windows, and a chimney that come with it (The Chimney is actually what I'm using to lift the closest side up for a better pic of it), but I'm not using those with this one. I'm not making it as a cabin, but a smokehouse. No chimney or windows for that, and I'm going to be using a better looking door just as I did with the prior one, and I need to work out a vent as well. On top of that, I got something rather nice as a detail piece... ...and it's a charm that is pretty close to scale for minis (Slightly on the large size), but they were pretty damn cheap (25 cents for 5 of them with free shipping). All I really need to do with them is to snip the hoops on the back and I'm not even sure if that's 100% necessary. |
|
sotf
Advice Guru
 
Posts: 1,084 
|
Post by sotf on Feb 16, 2017 8:11:14 GMT
Well, got a bit more done on the cabin to smokehouse part...and I've got a totem shrine pretty much ready to paint after a few minor things to it. Smokehouse
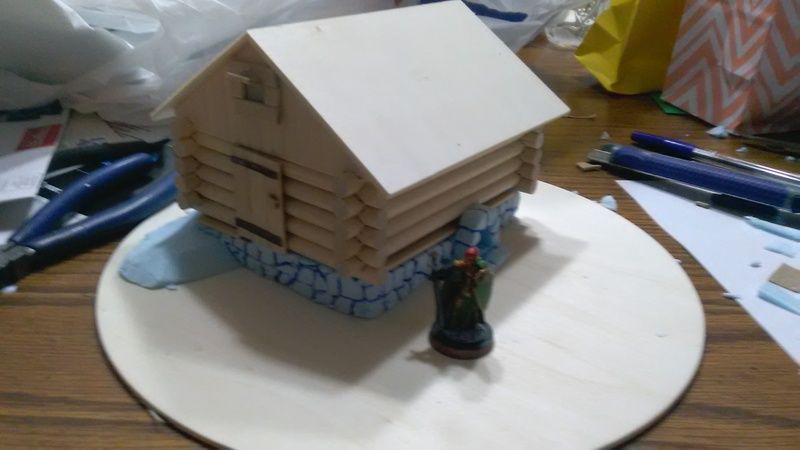 Well, I'm working on two major parts for it, the first being a deck for under the door, and the other is a cover piece for a large woodpile. A lot of the foam that isn't for stonework is going to be covered by gravel that would be piled up against the hill. I've also got to do the shingles, but that'll be after I finish the covering area for the wood. Totem Shrine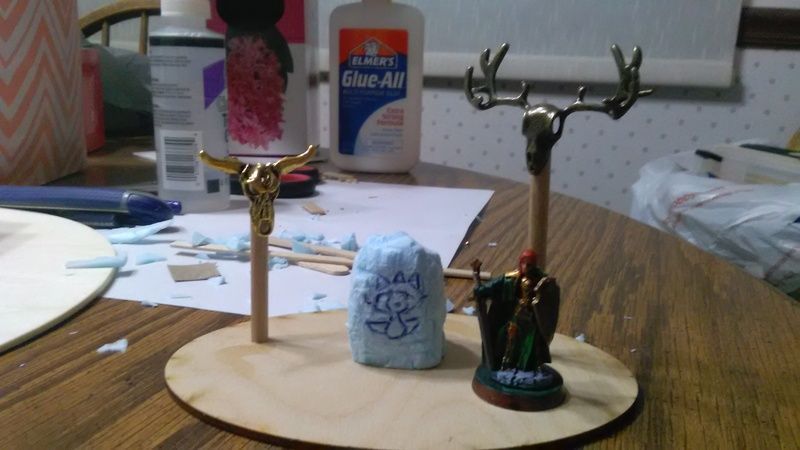 I've largely got a bit of boundary between areas intended for flock and walked on areas. Both skulls are charms, the bull skull being another of the ones that will eventually be mounted on the smokehouse (I'm painting it first since the part it would be attached to would show through and would be a pain in the rear to paint right).
|
|
sotf
Advice Guru
 
Posts: 1,084 
|
Post by sotf on Feb 21, 2017 21:11:56 GMT
Got more done on the Smokehouse, haven't attached the wood pile with cover to the rest yet (Going to need to finish the roofing first because the overlap of roofs would make that harder to do). Decided to put a door over the furnace part and got the deck together and attached in place. |
|
sotf
Advice Guru
 
Posts: 1,084 
|
Post by sotf on Feb 28, 2017 10:15:41 GMT
One thing I'm starting to get annoyed with is the aquarium gravel I'd gotten a while back. Found a sealed sack of, essentially, neon colored gravel a few years back that were the only thing left from a massive sale at a nearby pet store that was moving location.
Stuff is a pain to prime properly since it takes a few coats to cover it up and it takes forever to work paint into the gaps of it even while watering the paint down. Can't spray it because whatever they used on it makes it tacky to spray paints. But it still works, and is just a pain to work with...and I still have about a fifth of the pickle jar that filled up from the bag.
But with rain and a bit of snow recently, I've been black bombing it by hand rather than a spray despite giving it a layer of glue over the foam parts before the weather issues started.
Parts of it I'm really wishing that I hadn't locked in position before painting it (Such as the woodpile piece, I glued it in place after the shingles were in place, and I wish I could have done the area behind the deck because it's a paint to get it right along with the underside of the deck, though with the deck it would be quite hard to see it).
Main things were lines of stones to border the path or similar areas, then used a lot of the stones to pretty much cover the foam areas along the sides of the building. I also put a few rock piles around the base and scattered a few single ones in areas that will be flocked over later on and a small "heap" around the pillars for the animal skulls with the shrine. After placing the stones, I put a little bit of fine sand over the sand to add a bit more to tie them together into a cohesive look and to help with the glue in holding the stones in place.
Then I used the hot glue gun to texture the walking areas a bit more. Basically using Scotty's texture technique for it except using the glue to mark the normal paths people would be taking with ruts and similar.
I also used a little bit of hot glue to add some variance to the larger areas that will be, eventually, flocked over after painting. Then I've basically went with some white glue and sand for the areas that aren't going to be trampled along with, essentially, a very light drybrush of white glue over the trail areas and a tiny bit of sand to cover the areas that are a bit to flat for the dirt.
|
|
|
|
Post by Sam on Feb 28, 2017 12:15:37 GMT
Good to know info. I just salvaged some black aquarium gravel. Have not tried to use it yet. Thought it might be useful on bases.
P.S. When I first saw the Cabin I thought it was Lincoln Logs, but with the miniature next to it I can see the logs are smaller. Great job. Really like the look of the smokehouse. All the added pieces really kick it up a notch.
|
|
sotf
Advice Guru
 
Posts: 1,084 
|
Post by sotf on Feb 28, 2017 13:57:54 GMT
Good to know info. I just salvaged some black aquarium gravel. Have not tried to use it yet. Thought it might be useful on bases. P.S. When I first saw the Cabin I thought it was Lincoln Logs, but with the miniature next to it I can see the logs are smaller. Great job. Really like the look of the smokehouse. All the added pieces really kick it up a notch. For the gravel, you probably want to test it out first before doing anything big with it. And for salvaged gravel, you really want to do more to it there. Wash it with disinfectant and anti-microbial stuff, and you probably also want to put it in a pie pan and in the oven for a bit as well. You really don't want to deal with things that can happen there. The kits for the cabins are a lot like lincoln logs in how they're shaped, but need a bit more to push them together since they're a rather tight fit. It seems like it would be doable to copy the notches into other dowels, but I've got enough ideas for buildings that it would be a few in the future there. |
|
|
|
Post by margaret on Feb 28, 2017 17:58:25 GMT
I'd be careful about putting black aquarium gravel in the oven. I don't know what the coating on it is and it might off-gas badly in the oven. Maybe test a very small amount first? But yes, disinfect it before using.
|
|
sotf
Advice Guru
 
Posts: 1,084 
|
Post by sotf on Feb 28, 2017 20:08:31 GMT
I'd be careful about putting black aquarium gravel in the oven. I don't know what the coating on it is and it might off-gas badly in the oven. Maybe test a very small amount first? But yes, disinfect it before using. The stuff should be fine, most of the aquarium gravel coloring is more of a heat glazing thing anyway because of how it works if I remember right. Dropping it in boiling water would also work for the purposes of getting rid of issues though |
|
sotf
Advice Guru
 
Posts: 1,084 
|
Post by sotf on Mar 2, 2017 6:24:23 GMT
Well, finished the two pieces, all that's left is the sealing layer that's for the flock and leaf litter...so I'll probably be able to take some pics of it by tomorrow because it's a heavily watered down glue and until it fully dries, it looks strange.
|
|
sotf
Advice Guru
 
Posts: 1,084 
|
Post by sotf on Mar 2, 2017 20:41:24 GMT
|
|
|
|
Post by Wyloch on Mar 3, 2017 2:06:52 GMT
Nifty - ever consider texturing those wood planks?
|
|
sotf
Advice Guru
 
Posts: 1,084 
|
Post by sotf on Mar 3, 2017 2:37:04 GMT
Nifty - ever consider texturing those wood planks? They actually were textured. I tend not to go with the deeper texture for things that I try to look more like something normal because it often looks out of place in it. A couple runs over an old wire brush works rather well for it. If I wasn't attempting something that can do double duty for a historical setting with parts of the set, I would have added them...plus it's a pain to get them to look right anyway on a dowel compared to planks. |
|
sotf
Advice Guru
 
Posts: 1,084 
|
Post by sotf on Mar 3, 2017 21:44:12 GMT
Working on two definite buildings now, possibly a third with some of the pieces left over from the five kits used for what I'm working on. The Barn
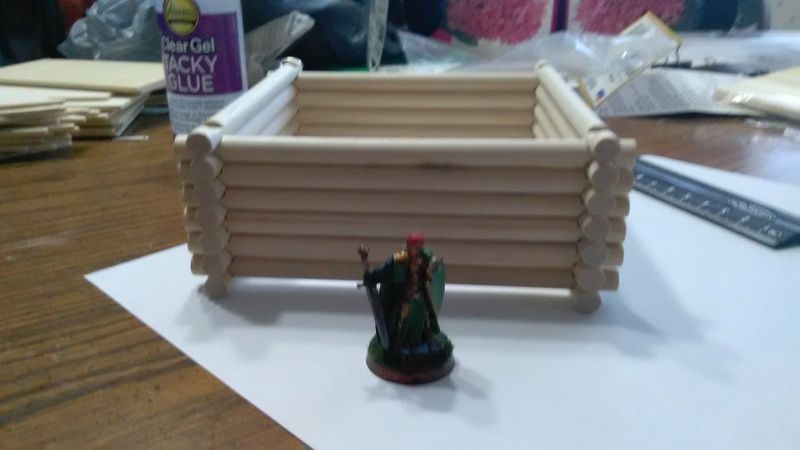
With both this barn and the tower, the included roof pieces don't fit since both use the longer pieces for all sides...so I'll need to work that out. Watch Tower
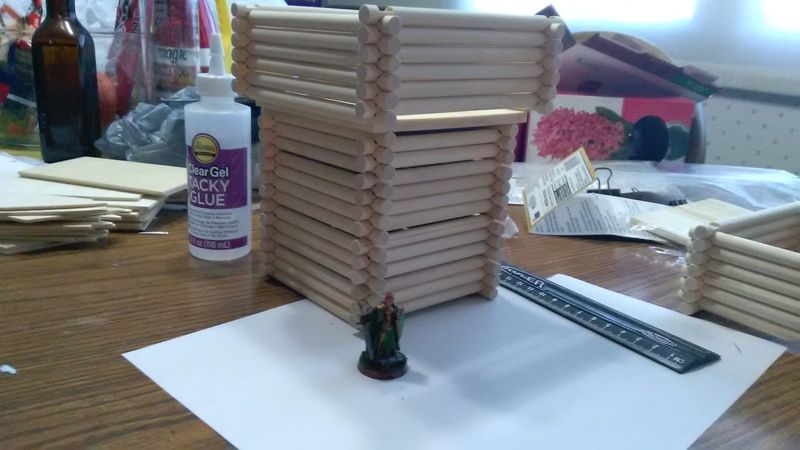
This is the watch tower, so far, I've got to cut down a platform to fit the expansion for the upper part of the tower. Also, unlike the other buildings, including the barn, I'm aiming at using a pyramidal roof...
|
|
sotf
Advice Guru
 
Posts: 1,084 
|
Post by sotf on Mar 8, 2017 7:34:14 GMT
Well, my work got delayed until I can get some more bases for the buildings...
So, I started on something else for the settlement, I'm making a well...very slowly making a well. Had some wooden rounds that, I believe are either 2 1/2 or 3 inches diameter. Used a normal 1"round base and marked a circle in about the center of it. I've used tacky glue outside of that circle and I've been working aquarium gravel into it and building it upwards. Once I finish the stonework for it, I'm going to build the upper framework for it.
The gravel build is just extremely slow going...it does look far superior to an earlier attempt at one using foam though.
|
|
sotf
Advice Guru
 
Posts: 1,084 
|
Post by sotf on Mar 10, 2017 6:58:51 GMT
Still working on things, haven't finished the well for painting, or even the pseudo-mortar step I want to do as I decided on another option for the tower that took up time. I still need to "black out" the interior of the lower section of the tower since I really don't want the gaps to be visible when I'm done and some of them let light in far to easily... Watch Tower
|
|
sotf
Advice Guru
 
Posts: 1,084 
|
Post by sotf on Mar 17, 2017 18:53:57 GMT
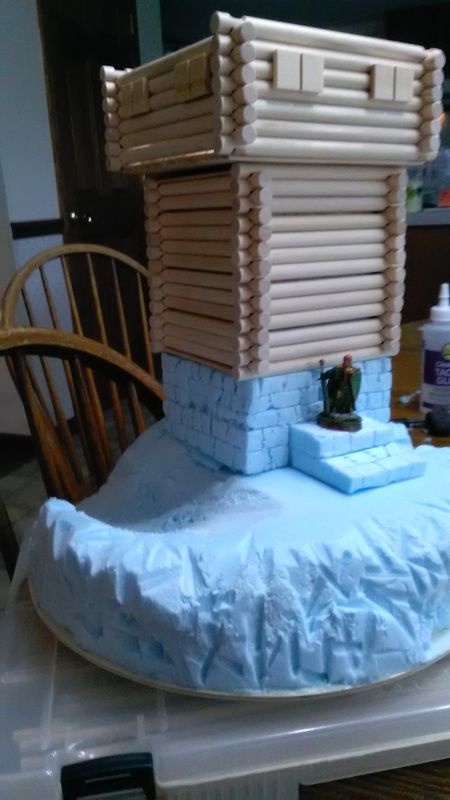
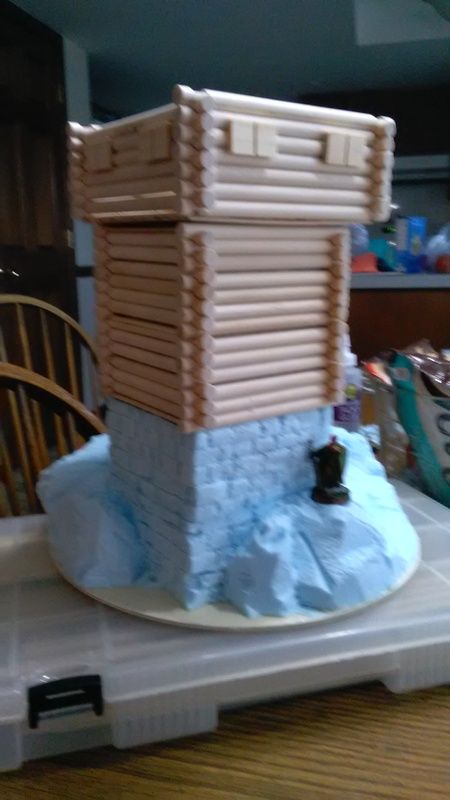
Well, got more done on the tower. It's turning out a bit larger than I'd planned, but I kind of like the look of it with the base pretty much ready for sand and stones being added along with anything else I can think of to fit on the base. Still haven't gotten anything done for the roof of it though... The Watchtower
|
|
sotf
Advice Guru
 
Posts: 1,084 
|
Post by sotf on Mar 18, 2017 23:28:15 GMT
As a side note, the tower without the roof comes to just over 11 inches tall measuring from the base up at the corner with the stonework to the top of the logs...
|
|
sotf
Advice Guru
 
Posts: 1,084 
|
Post by sotf on Mar 20, 2017 0:48:44 GMT
Still working on the roof, but I've just finished texturing the base for the tower. I'm going to be painting it in parts and then attaching the parts because there are parts of the tower that would be a pain in the rear to paint if everything was in one piece.
The base, the upper tower, lower tower, roof, door, and some banners I have planned for some of the sides of the tower.
As I waited for the glue to dry for sand and stones on the base, I tossed together a few pieces of random terrain that are still drying, but ready for paint...three large rock formations from scrap foam from the base along with two bases that are for more ferns to place around.
Still thinking about where I might be able to place a fern on the tower, one won't be on the well or the rock formations since there really isn't room for them at all there
|
|
sotf
Advice Guru
 
Posts: 1,084 
|
Post by sotf on Mar 20, 2017 2:42:13 GMT
|
|