|
|
Post by Meph on Jan 30, 2016 11:28:14 GMT
I will have to measure it and see. Mine is probably too high also but im not really worrying about it. I will get you a measurement though.
|
|
|
|
Post by jennifer on Jan 30, 2016 14:21:09 GMT
I will have to measure it and see. Mine is probably too high also but im not really worrying about it. I will get you a measurement though. YOur's doesn't look too high at all.. I like the way your's looks. Mine might be taller I am thinking. |
|
|
|
Post by Meph on Jan 30, 2016 15:42:37 GMT
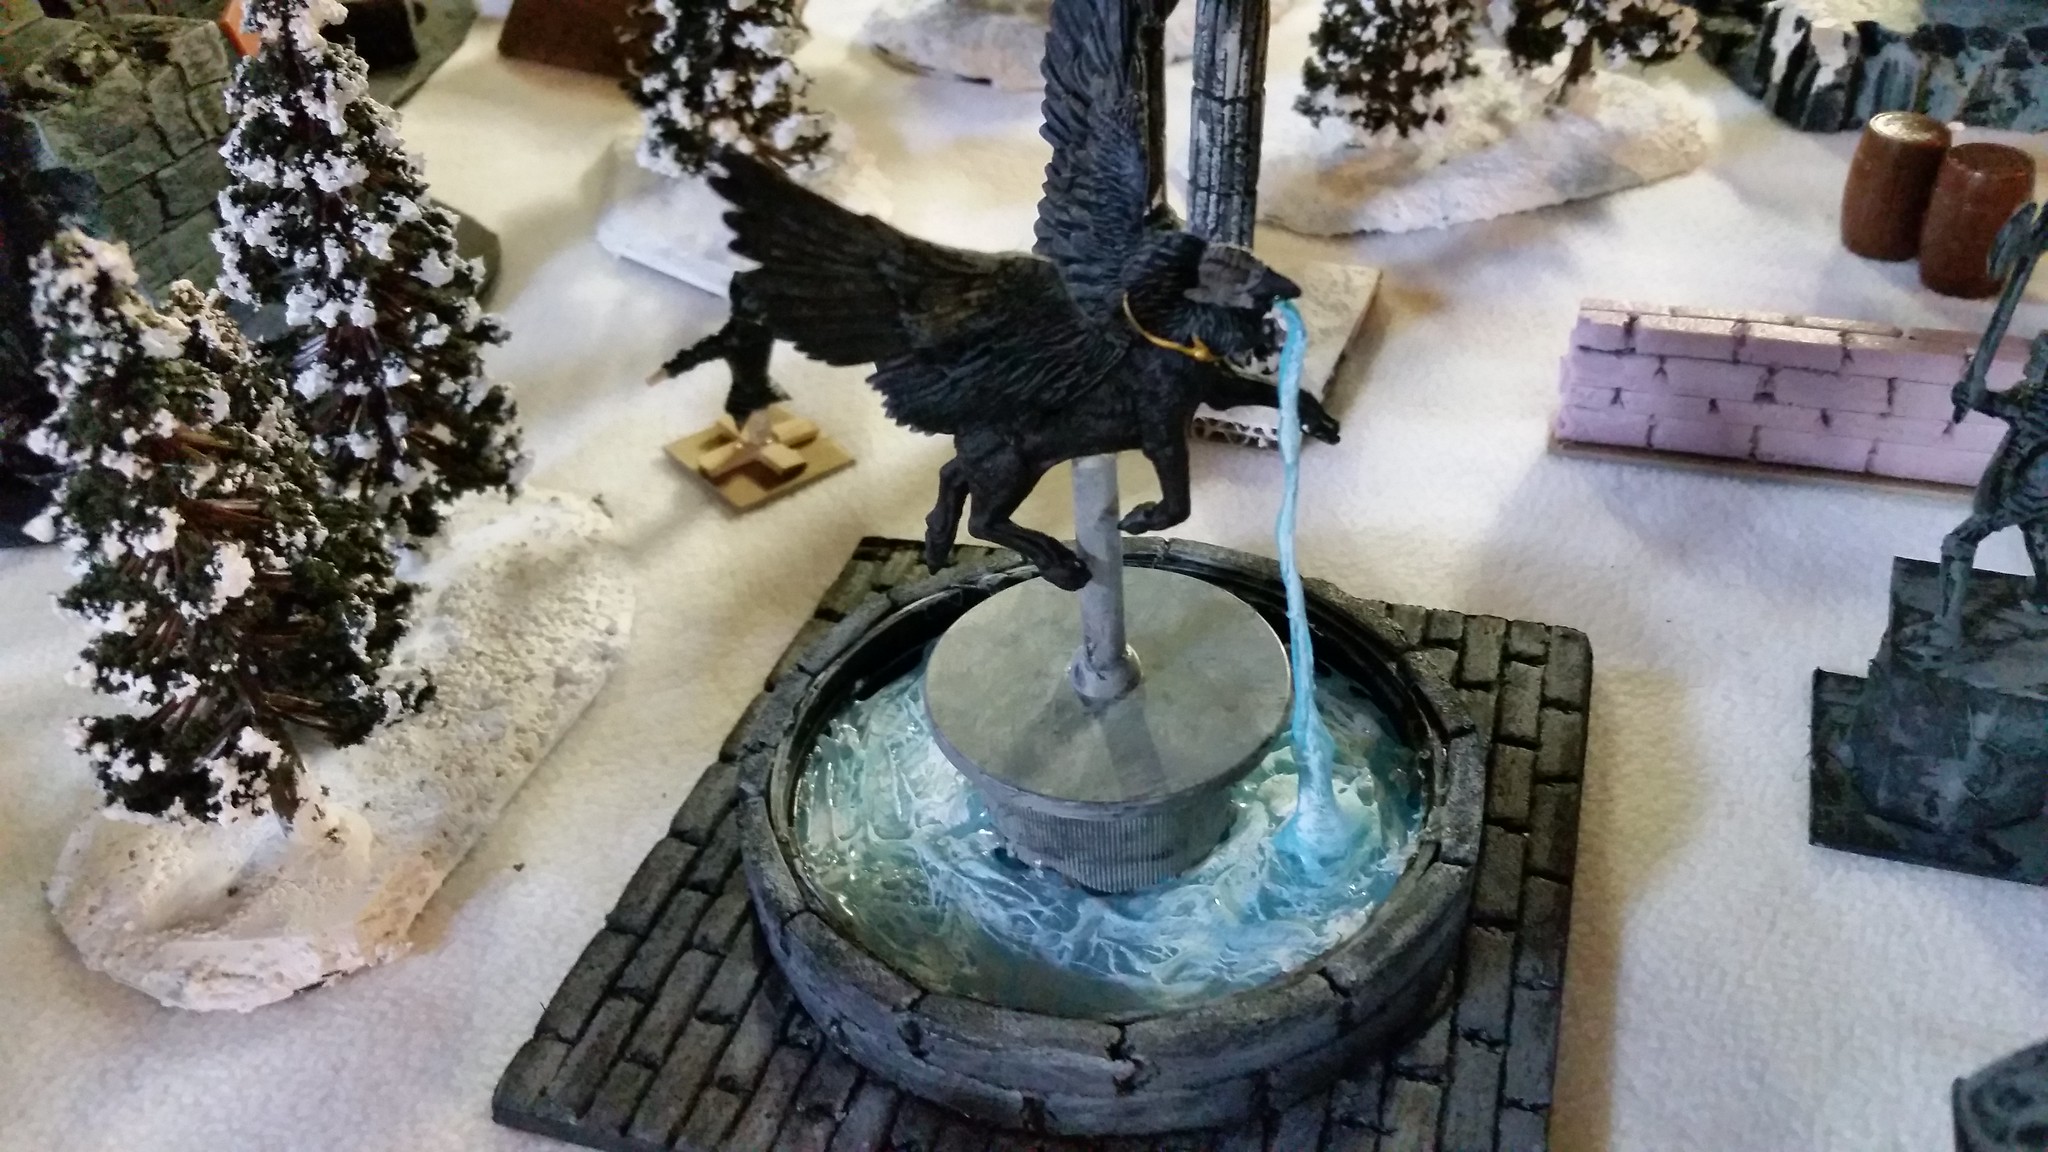
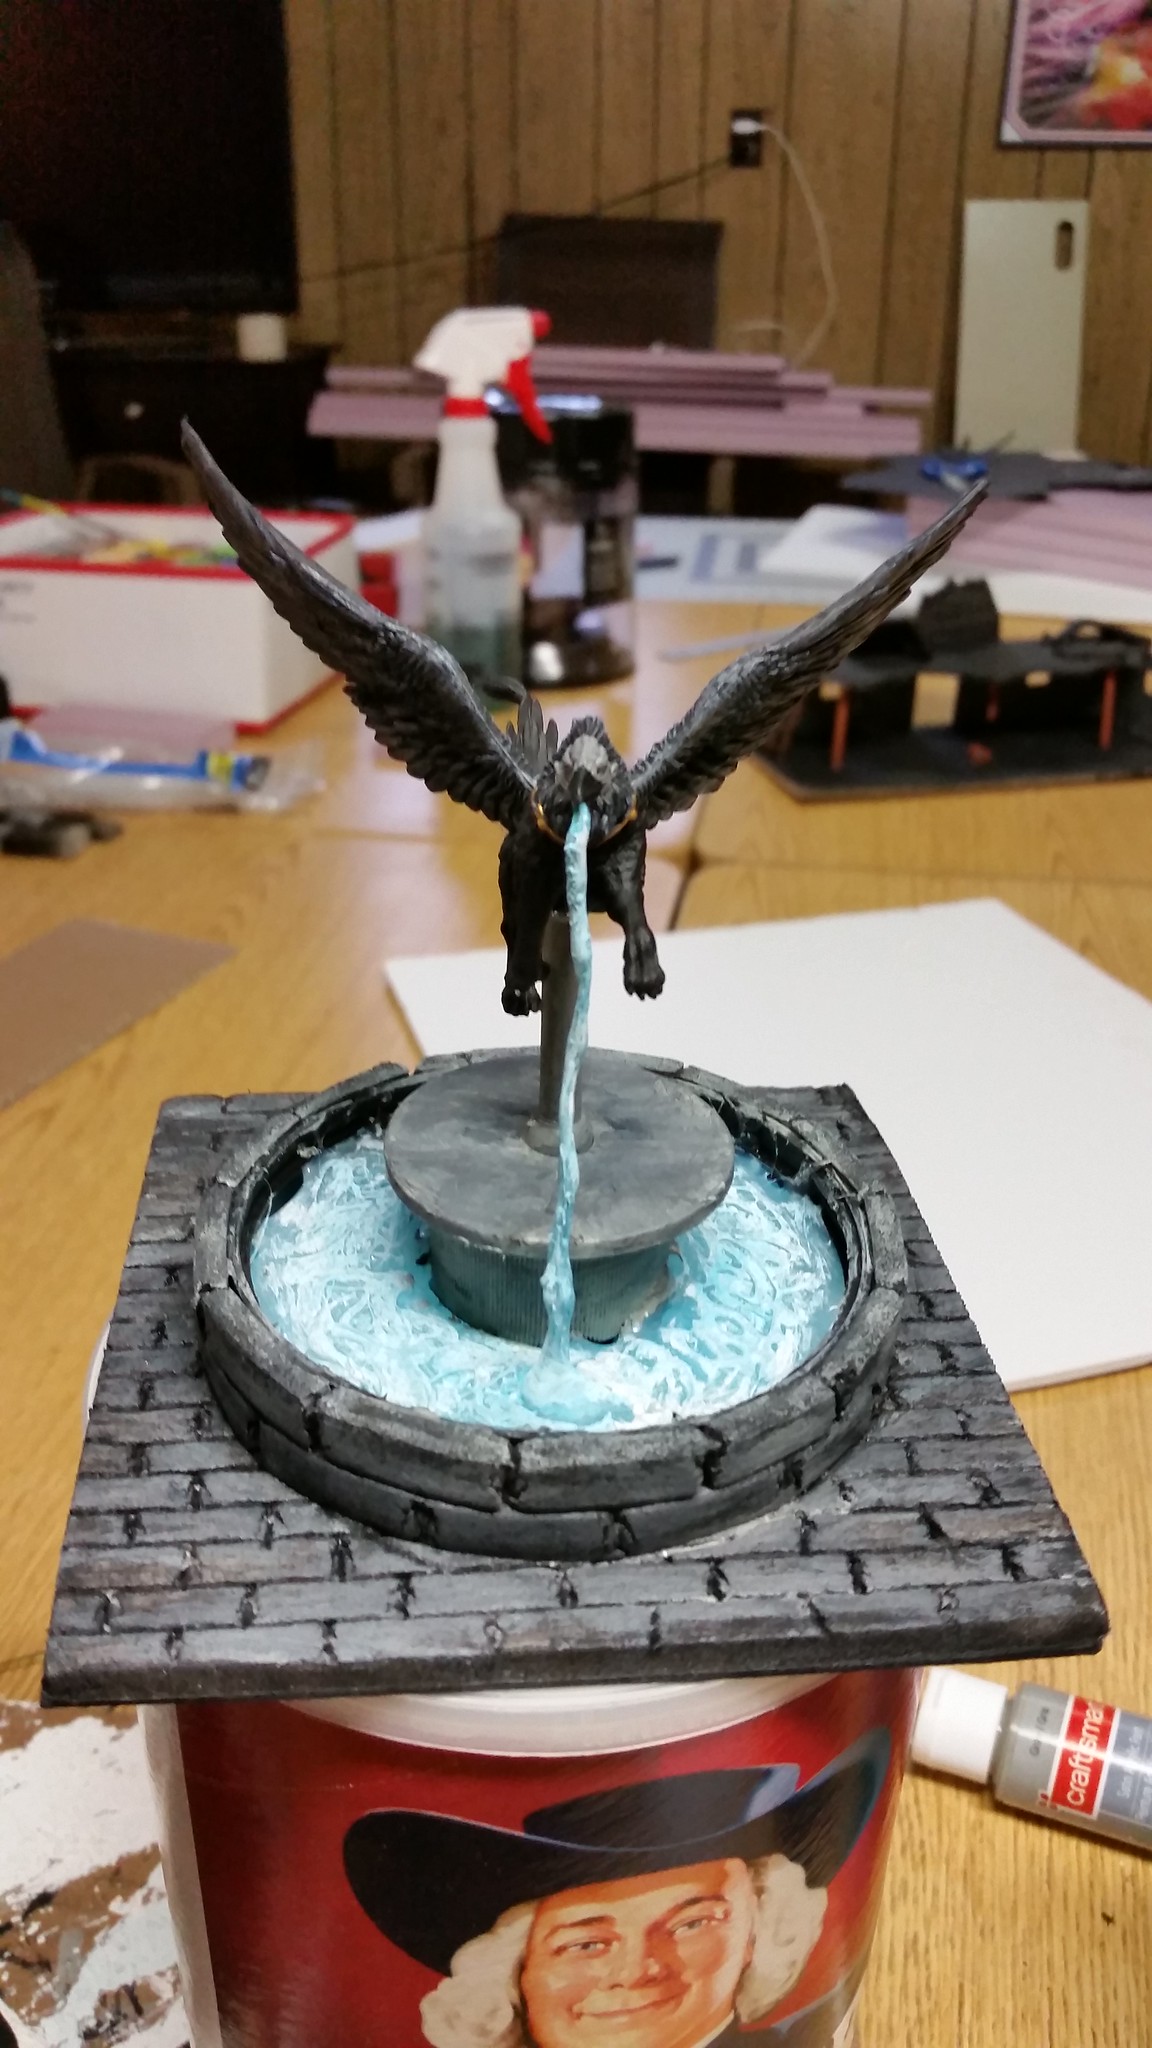
I added another set of 16 trees to the mix and reconfigured the layout a little. I think it's ready to go. 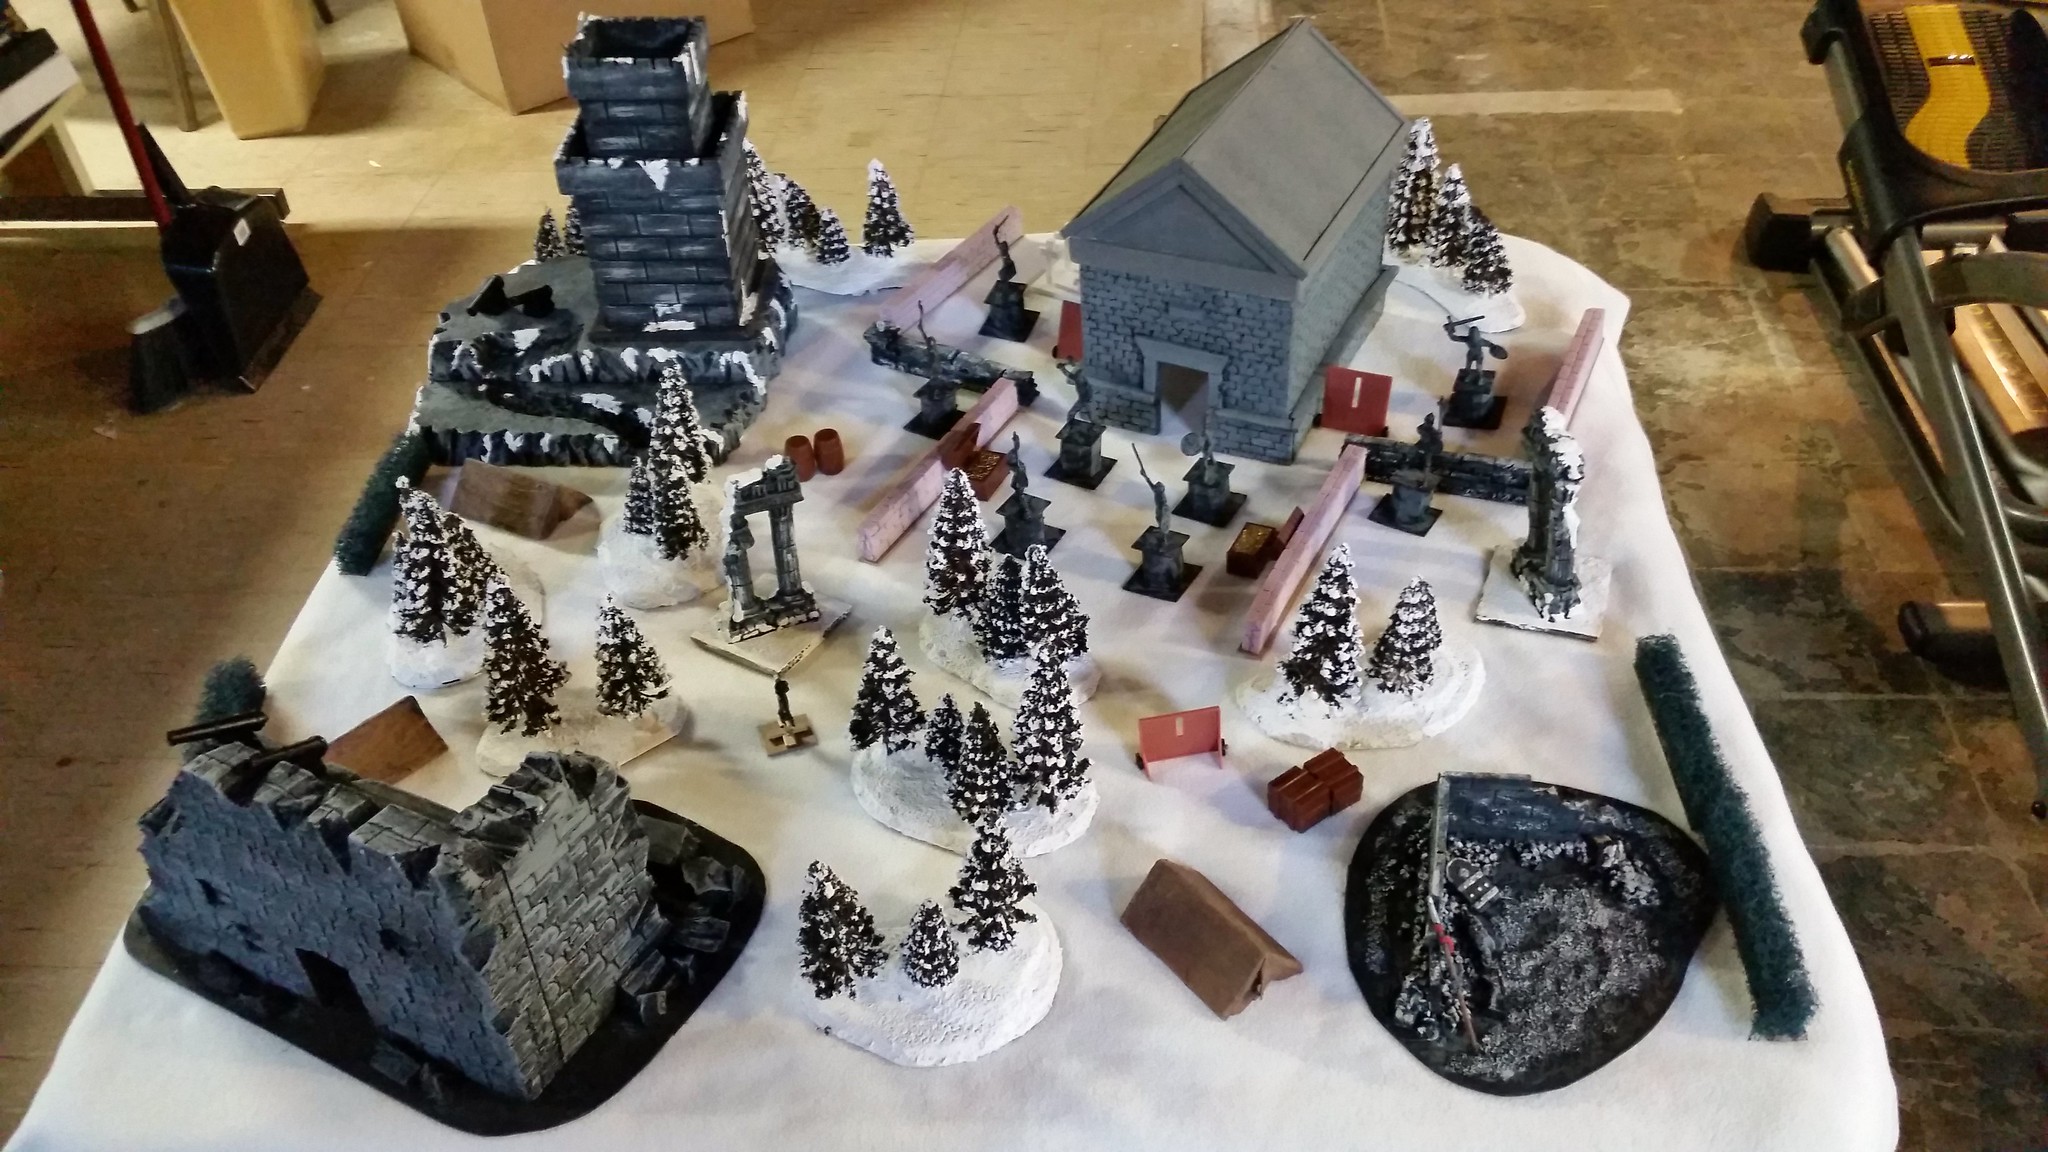 I started work on my fountain also. I had a whole set of picture of the original fountain I was making. It had the same base but up top I had 3 streams flowing in different directions using plastic zip ties. Every time I added more hot glue it reactivated the existing glue and the zip ties moved or came off. At one point I had my hands covered in hot glue and was about ready to throw the thing at the wall. After a moment to chill I decided to use one of the excess miniatures I have. I have 4 of this mini and don't know when I will ever use 1 of them so this was a good use. This way is much easier and will be more durable. I used E6000 this time for the plastics. 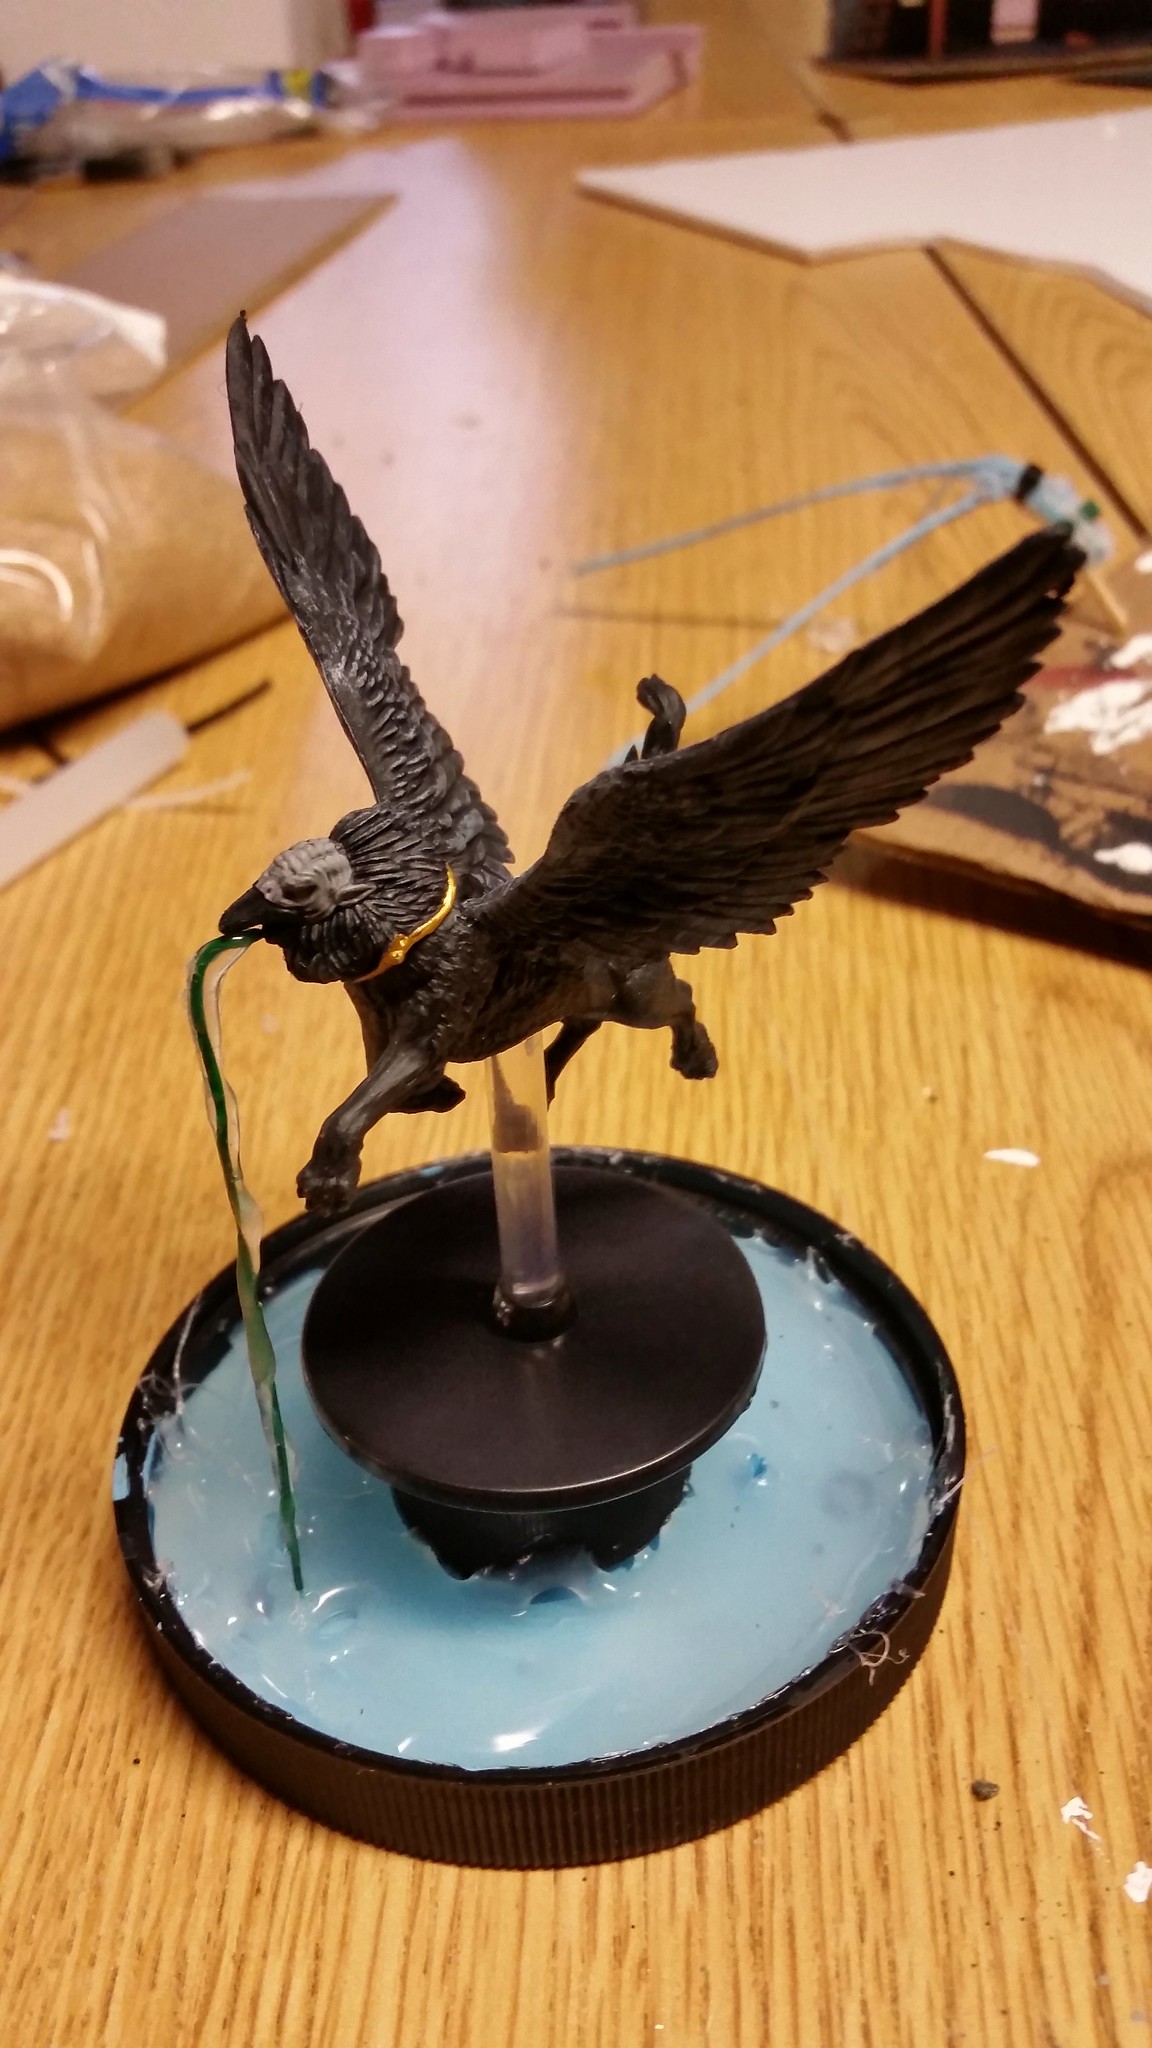 How long do you guys usually give E6000 to bond? THis is the first time I have used it. |
|
|
|
Post by jennifer on Jan 30, 2016 18:30:04 GMT
Your game board is looking very nice Meph! Love those trees!
That fountain is going to be awesome! I can already see it now! Can't wait to see finished photos.
Jennifer
|
|
|
|
Post by Meph on Jan 30, 2016 19:00:09 GMT
|
|
|
|
Post by Meph on Jan 30, 2016 19:01:08 GMT
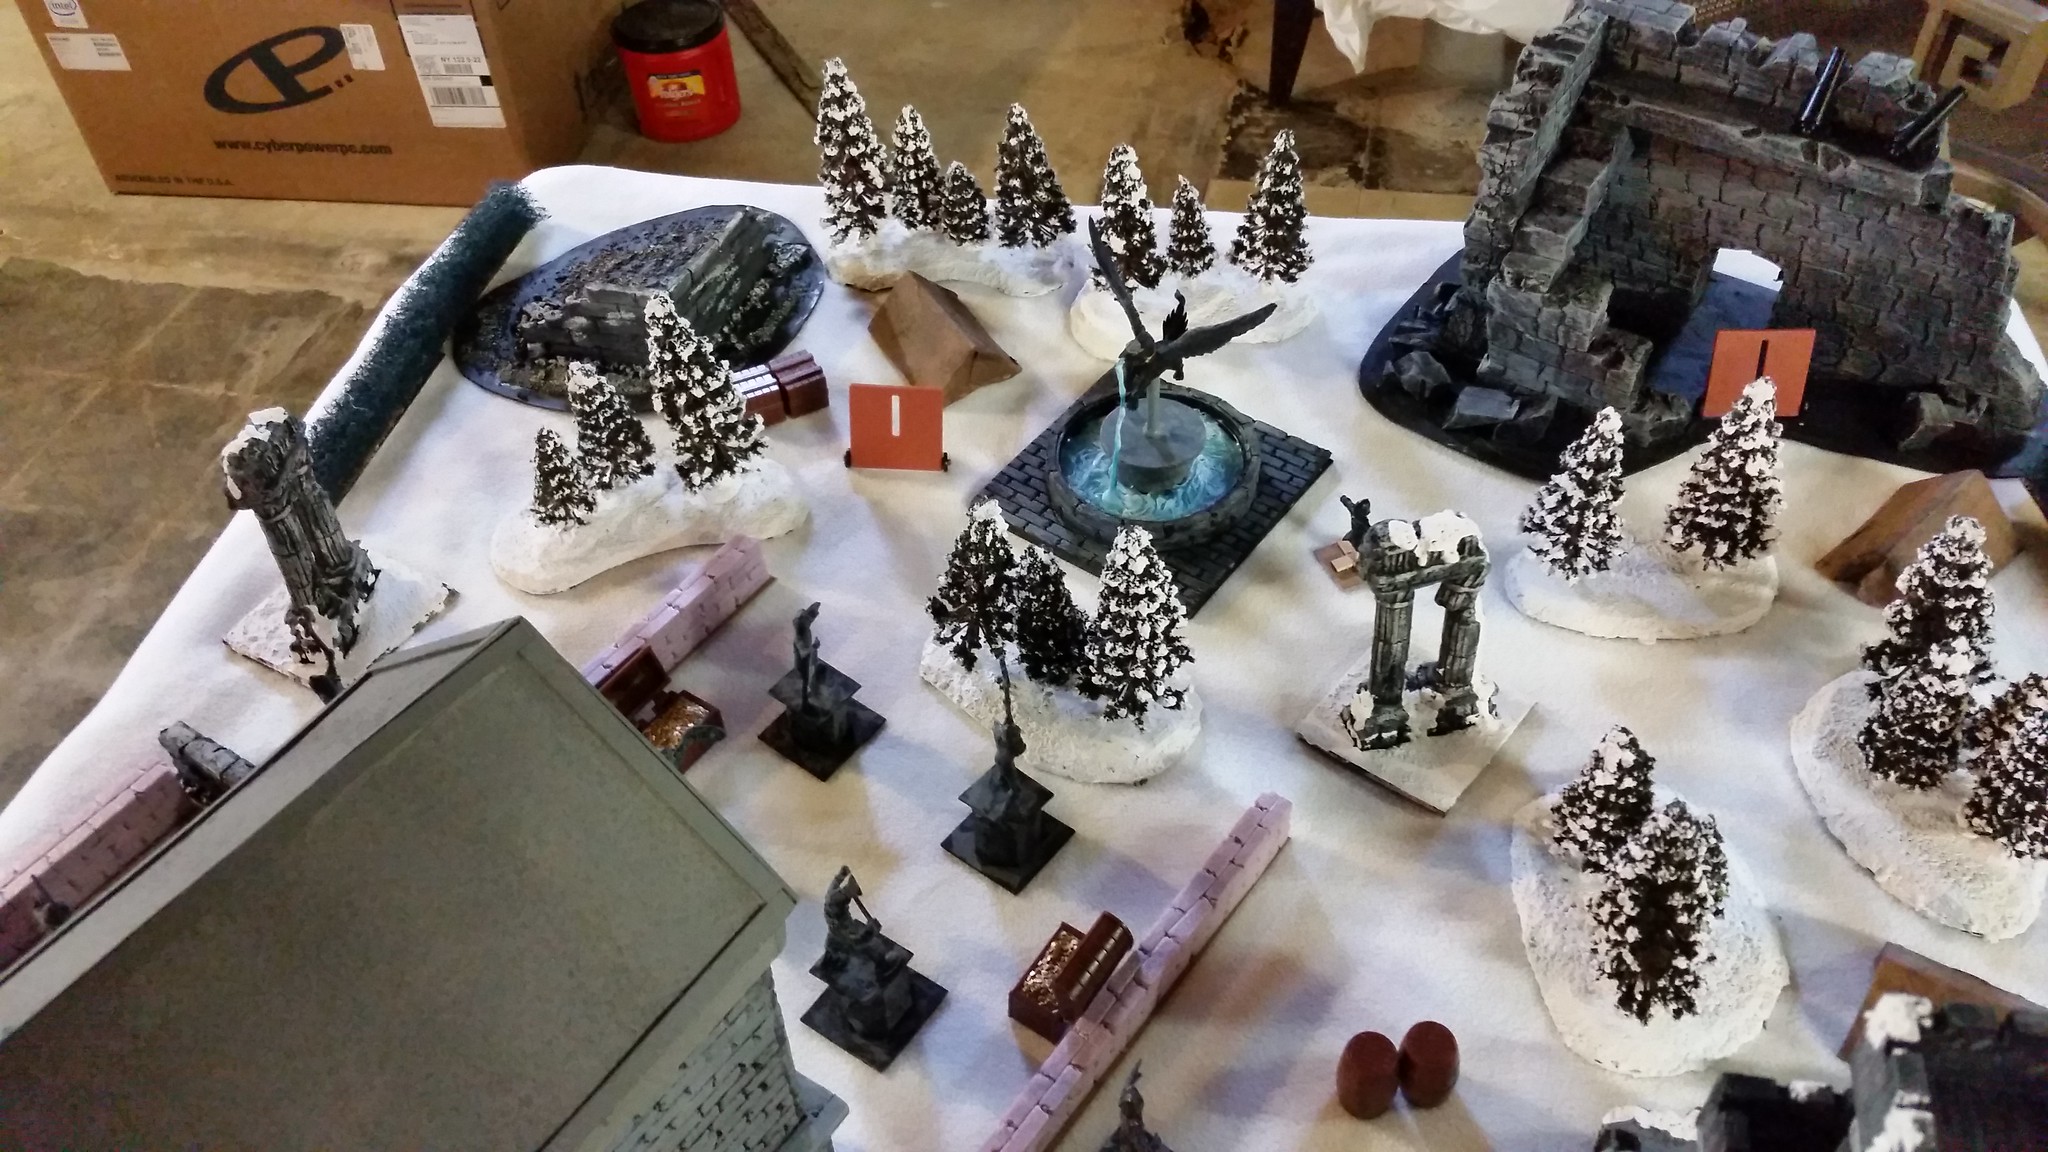
And I believe that last pic has a sneak peek of the 3 story wizard tower I need to build  |
|
|
|
Post by jennifer on Jan 30, 2016 20:34:56 GMT
That fountain is amazing! Great work! Good water effects! I need to make a modular insertable water/fountain thingy for my well.. to make it a fountain when needed  |
|
|
|
Post by Sleepy Hollow Mike on Jan 30, 2016 20:55:33 GMT
Awesome work there
|
|
|
|
Post by Meph on Feb 1, 2016 11:10:06 GMT
|
|
Nerevar
Cardboard Collector

Posts: 30 
|
Post by Nerevar on Feb 1, 2016 14:08:27 GMT
Hey everyone, new to the forum here. Just wanted to say that your stuff looks great Meph! I know it must have been time consuming to do all that brick work but it's well worth it! Never played this Frostgrave game everyone seems to be so fond of, but the things you have created are still awesome nonetheless.
|
|
|
|
Post by voodoo on Feb 1, 2016 17:32:37 GMT
damn dude! okay going to see if my lgs has Frostgrave in stock. lol
|
|
|
|
Post by Meph on Feb 1, 2016 21:55:39 GMT
|
|
|
|
Post by kgstanley81 on Feb 1, 2016 22:14:04 GMT
I've always used white or black rattle can primer's, cheaper is sometimes better because it doesn't fill in the details
|
|
|
|
Post by kgstanley81 on Feb 1, 2016 23:27:40 GMT
Also depending on the color your going with at the end, more colorful (white) primer or a darker tone (black), I've been using white a lot more than black, but I am using the dip method (Tudor- poly-stain) and I have read that since this will darken the colors use a white primer
|
|
|
|
Post by Sleepy Hollow Mike on Feb 2, 2016 5:42:27 GMT
Also depending on the color your going with at the end, more colorful (white) primer or a darker tone (black), I've been using white a lot more than black, but I am using the dip method (Tudor- poly-stain) and I have read that since this will darken the colors use a white primer Tudor will darken the model abit but it depends on a number of factors. Firstly the amount of Dip left on the model. I know this sounds obvious but some ppl like a lot of stain in the deep recesses and others( myself amongst them) dig a more normally shadowed look. I try and get as much off as I can. That way the primer color is more where I want the end to be. Secondly I also think that way it is applied and indeed how the excess is removed makes a bit of a difference! I used to just dip em and use my dremel to whirl it off. Now I have become more meticulous and paint it on. Removing or adding as I go. |
|
|
|
Post by Sleepy Hollow Mike on Feb 2, 2016 5:47:51 GMT
Okay firstly I dont understand the zipties in the first photo. I think they are stabilizing it? Secondly AFJ! (Awesome freaking job) Love the whole idea of a fountain in Frostgrave! I am working on a similar idea but mine will be lighted! Plus I think a reflecting pool may be in order! |
|
|
|
Post by Meph on Feb 2, 2016 10:53:02 GMT
The zip ties in the first photo were going to be water shooting straight out of the fountain and then flowing down the sides. It was going to require a lot of hot glue streaming it out. The problem was that the hot glue kept softening the glue holding the zip ties and their pressure kept pulling it out.
The first picture has nothing to do with the final product. It shows the total change in direction I took in the first hour of this project.
|
|
|
|
Post by curufin on Feb 2, 2016 14:36:49 GMT
I love that fountain! Great example of repurposing a mini!
|
|
Nerevar
Cardboard Collector
Posts: 30
|
Post by Nerevar on Feb 2, 2016 18:15:05 GMT
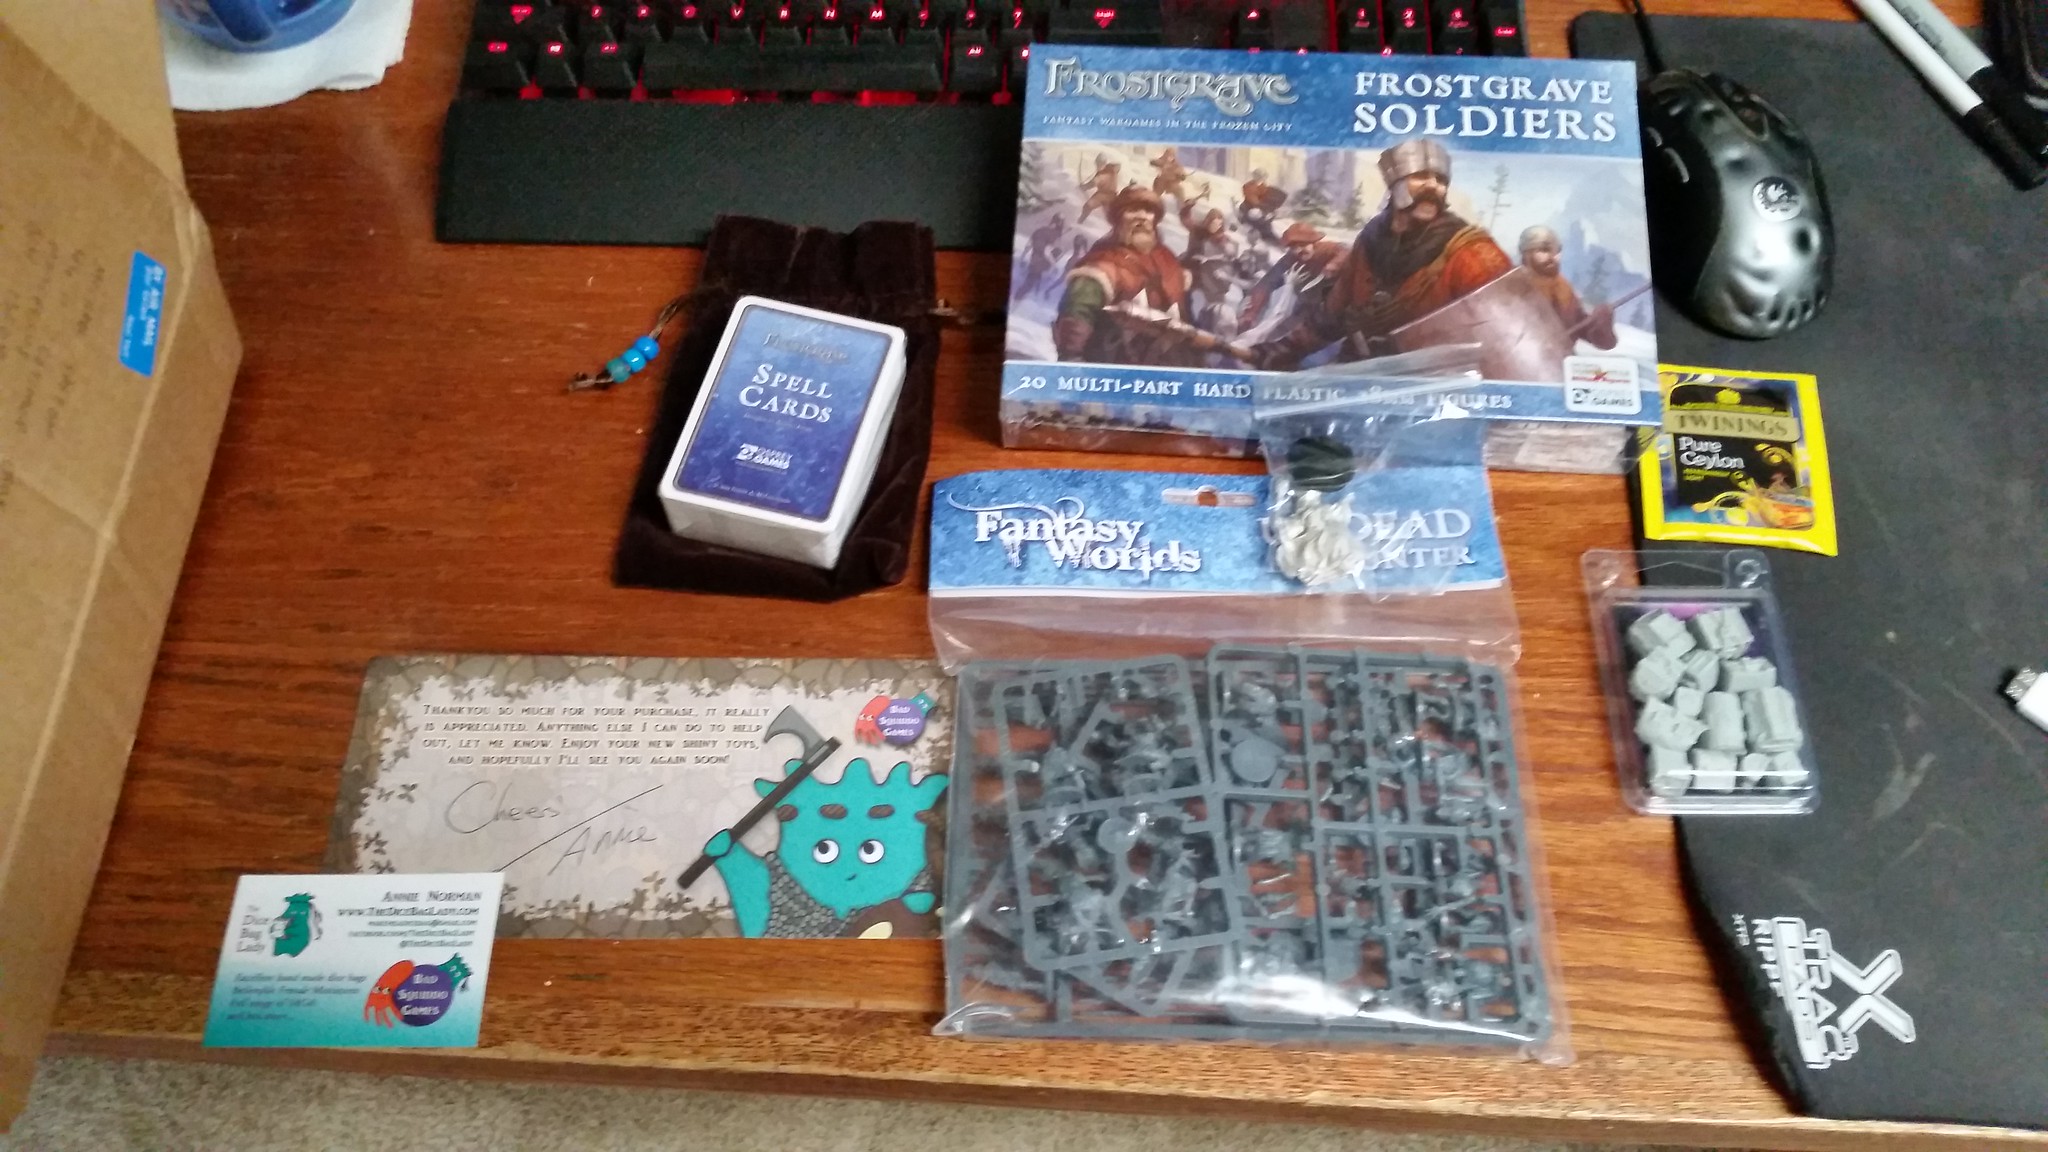
I have done quite a bit with plastic miniatures so hopefully I can lead a few pointers. How I do them is I cut everything out of the sprues first, clip off and file down any little bits and configure how I want the arms and stuff to be posed on the miniature. How I do this is I do a "dry fit" on the model to see how it will look. In case you're wondering, a dry fit just means that you put the two pieces "together" without any actual glue and hold it in the position you wish it to be. Next, and this is totally by preference/working space, I paint the body separately, each arm separately, the head, and the bottom all separately as well. Just be careful not to paint the joints of where the two pieces will actually meet. I do each piece separately because 1) it's easier to get in at every angle, making sure you don't miss any spots 2) if the model as lots of stuff in the way (i.e. weapons, belts, arm positioning is funky, etc) its harder to get in there with a brush if everything has already been attached. Of course, you could just assemble it all, paint it all up at once and if you find it hard to get at certain places, just carefully break off the piece you're working on at the joint itself and just reattach it later.
Ok one last thing and I promise I'm done with this post lol. As far as priming goes, I just buy cheap "rattle can" spray paint primer from Walmart. Works just fine and doesn't eat up any of the details (unless of course you're standing too close). As others have said before, if you're going for a darker color scheme, use black primer. Lighter color scheme, use white primer. Of course there are always exceptions and also personal preferences :-). Hope some of this was helpful. Good luck and I look forward to seeing more of your great work!
|
|
|
|
Post by SpielMeisterKev! on Feb 2, 2016 18:24:20 GMT
Howdy, I have done quite a bit with plastic miniatures The proof is in the pics... Could be some karma in it for you, Kev! |
|


 First of pic of where this started this morning. I like the new path I chose.


 Cheers!
 Cheers!