dossen
Paint Manipulator
 
Posts: 182 
|
Post by dossen on Jan 28, 2017 19:07:31 GMT
After following jennifer 's sculpting thread I felt inspired to try something myself. Since I'm not really good at humanoids I looked for something that I could pull of, when I came to this picture in the 5th Edition Monster Manual: 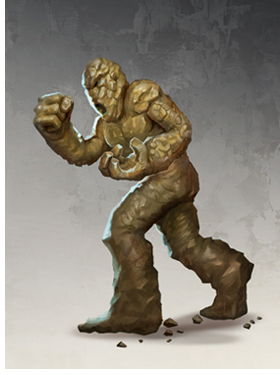 The clay golem is large, so I had a bit more size to work with, it's not a natural creature, so I don't absolutely need to get muscles and stuff right, and it's supposed to look like it was sculpted from clay :-) So first I need an armature 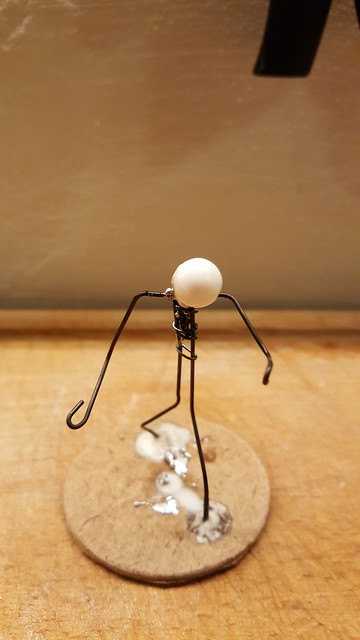 Just thick steel thread with a big bin for the head. On this I sculpted a reasonably man-like figure 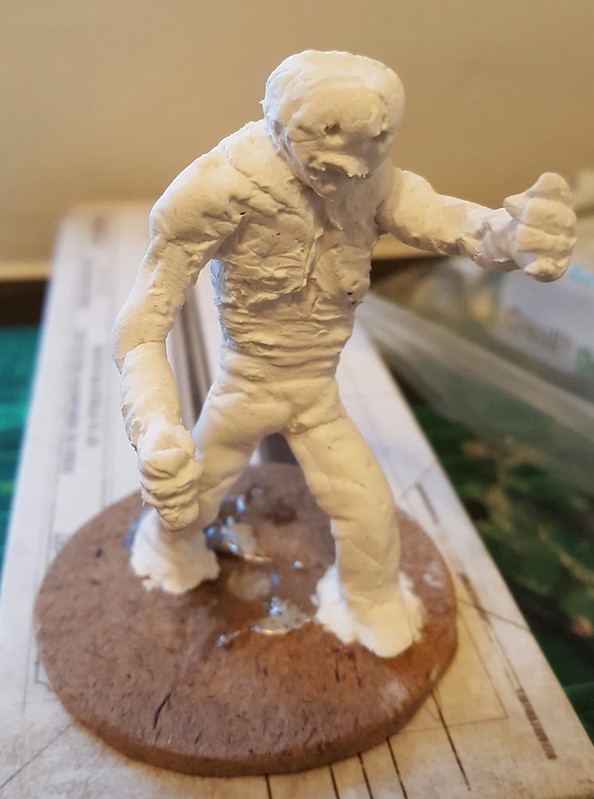 Took maybe an hour to do in one go. I know nice structure takes layers and time, but I'm going for roughly sculpted her. He didn't turn out half bad compared to my mental picture, although he i a bit slim from the waist down. Leaving him to dry til the next evening, it's time to paint him up 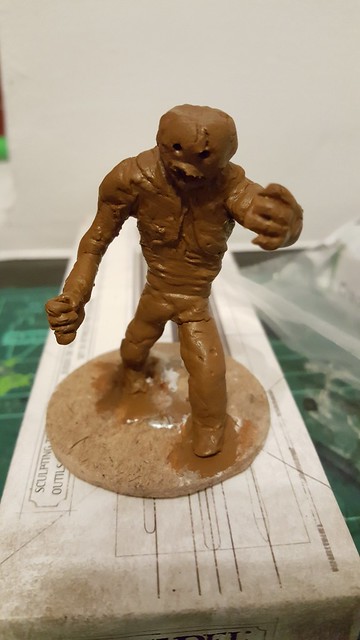 Old GW Beastial brown I think it was. Applied over a quick black wash to just emphasize the shadows. After that a Sepia wash 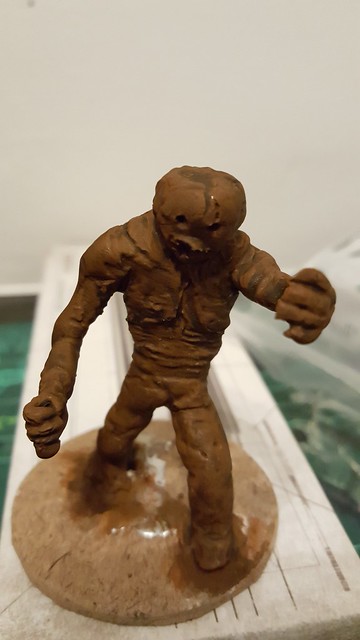 He's starting to have details. A quick highlight, a few details (eyes), and a bit of grass on the base followed 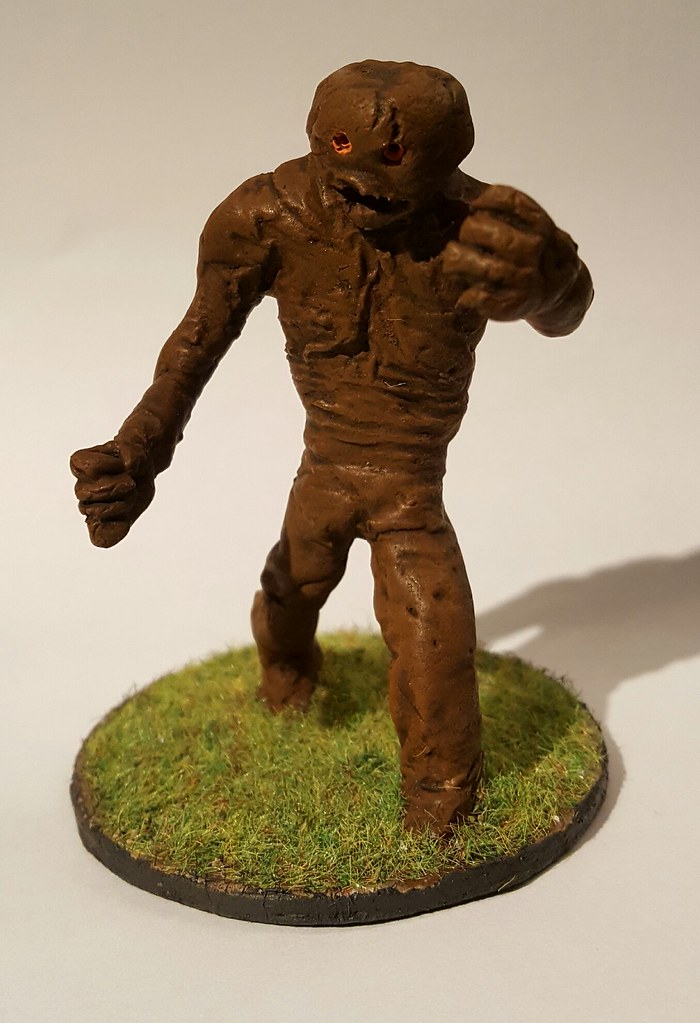 Now I just need to find an excuse for putting the Golem on a table :-) |
|
dossen
Paint Manipulator
 
Posts: 182 
|
Post by dossen on Jan 29, 2017 22:31:27 GMT
I'm going to try another golem... This guy  I'm going for a bit more surface detail this time, so time to start cheating... I mean crafting... A trip to the old box of odds and ends turned up a head and some bits of a horse... Here it is with the initial wire armature 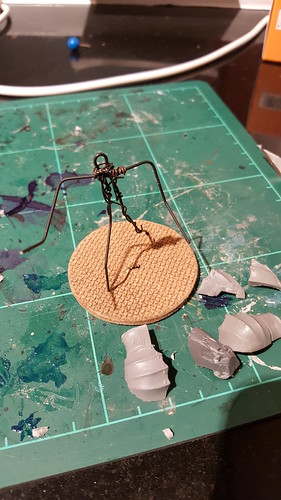 Adding a basic structure of the same air dry clay and the plastic bits (plus a few extras) looks promising 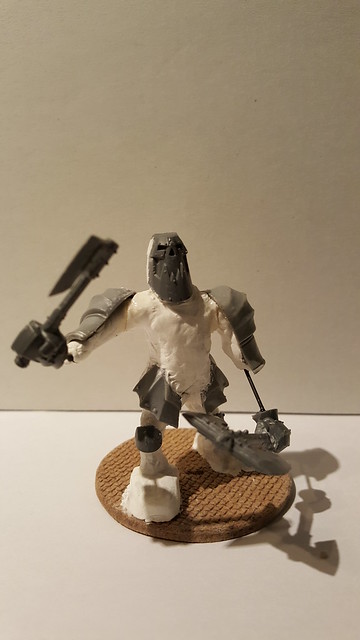 Still a long way to go, and I think I need to switch to green stuff and/or milliput to get the details to behave like I want them to. I'm also still pondering whether to keep both axes or cut of one or both... But I'm inclined to let him keep them - nothing says dangerous magical killing machine like wielding a pair of weapons that are that big :-) |
|
sotf
Advice Guru
 
Posts: 1,084 
|
Post by sotf on Jan 30, 2017 4:02:09 GMT
Still a long way to go, and I think I need to switch to green stuff and/or milliput to get the details to behave like I want them to. I'm also still pondering whether to keep both axes or cut of one or both... But I'm inclined to let him keep them - nothing says dangerous magical killing machine like wielding a pair of weapons that are that big :-) With things like the sharp edges you'd want with metal golems, you probably want to try something other than green stuff, the various options for "brown stuff" is what tends to be best for the sharper, harder edges. Greenstuff is great for more organic looks such as people, cloth, and similar (Along with filling gaps and the like)...but the brown is perfect for things you want to look somewhat smithed or machined. |
|
dossen
Paint Manipulator
 
Posts: 182 
|
Post by dossen on Jan 30, 2017 11:52:46 GMT
I have some grey stuff as well, I think I will use that. Might soften it up a bit with some milliput - that should work well for hard edges and metal-like texture.
|
|
|
|
Post by DnDPaladin on Jan 30, 2017 21:18:25 GMT
OMG Clay face !!!
|
|
dossen
Paint Manipulator
 
Posts: 182 
|
Post by dossen on Feb 13, 2017 19:22:10 GMT
I got a bit more work done on the iron golem. Mixed some grey stuff with some milliput - gave a really nice soft clay to work with, and it looks like it held the edges I went for well enough. 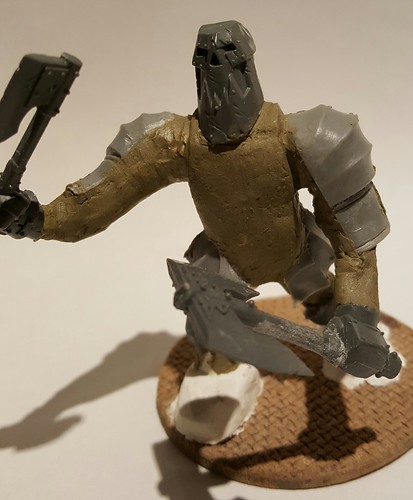 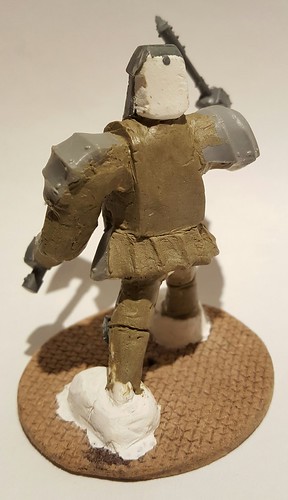 I'm gonna wait for the clay to fully harden before trying to sand it smoth - and then he needs more in a few places. I'm gonna try for a look like somebody welded a bunch of armor parts and big plates together and animated the result - a real juggernaut coming at you. |
|
|
|
Post by guillaume on Feb 13, 2017 21:35:35 GMT
"I'm gonna wait for the clay to fully harden before trying to sand it smoth - and then he needs more in a few places."
are you familiar with the "milliput juice" smoothing ? cause sanding a fully assembled mini look like utterly difficult too me ^^'
anyway your sculpt have great potential! good luck^^
|
|
dossen
Paint Manipulator
 
Posts: 182 
|
Post by dossen on Feb 13, 2017 22:33:50 GMT
"I'm gonna wait for the clay to fully harden before trying to sand it smoth - and then he needs more in a few places." are you familiar with the "milliput juice" smoothing ? cause sanding a fully assembled mini look like utterly difficult too me ^^' anyway your sculpt have great potential! good luck^^ Some of it is quite difficult to sand. I'll have a go at giving the rough areas some juice when I'm satisfied with the sculpting. But I think it will take a few more sessions to get to that point. |
|
|
|
Post by guillaume on Feb 13, 2017 23:09:52 GMT
do you own a dremel with cutting disk ?
if so do you have considered cutting the arms and head^^
if not i admire your bold dedication, i hope it will be easiest than it look
this sculpt can be awesome but the amount of work needed will make you pay for every second of awe the finished sculpt will inspire
|
|
dossen
Paint Manipulator
 
Posts: 182 
|
Post by dossen on Feb 15, 2017 0:40:14 GMT
Thanks for the advice guillaume - I think I'll hold that one in reserve - I do have a dremel tool, but I'm not too confident that clay, plastic, grey stuff and wire armature will stay together if I start cutting. So far sanding and cutting has actually not been too bad - and once I get a few more layers on - maybe with a few more plastic bits to hide the most difficult spots and add some cool details - I'll try the milliput juice thing and then take it from there :-) 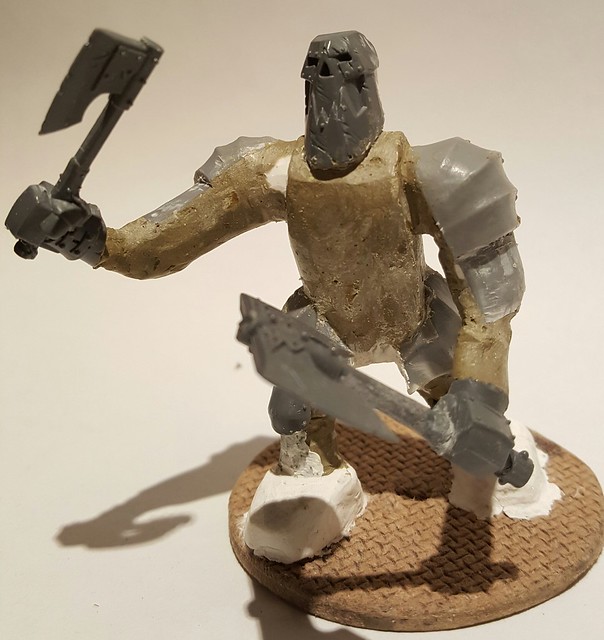 But no matter what, he'll look dangerous. |
|
|
|
Post by guillaume on Feb 15, 2017 13:51:04 GMT
sory if i gave you too much unsolicited advice^^
one last one: chainmail in greenstuff and "toothpick in cotton swab"hydraulic cylinder are great to hide the fail on this kind of project^^
|
|
dossen
Paint Manipulator
 
Posts: 182 
|
Post by dossen on Feb 15, 2017 14:55:07 GMT
sory if i gave you too much unsolicited advice^^ one last one: chainmail in greenstuff and "toothpick in cotton swab"hydraulic cylinder are great to hide the fail on this kind of project^^ No worries :-) It's up here to get advice - if I didn't wan't it, I'd just post the finished model... but getting extra ideas and advice is half the fun :-) |
|
sotf
Advice Guru
 
Posts: 1,084 
|
Post by sotf on Feb 15, 2017 19:30:02 GMT
Another thing you might consider to use for armor plates are pieces of plasticard or packaging plastic/clamshell packs.
|
|
|
|
Post by bluecloud2k2 on Feb 17, 2017 2:56:14 GMT
Also:
Flexible drinking straws (the thick kind that come with reusable 32 or 64 oz cups)
The feet off of 20 oz soda bottles.
|
|
|
|
Post by ivenbach on Feb 22, 2017 3:15:51 GMT
Keep it up. Looks really good.
|
|
dossen
Paint Manipulator
 
Posts: 182 
|
Post by dossen on Feb 22, 2017 14:04:34 GMT
I'm still carving, filing and sanding on this one :-) I do also add some extra material here and there, but mostly I'm getting the look that I'm after by removing bits of material. That also has the advantage of being really smooth (as long as the knife is sharp enough). I'm also experimenting with adding a few bits of scrap plastic or maybe some more bits and pieces from my Warhammer model leftovers. Right now he looks like this: 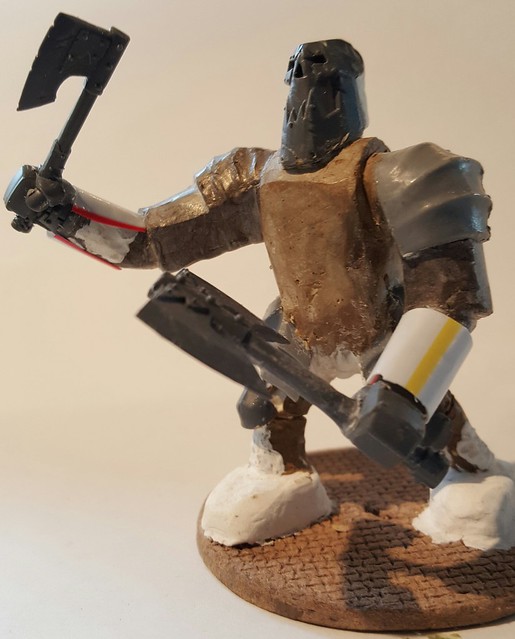 I think the plastic bits on his lower arms need a bit more work, but I like the layered effect that they give - and the really smooth surface. |
|
dossen
Paint Manipulator
 
Posts: 182 
|
Post by dossen on Apr 16, 2017 15:29:19 GMT
Finally got around to getting some more work done on this guy. First off he got a wash with milliput (thanks to guillaume for the tip/reminder) - it was actually a lot smoother than it looks - he just had a lot of roughness :-) 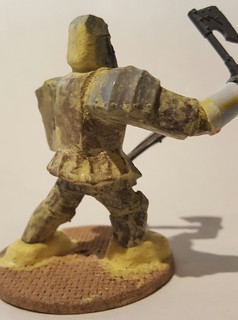 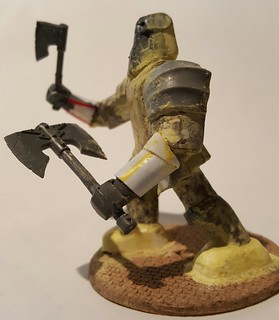 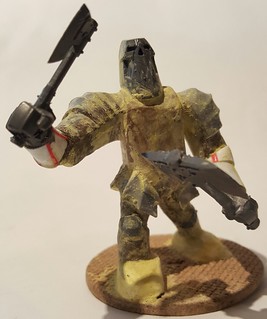 Then I wanted to give him to look like very old metal - rusty and dirty. This is something like gun metal grey over black, followed by rust and dirt, drybrushed with more gun metal followed by a light drybrush of some old GW Chainmail to bring out all the edges and other interesting details. 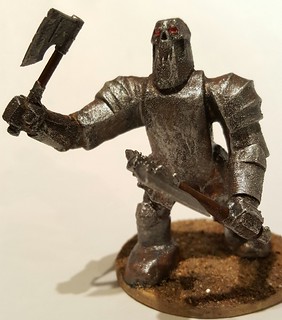 I'm still working on his base, so he'll make one more appearance. |
|
dossen
Paint Manipulator
 
Posts: 182 
|
Post by dossen on Apr 25, 2017 19:20:56 GMT
I found some more in-process pictures just to give a short idea of how I got to where I ended up :-) The first one is just black primer and plain sand on the base. 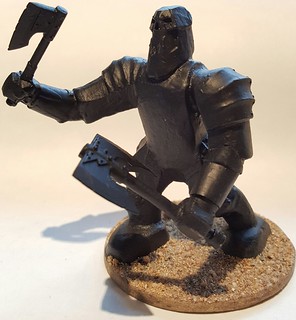 And then one with gunmetal, rust (the dry Ryza Rust compound from GW), and dirt (Typhus corrosion) added. And a bit of a wash on the sand. 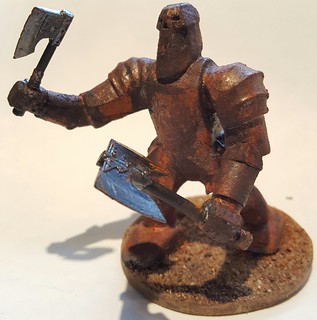 He did get quite a lot of that stuff. Now we are jumping ahead again, to the finished article :-) The paving stones on the base was done in a finely grained acrylic modeling paste and colored with a wash. 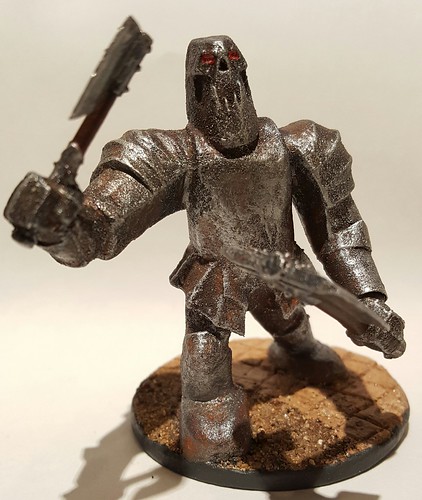 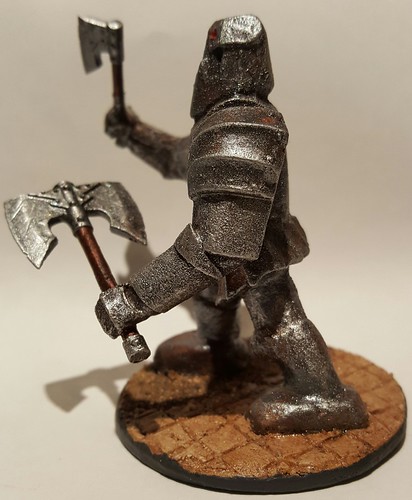 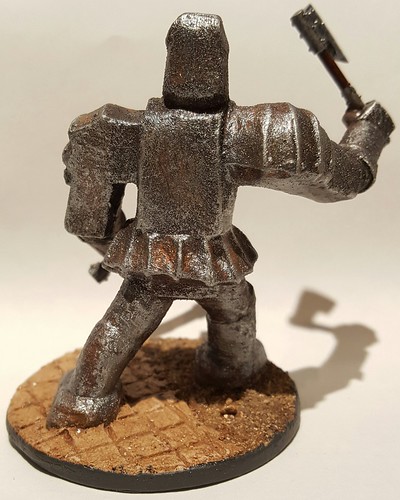 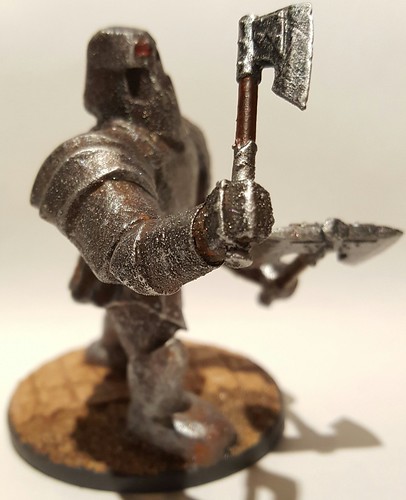 I think he looks the part of some ancient steel construct brought to life by magic... and with the red eyes it must be evil magic - obviously ;-) And here's one of all three of my large golems. The flesh one is from the Castle Ravenloft set. 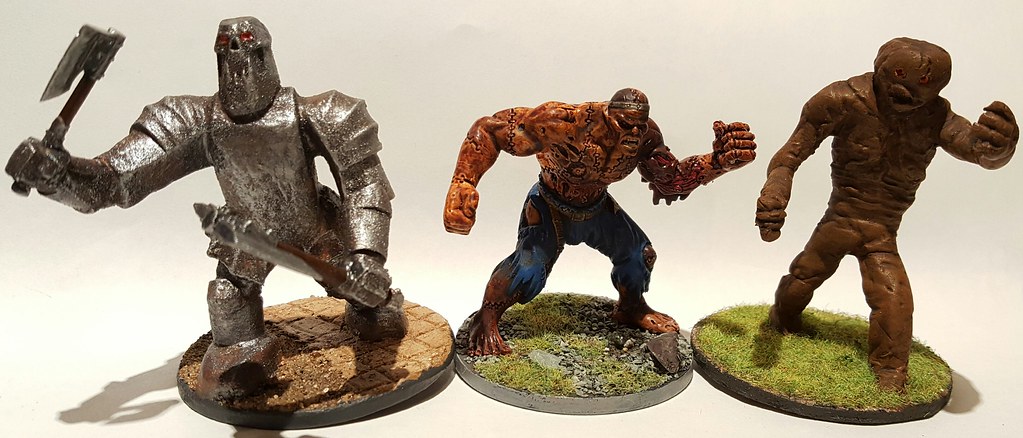 And I guess I'll have to figure out how to make a stone golem at some point (I'm thinking that it needs to look more statuesque and regular/symmetric than either the iron or the clay golem)... And since the 5th edition monster manual makes the flesh golem medium sized I'll likely also find some bits and build a figure to paint up for that :-) |
|
dossen
Paint Manipulator
 
Posts: 182 
|
Post by dossen on Oct 8, 2017 20:35:54 GMT
It's been a while, but I did state my intention to do a stone golem as well. Like the others I'll just put the picture I'm using as primary inspiration here:  I wanted something tall and broad broader than the others and knowing that I suck at hands and heads, I fixed up something from my store of bits and mounted it on some wire. 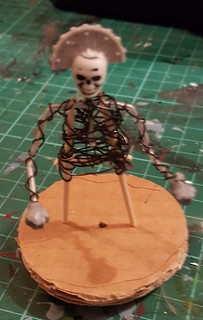 This got a cover of air-dry clay to flesh it out with something cheap. 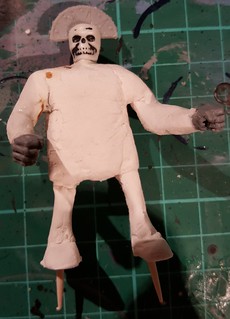 And then came inspiration (or madness - either one feels likely) - I'd do the surface in little bits of thin adhesive cork. 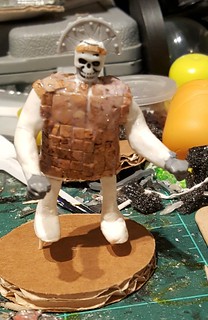 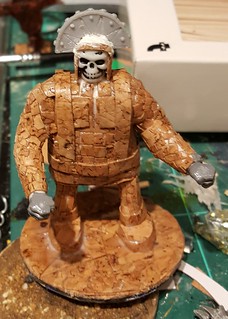 Each little (maybe 1-2 mm on each side) square was stuck on with its own adhesive and once a bunch of them were on I'd brush a paper-craft glue/varnish on top to make sure they stayed put. And then some bigger details in more cork was glued on top of the base layer. Then black-bombing and some grey paint. 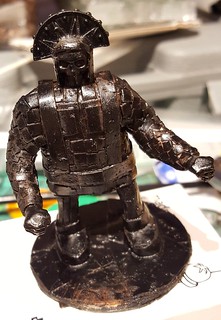 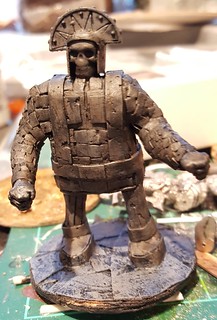 I'm reasonably pleased with the result after some more drybrushing and a bit of detailing - he looks a lot more like a stone construct than I dared hope for: 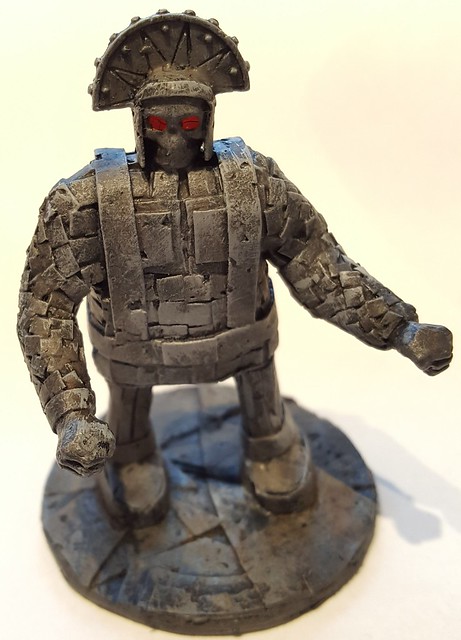 And together with his two friends, I now have all three large golems of the 5th edition Monster Manual: 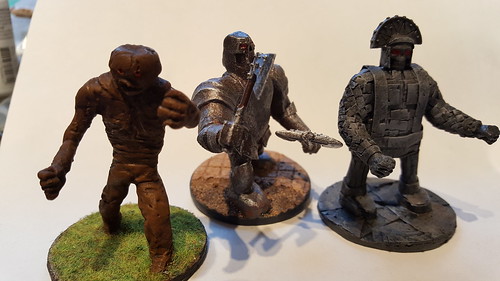 I'm also working on a flesh golem in the specified Medium size-class - but since I'm not going to try sculpting a monster made up of human parts, I've put him together from some plastic bits and prepped him for some painting. 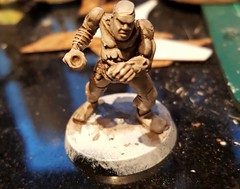 There are some zombie bits in there and the top of the head was cut of and glued back on with a slight groove to make him look properly golem-like. And his arms were also deliberately selected to look unmatched. |
|
dossen
Paint Manipulator
 
Posts: 182 
|
Post by dossen on Nov 5, 2017 21:44:15 GMT
I've gotten some colors on the flesh golem guy - I'm not quite satisfied yet (especially since I actually like how I got the Ravenloft one to look), but so far all of him is at least colored. I'm trying to convey the idea of him being made from parts by using different flesh colors but I think he might need something to unify as well. 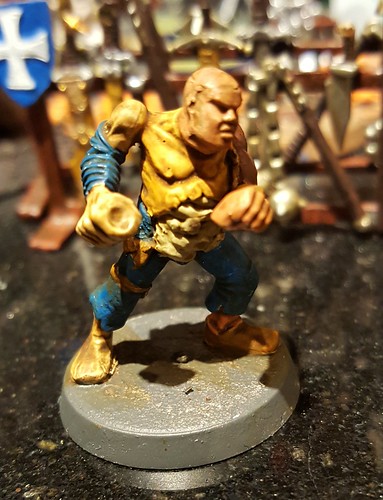 Since my Bullywug sculpt came out quite good, I'm re-evaluating if I should try for a sculpted flesh golem as well :-) Maybe something a bit big and bloated - possibly using plastic arms from my spares (still not quite ready to tackle human hands) - they'll have to be really mismatched. And maybe if I can find/modify another head, that doesn't look too bright ;-) Besides, one can never have too many golems... |
|