|
|
Post by sgtslag on Feb 2, 2024 21:33:10 GMT
Update 2.0Finally, progress. Never found my red paper, bought another pack of colored paper so I could get one red sheet from it… Painted the entire sheet with water-based Royal Walnut gloss urethane stain, and I let that dry fully. I cut the tinted red paper into two pieces slightly larger than each wing, and I attached it with White E6000 Glue. On Draco-Lich 1.0, I used spring-loaded clothes pins to hold the paper in place; I also used multiple pieces of paper, gluing them in place, one at a time, separately. This time, I chose to go for it: I coated each wing bone with White E6000 Glue; I laid the cut sheets of paper down on top of Freezer Paper (excess glue should peel off, easily); I covered each wing, on top, with another piece of Freezer Paper to guard against excess glue pushed out; then I put stacks of books on top of the covered wings, to press and hold the paper into place, while the Glue dries, overnight. This is a little risky, as I have no control over how it will flex into shape, when I remove the books, but I can always peel the urethane stain and Glue off, and do the wings again, if necessary. Tomorrow, I will trim the red paper, to proper shape; I will 'damage' the wings, mildly, to make them look aged and well worn; after that, I will cover the cut edges of the paper with more urethane stain, if necessary; I will matte clear coat it, and I will base it. Hoping to finish it tomorrow. The black horns, and wing tips, are based on official D&D models and color drawings I've seen. I am uncertain how it will look, finished. If I hate it, I will rub off the black paint, and stain it again, to leave it as worn, aged bone. Cheers!
|
|
|
|
Post by sgtslag on Feb 2, 2024 14:19:43 GMT
Welcome to the forum, kdevalle95 ! We have years of posts available for your review. This forum is still active, in spite of the fact that DM Scotty no longer posts/visits it anymore. It is not as active as it was 10+ years ago, but a few of us keep posting to keep it alive. There is too much gold in this forum to let it disappear. Feel free to post new topics, new questions, etc. We are here to learn, to share, and to help. Cheers! |
|
|
|
Post by sgtslag on Jan 25, 2024 17:43:07 GMT
I bought a set of 30 pre-owned, OOP, GW Zombies, around 25 years ago. They were hard plastic, with different arms, heads, and such, to glue onto the bodies, to make them fairly custom in their final form. Sounds great, doesn't it? Each one, out of 30 figures, can be posed differently, such that no two figures will be alike -- similar, maybe, but not the same pose, after pose, after pose...
The arms (round head for the upper Humerus Bone) glued into the shoulder's slightly concave socket. Model glue dissolved the surface plastic, which should have created a solid fusion of the plastic bits... It did not -- they broke off, easily, in spite of careful application of the proper glue type.
This was my second such set of multi-part figures. I bought some detailed, Roman Soldier skeletons in the late 90's: separate feet (legs needed to be glued to the ankles atop the feet!); leg assemblies (thankfully!) attached to the torso; arms glued at the shoulders; separate hands holding weapons (yes, you had to glue the hands to the arms, at the wrist): and heads glued to the torso's neck (these were actually strong enough not to break, easily). They were so fiddly, so delicate, that I finally threw them into the trash, as they were only suitable for displaying, without touching them, or they would break off into multiple pieces. Seriously? Gluing the entire, assembled body, onto the feet, at a thin, small, ankle joint?... Being skeletons, they did not have much surface area at the glue points, so structurally, they were quite weak, in multiple places. I believe these Roman Skeletons went OOP within a year of release, due to how delicate they were, once assembled.
These GW Zombies appear to be really nice figures. They sat in my painting queue for around 25 years. I finally began working on them, a few months ago. I did some experimenting on them, using new painting techniques (applying a green ink wash, as well as paint), to see if inks could be substituted for paint, over gray primer -- mixed results), but they were good enough for ripened, decaying Zombies, at arm's length, on the tabletop.
I was matte coating them, yesterday, and when I moved them around inside the painting box (contains the sprayed paint, forming a cloud, which provides more even coating, while containing the over-spray quite well), I managed to snap off several of their glued arms, breaking off at the shoulders... Deja' vu!
Granted, these GW Zombies date from the late 90's to the early 2000's. Things have improved, a great deal, since then, for multi-part miniatures.
For example, I have purchased several sets of North Star's hard plastic Gnoll figures, which must also be assembled: poseable arms (plenty of surface area at the shoulder joint, to create a strong bond); multiple weapon options; and, multiple heads which can be posed at different angles and facings (this was quite fun to cock some heads at an angle, and turned, slightly, creating a comical caricature of a Gnoll -- great body language!). These Gnolls were marvelous to assemble, and they have withstood the rigors of tabletop use, without issue -- no breaking, after several games with various people handling them!
If you buy multi-part miniatures, stay away from figures with small, bony arms, legs, hands, feet; avoid figures with too many parts to assemble, as they likely won't survive more than very delicate handling... I would say this is primarily an issue with Skeleton and Zombie figures. Cheers!
|
|
|
|
Post by sgtslag on Jan 18, 2024 17:15:44 GMT
Now for something completely different... On another forum, someone posted on their RPG books falling apart. I took some steps, back in 1980, to ensure my 1e AD&D books would last as long as I could make them: I covered them in Clear Contact Paper (self-adhesive, translucent vinyl shelf liner). Around 10 years ago, I added non-permanent book markers. I thought I would share these tools with you. To start off, here are some photos taken, today, of my 1980-1988 1e books, all covered with Contact Paper. Here are the 1e PHB, DMG, and MM, all purchased in 1980, all covered in Contact Paper, in 1980: front covers, back covers, inside cover showing the Contact Paper seams covered with Scotch Tape. Note that neither the Contact Paper, nor the Scotch Tape, has yellowed, after 44 years... Neither have they peeled off the inside covers. The Scotch Tape may be overkill, but I wanted to make it difficult for the vinyl to peel away from the covers. The spine joints have cracked on several of my books. This is to be expected, after years of flexing in use. Note that those spine joints which have cracked vinyl, the vinyl has not peeled away from the rest of the spines, nor from the covers themselves. Here are my 1989 purchased copies of my 2e PHB and DMG, photographed today, having received similar treatment with Contact Paper and tape: front covers, back covers, inside cover. Notice that the 2e books look worse, more worn, than the 1e books which are nine years older! My 2e PHB did suffer from a puppy chewing on the front, bottom-right corner, as I carelessly left it on the floor, where he could reach it -- that was my fault, not his. LOL! I believe that my 2e books were made with lower quality materials, but they are also much more used than my 1e books, which were supplanted by the 2e books, in 1989. My 2e books are still being used, today, so 30+ years and counting, compared to only nine years of regular use for the 1e books. ++++++++++++++++++++++++++++++++++++++++++++++++++ Another craft project for your RPG books, or any books you want/need markers for, is to use ribbon strips for page markers. I used strips of cut cloth, and those are fraying, badly, as can be glimpsed in some of the photos. I need to replace mine with ribbon strips, which won't fray as quickly, nor as easily. The ribbon strips can be glued together, at one end, into a bundle: - Cut as many strips, of whatever colors desired, making them all the same length;
- Neatly stack the ends (one end only) together, on top of a sheet of wax paper;
- Apply PVA Glue to the ends, wetting all of the strip ends, together in a bundle;
- Place a second sheet of wax paper over the glued ends, setting a book on top of the wax paper (which will prevent the moisture from reaching the book, but use a book/flat weight you don't care about, just in case...), to press the whole flat, and let it dry overnight.
Once dried, you can either insert the glued ends in between the cover spine and the bound pages, or you can insert it between front, or back, pages, halfway down the page, to anchor it inside the books.
Alternatively, you can glue the ribbon ends to a small piece of cardboard, or matte medium chipboard. Once this is dry (press it between wax paper sheets, as well, to keep it as flat as possible), the cardboard tab can be inserted into the spine of the book, or between pages. DO NOT GLUE THE TAB INSIDE THE BOOK SPINE! If the ribbons wear out with use, are damaged in some way, they can be replaced. Cheers!
|
|
|
|
Post by sgtslag on Jan 17, 2024 14:32:24 GMT
I LOVE the vibrant color schemes! They all work, so well together. I also love the cohesiveness of the whole: the color scheme, the sculpting style, the whimsy, and the fun. Thank you, for sharing your art with us. Cheers!
|
|
|
|
Post by sgtslag on Jan 16, 2024 18:00:31 GMT
I also found this video, on YouTube, which discusses using regular paper, and PVA Glue, to make curved, dynamic flags. Note that you will need to use laser/toner printed flags, as ink jet flags would run when PVA Glue is applied to them...
In my example of my colored flags photo, above, I used peel-n-stick label paper. Note that this method can yield some curvature, it is far more limited than what you can achieve as shown in the video. Note, also, that laser/toner may flak off when curving the paper flag around the flag pole, as shown in the video. Still, I need to try this technique, on my next flag. Cheers!
|
|
|
|
Post by sgtslag on Jan 15, 2024 19:21:23 GMT
Note that these flags/banners can be used for more than the battlefield. If you need a banner/flag for a building exterior, these will work for that purpose, as well. I've made my past banners, out of paper. Recently, I found this on YouTube. The video demonstrates how to cut an aluminum soda can, with scissors, to make wavy banners. He also discusses how to paint them. Me, I plan on printing my own designs on full sheet label paper, applying that to the aluminum can, prior to making the final cuts to shape it. I use the paper banners to help identify different units of figures which are otherwise the same figures! I use colored plastic tubules, glued to their bases, as well, using the same colors as the Unit Flags/Banners. It really helps differentiate the figures by Units. Note in this example, the figures on the right side, are all Hill Giants (blue and red tubules), but the colored tubules show they are different Units, standing next to one another. The paper banners/flags work well enough (not every Unit has a flag/banner, hence the tubules on the rear corner of the bases), but I think the aluminum can method will be even better. Note that water-slide transfers can be applied to these aluminum flag banners, as well as print, peel-n-stick labels, along with just painting your symbols onto them. It will certainly produce more durable, more animated, dynamic flags and banners, than just paper. Cheers! |
|
|
|
Post by sgtslag on Jan 10, 2024 15:07:16 GMT
I need to locate Recur's website, to see what other Dragons they might have for gamers.
Like you said in my Schleich post, these toys do tend to be large, but if you play 2e AD&D... These are still quite small! LOL! Huge, ancient Wyrms, in the 2e Monstrous Manual, are epically sized, being 200-feet plus, in length... If I were to use these toys as Ancient Wyrms, per 2e descriptions, I would need to use 10-12mm tall Humans!
That would be fun to reveal on the tabletop with my players some day. They've had dealings with an Ancient Gold Wyrm, in the past. It would be a hoot to see their jaws fall open when I put out properly scaled Human figures for their PC's, next to the Ancient Gold Wyrm, in all his glorious, gigantic size and mass. LOL! Cheers!
|
|
|
|
Post by sgtslag on Jan 9, 2024 4:18:51 GMT
OK, the money shot of the whole figure, with dimensions, first...  Check out the head spike. Personally, I am not a huge fan of the D&D Blue Dragon's head spike, but... This toy is about as close as an un-official Blue Dragon figure can get, without infringing upon IP rights.  Now, about that paint job... This could be improved upon quite easily, with a darker blue paint, or wash, over the factory paint -- maybe a dark wash to just darken the body scales rather than a repaint? I'd redo the belly scales with a medium tan; I think the factory wing skin would tone nicely with a dark brown wash. I would also finish the painting with a dark, overall wash: Royal Walnut colored Minwax, water-based formula, followed by a matte clear coat. This would not require a lot of work to turn it into a very nice Dragon for the tabletop, whether for mass battles, or for tasty PC edibles served in its lair for its neighbors come to visit for an intimate luncheon get-together: " Human, Elf, Dwarf, Gnome, and some scrumptious Halfling Hors-d'oeuvres, my friends?" LOL! I think it would be an electri-frying experience: the sights, the tastes, the aromas of various burnt fleshes, leathers, and vaporized metals in the air!... "Mmmm, delicious!"OK, the vital stats: Purchase Link - Amazon.com; Sale Price: $24.99. Cheers! PS: This one is gnawing at me. I have a couple of Blue Dragons in my collection, but this one has the tell-tale head spike. I am truly a sucker for D&D-based toys... S-a-l-u-t-e! |
|
|
|
Post by sgtslag on Jan 8, 2024 20:06:30 GMT
Those are really cool, thanks for posting them! I totally agree! What thrills me the most about these toys, is that most of them come out of the package, fully/appropriately painted, ready for the tabletop, at toy prices, not collector/gamer prices. I love that! The White Dragon looks fierce, even though players may know that they are the weakest of the true Dragons, this toy will give them pause. when they see it on the tabletop, in front of their PC miniatures... Compare these toy Dragon prices to Reaper Dragon model prices, along with WotC D&D Dragon model prices... These are a steal of a deal. Even if you choose/need to re-paint these toys to use them in your games, they are still a great price for what you get. I've converted several toys and a couple of Halloween "decorations" to be used as FRPG and fantasy tabletop wargames figures, for a small fraction of what fantasy models would have cost for the same purposes, assuming I could find proper gaming miniatures for what I wanted (I tried, they often don't exist for what I need). When I see toys in the stores, I always look at their sculpts, first. They can always be repainted, if necessary. Consider this toy "Swamp Dragon," in its factory paint: 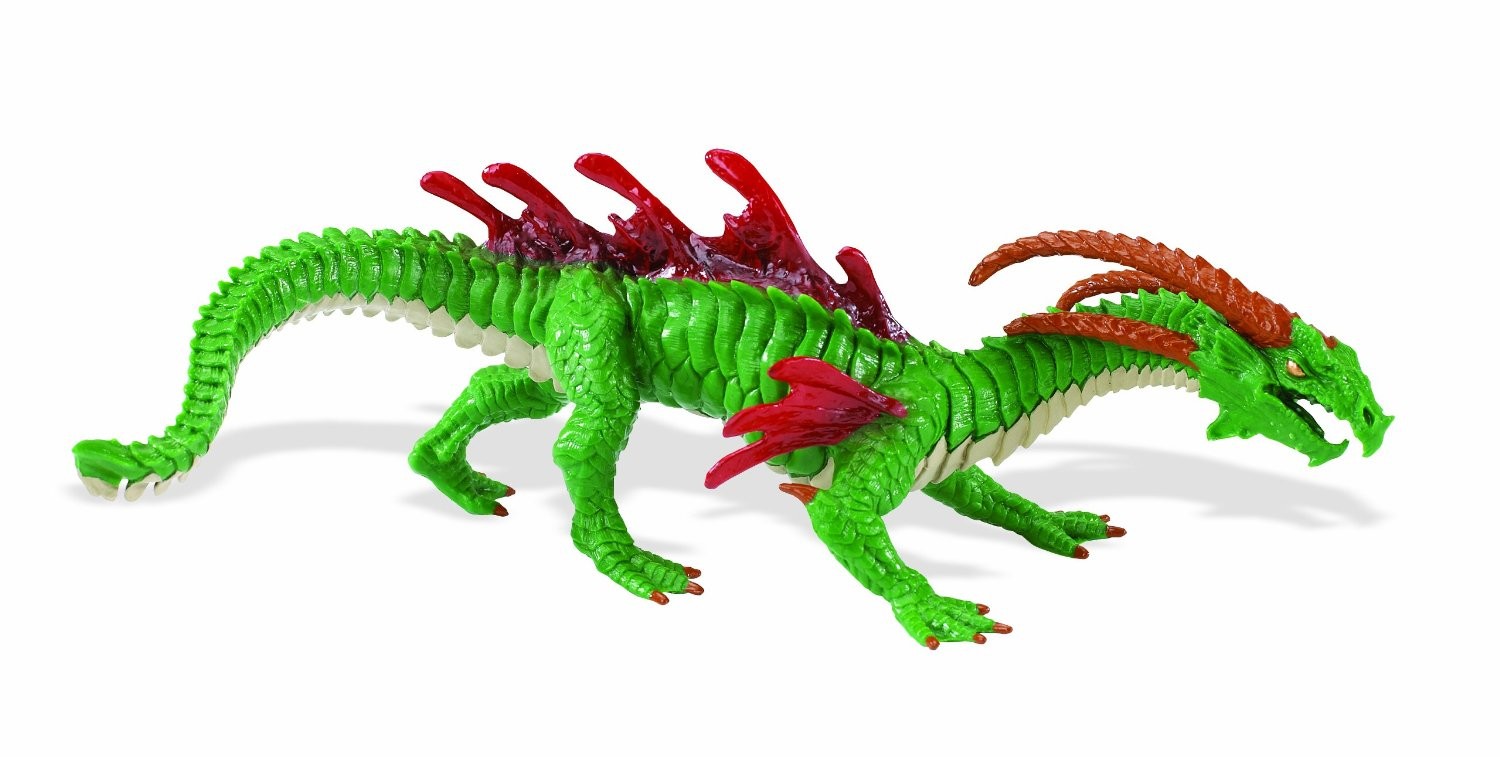 And here it is re-painted, as an AD&D Copper Dragon, conversing with his 28mm Dwarf friend: 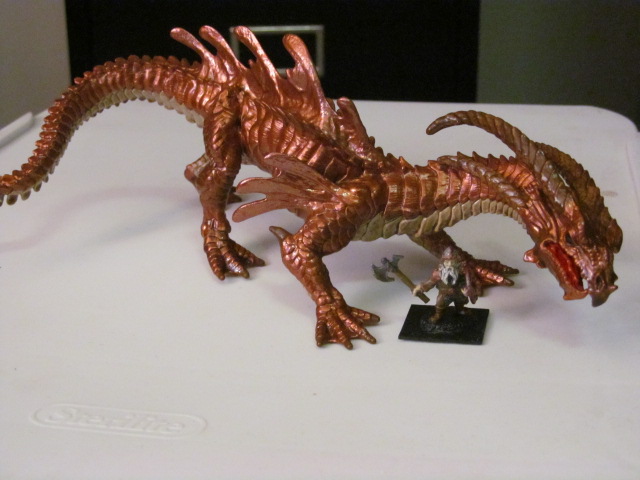 Not only is this a nice Dragon figure, but it was a blast to re-paint it. The results came out far superior to what I expected. It was a great pleasure to work on it, to see it turning into something I could really enjoy! The factory paint job was very ugly, but the sculpt was superb for an AD&D Copper Dragon, IMO... Here is a full profile view, as he shares a laugh with two 28mm Humans. Cheers! |
|
|
|
Post by sgtslag on Jan 3, 2024 20:17:52 GMT
Schleich makes some really interesting toy figures suitable for D&D gaming. Here is a list of some of their offerings (the most useable for D&D gaming, IMO): Home site listing Dragons and Monsters. Be sure to shop around, as prices vary considerably. Gold Dragon [Lunar New Year Dragon], $39.99: Use with factory paint, or re-paint, as desired. The only thing I might try to improve on the factory paint, would be a black wash, to add some shadow to the recesses and scales, but this might be more trouble than it is worth! Dimensions: 11.2 x 4.5 x 4.7 inches! ( Chinese knock-off available on Amazon for $17.99, same dimensions!)  White Dragon [Ice Dragon] White Dragon [Ice Dragon], $24.99: Perfect, IMO, as is, from the factory. Honestly, this is one of the very best that I have ever seen. Wings are posable, rotatable. Check out the size of this beast: 6.1 x 7.9 x 8.1 inches. 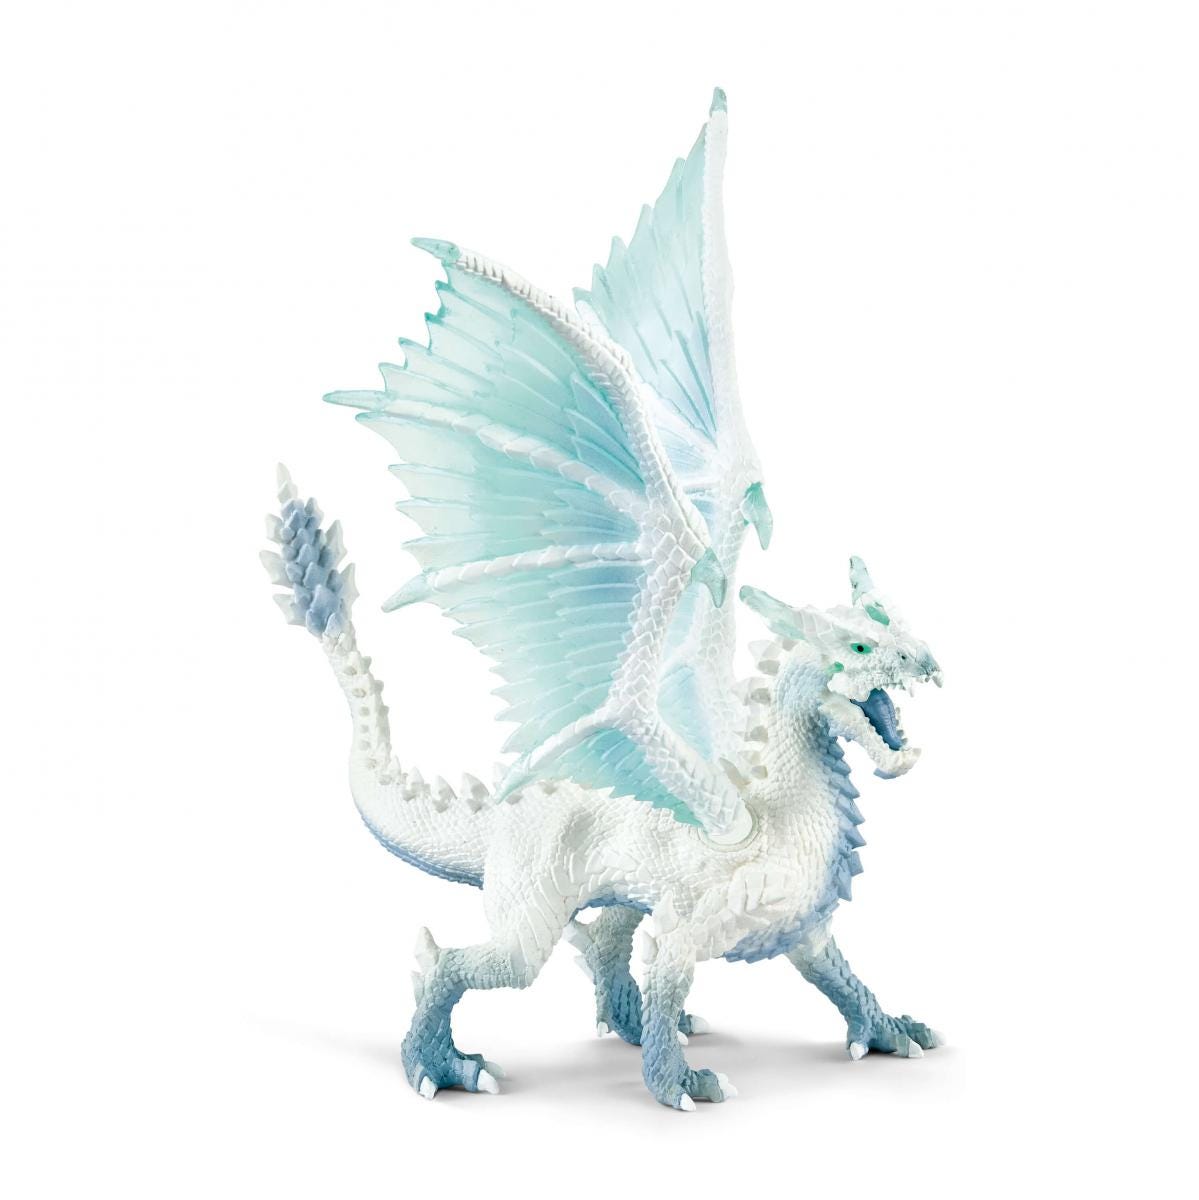 Red Dragon [Lava Dragon] Red Dragon [Lava Dragon], $24.99: Perfect, with factory paint. Wings are posable, rotatable. Dimensions: 7.9 x 5.5 x 5.7 inches. 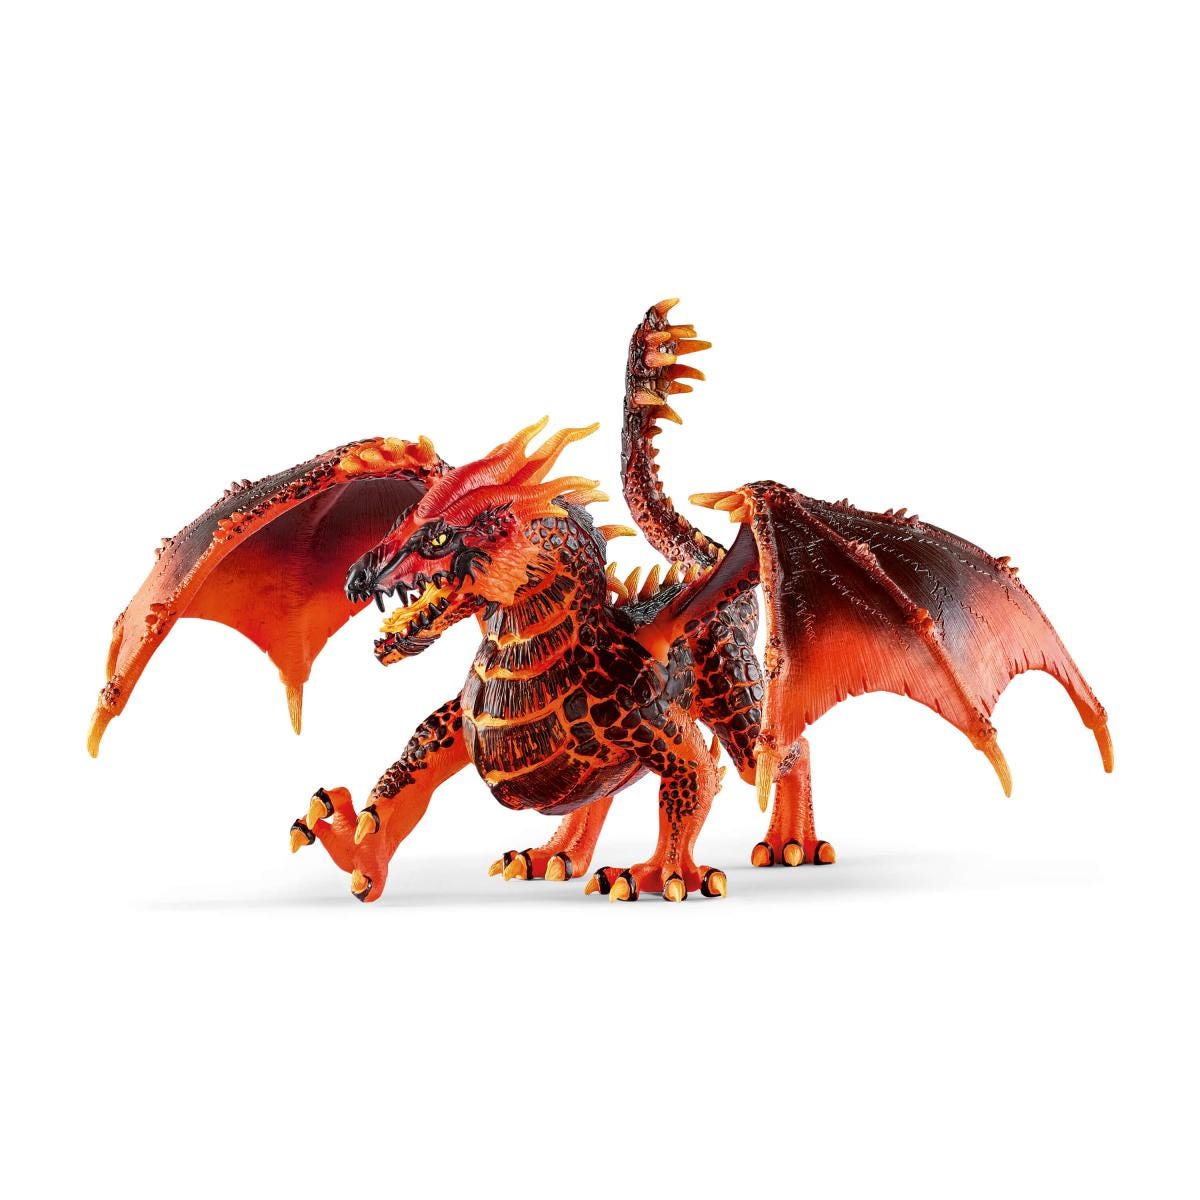 Shadow Dragon Shadow Dragon, $24.99: Perfect for an AD&D Shadow Dragon, but it could easily be re-painted for other types of D&D Dragons: Blue or Green; Crystal Dragons, or perhaps a Brown/Steel/etc? Wings are posable, rotatable. Dimensions: 8.5 x 7.4 x 5.2 inches. 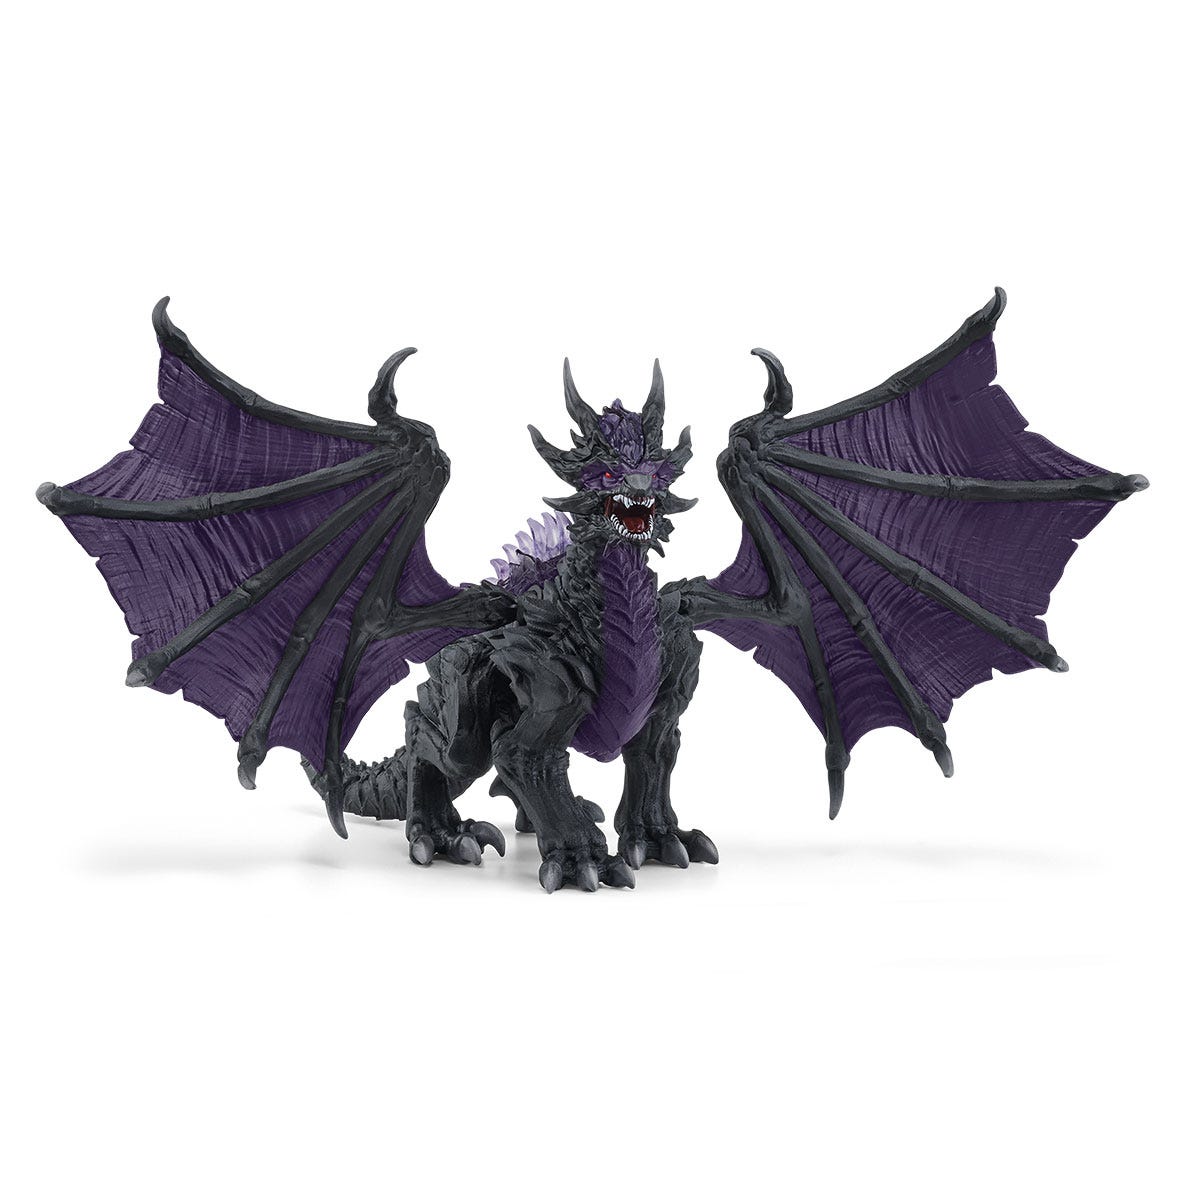 Ice Spider Ice Spider, $10.99: This could be loads of fun to insert into G2's ice caverns, to mix things up a bit... Make up whatever stats you want, but be sure to make the HD compatible with its gargantuan size... Dimensions: 6.1 x 3.2 x 7.1 inches. 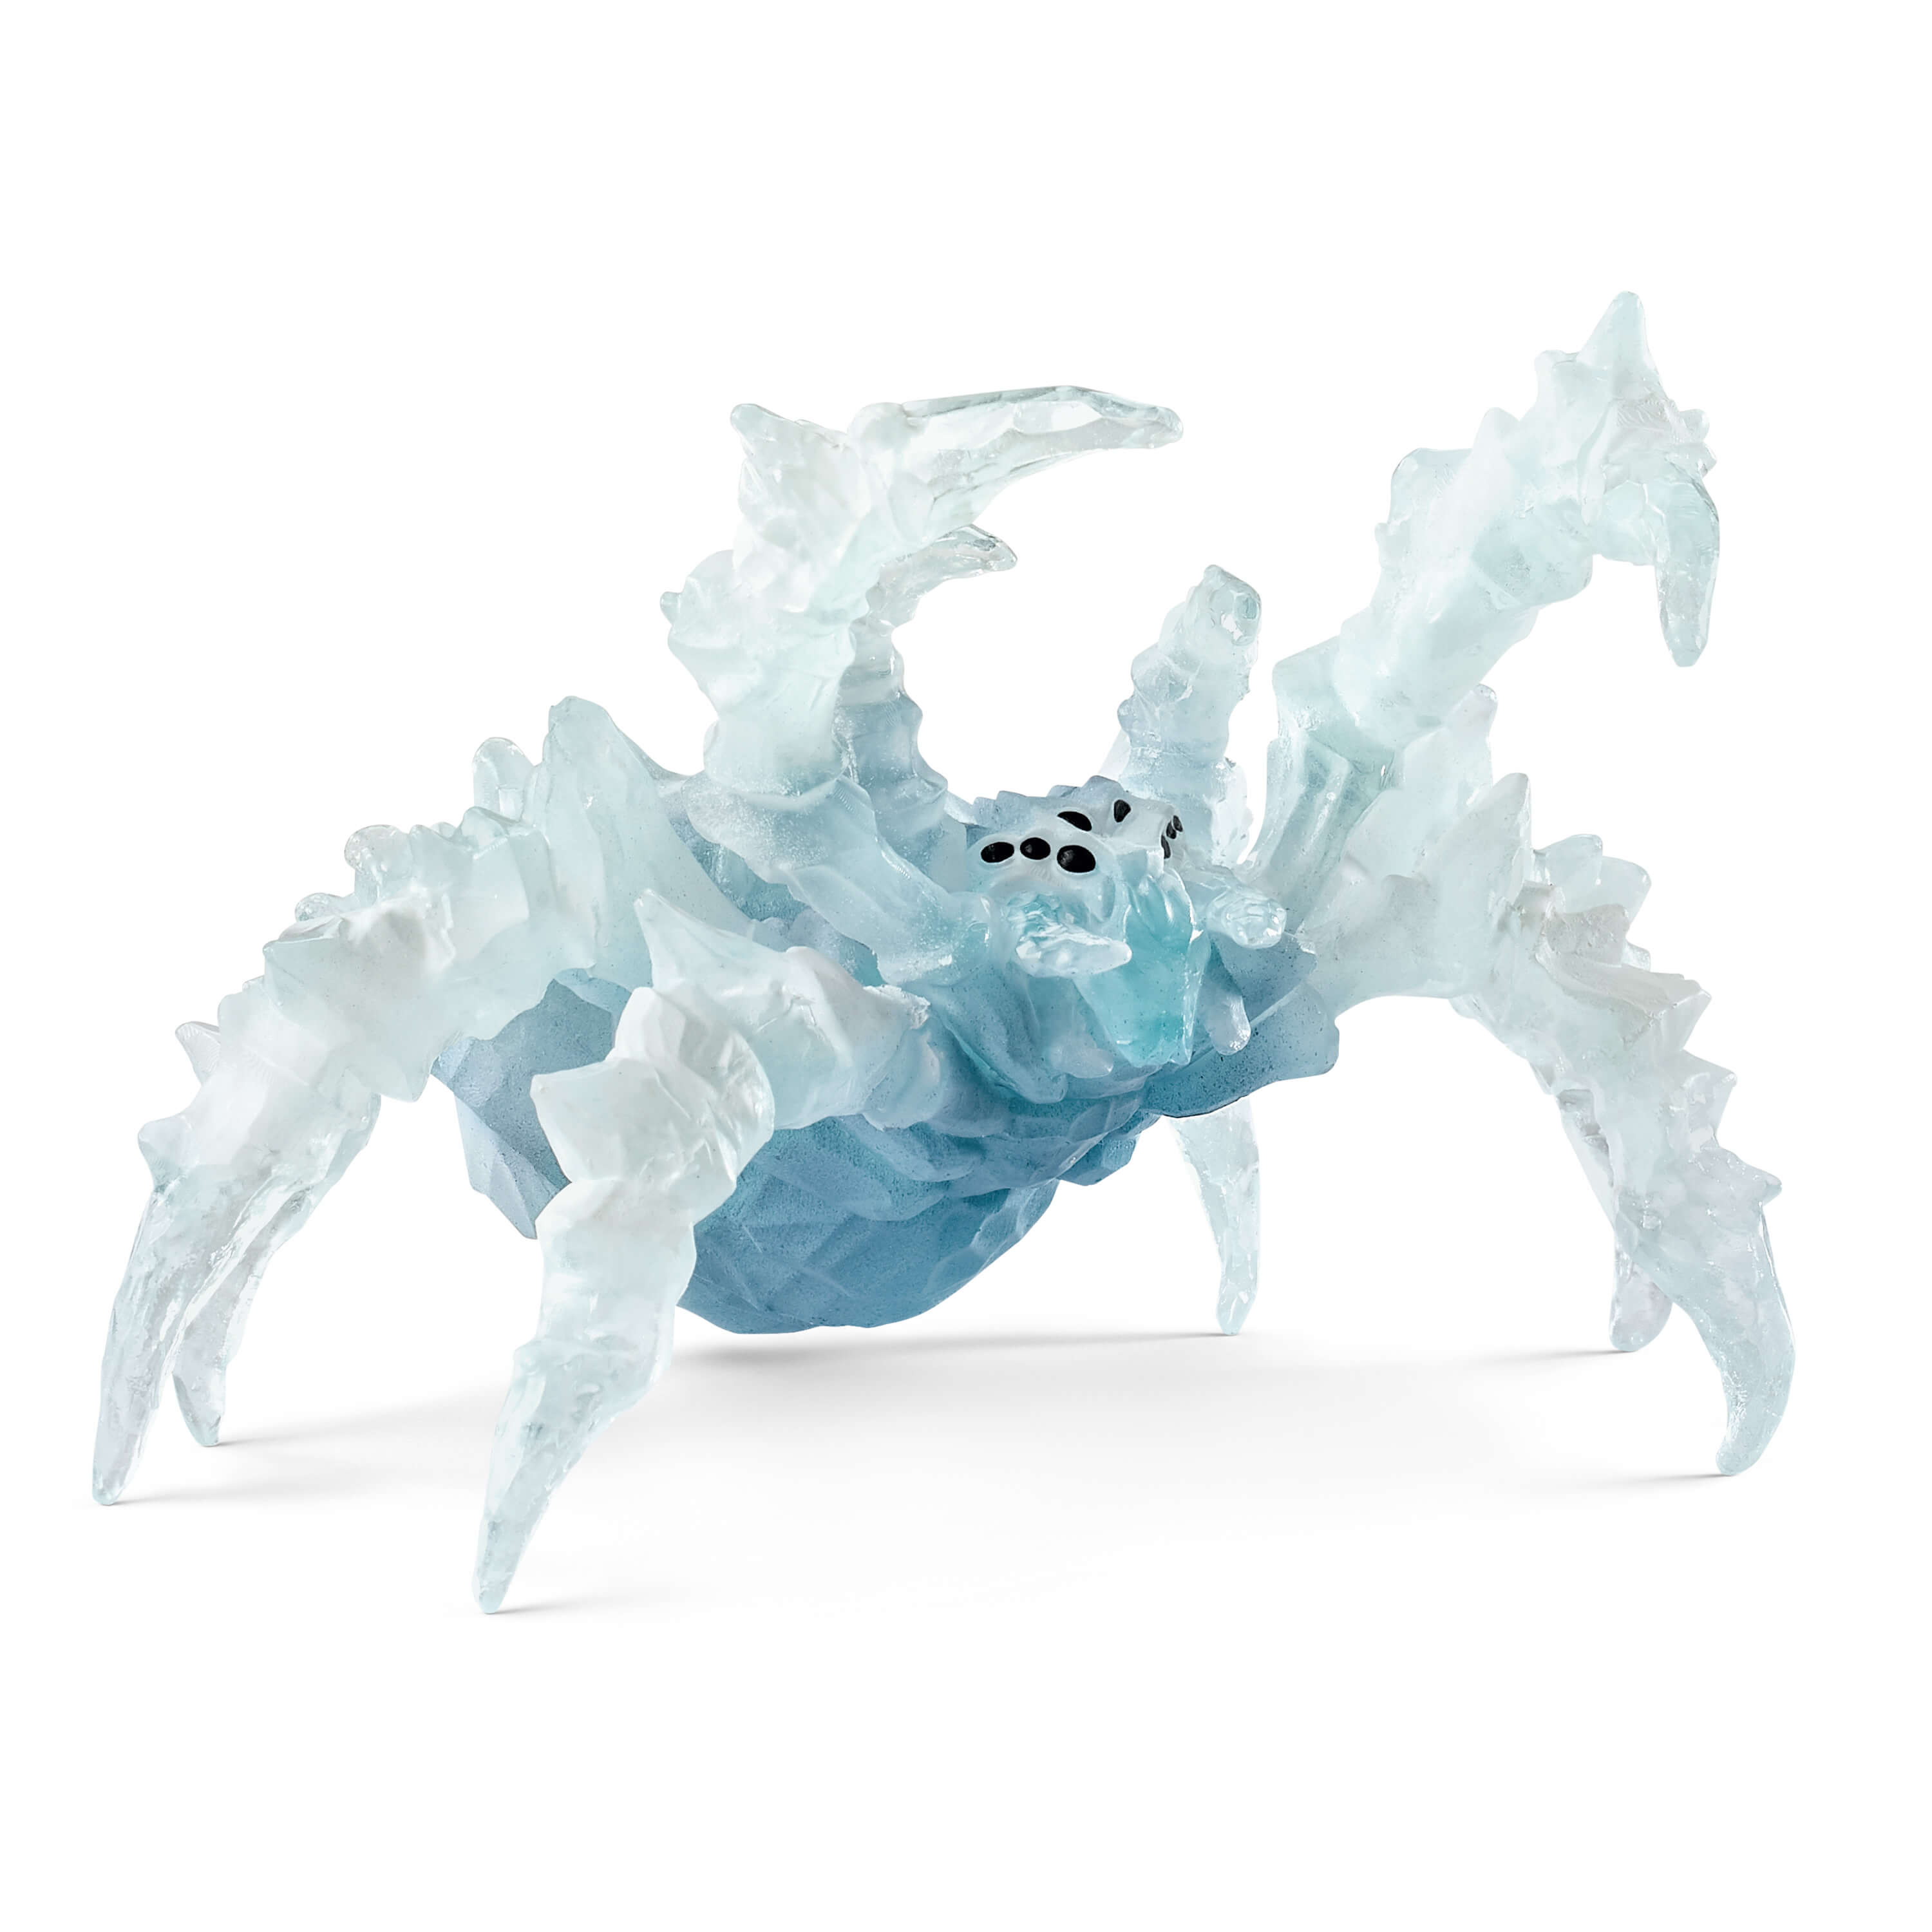 24 HD Earth Elemental [Shadow Stone Monster] 24 HD Earth Elemental [Shadow Stone Monster], $24.99: When you really need a gargantuan Earth Elemental to challenge those haughty, high-level PC's... Paint can be added to make it into whatever you prefer. Dimensions: 9.0 x 3.2 x 4.7 inches. 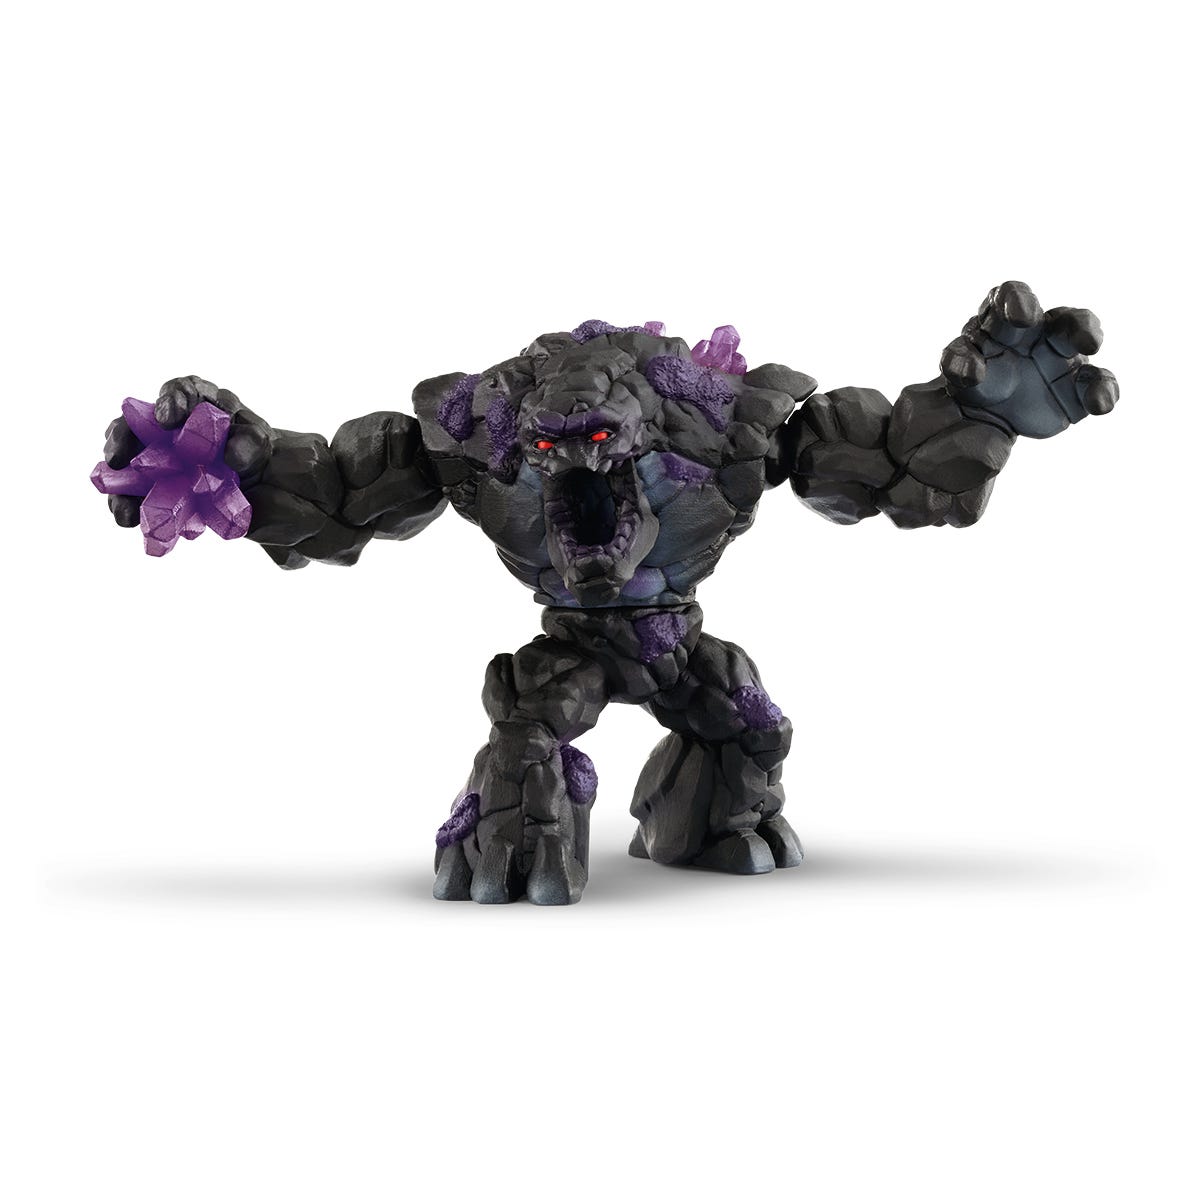 24 HD Fire Elemental/Lava Elemental [Lava Smasher] 24 HD Fire Elemental/Lava Elemental [Lava Smasher], $24.99: How about a vacation in the warm, sulfurous, City of Brass? Be sure to tip the Bell Boy, generously, as he appears to be having a bad day, and he is about to transport your luggage... Dimensions: 7.1 x 3.9 x 5.4 inches. 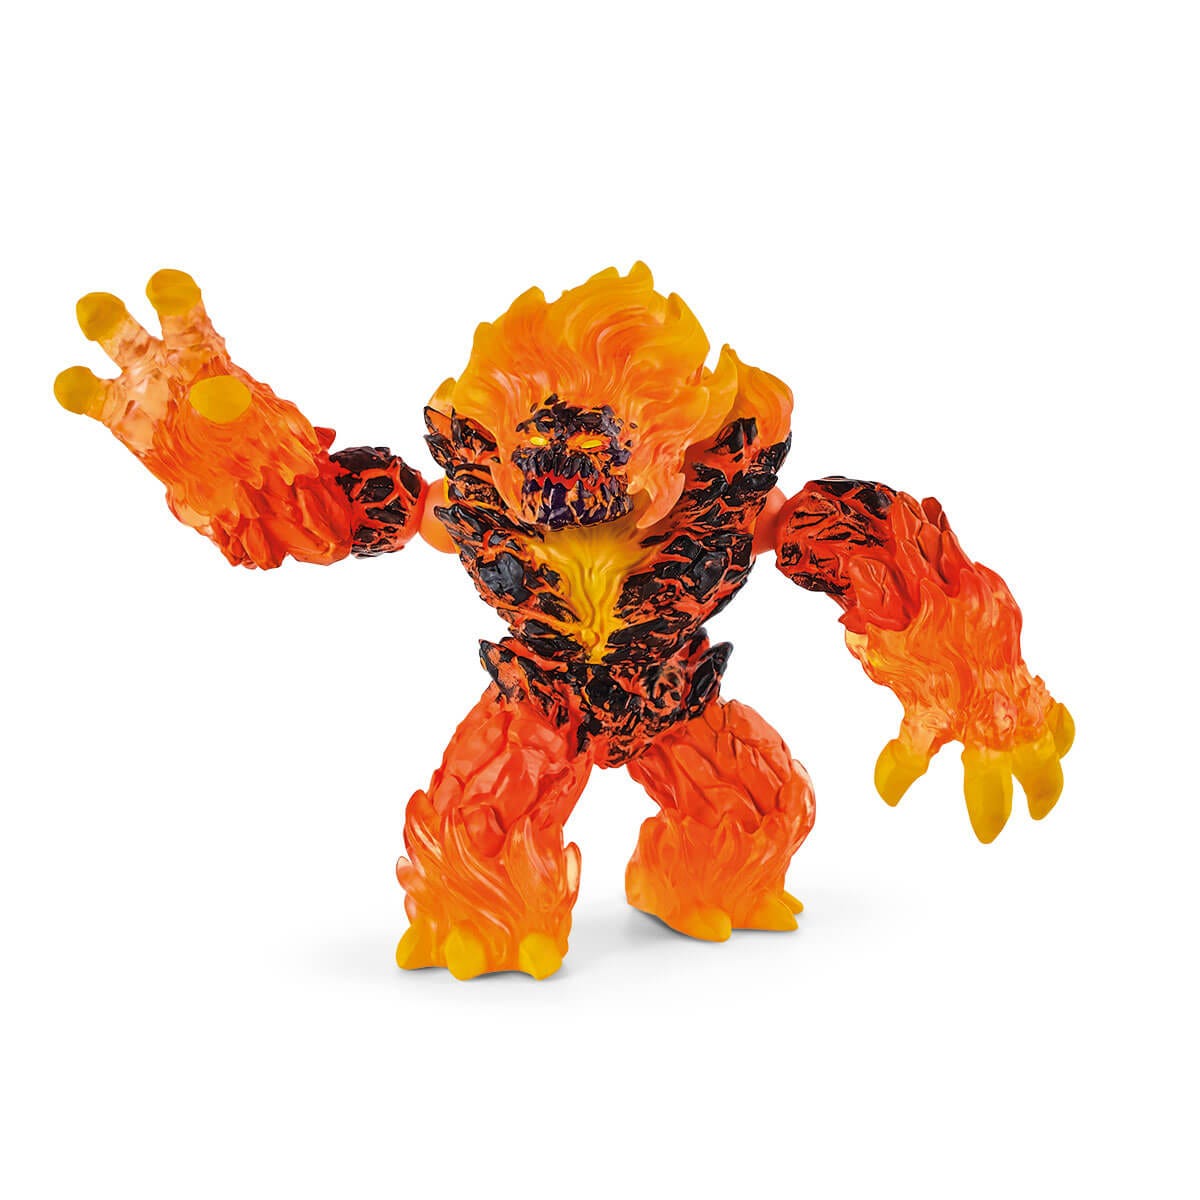 24 HD Lava Elemental [Lava golem with weapon] 24 HD Lava Elemental [Lava golem with weapon], $19.99: A friendly, welcoming Concierge at the gates of the City of Brass. Imagine your face, and your metal weapons and armor, melting when he says, " W-E-L-C-O-M-E!..."Dimensions: 6.1 x 4.3 x 7.1 inches. 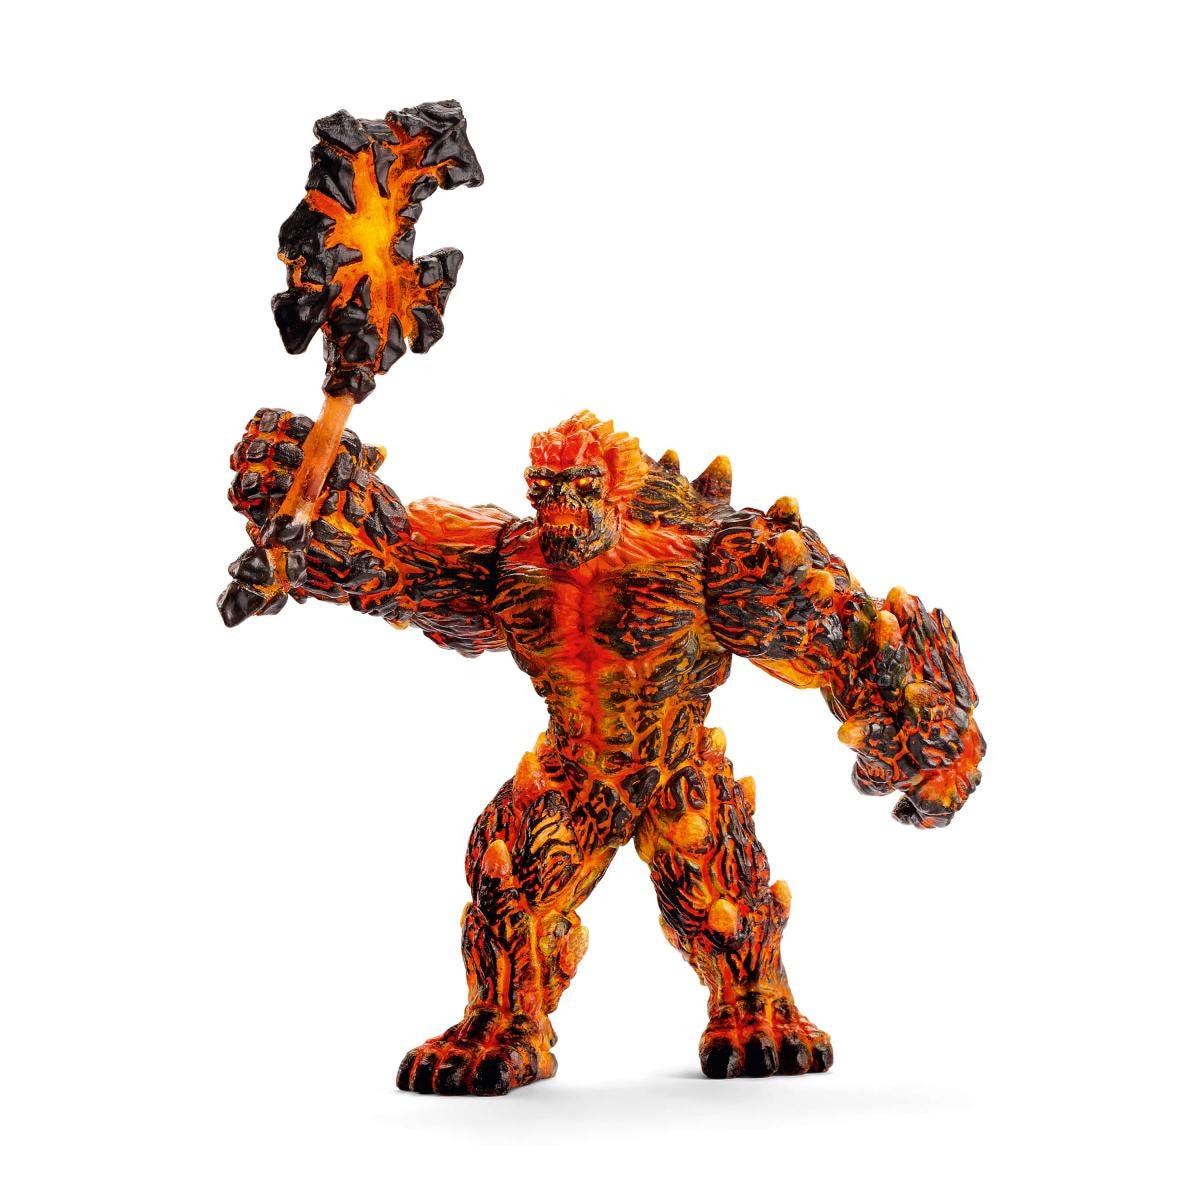 If interested in any of these toys, I suggest moving quickly. Schleich does vary their fantasy offerings, over time, removing products from the line-up. Several of their past products are now OOP; and on the re-sale market, their prices can be harshly inflated. Cheers! |
|
|
|
Post by sgtslag on Dec 18, 2023 17:37:44 GMT
I made a water + black craft paint wash, for the first 20+ figures I painted. Then I discovered The Dip Technique, and later on, Magic Wash. I began using both techniques immediately, and I still use them today, 30+ years later!
I paint armies, 20-200+ figures per army. Both techniques speed my painting, exponentially! I've painted 1,000+ figures since the 90's. Couldn't have done it without these two techniques. Cheers!
|
|
|
|
Post by sgtslag on Dec 15, 2023 2:57:40 GMT
Update: I painted the Flame Blade spell's sword of fire, on the aforementioned Cleric figure. I laid down a red paint layer, along the main blade portion. While that was fresh and still wet, I laid down some medium to light Orange paint, wet blending it with the Red. I quickly applied some Sunflower Yellow further out on the molded flames, wet blending all three colors. It turned out rather well, IMO. Photo 1, front view. Photo 2, rear view. Photo 3, 3/4 view. I like the results. It is not your typical, off the shelf, flame painting scheme. Red does not jump out as the go-to primary heat source color for flames. By following the book's basic premise for its appearance, I came up with something that is unique, different, and easy to accept as a magical fiery weapon spell That's what i think. What do you think? Cheers!
|
|
|
|
Post by sgtslag on Dec 12, 2023 6:07:37 GMT
Disclaimer: I found this on YouTube, in a car model-making video. I did not discover this on my own... The secret ingredient of the infamous, Magic Wash formula, was Future/Pledge Floor Shine, until they stopped making it, around 2021? I learned of a replacement for it: Quick Shine Floor Polish, available at Wal-Mart stores, and online. Cost?$6.87, for a 27 ounce bottle, or 25.4 ¢/fluid ounce, in US money. Is it the same product? Will it work the same? Can I add any acrylic polymer paint to it, to make custom colored washes for my miniatures?Take a look at the ingredient list, from Wal-Mart's site: The Polymer indicates it is acrylic, like paint; the Surfactant is the chemical which breaks surface tension, allowing it to flow into nooks, crannies, and recesses, through capillary action, drawing the diluted pigment particulates into the folds of the models. This is precisely what Future/Pledge Floor Shine did. It is the same basic formula, it performs the same way. Hallelujah, Baby! I am a dyed-in-the-wool Dip'er, and I love the Magic Wash as my go-to when I need a non-brown/black. custom colored wash, like blue, or white, on an otherwise all black painted figure (see below). I used a Magic Wash -- Blue, on my Anubis army figures, which started out all black; the blue paint in the recesses brings out the details in their sculpting. Magic Wash is an incredibly useful tool in my painting kit techniques. My last bottle of Pledge Floor Shine is 10+ years old, and it is slowly drying out, thickening, inside the bottle. Not sure I can add water to it, to revive it. Now I don't have to experiment, I have found a replacement product -- inexpensive, and essentially the same thing! Cheers!
|
|
|
|
Post by sgtslag on Dec 11, 2023 17:23:22 GMT
Surfing through Amazon.com, I found a sweet deal on a new-to-me, Rotary Tool, with the flex shaft attachment included with a host of attachments, and a nice carrying case, for $40 (10,000-35,000 RPM, 180 Watts). I watched a review video on Amazon, so I know that it is loud. Several years ago, my trusty Ryobi rotary tool finally died, after 10+ years. I could not find a replacement that I liked, so I went to Harbor Freight, and I took a chance on their Chicago Electric Rotary Tool, currently $25 (8,000-35,000 RPM, 160 Watts). The HF tool has no flex shaft... It's nice, it does the job, and it, too, is very loud. The Amazon tool comes with a lot of extra's which make it a pretty sweet deal. I wish I had a flex-shaft attachment. I got accessories with my HF unit, but not as many, no flex-shaft, no carrying case for everything. Sorry to shill a product, but this is a sweet deal, IMO. My HF unit is now around 5+ years old, and it is going strong (and loud!). Note that both of these units are 100% compatible with Dremel attachments! My moto-tool is one of my favorite tools for crafting, but mine gets a lot of use outside of crafting, in my garage, and around my house, as well. It is an indispensable tool. I am sorely tempted to order this Amazon unit just for the flex-shaft, the carrying case, and all of the included tool attachments! All of it would be incredibly useful. Dremel is good, but you are paying a premium for their brand name, IMO. Cheers! |
|
|
|
Post by sgtslag on Nov 23, 2023 4:10:52 GMT
Thanks for the advice on painting this foam. It looks much bulkier to store than double-layer cardboard, though. You are correct, it is bulky to store. It is one out of many different options available. Every option has its place. I use different options as the need arises. Cheers! |
|
|
|
Post by sgtslag on Nov 19, 2023 0:02:58 GMT
Nice mini's, nice painting. Very fast work! Cheers!
|
|
|
|
Post by sgtslag on Nov 13, 2023 22:06:22 GMT
Welcome to the site.
As far as I remember, there were a couple of other companies offering similar molds, around 10 years ago. Not familiar with what is available today. Have you tried your preferred Search Engine?
Alternatively, there likely are 3D printed STL files available. FDM printers will cost less, and for terrain making, that is important. That would be another hobby, however.
Thirdly, there might be some 2D files available on DriveThruRPG which might suit your needs. You can build them up to 2.5D, by adding short walls (won't block line of sight, easier to use with miniatures as they won't 'hit' the walls with their arms).
Fourthly, you can build what you need, either from scratch, or using wooden, or plastic, blocks.
Fifthly, there is the option of vacuum forming terrain pieces: you just need a handful of masters, to stamp out as many pieces as you need. Cheers!
|
|
|
|
Post by sgtslag on Nov 8, 2023 15:04:18 GMT
Here is a new video, not by DM Scotty, demonstrating a new version of 2.5D terrain making: The video uses EPA Foam, such as what you can buy, in the USA, at Harbor Freight, for a reasonable (IMO) price: $8.99, without discount coupons, for a pack of four. I've used these in the past, for a ground mat. I cut a 1-inch grid pattern into mine, then I inserted vertical card wall sections, to make up the Steading of the Hill Giants (3-in-1 module -- it's cheaper than buying them separately), in full, 2.5D glory. It was massively huge, took a couple of hours to put together, but it was epic... I am preparing to use more of these mat sections for The Glacial Rift of the Frost Giant Jarl, painted white, with blue sponge patterns, to represent the glacier; I'll stack modular ice cavern wall sections atop the mats, to make all of the chambers for the PC's to die -- I mean, adventure in. Yeah, yeah, that's the ticket, to "adventure in..." This video is a new take on using EPA Foam mats. I have my 2D PDF dungeon printouts, attached to the glue side of peel-n-stick vinyl floor tiles, so I won't be investing in this approach, as I already have made a major investment in that. Thought I would share it here, though. It is a fantastic demonstration of DM Scotty's 2.5D approach. Keep watching to the end of the video. He shares that his clip-on doors, which DM Scotty and Wyloch also demonstrated in their videos, actually was in use in the early 1980's! Great minds think alike! EPA Foam sheets are a superb base to build terrain upon, with, or without, a grid. I've painted mine for dungeons, with the idea of using vertical, 2D cardboard wall sections, to make up dungeons, as well. My original plan was to use this approach to make up a complete scaled model of the Halls of the Fire Giant King (Snurre), for G3. A friend offered me the use of his Dwarven Forge terrain, so my 2.5D dungeons were tabled: it would take me 50+ hours to make enough wall sections, then it would take hours to put it all together, according to the module's map... It is an incredible amount of work, and time. Using my friend's DF terrain, will save me 50+ hours, and it will speed up the setup process, as well. Painting EPA Foam:The YouTuber recommends using textured spray paint, which works very well on smaller pieces of foam. I am concerned that it might not survive flexing on a full sheet of foam, over time. This stuff goes on a bit thick. I have not tested it, this is just my concern -- it might stick just fine, and flex just fine. You will need to experiment with it, if you choose to use this type of paint. I used DM Scotty's sponge painting, wet blending techniques, on my mats. I used inexpensive craft paints, without any primer, or surface preparation. That was 8+ years ago, and they look the same, today, without any peeling or flaking off. I used full sized, uncut pieces of foam, and they have been flexed quite a bit, over the years. They have also been tossed around in storage, without any effect on the craft paints applied. The dark gray color of the foam, is a wonderful base to work up from, for most terrain colors: brown, gray, green, yellow, etc. For ice/snow, you can just apply some titanium white craft paint (opaque, offers superb coverage over the dark foam) -- brush, airbrush, sponge, etc. I do not recommend Latex paint, or house paint emulsions. I used Latex white ceiling paint on a knock-off foam brand, and it began peeling off, after a year. The acrylic craft paints have never peeled, after 8+ years, and counting. Cheers! |
|
|
|
Post by sgtslag on Nov 5, 2023 2:17:56 GMT
There are specific qualities listed in the 1e AD&D Monster Manual and the 1e Player's Handbook, that can make a real difference.
I went on a journey pursuing Gary's vision, getting figures in proper proportions to one another, so I could see just how big/small they are, compared to Humans -- I learned a lot from this exercise! I have pursued his published color schemes for monsters as well. What I have learned is that Gary was truly talented in his visions.
I have a modern Priest figure, holding a flaming sword -- created by the spell, Flame Blade. I looked in the spell description and I learned it creates, "a brilliant red flame!" I now have a color scheme to apply to it, which is more particular than just another, standard colors, flaming sword. I plan on wet blending red, in the center, with orange and yellow moving outward. It will not be 'just another flaming sword.' I will use a medium, bright red, in the center, as per the spell's description. This might not be from Gary, but it is in the same spirit as Gary's early design elements: not just flames, but flames of a particular color/temperature/scheme.
The Mage spell, Wall of Fire, is colored differently from the Priest version, by the same name! This is something which is typically ignored, and that is a shame. The color scheme imparts information to the Players, if they know the color schemes...
There are a few videos on YouTube on how to make Wall of Fire spell markers. Each video I have watched, completely ignored the colors mentioned in the PHB!
Nearly everyone paints their Goblins, and their Orcs... Green! Re-read Gary's descriptions of these creatures. I painted my Goblins brick red, with the idea of painting other groups in yellow and orange, according to what Gary listed. I loved the red, and I wanted a horde of one tribe. I am still considering painting some of my 220+ Goblin figures yellow and orange, to create more defined Units, made up of different tribes, for my 2e BattleSystem games...
How about you? Do you investigate the details, or do you go with the pack? If you look into what is actually published, you might find some tweaks that can really make them just a little different than what you might otherwise assume, and expect. For me, this is quite fun, quite intriguing, and a joy to see the game designer's visions in 3D living colors. Cheers!
|
|


 Cheers!
 Cheers!