


Classic D&D Monster - The Roper Tutorial (Image Heavy)
Jun 21, 2014 1:34:50 GMT
DMScotty, tauster, and 8 more like this
Post by Jason on Jun 21, 2014 1:34:50 GMT
(Edit: I have built another one since this initial build, and I am adding some adjustments to the process.)
I am not sure if anyone has tackled this monster, but I am giving it a shot.
The Roper
Looked up and found that the look of the has morphed over the years. The mouth and look of the monster varies in appearance. This makes sense, because fluff states that when it moves into a new area. The body and color shift to resemble its surroundings. I based this design on the stats given in 3.5 edition of D&D. It stands about 10 feet in height, in game terms.
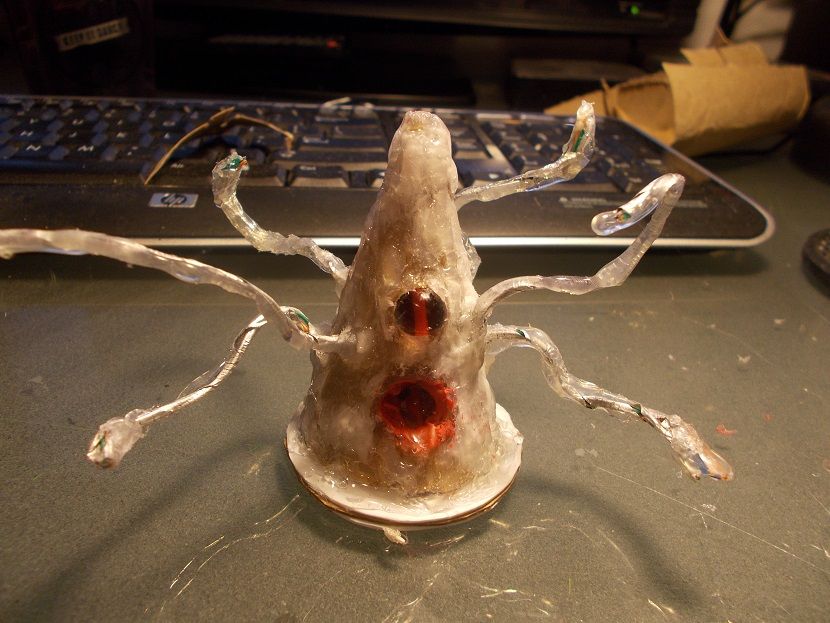
1. I started with a toilet paper roll and cut it. I rolled it into a cone, and hot glued it together. I drew the Eyes and Mouth on the cone. I cut the hole for the eye.
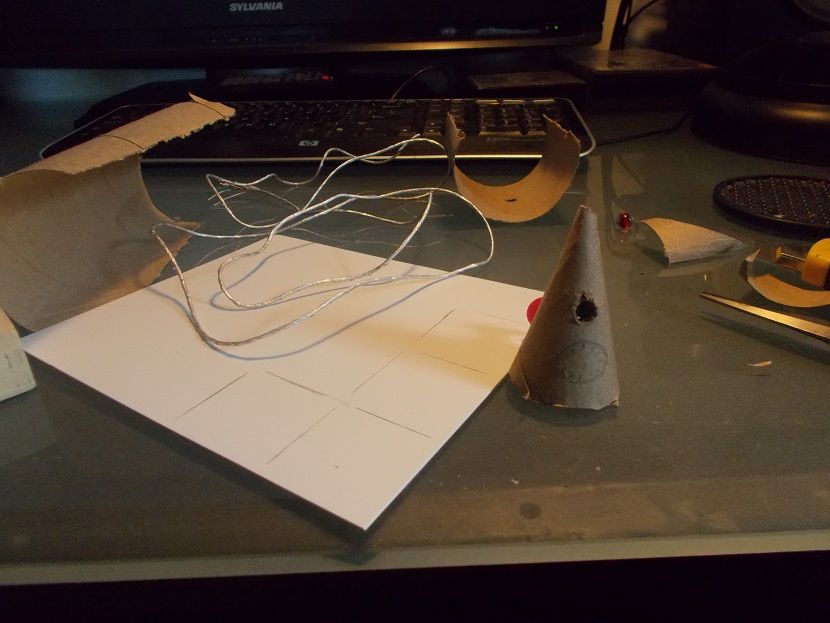
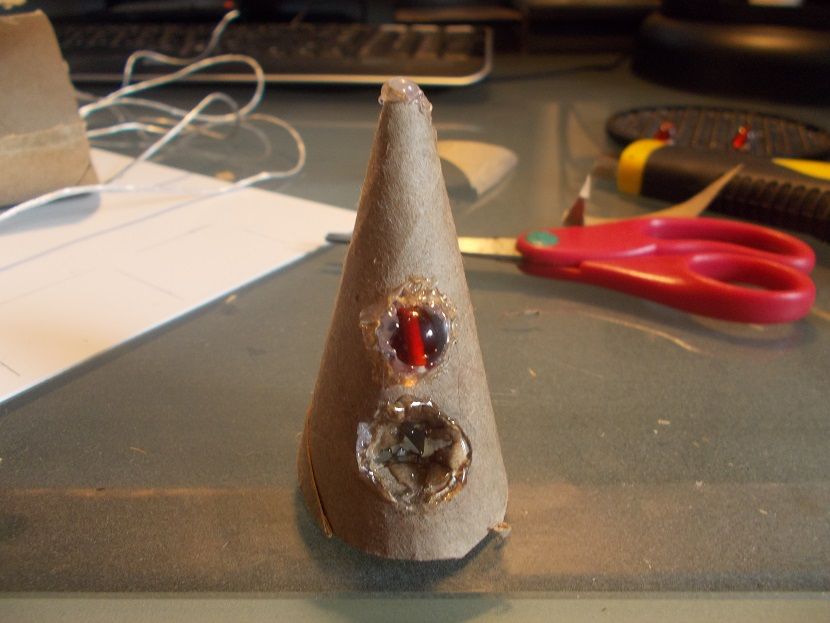
2. I cut a plus sign in the mouth area, and folded the cardboard in. I did this to help support the hot glue I am using to form the concave mouth area. I took a small cats eye bead and place it in the eye socket from behind. (Note: The Eye could be painted so any round object would work.) I hot glued it in place and hot glued the gaps
3. I took some wire from a dead wired mouse cord (Any wire could work.. The second one I built used copper wire), and I stripped the plastic the plastic coating off. I then poked holes into the area in the body I wanted the ropes to be place and hot glued the rope in place from the inside. After that dried, I positioned the wires how I wanted them.
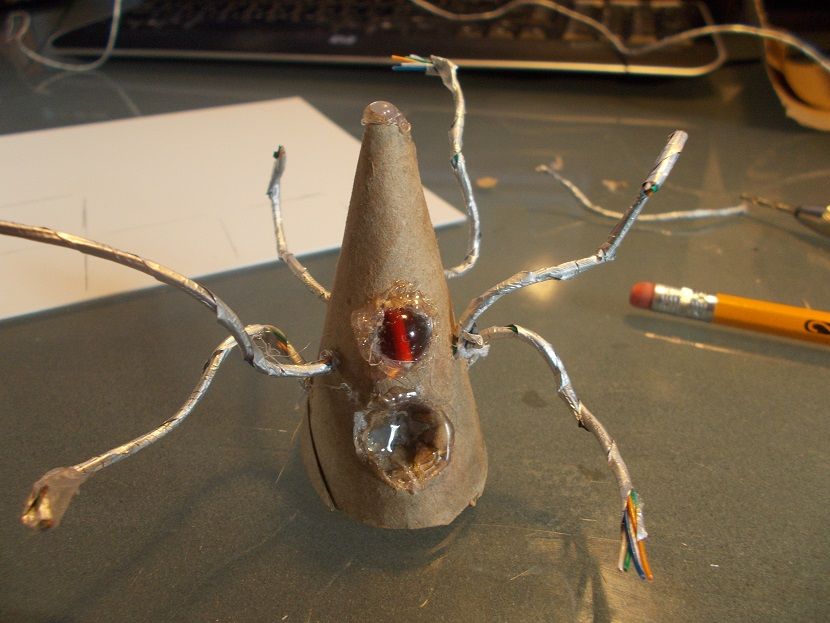
4. Then I ran some hot glue on the wires to strengthen and thicken them up.
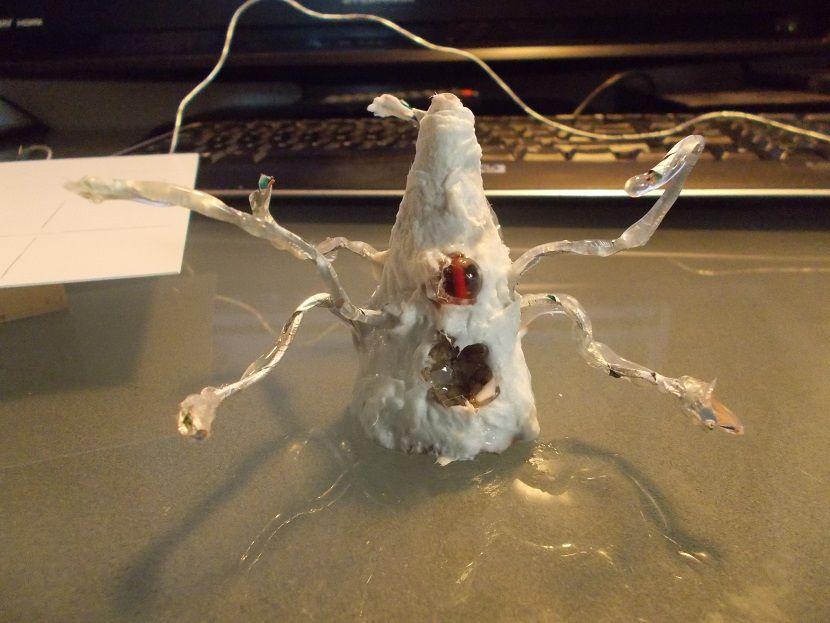
I used small wet strips of wet toilet paper and white/pva glue, and began to cover up the body of the monster. (This step can be dropped if you just want to texture with the glue gun... I did not use it on the second one I built, and it turned out just as well as this one did)
5. I cleaned up the eye. Based him on plasticard. Used the glue gun to texture cover and fill in the surface. Tried two different ways to put the teeth in, both failed. Decided to go back to that later.
6. Put some silly putty over the eye and primed the model.
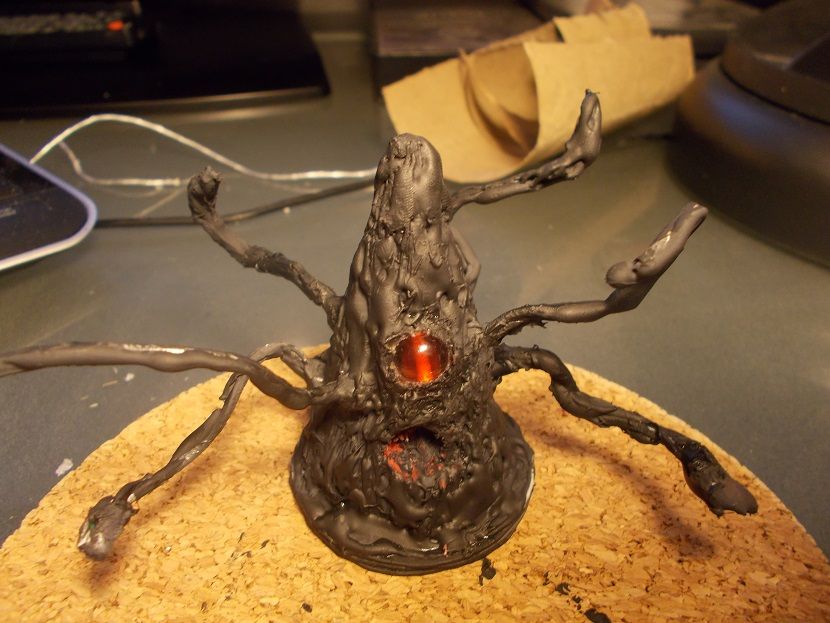
7. I widened the mouth a little and gave it some teeth made out of toothpick ends. Touched up the ropes with the glue gun, and trimmed down some mistakes. I did another coat of black, and then I remembered that I didn't base it. So I based with sand. After it dries, I will paint it black before I begin painting.
Note: After looking at the picture, the teeth don't look as sharp up close and personal. If I make another, I will sharp the toothpicks first. Might be something to consider for others trying to build this.
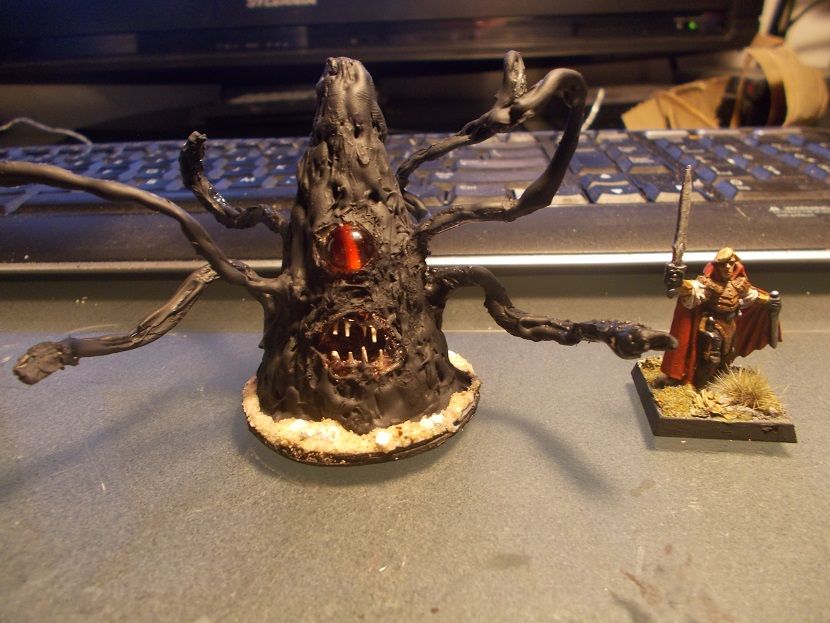
8. Here is the finished and painted Roper. I did more work in the mouth than is showing. I picked out the gums with a dark purplish red and highlight with a dark red. I put a gloss varnish on the eyes and in the mouth. Satin varnish on the body. I made a quick mushroom out of a thumbtack for the base which I painted with khaki and washed with sepia. The cats eye marble has the weird ability to follow your movements.

On a final note, I am really proud of this build. This is the first non-terrain oriented craft I have ever attempted. I hope this helps others to make their own ropers.
I am not sure if anyone has tackled this monster, but I am giving it a shot.
The Roper
Looked up and found that the look of the has morphed over the years. The mouth and look of the monster varies in appearance. This makes sense, because fluff states that when it moves into a new area. The body and color shift to resemble its surroundings. I based this design on the stats given in 3.5 edition of D&D. It stands about 10 feet in height, in game terms.
1. I started with a toilet paper roll and cut it. I rolled it into a cone, and hot glued it together. I drew the Eyes and Mouth on the cone. I cut the hole for the eye.

2. I cut a plus sign in the mouth area, and folded the cardboard in. I did this to help support the hot glue I am using to form the concave mouth area. I took a small cats eye bead and place it in the eye socket from behind. (Note: The Eye could be painted so any round object would work.) I hot glued it in place and hot glued the gaps

3. I took some wire from a dead wired mouse cord (Any wire could work.. The second one I built used copper wire), and I stripped the plastic the plastic coating off. I then poked holes into the area in the body I wanted the ropes to be place and hot glued the rope in place from the inside. After that dried, I positioned the wires how I wanted them.

4. Then I ran some hot glue on the wires to strengthen and thicken them up.
I used small wet strips of wet toilet paper and white/pva glue, and began to cover up the body of the monster. (This step can be dropped if you just want to texture with the glue gun... I did not use it on the second one I built, and it turned out just as well as this one did)

5. I cleaned up the eye. Based him on plasticard. Used the glue gun to texture cover and fill in the surface. Tried two different ways to put the teeth in, both failed. Decided to go back to that later.

6. Put some silly putty over the eye and primed the model.

7. I widened the mouth a little and gave it some teeth made out of toothpick ends. Touched up the ropes with the glue gun, and trimmed down some mistakes. I did another coat of black, and then I remembered that I didn't base it. So I based with sand. After it dries, I will paint it black before I begin painting.
Note: After looking at the picture, the teeth don't look as sharp up close and personal. If I make another, I will sharp the toothpicks first. Might be something to consider for others trying to build this.

8. Here is the finished and painted Roper. I did more work in the mouth than is showing. I picked out the gums with a dark purplish red and highlight with a dark red. I put a gloss varnish on the eyes and in the mouth. Satin varnish on the body. I made a quick mushroom out of a thumbtack for the base which I painted with khaki and washed with sepia. The cats eye marble has the weird ability to follow your movements.

On a final note, I am really proud of this build. This is the first non-terrain oriented craft I have ever attempted. I hope this helps others to make their own ropers.


 Cheers!
 Cheers!