


Post by DMNate on Feb 14, 2014 3:41:07 GMT
I wasn't happy with the tutorials I've seen for my purposes, so I thought I'd put one out there. Though there have been some good recent tutorials for some quick wood effect, I thought I'd make one for those projects you want a little more realism on. Maybe center pieces or... pirate ships... or... whatever. Anyway, without further ado, here is one of my wood-grain methods. I know this is likely more in depth than you'd like to do for some things, but there might be some people out there with too much time on their hands, like me.
I have decided to demo this method on a plank, as I need one anyway. I'm doing this on foam board, which is kinda important for the correct effect. I get mine from Dollar Tree, as it's very easy to peel the paper off, and get to the good stuff.r
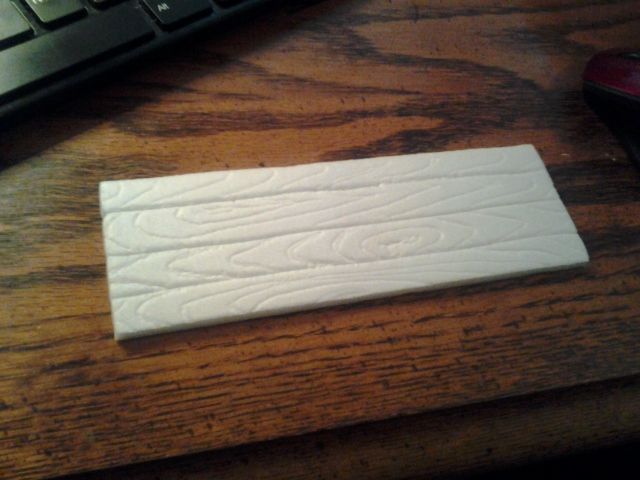
First step is to etch out some planks.

In this case, I am having the whole length be single boards, but in the case of larger scale pieces, and flooring, you should space out varying lengths and connection points. Look up some pictures of wood-flooring to get a better idea of what I'm talking about.
Next step is to etch out some actual knots and grains in the foam. There isn't so much a trick to this as much as practice. Look up pictures of different grains and try to match them. I'd suggest practicing shapes and spacing on paper before etching.
Next, simply base it black.
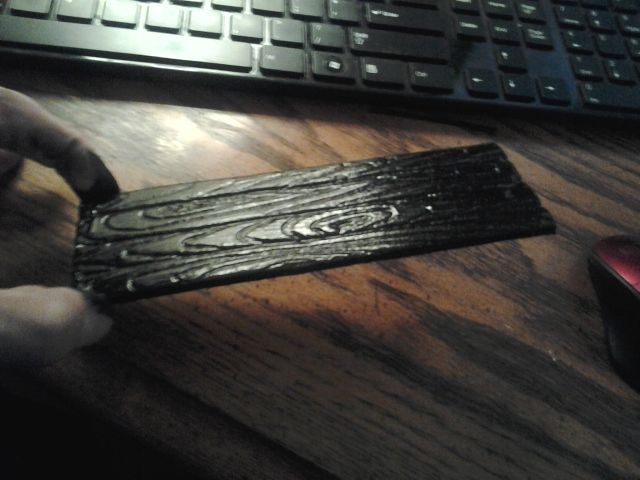
Once dry (which this image obviously wasn't, but it was difficult to see the grain without the glare), dry brush a 2/3 burnt umber 1/3 tuscan red mix on, being careful to leave the grains black. (Disclaimer: This will end up coming out quite red, which I like, but others may not. You could do just burnt umber if you prefer a more basic brown color, but I find it comes out looking too much like dirt.)
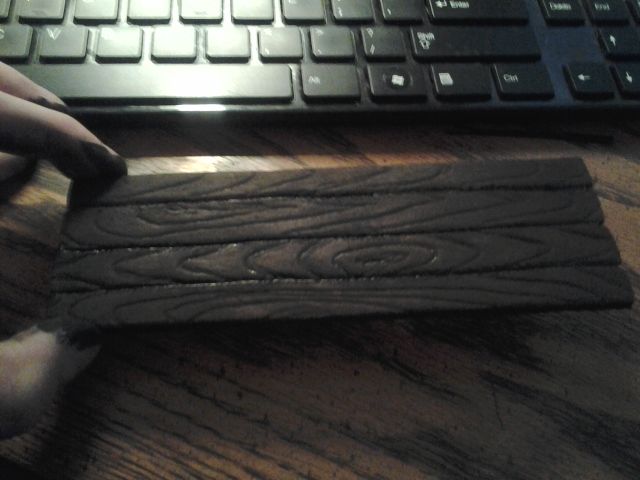
This came out very difficult to see, but I assure you it is dry brushed on. It is good to keep it dark at first.
Next, add some yellow to the mix of paint you already have there (or mix up some new with the same ratios). If you keep with the ratios I gave it'll come out looking pinker than you think it should, but it works. This part is important though. This helps give things a real natural feel. Don't mix the paint into a homogeneous color. Leave streaks of dark and streaks of yellow in there. The uneven color will help the look. Now take this color and lightly paint (very lightly, don't over do it. It's always easier to add more later than take paint away) the under side of each grain. By the underside, I mean the side that would be closer to the knot.
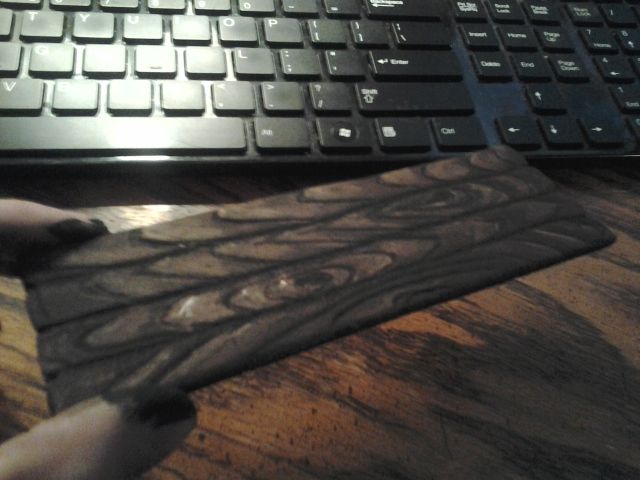
And there ya go! After this, I usually add a little more yellow to the mix and highlight a couple places just for kicks, but that's the basic idea. It comes out very nice.
On larger scale (like flooring or decking) I don't etch grains on EVERY plank. I will draw grains on a few here and there just to give an impression. Here is an example with the deck of my ship I'm doing for this month's competition.
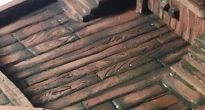
Notice how on the planks that don't have the grains, I simply faded into the middle from black to the lightest color. It comes out looking nice and quite realistic.
Hope this helps out! I can imagine there might be some pirate ships in the works, so have at, friends! Happy crafting!!!
I have decided to demo this method on a plank, as I need one anyway. I'm doing this on foam board, which is kinda important for the correct effect. I get mine from Dollar Tree, as it's very easy to peel the paper off, and get to the good stuff.r
First step is to etch out some planks.
In this case, I am having the whole length be single boards, but in the case of larger scale pieces, and flooring, you should space out varying lengths and connection points. Look up some pictures of wood-flooring to get a better idea of what I'm talking about.
Next step is to etch out some actual knots and grains in the foam. There isn't so much a trick to this as much as practice. Look up pictures of different grains and try to match them. I'd suggest practicing shapes and spacing on paper before etching.
Next, simply base it black.
Once dry (which this image obviously wasn't, but it was difficult to see the grain without the glare), dry brush a 2/3 burnt umber 1/3 tuscan red mix on, being careful to leave the grains black. (Disclaimer: This will end up coming out quite red, which I like, but others may not. You could do just burnt umber if you prefer a more basic brown color, but I find it comes out looking too much like dirt.)
This came out very difficult to see, but I assure you it is dry brushed on. It is good to keep it dark at first.
Next, add some yellow to the mix of paint you already have there (or mix up some new with the same ratios). If you keep with the ratios I gave it'll come out looking pinker than you think it should, but it works. This part is important though. This helps give things a real natural feel. Don't mix the paint into a homogeneous color. Leave streaks of dark and streaks of yellow in there. The uneven color will help the look. Now take this color and lightly paint (very lightly, don't over do it. It's always easier to add more later than take paint away) the under side of each grain. By the underside, I mean the side that would be closer to the knot.
And there ya go! After this, I usually add a little more yellow to the mix and highlight a couple places just for kicks, but that's the basic idea. It comes out very nice.
On larger scale (like flooring or decking) I don't etch grains on EVERY plank. I will draw grains on a few here and there just to give an impression. Here is an example with the deck of my ship I'm doing for this month's competition.
Notice how on the planks that don't have the grains, I simply faded into the middle from black to the lightest color. It comes out looking nice and quite realistic.
Hope this helps out! I can imagine there might be some pirate ships in the works, so have at, friends! Happy crafting!!!


 If there is enough people that would like a demonstration, I'll work on one.


 Cheers!
 Cheers!