|
|
Post by Meph on Mar 22, 2016 1:58:16 GMT
I finish designing and printing the Jousting Tilt. I really like the way it turned out. 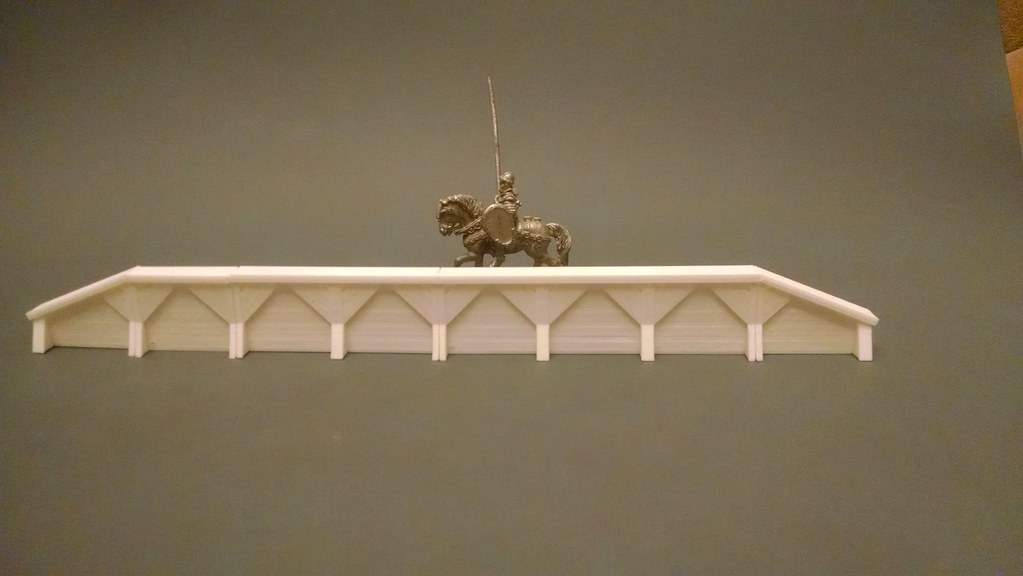 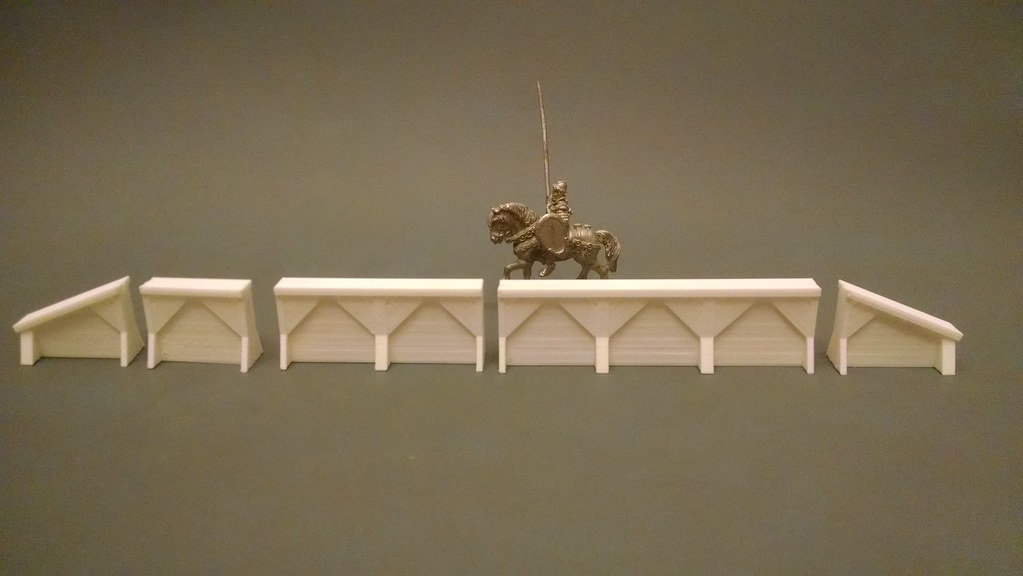  +Exalt, that is just awesome! Great job. |
|
|
|
Post by curufin on Mar 22, 2016 2:08:40 GMT
Thanks! It took a while to design. There are 9 total files (you can print as a solid piece or print each section in halves). Im going to keep plugging away at this.
|
|
|
|
Post by jennifer on Mar 22, 2016 9:48:45 GMT
Curufin, I am so happy you learned how to do this CAD stuff! Your stuff is going to be the very best terrain on Thingiverse I just know it  Wait, are you planning to upload to Thingiverse? Or some other site? |
|
|
|
Post by l7arkness on Mar 22, 2016 12:22:24 GMT
very cool
|
|
|
|
Post by curufin on Mar 22, 2016 12:29:12 GMT
Curufin, I am so happy you learned how to do this CAD stuff! Your stuff is going to be the very best terrain on Thingiverse I just know it Wait, are you planning to upload to Thingiverse? Or some other site? Dont say that! It will go straight to my head and my ego will be too big for this forum. All kidding aside, thank you very much for the compliment. I do plan on putting my works on Thingiverse and Shapeways as open source files. I think it will be a real delight if anyone decides to download, print, and use any of my models in their game. But, I think I want to complete the full set, (Design, Print, Assemble, and Paint) before I upload anything. Then I need to decide if I want to lump it together or separate the files. I will be trying to figure out how to build the best looking models with the fewest parts, using as little plastic as I can, and adding keyways where I can so the models can snap together to help facilitate gluing and strength. That may be a very tall order, but I wont learn if I dont push myself to the edge. I will very likely ask a favor of a few of you with printers. When I get a model finished that has a few pieces that all snap together, I may ask kindly if you would be willing to print it out and put it together. I would really like to see at least one other user using a different printer successfully assembling one of my models. It is probably superfluous as an STL file, but I am seeing at least 2/10th mm increase in model size as compared to the STL dimentions. That seems to be a bit high for the acceptable tolerances and just want to be sure the models work for other printers. |
|
|
|
Post by jennifer on Mar 22, 2016 14:17:02 GMT
sure i'll print and measure with calipers for u. Maybe is has to do with firmware and/or engineers trying to think about potential shrinkage?
|
|
|
|
Post by l7arkness on Mar 22, 2016 14:28:05 GMT
Curufin, I am so happy you learned how to do this CAD stuff! Your stuff is going to be the very best terrain on Thingiverse I just know it Wait, are you planning to upload to Thingiverse? Or some other site? Dont say that! It will go straight to my head and my ego will be too big for this forum. All kidding aside, thank you very much for the compliment. I do plan on putting my works on Thingiverse and Shapeways as open source files. I think it will be a real delight if anyone decides to download, print, and use any of my models in their game. But, I think I want to complete the full set, (Design, Print, Assemble, and Paint) before I upload anything. Then I need to decide if I want to lump it together or separate the files. I will be trying to figure out how to build the best looking models with the fewest parts, using as little plastic as I can, and adding keyways where I can so the models can snap together to help facilitate gluing and strength. That may be a very tall order, but I wont learn if I dont push myself to the edge. I will very likely ask a favor of a few of you with printers. When I get a model finished that has a few pieces that all snap together, I may ask kindly if you would be willing to print it out and put it together. I would really like to see at least one other user using a different printer successfully assembling one of my models. It is probably superfluous as an STL file, but I am seeing at least 2/10th mm increase in model size as compared to the STL dimentions. That seems to be a bit high for the acceptable tolerances and just want to be sure the models work for other printers. will gladly help if you need it, as well if you need any help with in the cad software very happy about having someone else interested in inventor |
|
|
|
Post by curufin on Mar 22, 2016 17:56:23 GMT
New design. The Coat of Arms rack: Looking forward to betting on or supporting your favorite knight in the joust? Did you lose site of them in the sea of other armored competitors when you left the stands to use the privy? Now, just wait until the herald places his coat of arms on the stand to know when your knight will be jousting and from what side of the list he will be jousting from. 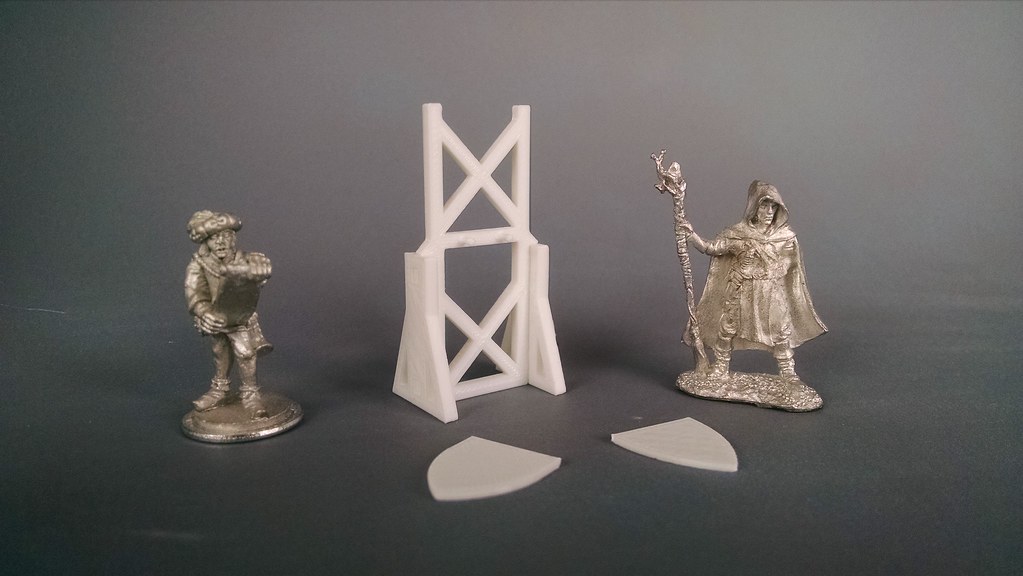 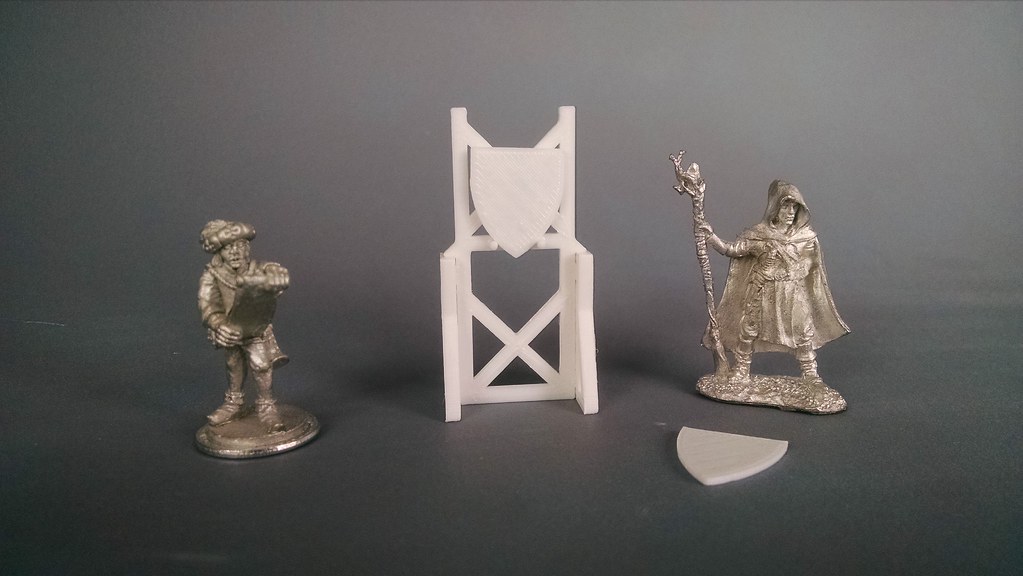 |
|
|
|
Post by jennifer on Mar 22, 2016 18:25:18 GMT
Very nice, do all these have a significant amount of wood grain? Can you upload one of the files to meph's dropbox, so I can download , print and paint?
|
|
|
|
Post by curufin on Mar 22, 2016 23:35:47 GMT
I didn't add any wood grain into the rack. What you are seeing is the texture left by the printer. These part are only 2.25mm wide, so there isn't much room to add detail.
I'll see if I can dropbox it.
|
|
|
|
Post by Meph on Mar 22, 2016 23:40:21 GMT
I sent you a direct invite with edit access.
|
|
|
|
Post by curufin on Mar 22, 2016 23:58:34 GMT
I sent you a direct invite with edit access. Okay, I think that worked....? |
|
|
|
Post by Meph on Mar 23, 2016 0:04:34 GMT
Yep, worked great.
|
|
|
|
Post by jennifer on Mar 23, 2016 11:50:58 GMT
New design. The Coat of Arms rack: Looking forward to betting on or supporting your favorite knight in the joust? Did you lose site of them in the sea of other armored competitors when you left the stands to use the privy? Now, just wait until the herald places his coat of arms on the stand to know when your knight will be jousting and from what side of the list he will be jousting from. I printed this plate. Looks great but I have no idea where the two rack pins went. I saw them one second and now they are both gone with no indication they were ever there. I dropped the piece of plastic twice on the floor.. but these shouldn't of come off. Do they snap off your's like nothing or something? Is there a good joint between them in the model -- I know some supports snap off easy is why I ask. This is really puzzling -- it's like they were never there. wow. ANyways I had to trim the top edges of the list brackets to slide in. Photo shows one seated and the other side won't seat yet because it hasn't been filed:  Also the rack pins weren't long enough for shield to sit alone on them.. I mean the shield was pretty vertical and kept falling off. Maybe make the rack pins a little longer and fatter? I can't find my rack pins now  lol.. gah wehre are they? Myabe I broke them off when I was trying to force the list bracket in. |
|
|
|
Post by curufin on Mar 23, 2016 12:12:19 GMT
Thanks for printing it out. This is what I was afraid of. The brackets did fit tight but snapped into position with a little pressure.
The pins are small, but mine aren't that fragile. I could increase the diameter a little. I used a very tiny amount of poster tak behind the shield to hold it into place. That way it goes on and can come off easy, but wont come off no matter how much you shake the piece.
Can you inspect the dimensions of the piece? I'm very curious to see what they are compared to mine.
|
|
|
|
Post by jennifer on Mar 23, 2016 13:34:31 GMT
Thanks for printing it out. This is what I was afraid of. The brackets did fit tight but snapped into position with a little pressure. The pins are small, but mine aren't that fragile. I could increase the diameter a little. I used a very tiny amount of poster tak behind the shield to hold it into place. That way it goes on and can come off easy, but wont come off no matter how much you shake the piece. Can you inspect the dimensions of the piece? I'm very curious to see what they are compared to mine. Which dimensions in particular? EDIT: btw, I think you're asking too much of the 3D printer technology to make them snap together. Everyone's printers are of different accuracy and various filaments shrink differently etc. I'd just make them somewhat loose fitting pins that people can put some super glue on. Like perhaps recessed and concealed. |
|
|
|
Post by curufin on Mar 23, 2016 14:26:25 GMT
I'm sorry, the knight you bet on, Sir TwinkleToes, has fallen down while walking to the list. He has severely injured himself and is forced to withdraw from the tournament. And as you know, according to Tournament Bylaws, Section 12, sub-paragraph 6, "A withdraw is the same as defeat". Please go see the rather large fellows at the Gambling Guilds pavilion, I believe they are looking for you.  |
|
|
|
Post by curufin on Mar 23, 2016 14:40:06 GMT
Thanks for printing it out. This is what I was afraid of. The brackets did fit tight but snapped into position with a little pressure. The pins are small, but mine aren't that fragile. I could increase the diameter a little. I used a very tiny amount of poster tak behind the shield to hold it into place. That way it goes on and can come off easy, but wont come off no matter how much you shake the piece. Can you inspect the dimensions of the piece? I'm very curious to see what they are compared to mine. Which dimensions in particular? EDIT: btw, I think you're asking too much of the 3D printer technology to make them snap together. Everyone's printers are of different accuracy and various filaments shrink differently etc. I'd just make them somewhat loose fitting pins that people can put some super glue on. Like perhaps recessed and concealed. The beams should all be 2.25mm square. The height of the brackets should be 26mm. The printer technology should be able to handle it no problem, at least to a tolerance of +/- a couple hundredths of a mm. The settings on your printer should be taking in account the type of plastic you are using. I'm wondering if it is a scaling issue. Mine seems to be mostly plus 2-3 tenths of a mm. That seems grossly out of whack to me. I do agree that the pieces may need to be a little looser... to help accommodate a wider range of printer. I love the snap together feature... but it may be unrealistic. I may do some alternatives with no keyways, so they can just glue together with no interference. I think I may print out another test cube to test measurements on my end. |
|
|
|
Post by jennifer on Mar 23, 2016 17:08:18 GMT
Which dimensions in particular? EDIT: btw, I think you're asking too much of the 3D printer technology to make them snap together. Everyone's printers are of different accuracy and various filaments shrink differently etc. I'd just make them somewhat loose fitting pins that people can put some super glue on. Like perhaps recessed and concealed. The beams should all be 2.25mm square. The height of the brackets should be 26mm. The printer technology should be able to handle it no problem, at least to a tolerance of +/- a couple hundredths of a mm. The settings on your printer should be taking in account the type of plastic you are using. I'm wondering if it is a scaling issue. Mine seems to be mostly plus 2-3 tenths of a mm. That seems grossly out of whack to me. I do agree that the pieces may need to be a little looser... to help accommodate a wider range of printer. I love the snap together feature... but it may be unrealistic. I may do some alternatives with no keyways, so they can just glue together with no interference. I think I may print out another test cube to test measurements on my end. The snap together may work, just think about warping as well. Especially with long narrow items. My printer is really accurate and I am fortunate to have had perfect adhesion printing your items (using hair spray & glass & heated bed). I'll measure the dimensions for you. IT maybe that you just need to give a tiny bit more room for things to snap together. I'm not sure.. lots of things involved here hah. |
|
|
|
Post by jennifer on Mar 23, 2016 17:13:54 GMT
"The beams should all be 2.25mm square. The height of the brackets should be 26mm. "
Beams are 2.45mm +- .03mm
Height of printed bracket: 26.17mm
Height I filed it down to to barely snap in: 25.7mm -- should probably file it down to 25.5mm to be even better.
I printed them all on the same plate. If it was a scaling issue wouldn't they all be enlarged evenly. Hrm maybe I'll open up the gcode file and see how I oriented them.. could be one of my axis' scaling is of a hair? I dunno.. I have had no problems with any of hte mods I've printed so far with my printer. Perfect friction fit for x axis bearings for example.
|
|


 lol.. gah wehre are they? Myabe I broke them off when I was trying to force the list bracket in.

 Cheers!
 Cheers!