|
|
Post by bloodchoke on Feb 15, 2015 14:37:19 GMT
Hello friends, LOOK AT MY TOYS!!! It's been a really long time since I updated my old painting thread, partially because I haven't painted much. I"m working on a couple minis now though, and have many more waiting in line, so I thought it might be a good time to start new show and tell thread. My old thread, N00b with a Good Wash, followed my progress from my very first miniature forward. It's quite Hero Quest heavy, as will be the first part of this one Here are some highlights... 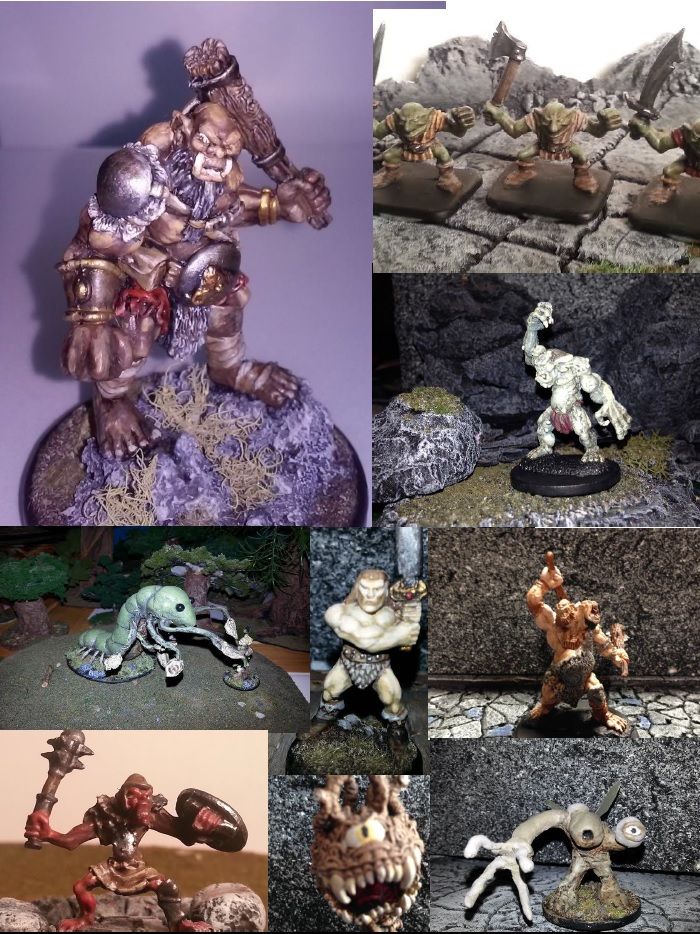 |
|
|
|
Post by Deleted on Feb 15, 2015 14:47:15 GMT
Fantastic work bloodchoke! Great painting skills.
|
|
|
|
Post by bloodchoke on Feb 15, 2015 15:11:15 GMT
Soon after the last update on the old thread, I painted a few more figures, but never got around to getting pictures of them. My old text-and-call phone was the only camera I had, and it was terrible. I finally relented though, and got myself one of them fancy touch-screen smart phones with a decent camera (actually a relatively cheap one). I hope it doesn't turn me into a zombie, but at least I can update this thread at the already tepid painting pace I set. Anyway, here are the minis I painted before a rather long hiatus. First up, Hero Quest Femirs. Painted one before, three more in this set. 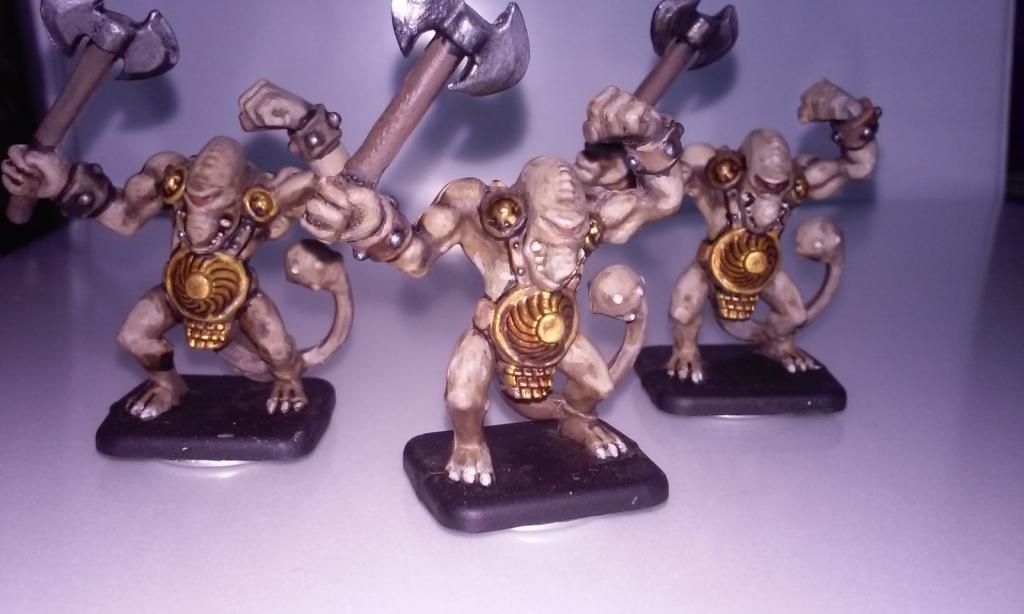 *Someone on here* suggested using fine black lines to separate different objects on a mini. Compared to the previous Femir I painted, these look a lot better mostly because of these. It's really apparent on the straps on these guys' backs. 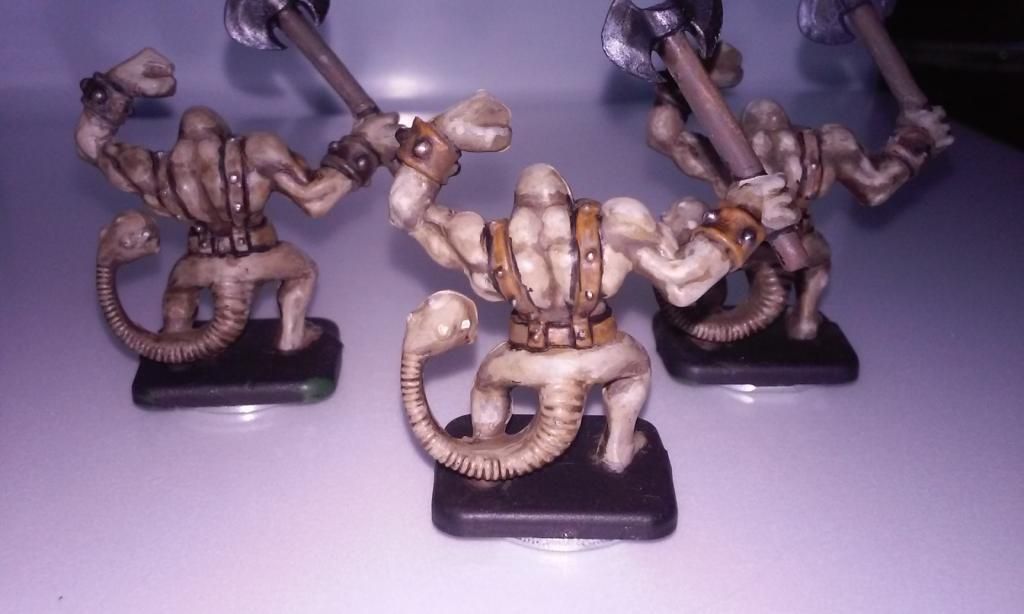 Because I wasn't sure what color scheme I wanted to use, I painted only one of the four chaos warriors. I like the black and gold, but I think I may try replacing the gold with the color corresponding to each of the chaos gods. Working on the green one (Nurgel, i believe,) now, so we'll see how it goes. 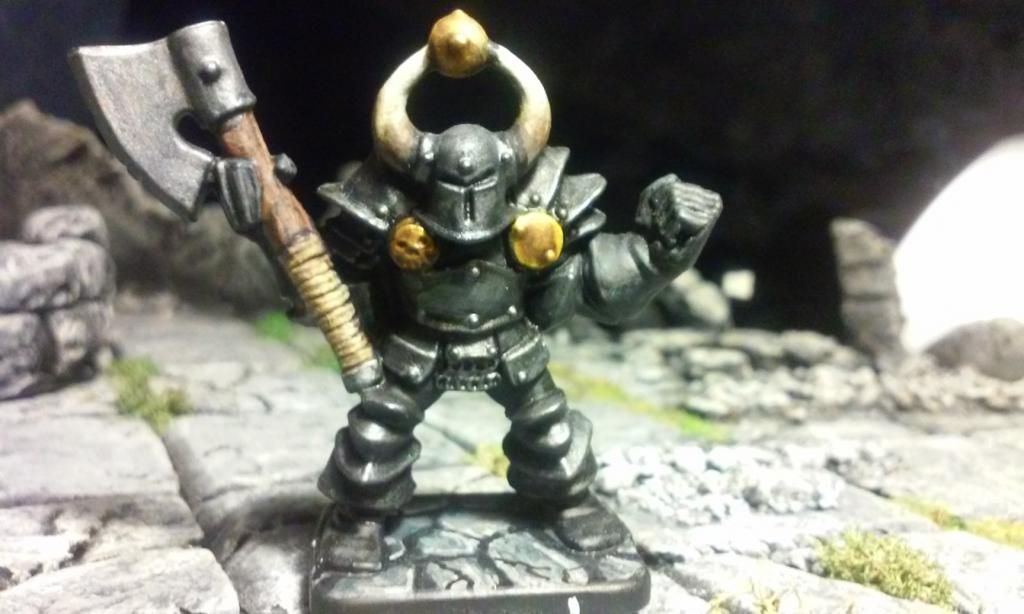 |
|
|
|
Post by curufin on Feb 15, 2015 15:29:22 GMT
Absolutely gorgeous paint jobs!
|
|
|
|
Post by bloodchoke on Feb 15, 2015 15:36:44 GMT
Thanks Noc! Getting ever closer to finishing that Hero Quest set. Pretty happy with this elf. Faces are a nightmare to paint for me (thank palor for hoods!) and usually turn out terrible, but this one is not so bad. It's a really nice sculpt too, which makes it much easier. Highlighted the boots wrong, so they look kind of silly, but hey, it is HQ after all. 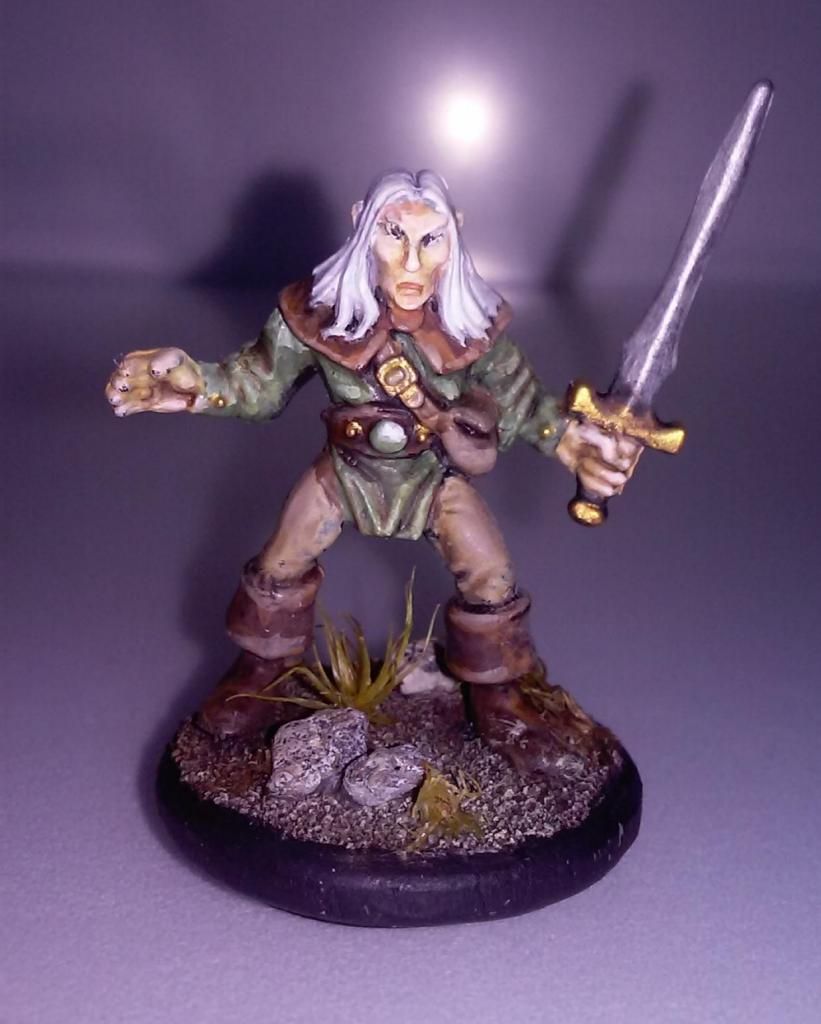 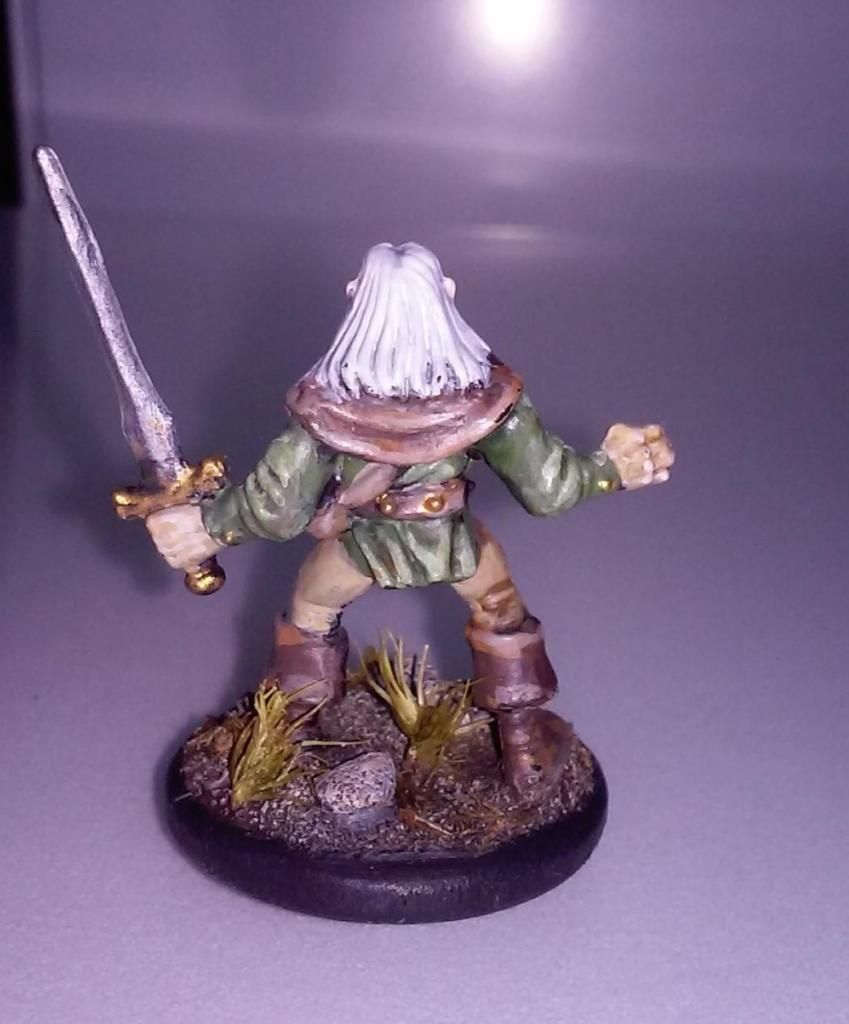 And finally, here's something that's actually not from Hero Quest. This fire elemental is from the infamous bad-CGI inspired Dragon Strike, from a few years after Hero Quest. I tried using the fire painting techique that AJ (I think) shared sometime back, but didn't quite pull it off. I still like her, though... 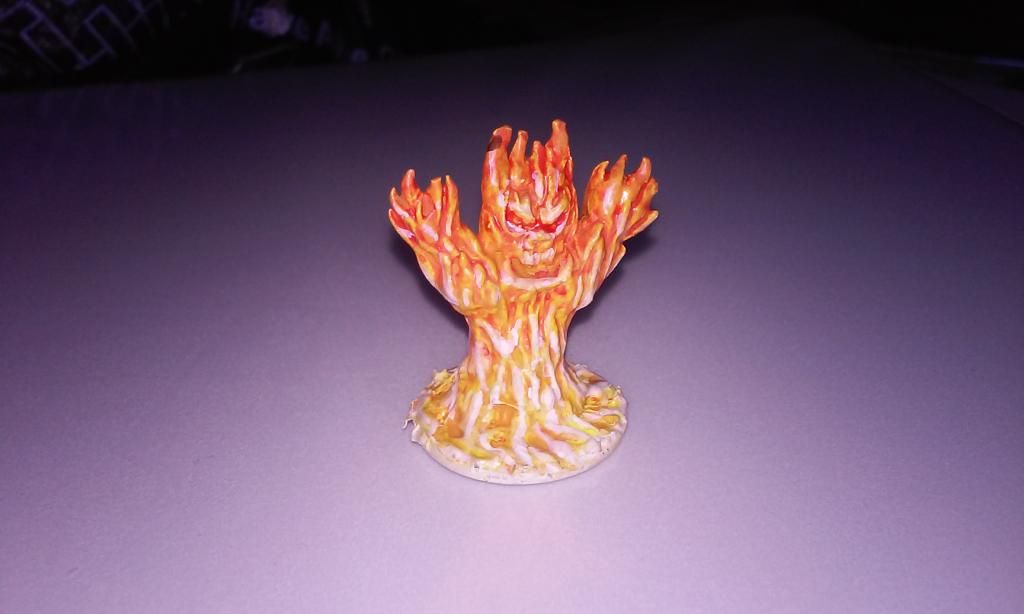 That's all for now. Thanks in advance for any compliments or critiques, and for stopping by. I'll have a few more to post in a few days, and more already started. |
|
|
|
Post by DnDPaladin on Feb 16, 2015 6:17:29 GMT
what you mean they look silly ?!! believe me after looking at the face, the boots are the least bit silly 8)
but seriously, great job there. those figs looks much better then mono color. they are the bomb seriously !
nice work !
Like and Karma for you !!!
|
|
|
|
Post by sgtslag on Feb 17, 2015 17:32:10 GMT
I'd suggest checking into The Dip, and Magic Wash. They could speed up your painting, if you like the results. Before you apply either one, though, first apply a full-strength coat of clear Pledge Floor Shine, with a brush: it seals the rough surface of the paints, allowing the pooling effect to concentrate only in the folds, not in the coarse, microscopic surface of the paints. Be sure to experiment on some test figures, first: block paint some plastic Army Men figures, then seal them with Pledge Floor Shine, wait 24-hours for it to fully cure, then apply both The Dip, and Magic Wash, to different test figures, to see if you like the effects of either one. Cheers!
|
|
|
|
Post by pedrodevaca on Feb 17, 2015 21:12:15 GMT
Huzzah! Bloodchoke updates!! Great stuff
|
|
|
|
Post by Alexis on Feb 17, 2015 21:36:57 GMT
They look awesome. My father painted his Hero Quest minis a long time ago. I always loved playing with them.
|
|
|
|
Post by bloodchoke on Feb 19, 2015 1:11:45 GMT
Thanks for all the kind words and advice, guys. As I mentioned, I just recently started painting again after a rather long lay off. Jumped right back into the HQ, starting with the rest of the goblins.  As you can see on the close up (especially), I got a bit rusty during the break. I got impatient with highlights and put a couple layers on too thick, the green wash didn't work out as I had hoped, and my brush work was just generally sloppy. Wish I had done better, but they're good enough for the table, I suppose. 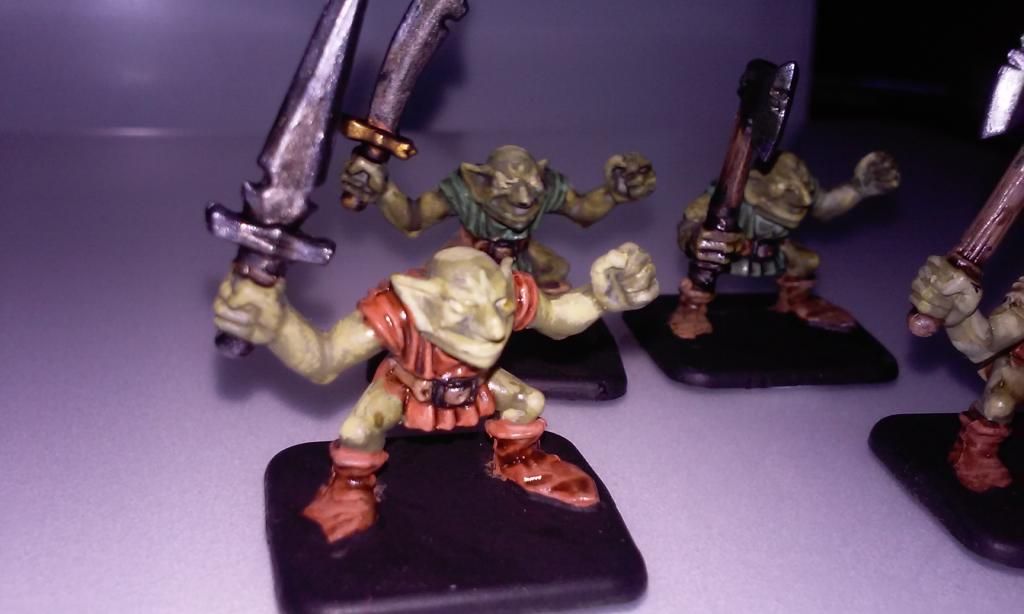 |
|
|
|
Post by bloodchoke on Feb 19, 2015 1:25:55 GMT
sgtslag, the Dip doesn't quite do it for me. I do realize that I'm trying to paint above my ability level, but my goal is to be able to paint at what I consider PC quality. But I definitely spend too much time on each piece and need a faster method, especially for monsters and NPCs and such. This guy I did paint quickly. Simple base colors, one highlight, and then a brown wash for the leather and black wash for the clothes. I have much less time invested in him, and I think it looks ok. 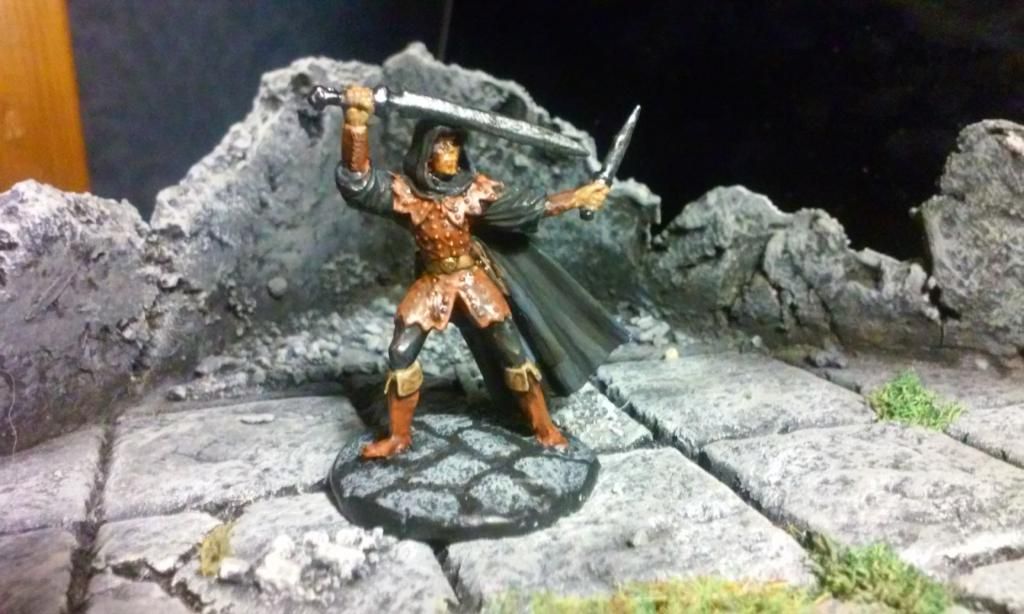 Almost finished with a PC I'm working on for a friend, so I'll update again in the next few days.
|
|
|
|
Post by Deleted on Feb 19, 2015 1:54:56 GMT
When I paint monsters I usually do 2-3 at a time by the time I hit the third monster the first one is almost dried. As for PC minis I find myself painting them any where from 2-4 hours.
|
|
|
|
Post by DnDPaladin on Feb 19, 2015 5:14:38 GMT
i dont even understand the term "dip"
the only thing that comes to my mind is a bowl of the stuff and you plunging the miniature into it and then letting it out of there to whatever else you need to do.
whe you guys use the term "dip" what do you really mean ? care to explain the process ?
|
|
|
|
Post by sgtslag on Feb 19, 2015 19:47:06 GMT
Love to share about The Dip and Magic Wash techniques!
The Dip: Paint your mini as usual, or, better yet (for us army painters...), apply simple block painting to your figures; painting assembly-line style is the most efficient, but it does tend to give lots of figures which are painted almost identically to one another (trade-off, mostly done by army painters); when the block painting is completed, and fully cured (24 hours), apply a brush-on coat of Pledge Floor Shine/Klear acrylic floor polish, to seal, and smooth over the microscopically rough paint surfaces, and let this dry completely (15 minutes, minimum, but overnight is better); then brush on (do not literally dunk your figure in, unless you really want to work at clean-up...) Minwax Polyshades Urethane Stain [either Royal Walnut (dark brown, muddy color), or Tudor (black)]. This stuff will accumulate in the folds, and recesses of the figures. Gravity pulls it down (make certain the figure is standing while it dries...), so check them after 10 minutes, and use the edge of a paper towel to absorb any excess in the creases, and on the bases. Let it cure fully (varies, but typically several days, as this is solvent-based urethane-stain), before dull-coating your figures.
Magic Wash: This is a mixture of Pledge Floor Shine/Klear, and a shading color of acrylic paint -- they're both acrylic products, so they blend beautifully, without chemical issues of any kind. Add the color of acrylic paint desired (it is completely customizable), to get the correct shading, then paint it onto the block painted miniature. It will accumulate in the folds, and recesses, just as The Dip will, however, this is a water-based stain/wash, which will dry completely within 15 minutes -- check for excess accumulation after five minutes! It, too, requires a dull-clear coat to get rid of the shine.
For more complete information, do an Internet search on "The Dip", and "Magic Wash". They're well documented, with many examples, and variations on the techniques. Both coat your paint with a very tough-wearing cover, which protects the finish, and surface of the miniatures treated with them. One is urethane coated, the other is coated in acrylic, which is normally applied to floors (tiles, and linoleum), which get walked upon, with shoes! Your paint is quite safe beneath either coating.
For fast painting, they cannot be beat. I average around 7-10 minutes of brush-painting, per figure, when I paint my armies. I apply a simple block painting, then I use The Dip (usually Royal Walnut, as I like the dirty look it gives them), or Magic Wash on them, followed by a matte clear coat. It takes a while to finish a group, but that "group" can be 20-50 figures, all completed at the same time. That makes it worthwhile. They look decent at arm's length, but they won't win any contests.
Both techniques are for speed, and simplicity. They are not 'high-end' painting techniques, period. They are "git 'er done", techniques. Experiment with it, see what you think. If you like it, run with it; if you don't care for it, move on, Friend, move on. Cheers!
|
|
|
|
Post by DnDPaladin on Feb 20, 2015 20:09:01 GMT
understood, though im still wondering why they called that dip to begin with when it has nothing to do with dipping.
but ok, thanks for explaining it. i'll check up on the internet for more, thanks for clarifying that out.
|
|
|
|
Post by sgtslag on Feb 22, 2015 4:27:00 GMT
Originally, the proponent advised folks to literally "dip" the figures into the Minwax Polyshades. Most folks discovered that the dipping process, resulted in excess coverage, so they switched to applying it with a brush, to save labor in removing excess. Some folks still dip their figures, but then they fix the dip'ed figure to the head of a drill, to spin the excess off (very messy process, but effective). Sorry, I gave you the short version. Cheers!
|
|
|
|
Post by DnDPaladin on Feb 22, 2015 23:05:35 GMT
small question, on my mod podge it says acrylic sealant, so can i use that for the dip ?
|
|
|
|
Post by sgtslag on Feb 23, 2015 15:12:42 GMT
Yes, you can. As long as it is fully cured, you can follow it up with The Dip; you can also apply it after The Dip, so long as The Dip coating is fully cured (wait several days, if letting it cure without heat). The same applies to Magic Wash: be sure it is completely cured/dry (wait several hours, to be sure, if no heat is used to speed curing), before applying another coat. ------------------------------------------------------------
Errrr... I may have misunderstood your question. If you were asking whether you could mix acrylic paint with Mod Podge, to make Magic Wash, instead of using Pledge Floor Shine/Klear, the answer is: I am not certain -- you will need to experiment with it after reviewing some online videos on the topic of Magic Wash. The key is that the Mod Podge+Acrylic Paint, would need to be a free-flowing liquid. The reason Magic Wash works, is because it freely flows, and capillary action pulls it into the folds, and recesses. If the Mod Podge will flow like a thin liquid, then, yes, it will work; if it will not flow like a thin liquid, then, no, it will not work. Cheers! |
|
|
|
Post by DnDPaladin on Feb 23, 2015 23:41:48 GMT
modpodge is water based sealant. pretty sure a watered down version could work.
but no, my question was, can i use mod podge for the dip itself.
EDIT:
i decided to try it, and used modpodge which im sure is just PVA glue to begin with. smells and acts like it.
i watered it down a bit, to make it more liquid. and applyed a wash of it to my figures. instant sticky problem solver.
now my figures are fine again. will try a full on podge wash over one of my swarm just to see the difference.
if i understand well from what i read on the net and from what you told me, the dip is nothing more then a wash to seal up the paint. which in turn is exactly what i've been doing with terrain tiles since day one. and at that simple watered down PVA glue would do the trick. i think there is something i missed, otherwise. in all cases thanks for all the info. i'll definitely experiment more.
|
|
|
|
Post by bloodchoke on Feb 26, 2015 2:47:41 GMT
Very slowly clearing some minis off the painting table... First up tonight, HQ Nurgle Chaos Warrior. What do you guys think about the green? Not exactly what I was hoping for, but I think I like it. I have a dozen or more of these guys, so I think I will do three more in this chaos gods color scheme. 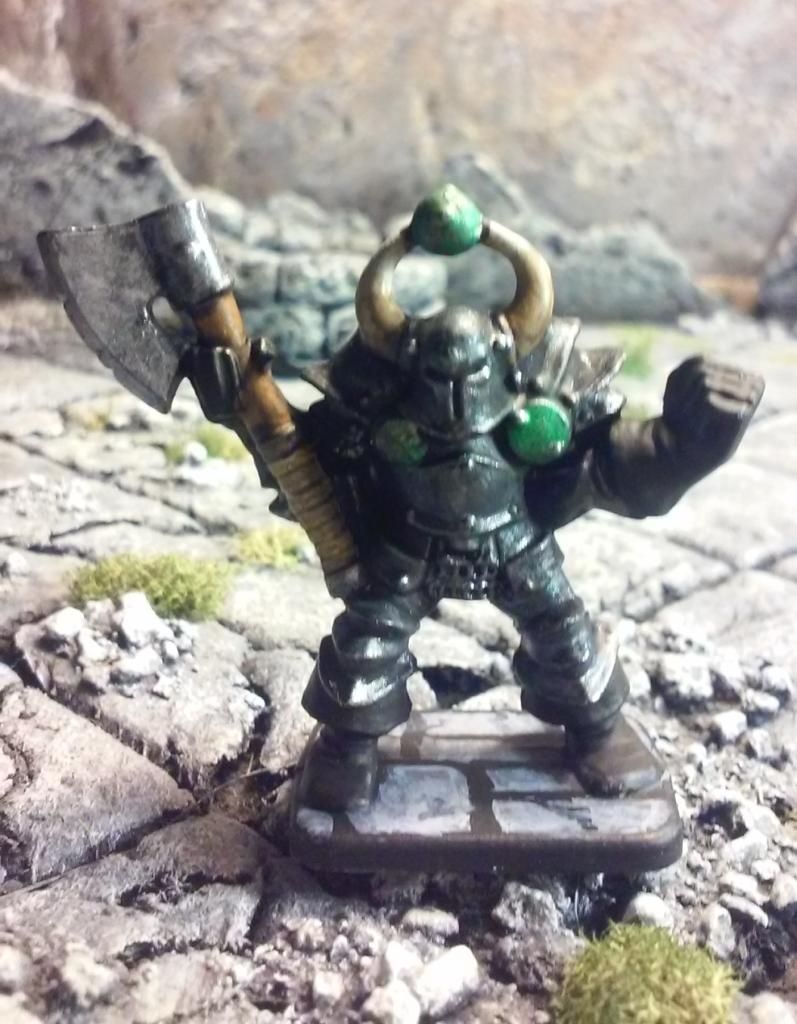 In the last thread, I posted my DM Brad inspired magnetic case. I still think it's a brilliant idea, and all my larger figures are still in it, but I have enough now that I decided it would be worth the added protection of a foam tray case. 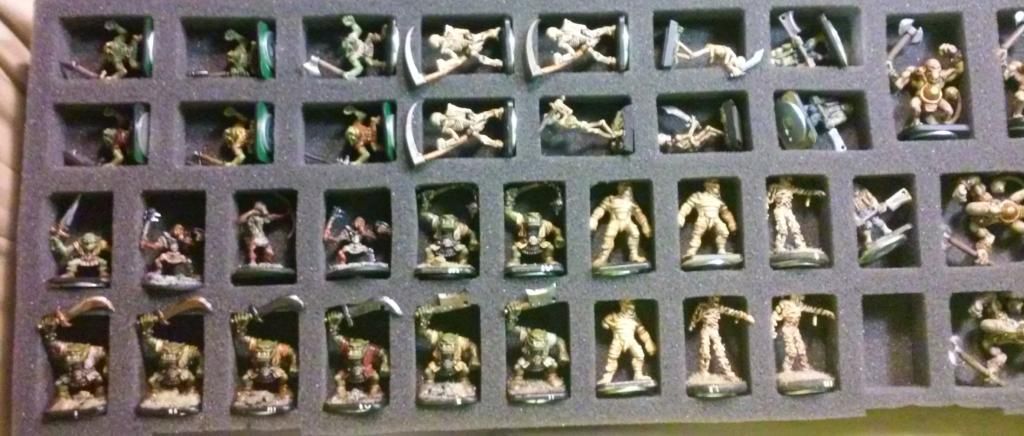 |
|


 Cheers!
 Cheers!