jazhi
Cardboard Collector

Posts: 45 
|
Post by jazhi on Feb 4, 2015 21:29:07 GMT
Hubby and I just moved into a new house and I have a dream craft room: ~900 square foot finished attic "bonus" room that I can use any way I like. Plus I saved all the moving boxes, which are all heavy-duty cardboard so I could reuse them for tiles. Sooo, I've launched into my first real dungeon crafting project. I'm using a combination of DM Scotty and DMG methods, taking the parts that I like best from each, and using other ideas I've seen or that I think will work for me. One major difference is that I'm using foam core for the floor and double thickness cardboard for the base. I want my floors to be textured, and the foam core can be imprinted with a lot of different textures. I may also use it for the walls because I can cut it to a quarter inch without it falling apart. I'm using gesso instead of spray paint for primer, both because it's better with foam and because I don't like to use spray paint. I'm also used to painting on gesso, so it seems natural to me. The other difference is that my base size is 3" instead of 6 cm, to give a bit more space inside the tiles. My hallways, for example, are 3" wide instead of ~2.5". With .25" walls, that leaves 2.5" instead of less than 2" between the walls. Just personal preference. I'm marking grids on the dungeon tiles more for the texture than for the measurements, but I think they will make it fast and easy to see effect range and radius at a glance. I'm starting with a big dungeon set, which I've scored at 1" intervals using a bone folder and an acrylic quilting ruler, shown in the following two images. I originally got the bone folder for bookbinding, but it's probably my most-used crafting tool. It has a thin, dull edge at the pointed end that slides nicely over the foam. Perfect for scoring the spaces between stone tiles. 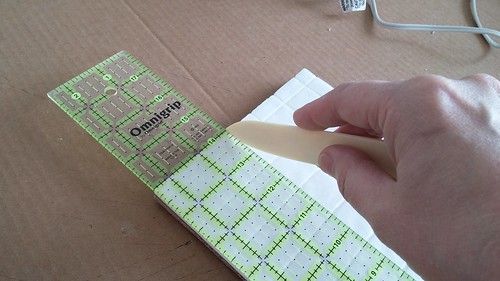 After I scored the tiles, I beat on it with my knuckles to create texture like beaten stone. The next step will be to draw cracks and tile patterns with a pen. 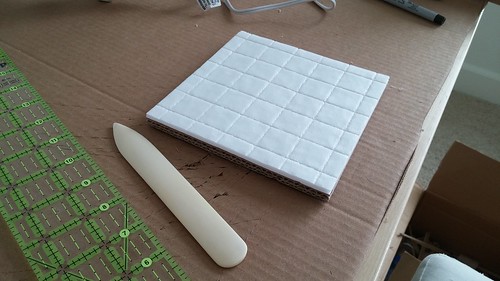 Here's my stack of tiles, so far. My goal is to have enough pieces to lay out two levels of DMG's Under the Tavern module. Most pieces will be generic, but I do plan to make some specifically for the module so I can make them a little more detailed. I also cut extras to experiment with and in case I make mistakes. 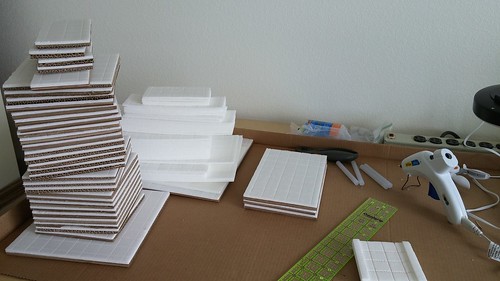 So far I've used five sheets of dollar store foam core, two small, heavy-duty Home Depot moving boxes, and maybe 8 glue sticks. The cardboard is going a lot further than I expected. |
|
|
|
Post by sgtslag on Feb 4, 2015 22:17:32 GMT
Nice! Looks like you are well on your way to having quite a nice set of modular tiles. Keep us updated as progress is made. Cheers!
|
|
|
|
Post by adamantinedragon on Feb 4, 2015 22:35:07 GMT
Beautiful. A great start that will end up as great pieces I am sure. Keep posting as you go!
|
|
|
|
Post by runningwolf on Feb 5, 2015 0:48:43 GMT
nice tiles and nice score for you getting a crafting room  |
|
|
|
Post by curufin on Feb 5, 2015 0:53:17 GMT
Yes, great looking stuff so far! Cant wait to see it all completed. Congrats on the house and crafting room.
|
|
milojaggerson
Paint Manipulator
 Laying tile on the floors...
Posts: 161 
|
Post by milojaggerson on Feb 5, 2015 2:36:43 GMT
This is very neat. I would not have thought to use foamcore board for flooring. Gives me some ideas.... Thank you, Jazhi! Please, keep posting your crafting.
|
|
jazhi
Cardboard Collector
Posts: 45
|
Post by jazhi on Feb 5, 2015 3:32:42 GMT
This is very neat. I would not have thought to use foamcore board for flooring. Gives me some ideas.... Thank you, Jazhi! Please, keep posting your crafting. I got the idea from one of DM Scotty's videos. The dollar store foam core is not only cheap, but it's really easy to peel the paper off. That's how you imprint the texture. |
|
|
|
Post by DnDPaladin on Feb 5, 2015 9:56:15 GMT
Congratulation on th ehouse, having one is real nice !!!
congratulation on a whole 900 square feet room. i dont think you will be missing space anytime soon with it.
as for the tiles, they look nice, can't wait to see them painted. the problem with gridded straight lines is that it looks too gridded. though royalty likes it squared and tight. still having a grid will make player use it. thats not a bad idea to keep it gridded like dmg does. that way players can easily wing it. but im not sure straight lines will do well for a gridless game. i fear the player at one point may only use the grid too often.
this is well done so it really depends on you. just an observation i noticed with my players. if i give them a gridded tile they play it gridded. reguardless of me telling them its not. so be carefull with the grid if you intend to play gridless.
keep up the good work, again, cant wait for it to be painted.
|
|
|
|
Post by Deleted on Feb 5, 2015 13:33:22 GMT
Very cool! I love foam it has such great texture. I think Kev suggested using rocks to roll over the tiles to get the same effect. Keep it up.
|
|
|
|
Post by voodoo on Feb 5, 2015 17:40:16 GMT
Congrats on the house and your new crafting room! excellent start on the tiles please keep us all posted with updates! cannot wait to see this all painted up. Cheers.
|
|
|
|
Post by thedmg on Feb 6, 2015 3:24:42 GMT
900 square foot crafting dungeon! Good luck. I am glad you are enjoying the module |
|
|
|
Post by halloweenville on Feb 6, 2015 13:37:52 GMT
First Congrates! on the new home and craft room, when we built our house I made sure to have a craft room put in it's small but it works, it's nice to have a place to work instead of the kitchen table...lol. and Those are some Sweet looking Tiles Can't wait to see more.
|
|
|
|
Post by runningwolf on Feb 6, 2015 16:04:15 GMT
I do have to look in the Dollar Stores for the foam stuff. Ya'll got me intrigued.
|
|
jazhi
Cardboard Collector
Posts: 45
|
Post by jazhi on Feb 23, 2015 18:18:37 GMT
Hubby surprised me with a Silhouette Cameo, which is a cutting machine for paper, fabric, etc. I've wanted one for ages to use for sewing projects, and it changes the game for me. Cutting paper dungeons is fairly trivial with it, and oh so much more perfect (which appeals to me). I like the 2.5D system but right now I love using my Cameo more. I also work for a company that makes printers, so I get a decent price on printer ink.
If someone in the N. Colorado area wants a box of half-done tiles, let me know. I also have a sh*t ton of cardboard that really needs a good home. We don't have curbside recycling anymore, so I have to figure out where I can take it, otherwise.
|
|
|
|
Post by dungeonmistress on Feb 23, 2015 18:23:59 GMT
I, too want to run thedmg's 'Under the Tavern' module. I think your flooring method looks great. What brand of gesso are you using? I make my own because I can very the consistency, color and texture for the project I'm working on (and because I'm always broke), but it is a bit time consuming. And right now, I need to make more. (sigh) I will be most interested to see how your set comes out. I'll be watching! Just saw your new post! Wish I lived in N. Colorado... I'd surely take those tiles off your hands! |
|
milojaggerson
Paint Manipulator
Laying tile on the floors...
Posts: 161
|
Post by milojaggerson on Feb 23, 2015 19:17:28 GMT
Hubby surprised me with a Silhouette Cameo, which is a cutting machine for paper, fabric, etc. I've wanted one for ages to use for sewing projects, and it changes the game for me. Cutting paper dungeons is fairly trivial with it, and oh so much more perfect (which appeals to me). I like the 2.5D system but right now I love using my Cameo more. I also work for a company that makes printers, so I get a decent price on printer ink. If someone in the N. Colorado area wants a box of half-done tiles, let me know. I also have a sh*t ton of cardboard that really needs a good home. We don't have curbside recycling anymore, so I have to figure out where I can take it, otherwise. I have a Zing Cutter that I'm planning to use to cut out the Heroic Maps dungeon tiles. I bought it originally to print out Pepakura projects. I have found that there a lot of extra steps involved in setting up a Pepakura to KNK cut (involving printing the outlines of the figures in the Pepakura file to a .PDF). I assume that the similar steps will need to be taken when cutting out the dungeon tiles (using FOXIT or similar .PDF print program to print out registration marks in .PDF file of the Heroic Maps tiles) Have you had a lot of experience with the Silhouette Cameo cutter? How does that fair when it comes to cutting out the paper for tiles? |
|
|
|
Post by DnDPaladin on Feb 23, 2015 23:21:04 GMT
cutting printers do not remove the need for tiles. if anything it allow for quite better texturing for those tiles. if i were you i'd use both methods.
also, roussseau uses that kind of machine. and hes making 2.5d tiles with it. you should see his set for his TMNT game.
all paper cutted. he basically stacks his paper so his tiles are all numerous paper sheet glued together. he even do 3D models with that method. says its easy to do really !
|
|
jazhi
Cardboard Collector
Posts: 45
|
Post by jazhi on Feb 24, 2015 0:47:18 GMT
I have a Zing Cutter that I'm planning to use to cut out the Heroic Maps dungeon tiles. I bought it originally to print out Pepakura projects. I have found that there a lot of extra steps involved in setting up a Pepakura to KNK cut (involving printing the outlines of the figures in the Pepakura file to a .PDF). I assume that the similar steps will need to be taken when cutting out the dungeon tiles (using FOXIT or similar .PDF print program to print out registration marks in .PDF file of the Heroic Maps tiles) Have you had a lot of experience with the Silhouette Cameo cutter? How does that fair when it comes to cutting out the paper for tiles? The Cameo uses GSP cut files and the community has created them for the E-Z Dungeon set from Fat Dragon. I happened to have that set (which was too much work for me without the cutter), so that's what I tried. The Fat Dragon PDFs include registration marks and I downloaded the cut files. Easy as can be. I'll try to get some pictures to show the process. I made some cut files using the software that comes with it, and that was very easy too. I wouldn't say I have a lot of experience, but I did play with it for most of the day on Sunday. |
|
jazhi
Cardboard Collector
Posts: 45
|
Post by jazhi on Feb 24, 2015 3:10:32 GMT
Ok, here are some pictures. This is a wall section loaded in Silhouette Studio: 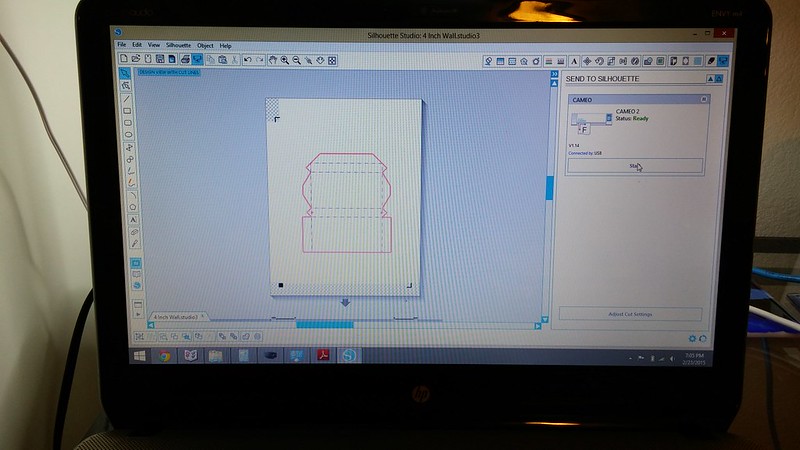 I loaded the printout (on 120 lb. card stock) and sent the cut file to the Cameo: 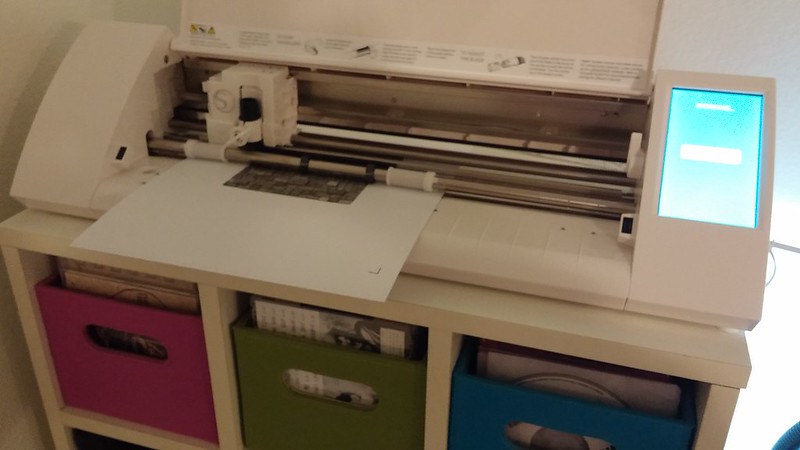 And here's a stack of cut walls and what I have assembled so far (room 10): 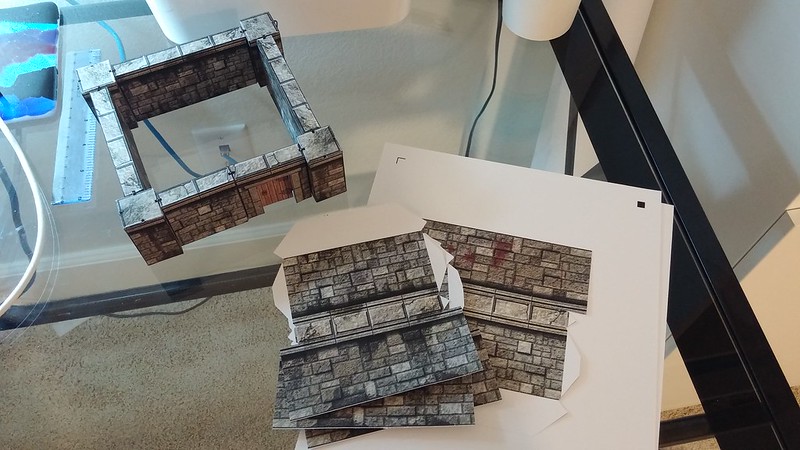 So far I've cut 20 4-inch and 8 6-inch wall sections in about an hour tonight. It really helps that I am using 120 lb. card stock and I don't need to use a cutting mat. Anyway, not to promote 3D on this forum, but I wanted to give Milo an idea of how easy it is. Flat tiles for 2.5D wouldn't be difficult to cut by hand, but I imagine it would be much more accurate with a machine. I would also consider buying full-sheet labels to make them. You can get them really cheap from onlinelabels.com. That's where I used to get shipping labels for my Etsy shop. |
|
milojaggerson
Paint Manipulator
Laying tile on the floors...
Posts: 161
|
Post by milojaggerson on Feb 24, 2015 13:24:48 GMT
Thank you for the pictures, Jazhi. I really like the idea of printing to full sheet labels, but at 10 cents a sheet, it would be best to be sure that the cut is going to be what is desired. Measure twice, cut once! I like the results that the robo-cutters return verses cutting via hand, but single layer and double layer cardboard gets crushed when running through the Zing Cutter. I'm sure the same results would happen in most cutters, so I'm afraid that there is no way to get around hand cutting the thicker material. I am planning to cut out some stencils for floor tiles, then using an air brush to spray over them to make my floor patterns. |
|


 Cheers!
 Cheers!