sotf
Advice Guru

Posts: 1,084 
|
Post by sotf on Oct 20, 2015 0:49:55 GMT
Well, the outside paper layer is done (waiting for it to dry), and needs a bit of the hot glue layer before I'm willing to flip it over to work on the interior of the tunnel. Realized when taking the pics that I'd forgotten to take the curve of the exterior into account when figuring out the tunnel ends, so they're a bit thinner than intended, but will still fit a 2" base inside. 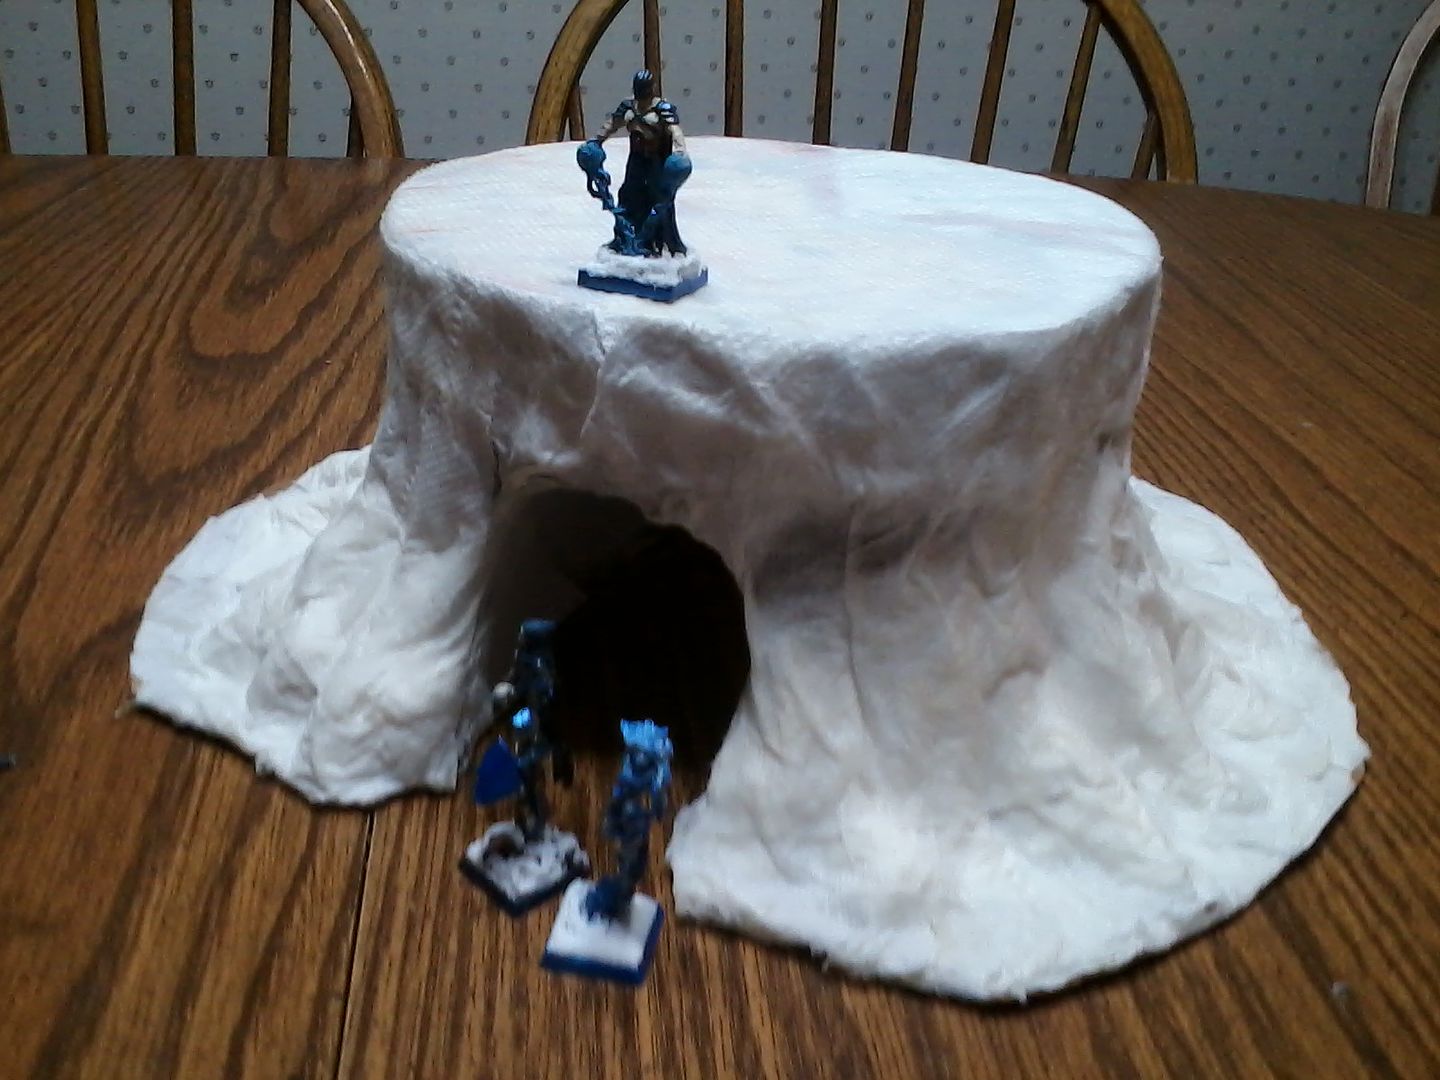 I've actually gotten a good resource for ferns, I found a nice plastic bucket of wilderness animals that has some cheap palm trees of various sizes. The smaller ones are kind of pathetic for trees, even using smaller scale minis, but if I remove the trunk, the leaves are the right size for ferns at 25-32mm...
|
|
sotf
Advice Guru
Posts: 1,084
|
Post by sotf on Oct 20, 2015 20:39:19 GMT
Well, I layered the outside edges with hot glue, still need a bit of trimming there and to pretty much do everything for the interior of the tunnel before painting. 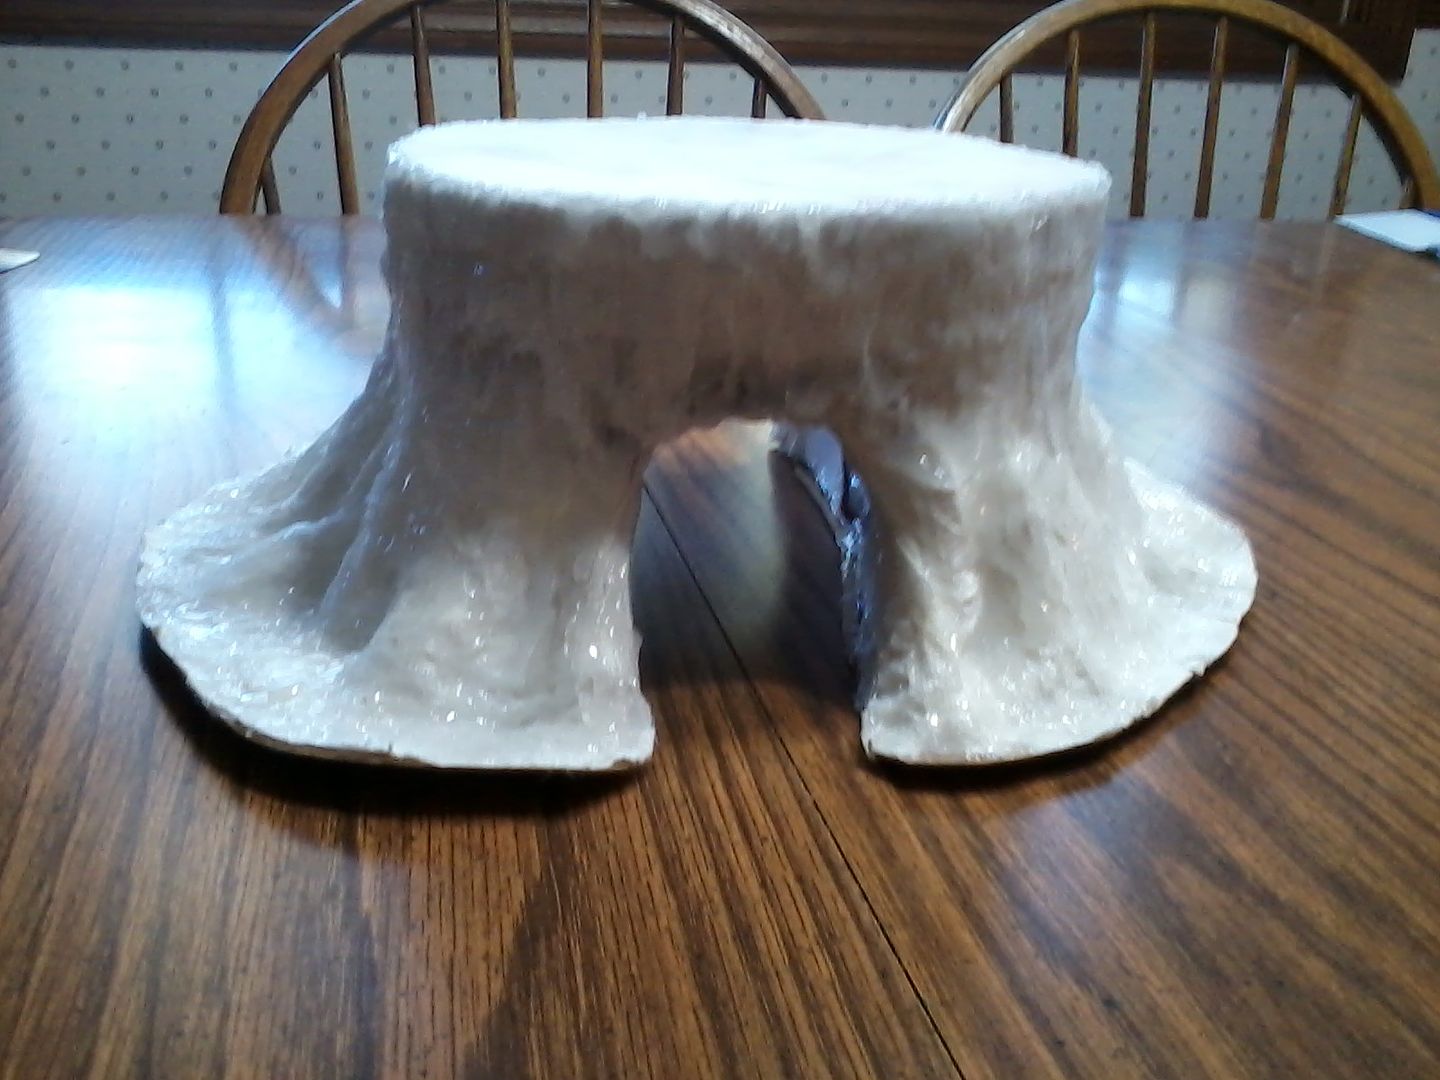 Nothing for scale with this one...but it is going to need basing due to the sheer amount of base warping it has.
|
|
|
|
Post by tauster on Oct 21, 2015 5:04:13 GMT
Now that's one giant treestump! Exactly the right thing for encounters in the Feywild I had in mind for ages... *grins happily*
|
|
|
|
Post by ogrestamp on Oct 21, 2015 7:20:23 GMT
Now that's one giant treestump! Exactly the right thing for encounters in the Feywild I had in mind for ages... *grins happily* That's a World of Warcraft sized tree  |
|
sotf
Advice Guru
Posts: 1,084
|
Post by sotf on Oct 21, 2015 22:15:12 GMT
One thing I'm also considering for that one in particular are inserts to close off the tunnel, but I'm finishing this up first and potentially a few other trees that fit the set
|
|
sotf
Advice Guru
Posts: 1,084
|
Post by sotf on Oct 22, 2015 16:39:56 GMT
Well, the interior is papered up, just need it to dry for the last bit of hot glue for this...this particular piece seems more slow going than most of my projects.
|
|
sotf
Advice Guru
Posts: 1,084
|
Post by sotf on Oct 23, 2015 2:25:56 GMT
Hot glue is on, letting the thing cool and a few painful points on my hands to stop hurting. The tunnel was a pain to layer the glue over, but I got it done. I also trimmed back the base a bit more. Might work some more white glue into the top before calling it for the night as well just to make that even harder.
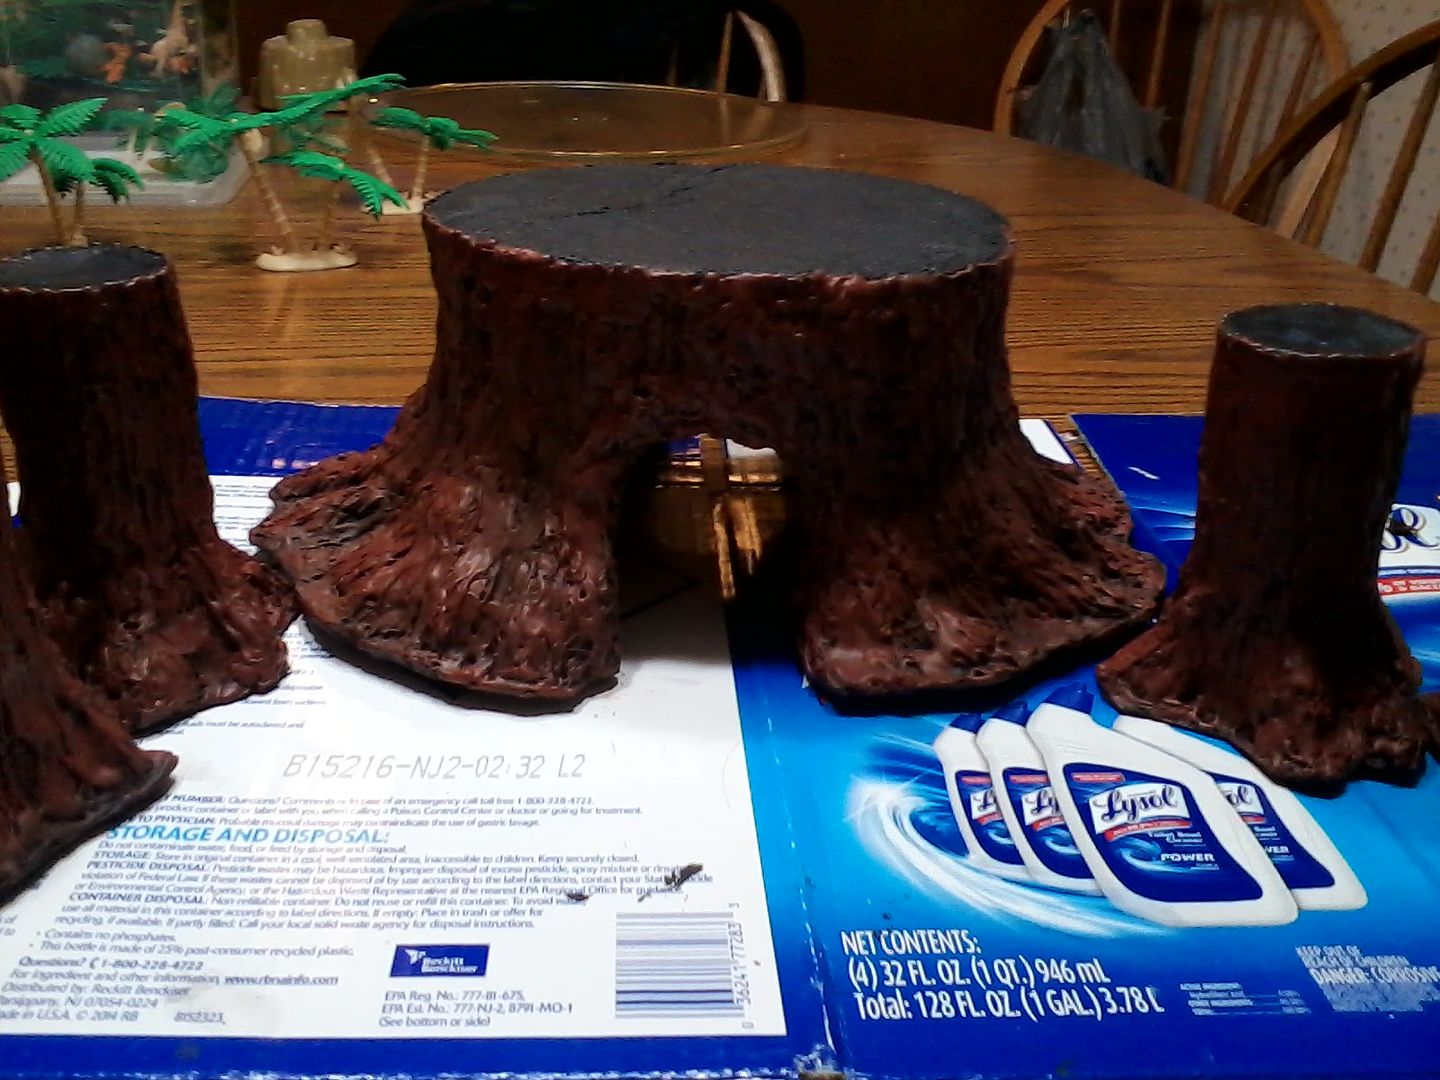
For some basic sizes.
The smaller trees, the largest of them is just under 4" across at the base, the big one is all but a full foot across.
When I get around to ordering the bases I want for them, the small ones are going to be on 5" rounds, and the big one is going to be on a 1' one cut basically in half along the tunnel to add a little bit more height there.
|
|
sotf
Advice Guru
Posts: 1,084
|
Post by sotf on Oct 26, 2015 1:15:57 GMT
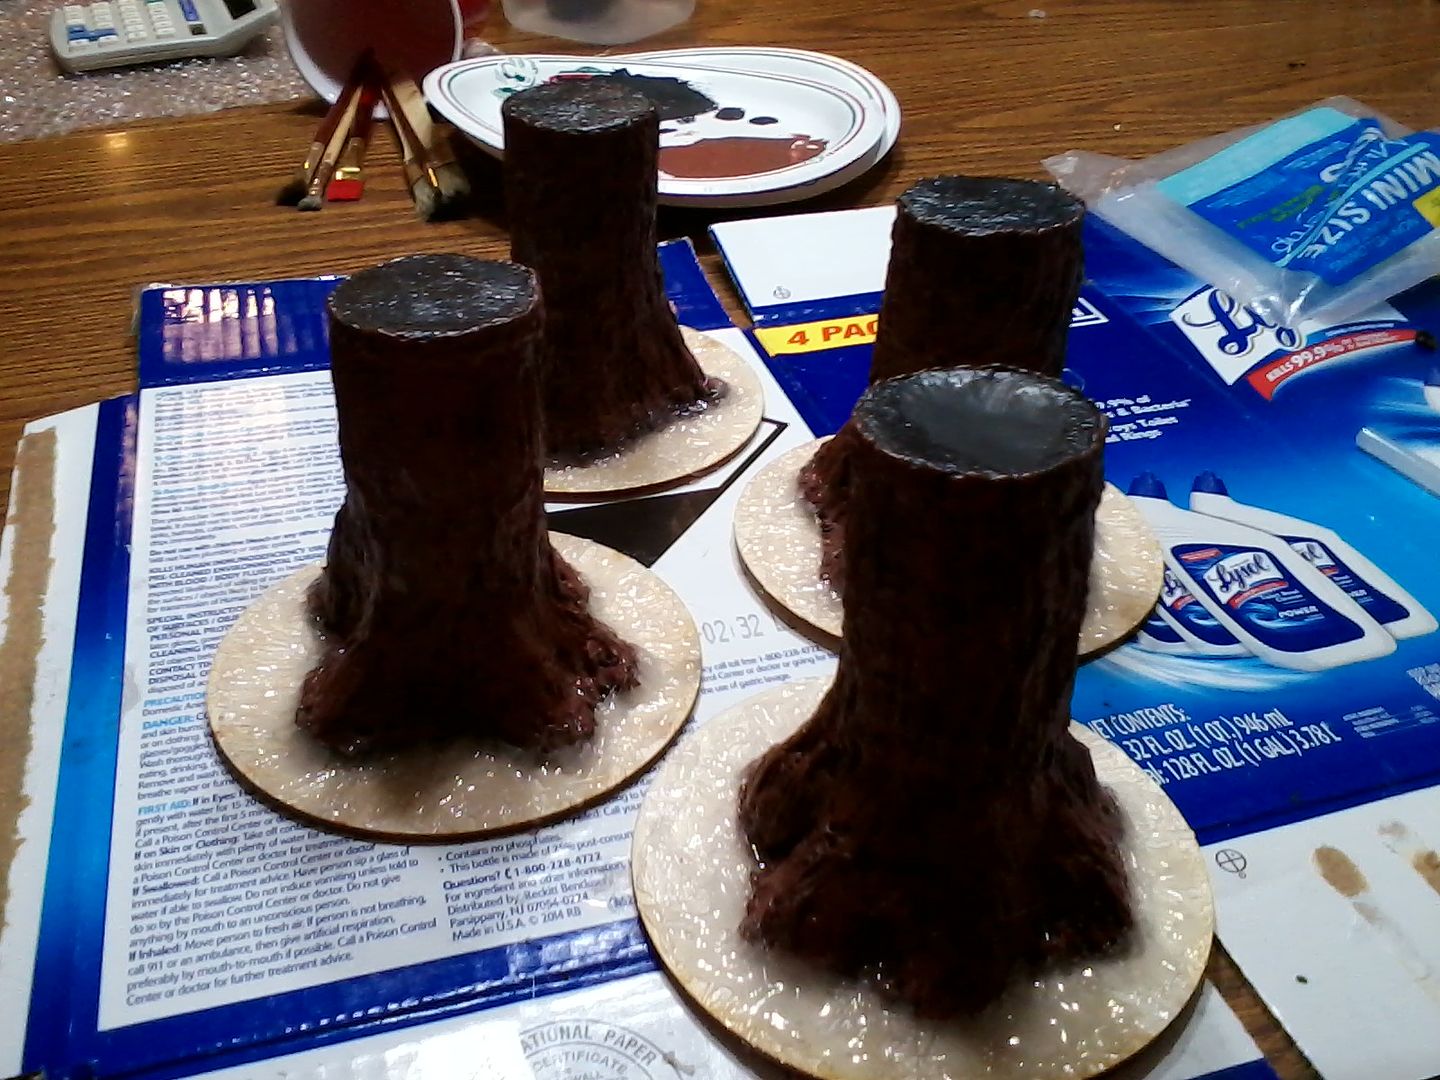
At the moment, it's primed and the first layer of drybrushing is done...a few more to go there.
|
|
sotf
Advice Guru
Posts: 1,084
|
Post by sotf on Oct 26, 2015 4:58:48 GMT
Well, I've got it painted up now, debating on adding ferns now or waiting until I have the base for it to do that along with everything else. You can see the larger of the palm trees that I have in the background, they might be slightly small, but are decent enough for small trees...the smaller of the two, well, they're tiny, and I've got a pic that I'm putting up in my general thread that will show them. But the smaller ones I can pop the fronds off and use them for ferns. |
|
sotf
Advice Guru
Posts: 1,084
|
Post by sotf on Nov 8, 2015 0:21:55 GMT
Got bases in, and attached the smaller trees to the ones I got for them and hit a basic texture...there's a few more steps for basing and I need to replenish my leaf litter as well... |
|
sotf
Advice Guru
Posts: 1,084
|
Post by sotf on Nov 11, 2015 20:03:03 GMT
Well, here's the completed version of the smaller trees baring a layer to seal it up. |
|
|
|
Post by ogrestamp on Nov 11, 2015 21:42:29 GMT
Very cool work there. I am liking these trees. I love how you got that Redwood look down. Good paint skills.
One point. Those ferns work, but perhaps put some glossy varnish on them to give them that just rained on look if you want this to be a rain forest type setting. That might make them pop out.
|
|
|
|
Post by Erasmas on Nov 11, 2015 22:01:49 GMT
They do look awesome, but (in the pictures, at least) the fronds do stand out a bit from the rest. Now, this is just my two cents here...
But I don't flock my stuff after I've painted it. I flock everything up before I even prime, and then I paint the flocking (or whatever the base consists of) right along with the mini (or whatever). The reason for this is because I have seen VERY few painters who can pull off the level of realism in their figures that matches that of most flocking. And so, to me, the two elements usually have enough of a difference to be somewhat jarring. My "fix" for this, since the chances of me becoming that kind of caliber of a painter is slim, is to paint it all. To me, this unifies the elements into a more cohesive finished piece.
Now, obviously this isn't for everyone. But, especially in this case, I think that those fronds could benefit from a full paint job - starting with a primer and building them up with acrylics the same that you did with the trees themselves.
|
|
sotf
Advice Guru
Posts: 1,084
|
Post by sotf on Nov 11, 2015 22:26:20 GMT
Very cool work there. I am liking these trees. I love how you got that Redwood look down. Good paint skills. One point. Those ferns work, but perhaps put some glossy varnish on them to give them that just rained on look if you want this to be a rain forest type setting. That might make them pop out. That's something that would probably make it work well, probably wait until after I hit the rest of it to seal it though. They do look awesome, but (in the pictures, at least) the fronds do stand out a bit from the rest. Now, this is just my two cents here... But I don't flock my stuff after I've painted it. I flock everything up before I even prime, and then I paint the flocking (or whatever the base consists of) right along with the mini (or whatever). The reason for this is because I have seen VERY few painters who can pull off the level of realism in their figures that matches that of most flocking. And so, to me, the two elements usually have enough of a difference to be somewhat jarring. My "fix" for this, since the chances of me becoming that kind of caliber of a painter is slim, is to paint it all. To me, this unifies the elements into a more cohesive finished piece. Now, obviously this isn't for everyone. But, especially in this case, I think that those fronds could benefit from a full paint job - starting with a primer and building them up with acrylics the same that you did with the trees themselves. I'd actually dipped them beforehand. The major issue with ferns is that they're a pain to repaint correctly without losing the right look for one. Sealing them will blend them in more, but ferns kind of hit the several of the same issues as pine trees do along with the issue of being tiny and fiddly in how they have the translucence to the leaves. Basing tends to be largely a matter of taste, and you can do a lot with them. But a good basing tends to work quite well to just make the minis work better in the long run even if the paint job isn't quite the best. By priming and painting over flock, you kind of lose the point of it and you're probably better off just using sand for texture. |
|
|
|
Post by Erasmas on Nov 11, 2015 22:30:30 GMT
I was using "flocking" in a very loose manner of the term - as in simply "any texture that you're gluing to a base", whether that be sand, grass, rocks, etc.
|
|
sotf
Advice Guru
Posts: 1,084
|
Post by sotf on Nov 12, 2015 2:01:38 GMT
I was using "flocking" in a very loose manner of the term - as in simply "any texture that you're gluing to a base", whether that be sand, grass, rocks, etc. Ah, normally there's the texture layer along with anything of that sort which is attached prior to painting, flock which is the basic ground up chunks that tends to be more powdery along with a few other things that are predone to look basically like grass, moss, or other things of the type. Static grass is another thing that is normally put on top of the flock along with things like the tufts, and others. Often basing is just another part of the craft. Good basing makes the minis look better, bad basing makes them look worse. |
|
|
|
Post by ogrestamp on Nov 12, 2015 8:38:27 GMT
Good point, Erasmus, I hadn't thought of that before. A good base is like a throw rug, it should tie the whole room together.
But I do like Sotf's base. What makes it for me is the third tree (the one that is to the right of the triceratops). On the right hand side it looks like moss and it looks like it's creeping up the tree trunk slightly. To me, that would be hard to capture painting and it does add to that overall wet look.
|
|
|
|
Post by skunkape on Nov 12, 2015 14:00:57 GMT
Nice accent by adding the fern bushes on the bases!
|
|


 Cheers!
 Cheers!