|
|
Post by ogrestamp on Oct 10, 2015 5:32:08 GMT
That's a nice texture, looks like bark (which is probably what you were shooting for, right?).
I like them as is but that is just a preference. I would only base them if you were going to add something around the trunks like some ferns or maybe skeleton of a long dead adventurer.
It might be easier to store them without the base, though.
|
|
sotf
Advice Guru

Posts: 1,084 
|
Post by sotf on Oct 11, 2015 0:40:11 GMT
That's a nice texture, looks like bark (which is probably what you were shooting for, right?). I like them as is but that is just a preference. I would only base them if you were going to add something around the trunks like some ferns or maybe skeleton of a long dead adventurer. It might be easier to store them without the base, though. Yeah, it was largely the consideration for if I wanted ferns and other undergrowth or not |
|
|
|
Post by ogrestamp on Oct 11, 2015 0:49:57 GMT
That's a nice texture, looks like bark (which is probably what you were shooting for, right?). I like them as is but that is just a preference. I would only base them if you were going to add something around the trunks like some ferns or maybe skeleton of a long dead adventurer. It might be easier to store them without the base, though. Yeah, it was largely the consideration for if I wanted ferns and other undergrowth or not Well, you could go modular. Create pieces to go around them, if you wanted to go that route. That way you have some variation to play around with. Also, in the giant forests just north of where I live, there is not a lot of undergrowth due to the fact that there is little light reaching down. So mainly you will have ferns around the trunk and a small clump of bush out where there is a patch of light. |
|
|
|
Post by ogrestamp on Oct 11, 2015 0:54:58 GMT
 Found this image. Thought it would help. |
|
sotf
Advice Guru
Posts: 1,084
|
Post by sotf on Oct 11, 2015 1:00:28 GMT
I've been considering things with fallen logs and other things as well for terrain with the set, and basing the trees with a few ferns and the same type of leaf litter would work well to tie it all together for use beyond just RPG pieces.
|
|
|
|
Post by ogrestamp on Oct 11, 2015 1:29:27 GMT
 And this is an Oregon state forest, the kind I remember growing up in as a kid. A lot more underbrush and visibility is almost zero at times. I remember being told, if I ran around in those parks, to stay on the paths. You get off the path and you can easily lose your bearings. As a crafter (and also from watching Star Wars as a kid), I think we gravitate towards the redwoods since there is less clutter and that makes it easier to craft. I myself naturally think about the redwoods when I think about a forest idea, like the fallen log with a pool of water behind it. That would be awesome to see (should you chose to craft it  . |
|
sotf
Advice Guru
Posts: 1,084
|
Post by sotf on Oct 11, 2015 4:06:12 GMT
Yeah, I've got a few ideas for water based ones, but I'm working on other things first until I get some more of the right water effects for those. I'd seen one image a while back of a redwood fall that dammed up a larger creek until it back filled behind it, but the redwood hollowed out so you could walk through the Redwood behind the waterfall...using that more for an event piece along with something that would work well for a board edge or corner to start a feature for boards
|
|
|
|
Post by ogrestamp on Oct 11, 2015 6:58:13 GMT
Now that would be cool to craft and to oggle afterward. "How are those halflings getting across that lake so fast?"
|
|
sotf
Advice Guru
Posts: 1,084
|
Post by sotf on Oct 12, 2015 15:25:20 GMT
Well, I finished painting them up...unfortunately a cousin was over who managed to partially mess one up (Family showed up unexpectedly while I still had them out and drying, he managed to leave a dent in one side, and the top ended up pushed down to leave a visible dent...) but it's fixable for use, but I don't think that if I cast these, that one will end up on the list, though I'm planning another batch of them soon... 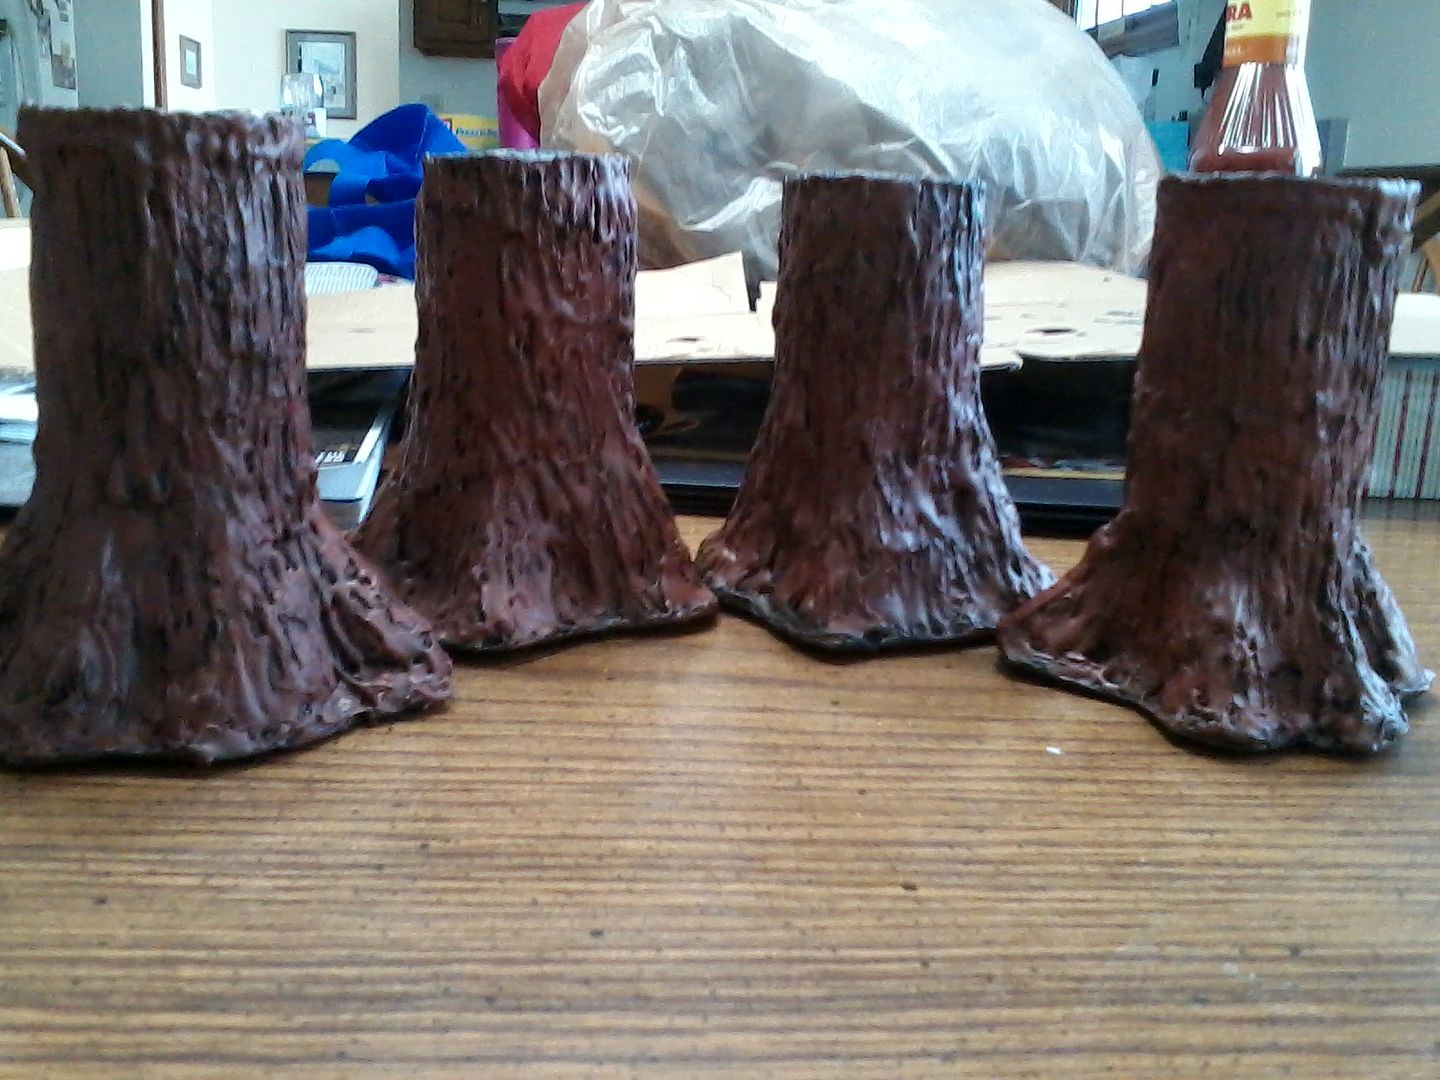 I am probably going to end up basing them eventually, just to make it easier to blend them into the board...and the underside of it has, somewhat warped...fixable by gluing the thing down to something solid anyway.
|
|
|
|
Post by Erasmas on Oct 12, 2015 19:02:08 GMT
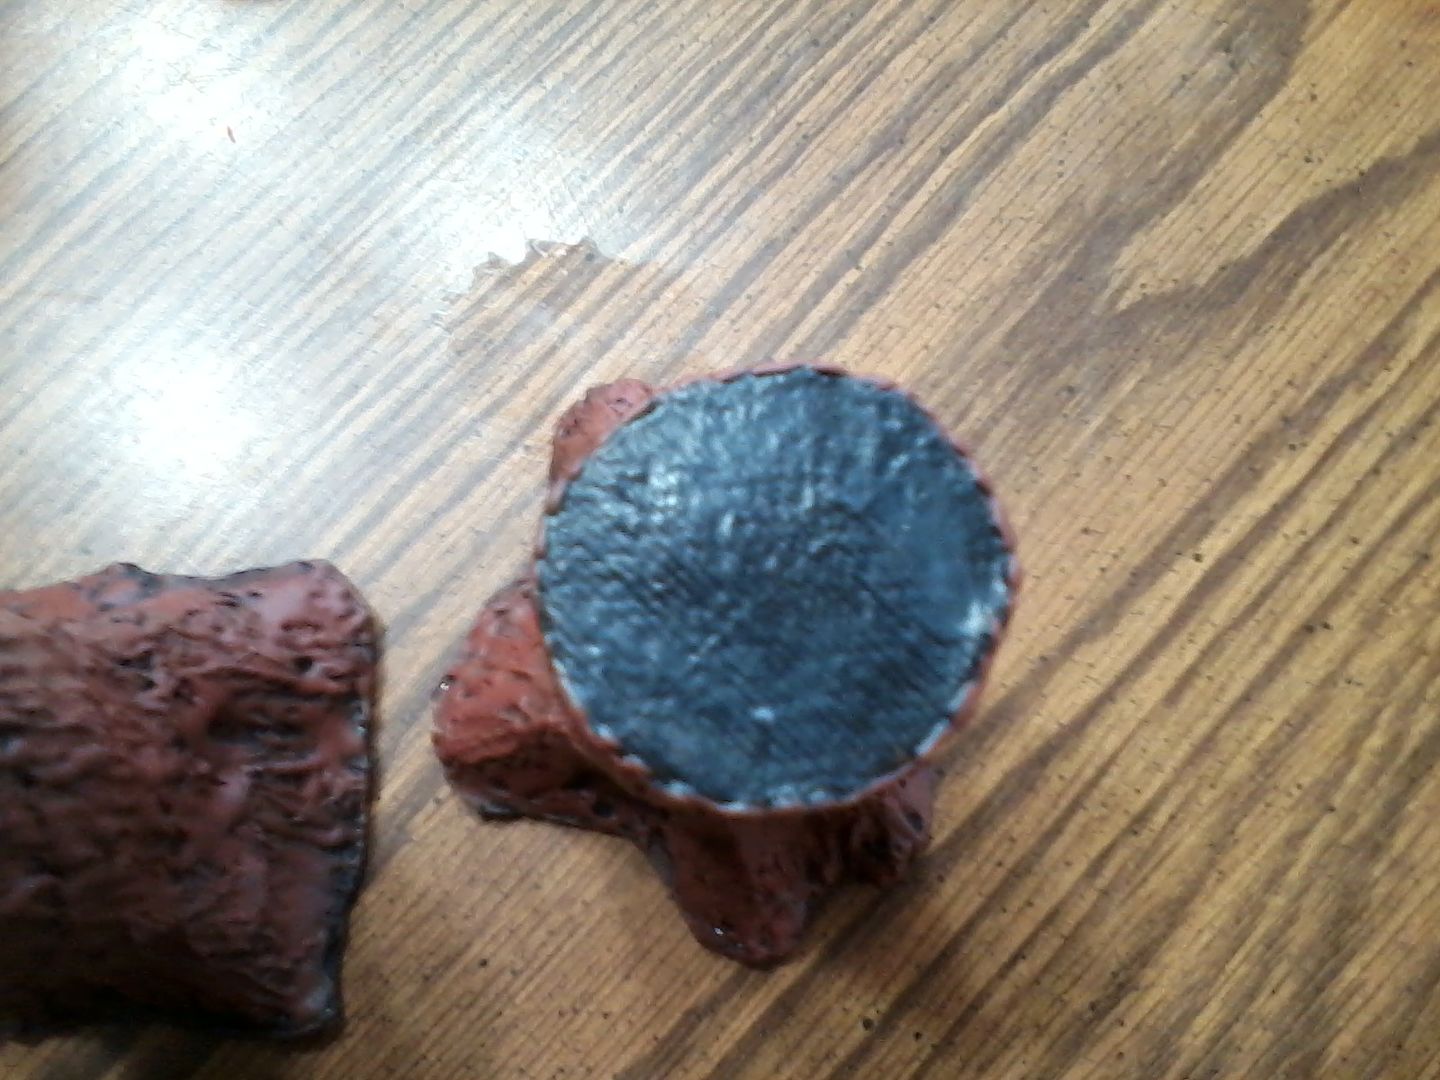
I'm curious to see what you did with the tops of these; the "cross sections", if you will. Could you possibly post a picture showing those?
|
|
sotf
Advice Guru
Posts: 1,084
|
Post by sotf on Oct 12, 2015 19:08:44 GMT
I'm curious to see what you did with the tops of these; the "cross sections", if you will. Could you possibly post a picture showing those? Here you go, the texture isn't entirely what I wanted originally, but it's the flattest I could get without layering card over the top of the paper mache, and the end result does look a bit better than just a flat black. |
|
|
|
Post by michka on Oct 13, 2015 6:43:47 GMT
Fantastic looking trees! I really want to make some big ass trees for a certain forest moon terrain project, and these are exactly what I'm looking for.
Also a big Thank You to ogrestamp for the photos of the actual giant trees.
|
|
sotf
Advice Guru
Posts: 1,084
|
Post by sotf on Oct 13, 2015 13:18:42 GMT
Fantastic looking trees! I really want to make some big ass trees for a certain forest moon terrain project, and these are exactly what I'm looking for. Also a big Thank You to ogrestamp for the photos of the actual giant trees. If you want to make platforms and such for Ewok style villages, you can make them rather quickly if you can cut through craft sticks with scissors and cut baseplates out of the midgrade cardstock like what you find with cereal boxes or the larger packages for soft drinks. You can even raise them up off of what you're sitting them on by adding a pair craft sticks on the underside as runners of sorts, just keep them going cross directions from the ones on top and you have no real warping issue. Glue the wood crossplanks to the card before cutting them down unless you want a join in the middle to make things easier. Same technique works well for piers and docks...though you often need to add things vertically as well there |
|
sotf
Advice Guru
Posts: 1,084
|
Post by sotf on Oct 13, 2015 23:11:04 GMT
Well, I've been working on an idea for a larger piece. It's going to be painted the same, but just a bit larger.
I'm using 4 of the TP rolls, attached together to make a larger base piece, with a path going through the center to form a tunnel. The aim is something akin to the car tunnels that are rather famous in the redwood forests.
Now, I'm not planning on quite so big of a tunnel as to let cars through, but mounted figures and I want at least room for a 2" base with enough space to move.
Since I'm planning on basing the current trees, this would be done at the same time. With a base for each leg, leaving the center open to fit over a path or whatever for easy access to the path as well.
|
|
|
|
Post by kgstanley81 on Oct 14, 2015 3:43:54 GMT
Can't wait to see it
|
|
|
|
Post by skunkape on Oct 14, 2015 20:04:21 GMT
Great looking trees!
|
|
|
|
Post by bluecloud2k2 on Oct 15, 2015 8:00:15 GMT
Fantastic looking trees! I really want to make some big ass trees for a certain forest moon terrain project, and these are exactly what I'm looking for. Also a big Thank You to ogrestamp for the photos of the actual giant trees. If you want to make platforms and such for Ewok style villages, you can make them rather quickly if you can cut through craft sticks with scissors and cut baseplates out of the midgrade cardstock like what you find with cereal boxes or the larger packages for soft drinks. You can even raise them up off of what you're sitting them on by adding a pair craft sticks on the underside as runners of sorts, just keep them going cross directions from the ones on top and you have no real warping issue. Glue the wood crossplanks to the card before cutting them down unless you want a join in the middle to make things easier. Same technique works well for piers and docks...though you often need to add things vertically as well there Or you can ask a cake shop for round boards. Or if you live in the states, I can mail you some 10 inch circles (i have a case of 250 or so). Pm me if you want to work out a trade. |
|
sotf
Advice Guru
Posts: 1,084
|
Post by sotf on Oct 15, 2015 16:02:19 GMT
If you want to make platforms and such for Ewok style villages, you can make them rather quickly if you can cut through craft sticks with scissors and cut baseplates out of the midgrade cardstock like what you find with cereal boxes or the larger packages for soft drinks. You can even raise them up off of what you're sitting them on by adding a pair craft sticks on the underside as runners of sorts, just keep them going cross directions from the ones on top and you have no real warping issue. Glue the wood crossplanks to the card before cutting them down unless you want a join in the middle to make things easier. Same technique works well for piers and docks...though you often need to add things vertically as well there Or you can ask a cake shop for round boards. Or if you live in the states, I can mail you some 10 inch circles (i have a case of 250 or so). Pm me if you want to work out a trade. That's more for the larger platforms and structures, the bridges and smaller ones are easier to do as modular. |
|
sotf
Advice Guru
Posts: 1,084
|
Post by sotf on Oct 16, 2015 22:27:37 GMT
Well, I now have the core section of the tree tunnel done, basically it's 4 TP rolls cut open with a 4" wide 2.5" high door formed on each end (each of the rolls had a 1/2 of each entry cut into it), linked them together to form the round, attached a top to it from a large piece of cardstock. I added bracing on the interior and exterior over the joints from the TP rolls and longer ones inside to make it more sturdy. (The ones on the exterior joins are the pieces cut out for the doorways) When working with the exterior rounds, it works well to have an item of the right size to place it around, I had a pot that this fit perfectly and just had to wait for the glue to cool slightly. If you don't, then you'll need to fight the cardboard because it tends to end up in odd shapes that are a pain to deal with until you have both the top and bottom closed. Then worked another into the shape of the tunnel itself to fit into the link the doorways down the middle and glued in place (It works better to make it oversized and then trim it down after hot gluing it in place) before I stuffed the open spaces inside with crumpled up paper towels before covering the underside openings with cardstock to seal up the interior. Then I took triangles cut from the scrap cardstock to extend around the tunnel entrances both from the inside of them and underneath to have edging templates for when I make the roots to help keep them fitting the chopped out tunnel look as well. One major thing to remember with this type of tree style is that with things like the top, tunnel, or underside (even the mini walls for handling the roots later on) is that an overlap is perfectly fine if not a good thing as long as it doesn't interfere with other pieces. It adds area where you can make sure things are hot glued securely in place and those overhangs get covered up when you get to the step of making the roots and paper mache TP layers, and then even more with the hot glue texturing layers. My only current issue is that it ended up a lot larger than I'd initially considered (While glueing it together, I'd planned on having larger overlaps along the side but that got changed due to not finding a template item to keep the shape of the right size while I had something of the right size with what I ended up with, the other being that with the height of the TP tubes, the tunnel probably ought to have been higher, but I can increase the height somewhat with the next underside layer (Which is to provide space to work the roots outward) and basing. 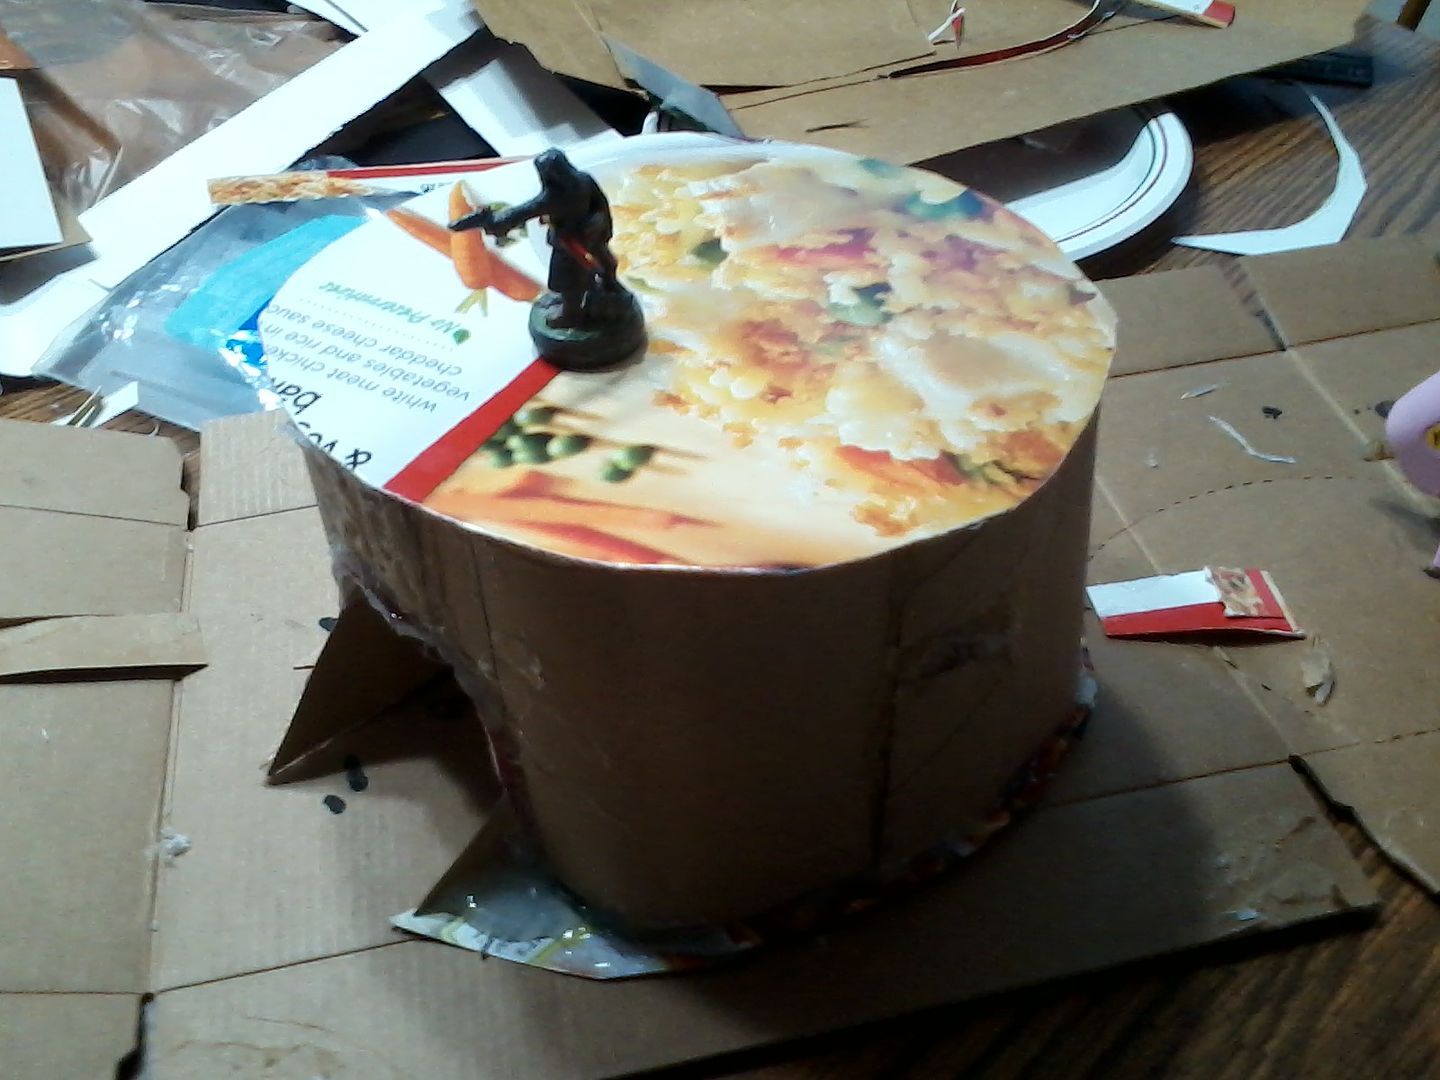 And, yes, there are large blobs of hot glue along the sides of the template pieces, that's mainly to make initial work with the TP in those areas easier.
|
|
sotf
Advice Guru
Posts: 1,084
|
Post by sotf on Oct 18, 2015 2:23:38 GMT
Hit a minor snag in texturing it. Needed a second layer of paper towel for the top because the first separated...only have the type that has the "half sized" sheets, so two of them would work except with the water and glue, it pulled apart, so I needed another layer to try smoothing it out...
Unfortunately, that's going to make it a bit harder for smoothing out the sides of the piece since I tended to largely work from the bottom up save for the very top, hopefully the end piece won't have that much of an issue, I have the roots worked out, mainly need the top half of the sides and the interior of the tunnel to work out.
|
|


 .
.


 Cheers!
 Cheers!