|
|
Post by Erasmas on Apr 7, 2015 20:28:46 GMT
Wherever there's room. I have TV tray tables in the room as well, but it definitely takes up the limited real estate of my gaming room very quickly when we do that. Now, I can't speak for my players, but if it were me playing... I would gladly keep my sheet off-table if it meant that I got to have more room for this kind of stuff. I usually put my sheet on top of a folder for writing support anyways (since the battle mat is vinyl, it is soft). So long as I have room to roll my dice, I'm good!
|
|
|
|
Post by voduchyld on Apr 8, 2015 12:58:50 GMT
Great looking stuff. I was try thinking of other sources for Asian themed minis. I remembered that Mattel had a very short lived toy line called GUTS! in the mid 80's, and one of the series was Ninja warriors. Here they are: 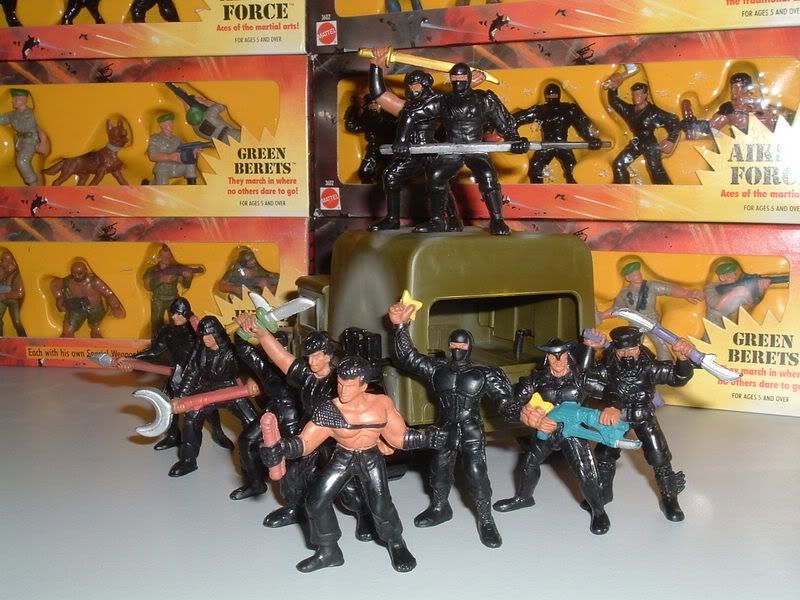 After looking up some statistics, it says they were between 2.5" and 3" tall. That is probably a bit tall for the 28-30mm scale (unless you have giant types in your game). Of course they could always be used for statues. Anyway, just thinking out loud. There are some on ebay right now Ninja Guts!I had some of those when i was a kid! They'd be great for the TMNT game i'm planning, since my turtle figures are like 2" tall. Thanks a lot curufin! |
|
|
|
Post by Erasmas on Apr 15, 2015 16:49:53 GMT
The work has slowed somewhat, but I'm still whittling away at it! I based up the Warbirds for my Umaji. Apparently, I failed to get any pictures of the bases in progress before the birds themselves were attached. However, you should still be able to get the idea. I found one more on the net and have it on order, but for now... here's the four that I currently have. The far left one has two different kinds of flocking down (though it is hard to tell the difference between them). The middle of it will be a gravel path with the outer edges being grass. The second bird is on a platform of matchsticks... it'll be a bridge/dock, something to that effect. The third bird (who I called Leaner, due to how far over he was warped to one side) needed a bit of a lift under one foot, so I built up layers of single-layer non-corrugated cardboard made to look like slate steps. I then just filled in the ground level with large-grit craft "sand". The final one is meant to look like it is in a bamboo forest. So, I glued down a piece of bamboo skewer (mostly buried) and then sprinkled on rosemary (I think that's what it is) as bamboo 'leaves'. I then put down another section of skewer. The buried piece will be painted tans and yellows, to look dried out, while the one on top will be painted more like the bamboo base from above... in order to look fresh.  Now, I plan on making some additions to the Umaji; namely elongated tail feathers and a short "mane" of feathers down the crest of their necks. Here is the beginning of my test for making the tail feathers. I measured off a section of scrap cardstock enough for three of the birds, as that's just so happens how big the scrap was. I measured them out as 1" long by 1/4" wide and cut them out roughly... since I want some small variation in length and width. I then marked them 1/8" from the top and used PVA to glue a section of small paperclip down (these are 1 1/4" long), not gluing them all the way to the top. I then rounded and tapered each feather down. The paperclip is meant to supply rigidity to the feather, allow it to keep any bend I give it, and stand in for the "quill" portion of the feather (not sure what the proper term is). I still need to bend these and cut the feathering into them... and then they will get stuck into the butt of my birds. I still haven't decided whether it will look better to put the paperclip on top or to hide it on the underside. Thoughts?  |
|
|
|
Post by Erasmas on Apr 20, 2015 15:18:41 GMT
Okay, I've gotten a bit more progress done on my Umajis' feathers (at least for their tails, that is). I also filled in the holes in their saddles with hotglue and then sheared it off at the surface. I might still go back over this with PVA or superglue to make it a bit more seamless when it comes time to paint them up.  And an above shot... 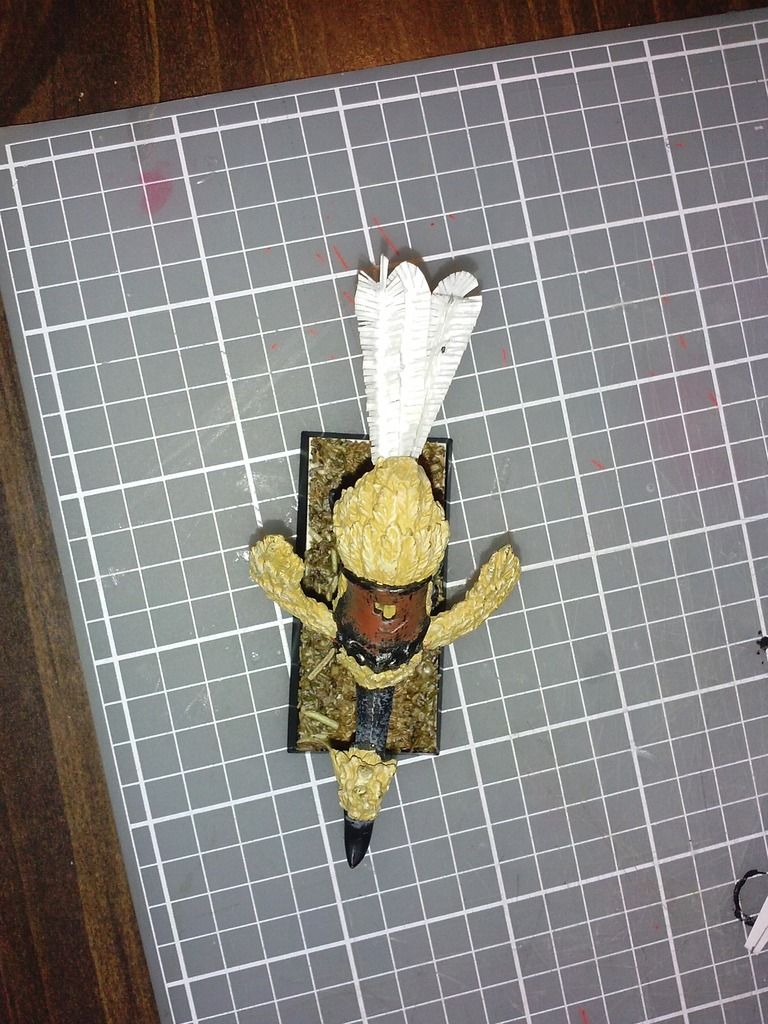 And now for the group shot. So far, I only have the four; a fifth one is on order. Again... if you know of where I can find more of these at a good price, please let me know!  And once again from above...  |
|
|
|
Post by DnDPaladin on Apr 21, 2015 4:48:53 GMT
Aero dynamics or just ready to lay eggs ?
i dont know with those feathers at their tails. it looks like they just had their butt raised and ready to dump.
the again they are running and its just more aero dynamic that way. love the feathers also. i think these are coming along nicely. so i'll put the blame of the laying eggs thing to my messed up mind.
nice work pal. its coming along nicely.
|
|
|
|
Post by Erasmas on Apr 21, 2015 14:53:00 GMT
Maybe they lay eggs while running!
LOL
No, I'm kidding, that's a terrible idea for species propagation. Aerodynamics was more the idea - a look that was more reminiscent of peacocks or roadrunners. It was a part of the original creature design... plus, it helps them look a little less like Chocobos.
|
|
sotf
Advice Guru

Posts: 1,084 
|
Post by sotf on Apr 23, 2015 0:22:58 GMT
One thing you may want to consider if you're going to do more of them, or similar basing is to look at some of the rimmed bases that are now available in more standard sizes than the 30mm+ rounds, they tend to work great for things with basings that raise the mini up more, and let you do other things while keeping a lower balance point, so less chance of them destabilizing and falling when you don't want it to.
|
|
|
|
Post by Erasmas on May 6, 2015 14:47:40 GMT
Alright, my fantastic wife and I managed to get some work done on those roofs this weekend! I made up a mixture of PVA and water and coated all of the tops with a brush. Placed them in the bright sunlight of an East Texas spring day on the concrete and each piece was dry about the time that it took to coat another one and get it outside. And then we did the bottoms on all of them the same. There was some warping from this step but not all that much. However, there was quite a bit more from the next stage - priming them black. Laid out a dropcloth and sprayed down the tops, making sure to cover them from all angles as much as possible. Then, once those were all dry, hit them again on the bottoms. The warping really seemed to occur on the edges, where I had (purposely) left an overhang of thin cardboard to give them the illusion of height. C'est la vie. I just applied more hot glue to the places that needed it, where I could, and marched onward. Truthfully, with the exception of one piece, I don't think it's all that noticeable. Anywho... then came the first drybrush of medium gray, hit "heavy and sloppy". We then went back in with a light gray for highlights along each individual ridge, leaving an untouched portion between the layers to give them some added shading. Then came the fun part. Using thin detail brushes, we went through and painted perpendicular lines to give the suggestion of separate tiles along the ridges. This stage was painstaking, but man did it make a difference! Also included below is a picture showing some of the green paint put onto the "woodwork", courtesy of my wife.    |
|
|
|
Post by Erasmas on May 7, 2015 23:12:58 GMT
So, taking a small sidestep into a less crafty aspect of this build... what do you guys think would be some interesting elements to throw into the mix when I run this scenario? I was thinking about it going a little something like Assassin's Creed, obviously with skill checks to keep balance and to jump gaps. But what are some other things that I can toss in there to help make this even more fun and memorable?
|
|
|
|
Post by dmconnor on May 8, 2015 1:45:15 GMT
Love this thread! Been wanting to do an East Asian campaign for a while, and there's lots of good stuff over here. Anyways, here's some ideas:
Maybe find a way to use some flying enemies that can pester/attack the players, perhaps driving up the difficulty of the skill checks.
It'd be interesting to have a building with a week roof, and if too many PCs stand on it, it collapses.
You could have a few catwalks/boards between the roofs. These could be moved and influenced by the players or the enemies.
You could have an enemy (Likely magical) use a spell or ability of some sort to cause high winds, making certain checks difficult and causing players to drift in a particular direction. Perhaps there's a druid, and they use some plants or vines that are growing up onto the roofs, adding obstacles for the PCs.
Maybe there's an area of particularly loose shingles, and the PCs could fall and slide if they run over it.
|
|
|
|
Post by DnDPaladin on May 8, 2015 19:41:38 GMT
its really nice, if i had to pick a fault in the design, it would be simply that the black in between the tiles is too big.
but overall, thats a really nice set of roof. truly well thought and done.
|
|
|
|
Post by Erasmas on May 8, 2015 20:38:32 GMT
Thanks for the suggestions dmconnor! Those are exactly the kinds of ideas that I was looking for. Yeah, I probably could have striven to get more of the medium gray down in between the crests in the corrugation. Like I said, that coat was put on quickly and I'm not sure that the technique that we used would have gotten the paint much deeper than what it did without filling in the gaps entirely. Thank you very much for taking the time to look through them and let me know what you think! |
|
|
|
Post by Erasmas on Aug 11, 2015 19:19:45 GMT
Hey Crafters! I'm still here, lurking mostly. I haven't been getting too much done on my projects as of late, but I did finally sit down and knock out some more work painting the guard tower for my Rooftop Chase sequence. Here's the whole thing all painted up. I'm still not 100% certain that I am in love with the extreme highlights on this, but it is growing on me. The gold accents are drawn on with a paint pen.  Close-up #1.  Close-up #2. 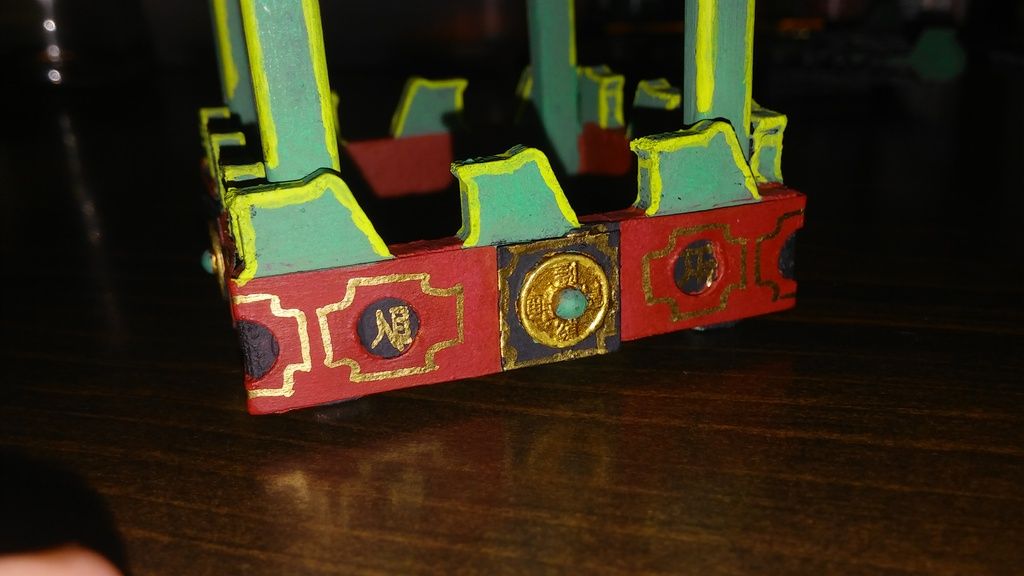 The "kanji" are symbols that I found online, where it was our alphabet turned into asian-styled symbols (some have been modified). I am going to use this so that, after a fashion, my players will actually be able to read props that I had to them. The letters on this simply say 'Jongshao", which is the name of the city where this scene will be taking place. I am still not sure what color to paint the gemstones in the center of those discs... Here is the progress on the hanging lanterns, which will go on the corners of the tower. I primed them in white, then painted them three shades of red (it's very subtle), leaving the middle the brightest to simulate illumination. I then highlighted certain parts in gold and painted the ropes black. There will be a gold accent on the ropes as well, just above the topmost lantern.    |
|
|
|
Post by nvdberg on Aug 11, 2015 19:27:00 GMT
EXALT! Damn nice. Keep it up.
|
|
|
|
Post by Deleted on Aug 11, 2015 19:40:21 GMT
I've been wondering what you've been up to. We need to get together for another paint day brother.
|
|
|
|
Post by Erasmas on Aug 11, 2015 19:50:25 GMT
Yeah we do!
Lately I've been getting things together for the upcoming BrigadeCon. I signed up to both play and run a game, so I have been putting my stuff together for the one I am going to GM. Other than that, just been doing things one day at a time and trying not to melt down here in the Sultry South.
|
|
Akrid
Tool Gatherer

Posts: 72
|
Post by Akrid on Aug 12, 2015 2:45:16 GMT
New post got my attention, and along the way through your thread I seemed to have dropped my jaw. While I go back and look for it let me just say "damn son, you got a mighty brain in your head."
|
|
|
|
Post by Sleepy Hollow Mike on Aug 12, 2015 3:14:15 GMT
I was wondering where you had gotten off to? I shouldn't have worried. The project seems to be just humming along fine!
|
|
|
|
Post by DnDPaladin on Aug 12, 2015 3:48:47 GMT
as usual, awesome work there.
|
|
|
|
Post by vestrivan on Aug 12, 2015 9:55:08 GMT
Stunning paint job! The tower is awesome! I was waiting for you to post your progress!
|
|


 Cheers!
 Cheers!