|
|
Post by Erasmas on Mar 19, 2015 14:12:13 GMT
Awesome.
TY for the wonderful recommendation on that, DMagamus!
I guess great minds think alike, huh?
|
|
|
|
Post by Erasmas on Mar 20, 2015 14:35:56 GMT
Not much of an update today, I am afraid. Wednesday night I decided to try my hand at creating that class that I mentioned above. I think it turned out alright, though it still needs to be playtested. And last night was 1st Edition night, so no more crafting then either. However, here are the promised pictures of the primed minis!  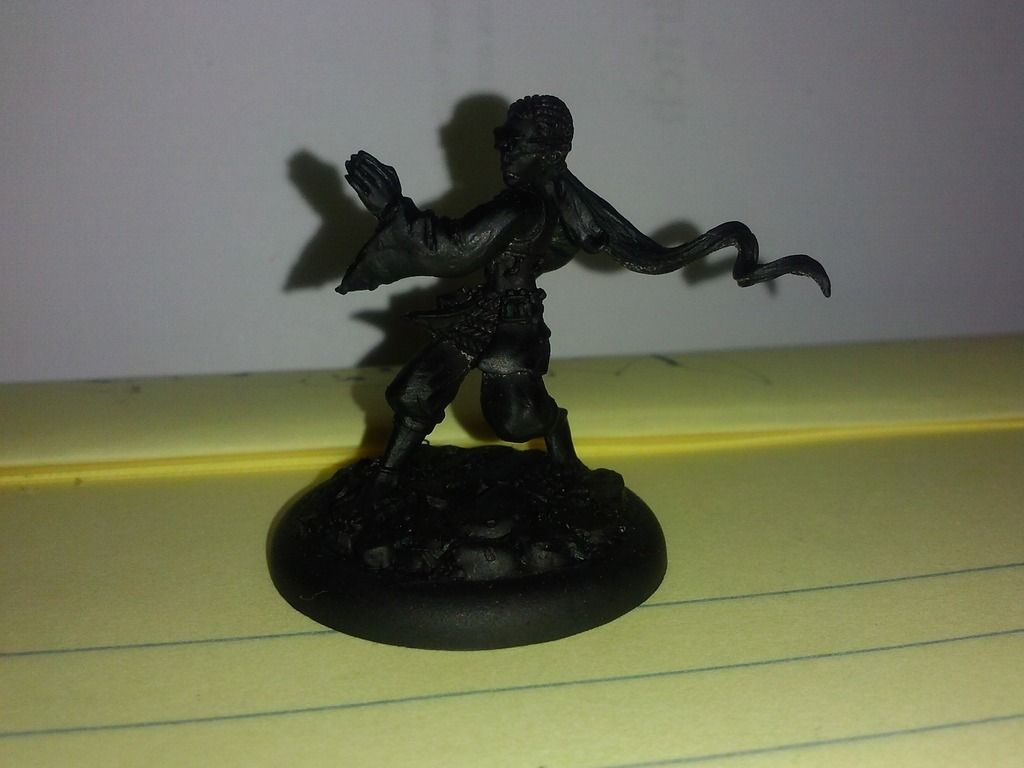 |
|
sotf
Advice Guru

Posts: 1,084 
|
Post by sotf on Mar 20, 2015 15:07:00 GMT
One thing you might want to consider with the koi people is to give them a layer of gloss varnish over their scales to make them look wet.
|
|
|
|
Post by Sam on Mar 21, 2015 12:45:58 GMT
Great looking stuff! Love the Asian sand garden.
|
|
|
|
Post by Erasmas on Mar 23, 2015 15:47:59 GMT
I managed to get some painting done over the weekend (mainly just yesterday). I had three bases that needed to be done and had already "flocked" and primed them. Ninja on gravel (same sand that will be used in the zen garden)  Geisha on wood planking (made from wooden coffee stirrers). The black edges on this one still need to be touched-up.  And this one is for a samurai, but since it turned out so pretty, I wanted a picture before I glued him in place. You can see the pin holes where his pegs will go.  And, last but not least, I also got started on my Koi People (calling them the Kobai). These were both base coated in a color called Parchment, and then drybrushed in Pure White. I did the eyes in black, then a brown iris with lighter streaks in it, black pupil, and then white dots for 'reflection'. The one of the left has been given his first pattern color, which will be built up more into orange from where he is now. The other will be done similarly.  |
|
|
|
Post by DnDPaladin on Mar 23, 2015 19:17:39 GMT
awesome work.
|
|
|
|
Post by SpielMeisterKev! on Mar 24, 2015 0:58:39 GMT
Howdy,
Them Koi gonna be the shizzle!
Kev!
|
|
|
|
Post by vestrivan on Mar 24, 2015 9:45:34 GMT
Cool bases, specially the bamboo... breathtaking!
|
|
|
|
Post by Erasmas on Mar 26, 2015 3:53:33 GMT
Still making progress on roof-building and a small amount of painting as well. Some more of the minis that I ordered for this are trickling in, and I will share the more prominent of those soon!
In the interim... I have a question. When coating carboard with the PVA/water mixture (such as I am nearing the point of doing with the roofs), is there any risk of warping it because of the water? If so, is there any way to avoid this?
|
|
|
|
Post by vestrivan on Mar 26, 2015 7:01:36 GMT
Cardboard can warp from almost any watery substance so be prepared... Look at the shoutbox down here. renel just asked that question and you have some answers... |
|
|
|
Post by Erasmas on Mar 26, 2015 15:43:20 GMT
Yeah, I"m just worried that whatever clamps or weights that I use are going to mess with the glue's surface when drying and will mar it. But, I will test it out on a smaller one and see what needs to be done! Anywho... more pictures! I have a planned NPC that will be based off of this picture (not my art, but I did modify the eyes):  So, when I was cruising for miniatures, I happened upon this awesome mini in the Elmore line from Dark Sword Miniatures! The only change that I had to make was his sword (which was decidedly "longsword-y"). I didn't have a falchion... but I did have a katana! 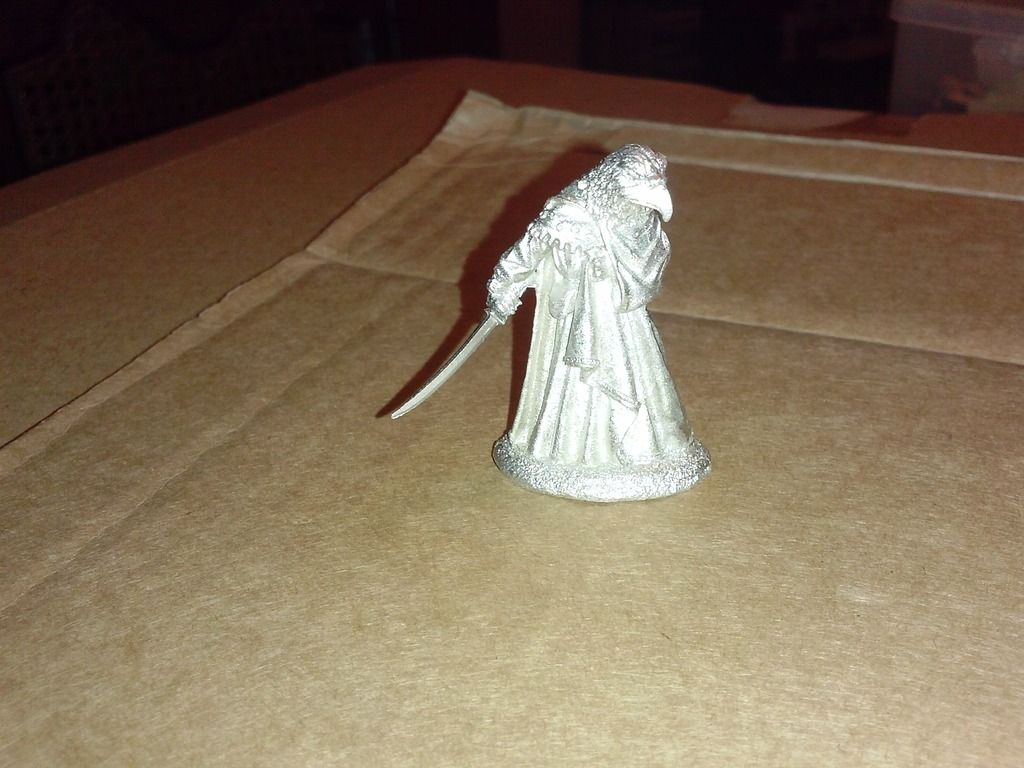 Okay, in the beginning of the Rooftops Project... I had one other 'significant' piece that I wanted to make - a large square "doughnut" that had an open-air courtyard in its middle. The piece measures 16" on a side, with a 6"x6" hole in the middle. Here it is after just the first two layers (the double-corrugated "foundation" and the LEGO cardstock "base"). Yes, I am an incredibly hairy bastard... thanks for asking.  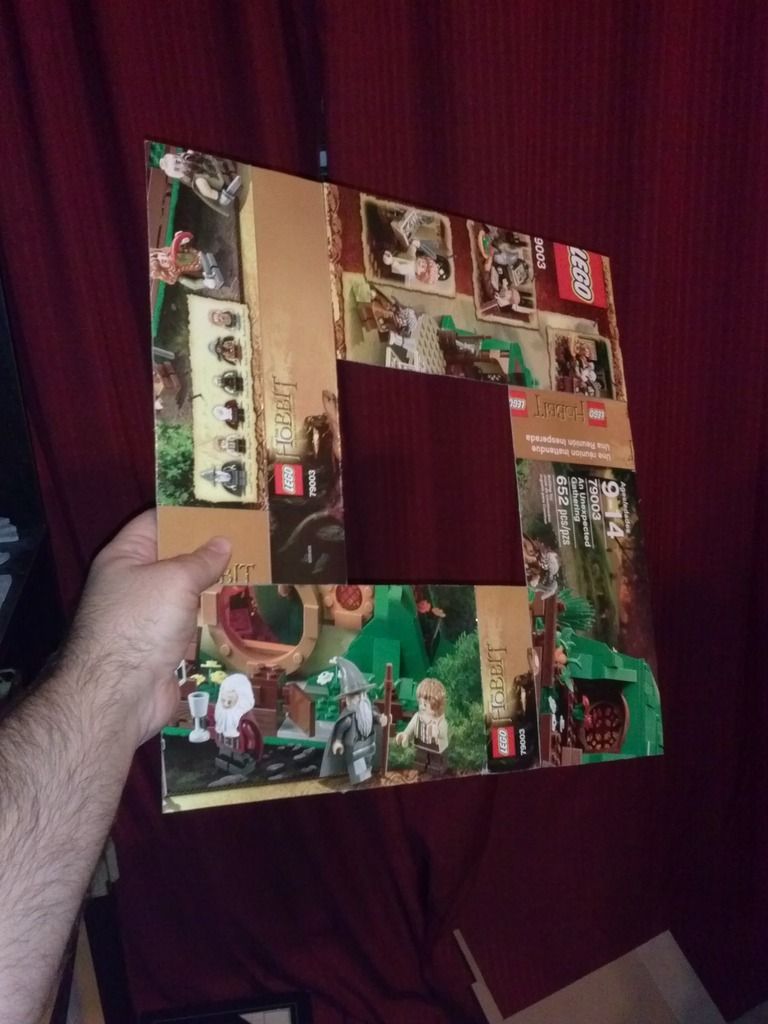 And here it is nearly finished. The only thing that it's missing at this point of the build is the quarter-inch strip of cardstock that indicates the 'peak' of the roof and a few more pieces of matchsticks.  |
|
|
|
Post by SpielMeisterKev! on Mar 26, 2015 17:24:07 GMT
Howdy,
Great find on the bird figure. Looking forward to seeing it painted up.
Emphasis on the flightless,
Kev!
|
|
sotf
Advice Guru
Posts: 1,084
|
Post by sotf on Mar 27, 2015 0:43:05 GMT
There's another option for the roof joints for keeping the tile theme if you don't want all of them to be ridged. Grab a couple extra plastic straws next time you get fast food, slice them in half length wise and then cut to size. If you want a bit more detail, chop up a bit to smaller lengths and layer them on to have the appearance of individual tiles. If you want to do exterior japanese style walls, piece of foam cut about the thickness of the wider tongue depressors that are sold in the crafts isle and high enough for your wall, mark about a third of the way up with a groove, take toothpicks and fill the groove, below that use a pen to engrave rough stone work, and above it would be plastered so can be left flat. For the roof, take two pieces of carboard with the corrugation exposed and join them with one of the small craft dowels the two lengths making the front/back tiling and look rather good. I've got a few examples on a blog that I really need to start working on again...though the only one I've got a picture of is part of a ruined section, I do have a few intact pieces as well Also found the older thread I'd started here with a few other tips. And one other major thing to consider, take a look at the wooden architectural puzzles. There are tons of asian buildings from all over in a lot of different scales and detail levels. They also tend to be quite cheap, though require a little work to get them game ready, but tend to go together easily there and paint up stunningly |
|
|
|
Post by Alexis on Mar 27, 2015 4:28:42 GMT
Wow those bases you made look absolutely amazing! The bamboo is my favourite. Great job!
|
|
|
|
Post by belatucadras on Mar 27, 2015 4:53:30 GMT
Everything looks top shelf! Great job on the koi and the bamboo base.
|
|
|
|
Post by Erasmas on Mar 27, 2015 14:58:26 GMT
Thank you guys, for all the kind words and encouragement!
Alexis: The bamboo was just toothpicks cut to length and glued down. I then used my pin vise to drill holes for the mini's pegs (sections of paperclips drilled and inserted into the heels) and painted it up. With you painting skills being what they are... something like this is easily within your grasp!
SOTF: Thank you for the heads-up and for slapping the links up here. You've got some awesome-looking stuff! I really like the design idea for the exterior walls... if I find myself needing to make some of those, I will definitely be stealing your idea. And yes, those puzzles are fantastic! But the storage and inability to have play take place inside of it puts a pretty big damper on them as an option (for me).
|
|
sotf
Advice Guru
Posts: 1,084
|
Post by sotf on Mar 27, 2015 17:59:46 GMT
Thank you guys, for all the kind words and encouragement! Alexis: The bamboo was just toothpicks cut to length and glued down. I then used my pin vise to drill holes for the mini's pegs (sections of paperclips drilled and inserted into the heels) and painted it up. With you painting skills being what they are... something like this is easily within your grasp! SOTF: Thank you for the heads-up and for slapping the links up here. You've got some awesome-looking stuff! I really like the design idea for the exterior walls... if I find myself needing to make some of those, I will definitely be stealing your idea. And yes, those puzzles are fantastic! But the storage and inability to have play take place inside of it puts a pretty big damper on them as an option (for me). Actually, there are several that you can play inside with, and if you're careful with assembly, they can be taken apart and put back together with flat storage. There's two builds from Stormtable (Though they're somewhat older now...) that show some pretty good interior playability, though he went more into the permanent setup for them and included basing and similar, but if you paint it in pieces, you can dissemble them easily enough...I've got a few other architectural models that I've cycled through as just decorative models in my office, that I have a bin full of them stored at various stages of dis assembly. Southern China HouseJapanese UchiWhile they're youtube links, they're to playlists of the full assembly, basing, and painting. |
|
|
|
Post by Erasmas on Mar 27, 2015 19:08:06 GMT
Excellent.
Thank you!
|
|
|
|
Post by Erasmas on Mar 30, 2015 17:13:49 GMT
I got another one of the NPC's miniatures in. The inspirational picture for this one is currently in flux. I had one picked out, but I have since found one that I like better... so I will likely be going with that. Anywho, it is a Hobgoblin mini from the new line of D&D miniatures made by WizKids. It already has a decidedly Asian-themed armor design to it. I just wanted to push that a little more. He will be getting a repaint. 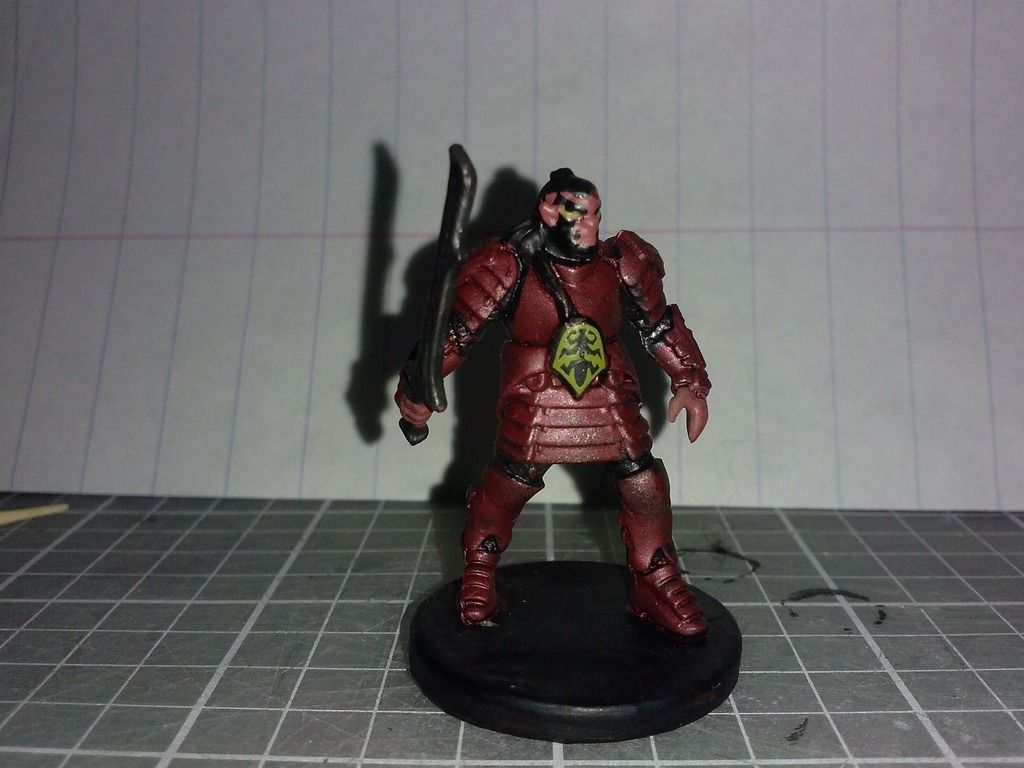 I decided that I wanted him to have one of those back flags that samurai have some times (forgive me for not knowing the name, I researched it and have since forgotten it again). So, I cut a section of bamboo skewer, drilled a small hole in it and inserted a section of toothpick. This made more sense than lashing it together, in my opinion. I then cut a piece of cardstock with tabs and super glued it all together. I also coated the flag in super glue to strengthen it.  I wanted him to have a samurai-esque helmet, so I put down some cardstock "plates" on his upper back and his neck, opting for Green Stuff for the dome of the helm. I then sculpted that on, pressed a seed bead into the top of it for some decoration, and more cardstock for the 'wings' and circle on the forehead. I used a bit more cardstock to wrap around the base of the skewer so that it looks like this pole is seated into some kind of harness to hold it in place.  Despite my best attempt at estimating how much Green Stuff I would need for the helmet, I was off. So, with what I had left over, I sculpted a tanto (shorter sword) sheath to put on his hip. Nabbed another, more oblong seed bead for the crosspiece and another section of toothpick inserted and filed down to size. 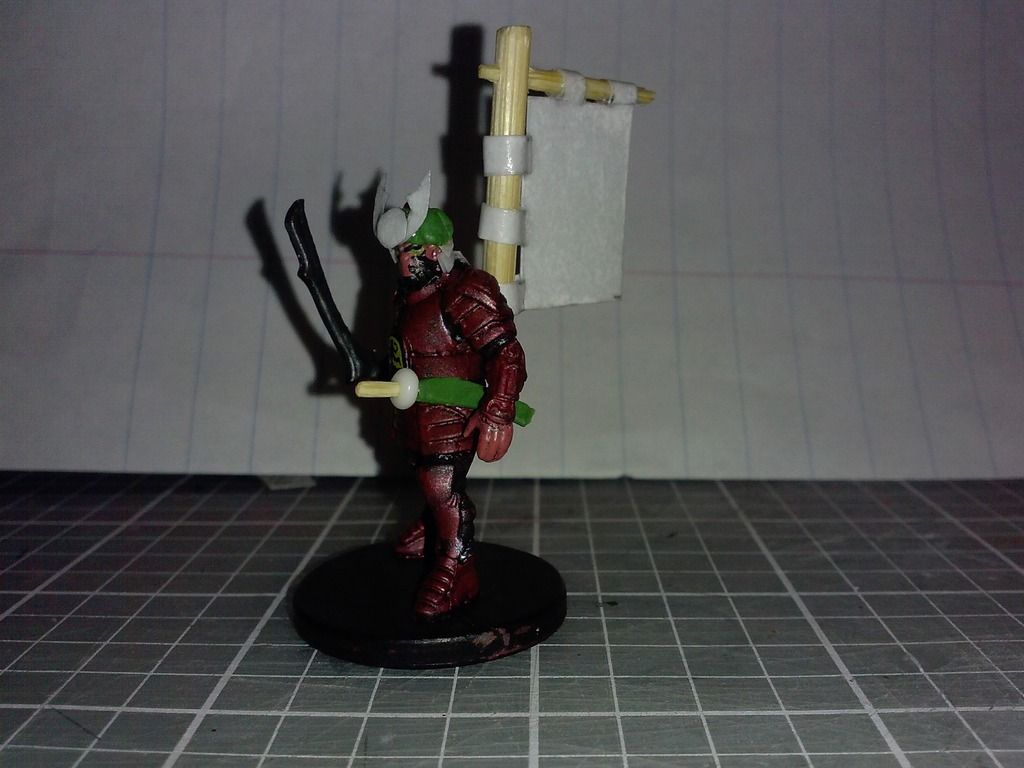 |
|
|
|
Post by Deleted on Mar 30, 2015 18:49:01 GMT
Your modding skills are excellent brother!
|
|


 Cheers!
 Cheers!