|
|
Post by Deleted on Oct 3, 2014 4:44:07 GMT
Created with just hot glue and card board. When I complete the set I'll post the rest with the floor and pieces. 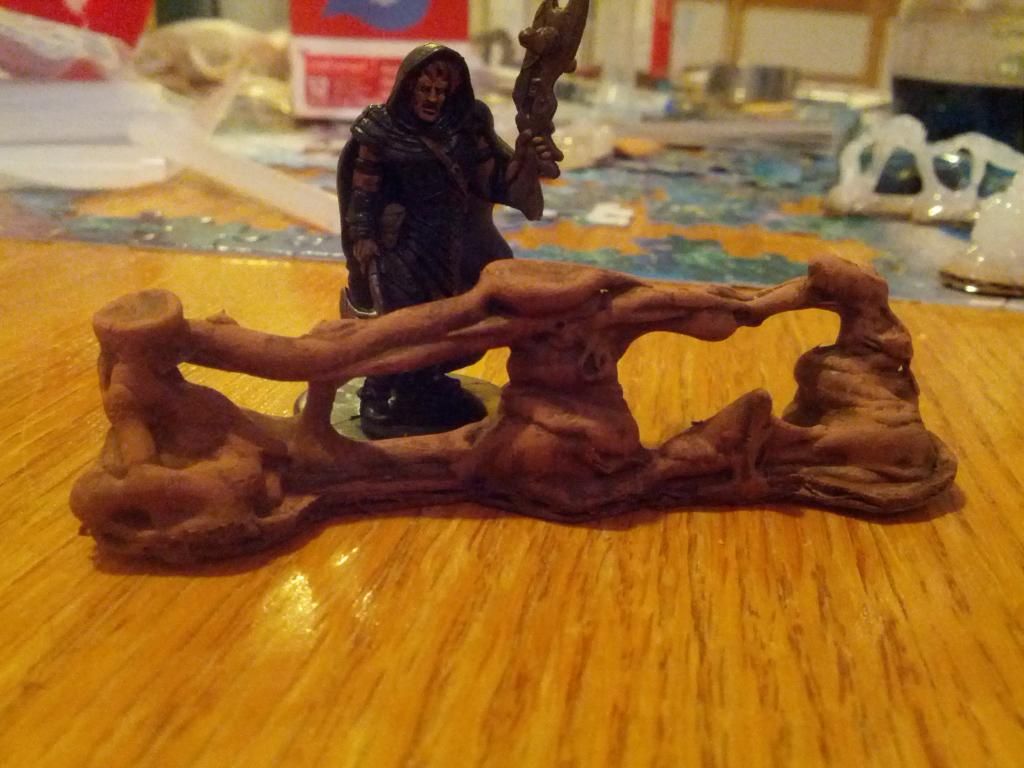 |
|
|
|
Post by DMScotty on Oct 3, 2014 6:35:33 GMT
Looks cool.
|
|
|
|
Post by tauster on Oct 3, 2014 12:41:42 GMT
Whenever I think I know all possible vairations of something, someone comes around the corner and proves me wrong. That's what I love in this community!  |
|
|
|
Post by astralplaydoh on Oct 3, 2014 12:45:46 GMT
Those look great. I would love to see a tutorial. I imagine these use up a LOT of glue.
|
|
|
|
Post by Deleted on Oct 3, 2014 12:57:06 GMT
Yes I used about 6-8 sticks to create all the walls I put up in the the pic in my paint progression thread. I have about 300 glue sticks so I can make pretty much everything I need for a while. And only 8 sticks for enough walls for a decent sized cave room or hallway is not a bad investment for durable detailed walls you can paint and manipulate, which was the main focus of the project. I even man handled the set piece to test its strength and it holds up. I'll be posting a tutorial if you all would like.
|
|
|
|
Post by rane on Oct 3, 2014 18:58:31 GMT
great work
|
|
|
|
Post by adamantinedragon on Oct 3, 2014 19:49:05 GMT
Saw a documentary on 3D printers with my wife and said something like "the cheapest 3D printters are essentially computer-driven hot glue guns." Then I said that lots of people use hot glue guns to sculpt things. I showed her this as an example of what I meant. Really cool.
|
|
|
|
Post by ReliantLion on Oct 3, 2014 21:40:13 GMT
Now I can't decide what to invest my time in...
|
|
|
|
Post by DnDPaladin on Oct 4, 2014 6:53:06 GMT
the choice is clear, put it all on 3D printers 8) !!!
nice job on that one.
|
|
|
|
Post by Deleted on Oct 4, 2014 7:09:21 GMT
Fungus is also very easy to make with this technique.
|
|
|
|
Post by ReliantLion on Oct 4, 2014 11:37:56 GMT
I know I'd have to take this a step further and use magnets and washers somehow. I think maybe an over/under approach would work. How long did you make your segments?
|
|
|
|
Post by Deleted on Oct 4, 2014 13:16:31 GMT
I'll have my tutorial finished today hopefully. Had you said magnets sooner I would have tried glueing a magnet inside a stalagmite to test its magnetism. I'm not sure how strong your magnets are, but the ones I use at work are industrial N52 high grade magnets. I'd be willing to give it a shot. As for length they are about 3 inches in length, was going to try to make 4-5 inch pieces for some hallways today. Now instead of using cardboard like I did you would place a washer down then just bridge your glue to the next washer would be the best looking way to do it I think. I'll give it a go today
|
|
|
|
Post by ReliantLion on Oct 4, 2014 14:11:44 GMT
 Here's a diagram showing what I'm thinking. Red is Hot glue Black is a Magnet Grey (may be hard to see, on opposite side of magnet) is a washer Brown is thin cardboard or maybe card stock. This will allow them to stick end to end easily. Probably completely unnecessary, but whatever. |
|
|
|
Post by Deleted on Oct 4, 2014 14:35:54 GMT
The only way I would use magnets is with a magnetized board. As for butting them together with the magnets so they don't show gaps is based on your preferences. I don't mind the gaps allowing for less pieces and more imagination. However I think your idea looks solid.
|
|
|
|
Post by Deleted on Oct 4, 2014 14:43:49 GMT
@aj hey do you have any links of that fungus? I'm interested.
|
|
|
|
Post by Deleted on Oct 5, 2014 5:01:47 GMT
Here are some step by step pictures. 1. Start with a piece of cardboard in this shape and then build a nice base of glue. 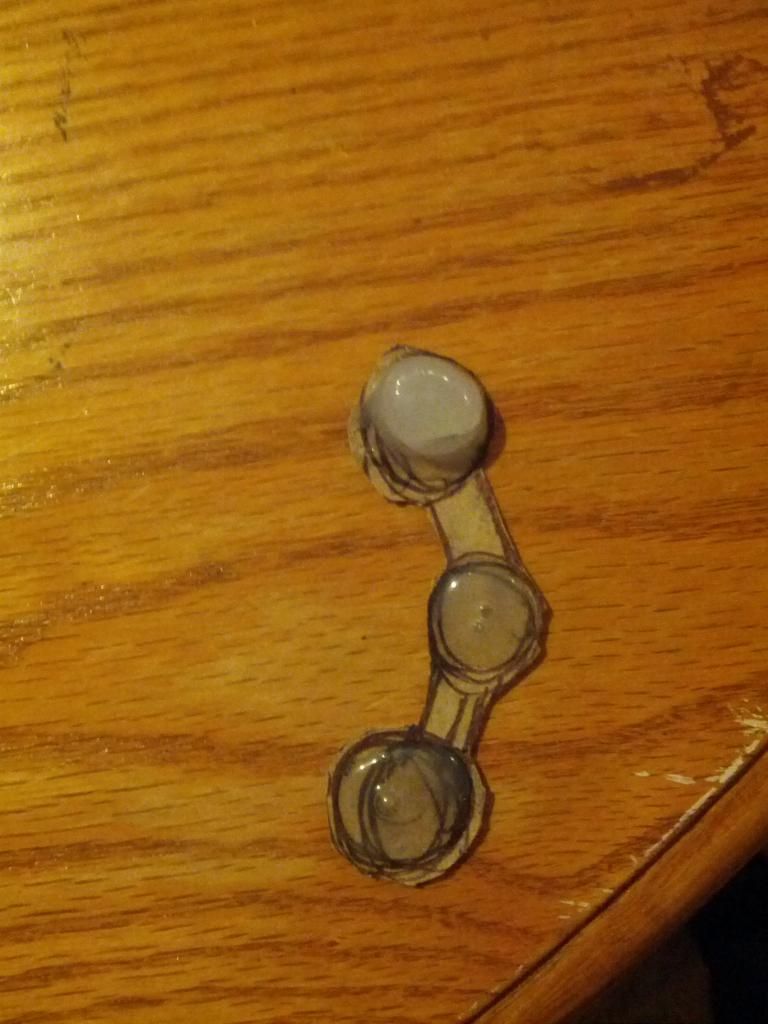 2. Then start building up the mounds of glue by twisting and cooling and holding it upside down to pull it away from the cardboard. 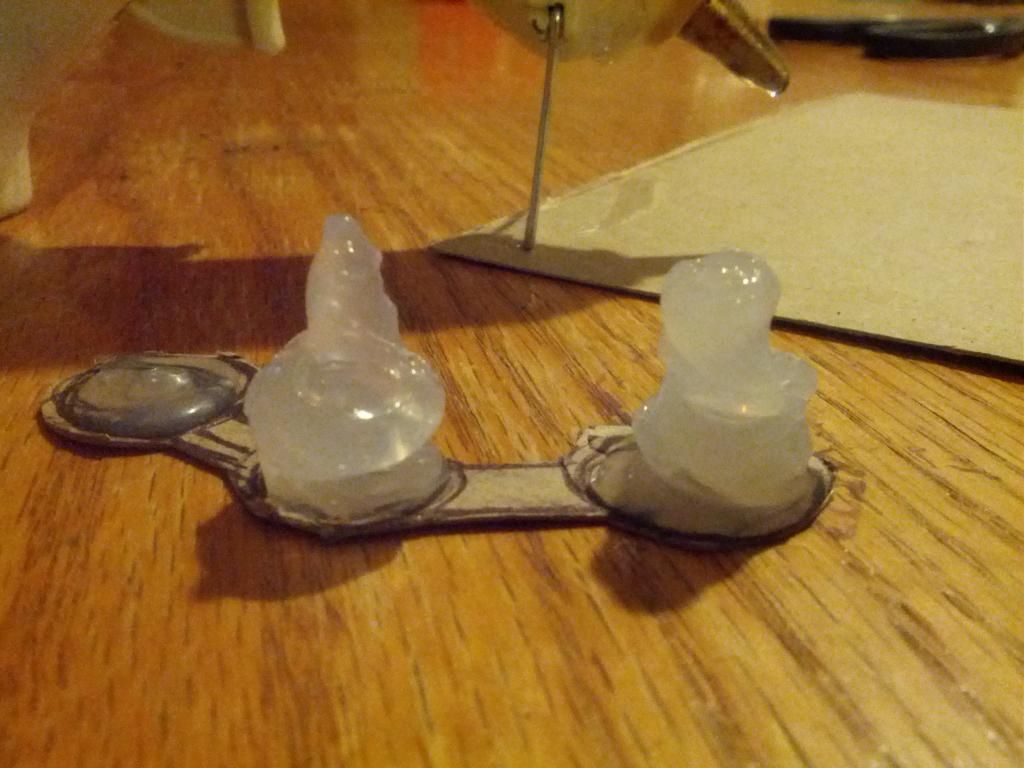 3. You then start to build the connecting piece by holding it sideways and adding to the mound allowing it to flow to the other side. 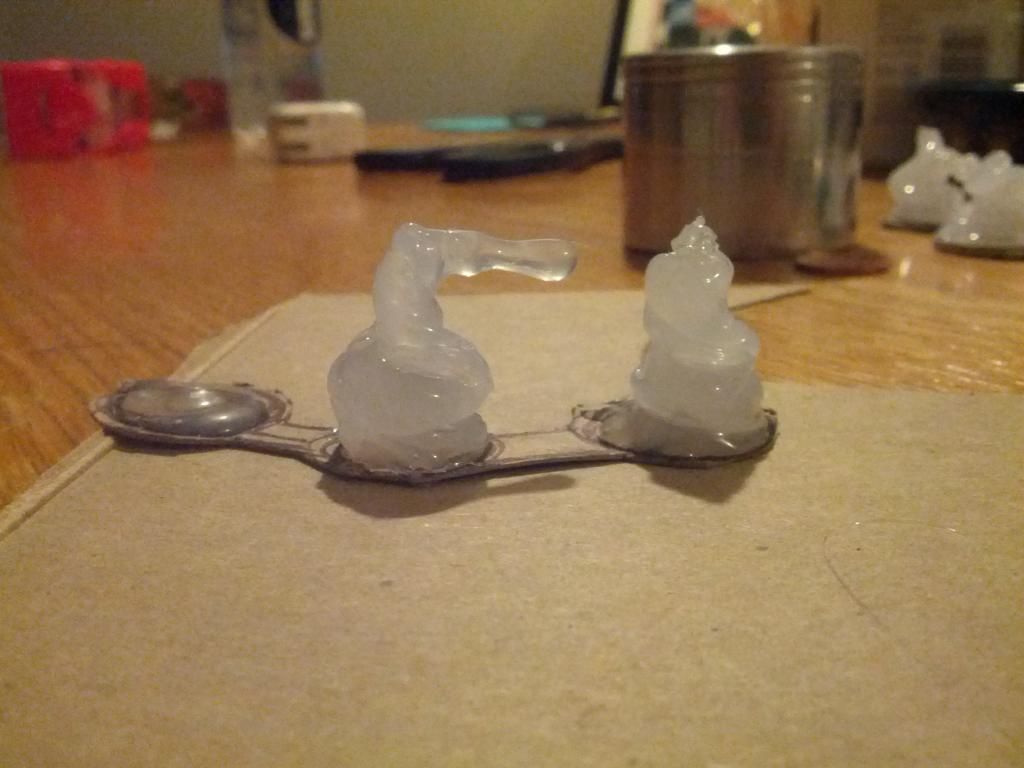 4. After the two mounds are connected for added strength and looks you can add drips from the connecting piece down to the cardboard. 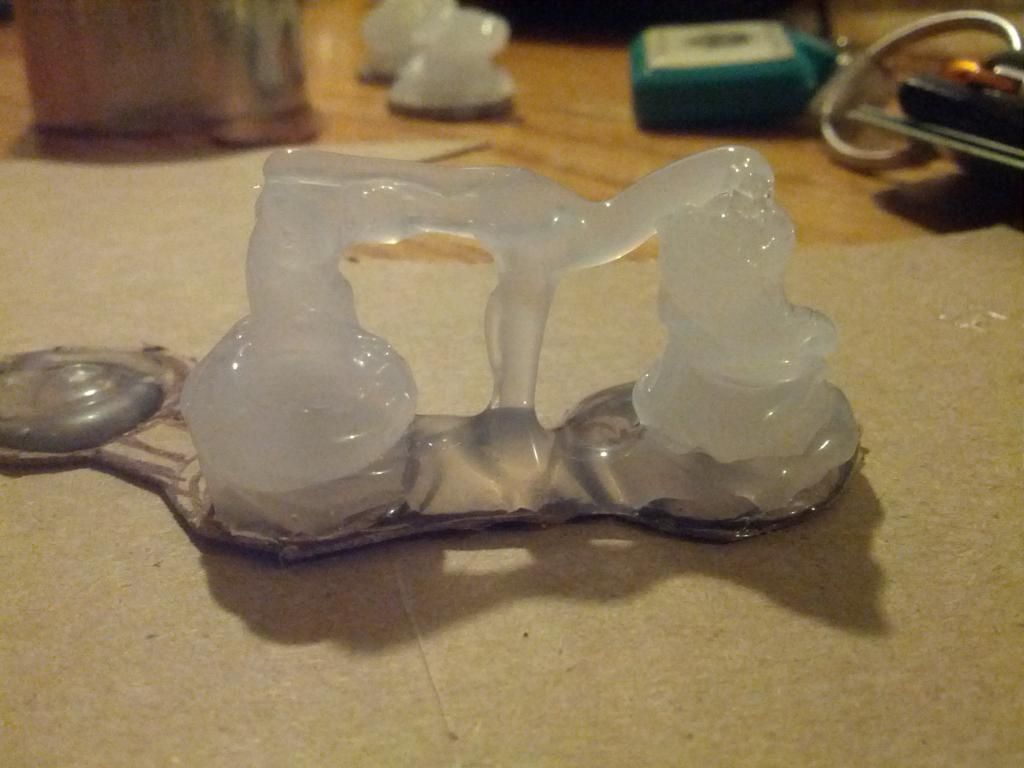 And there you have it. Hope this helps. |
|
|
|
Post by tauster on Oct 5, 2014 8:00:31 GMT
I'll try that asap, because these alls look absolutely great.
two ideas how to modify the method:
1) To save hotglue, you could
- stack strong cardboard or
- glue on a cardstock cone or
- crumple paper or aluminum foil
...and then just cover it thickly with hotglue. Not sure the shapes will be as flowing as with the original method, but it's worth a try, I guess.
2) If you have problems with overly runny glue, let the glue run into the desired shape and quickly dip it in a pot with cold water. Works wonders.
|
|
|
|
Post by DnDPaladin on Oct 5, 2014 12:12:38 GMT
when it comes to making depth with hot glue, i also found that using cardboard, paper or whatever else you can cram to make the height is just better. then add a layer of hotglue on it and when painted nothing Inside will show up. saves hot glue and also saves you time by not having to wait for it to cool off before doing it.
but nice going. those are nice cavern textures there.
|
|
|
|
Post by Deleted on Oct 5, 2014 13:08:16 GMT
The height of these cavern walls for me is perfect they way they are. Just under mini height. Adding cardboard or paper to them will add to more bulk or more time spent glueing and cutting cardboard or toilet paper. Although I do like the pot of cold water tech. I'll have to give it a try. Good ideas though, I'm excited to see other walls if anyone gets some put together.
|
|
|
|
Post by Deleted on Oct 5, 2014 16:05:15 GMT
Got the first set of cavern walls painted up. 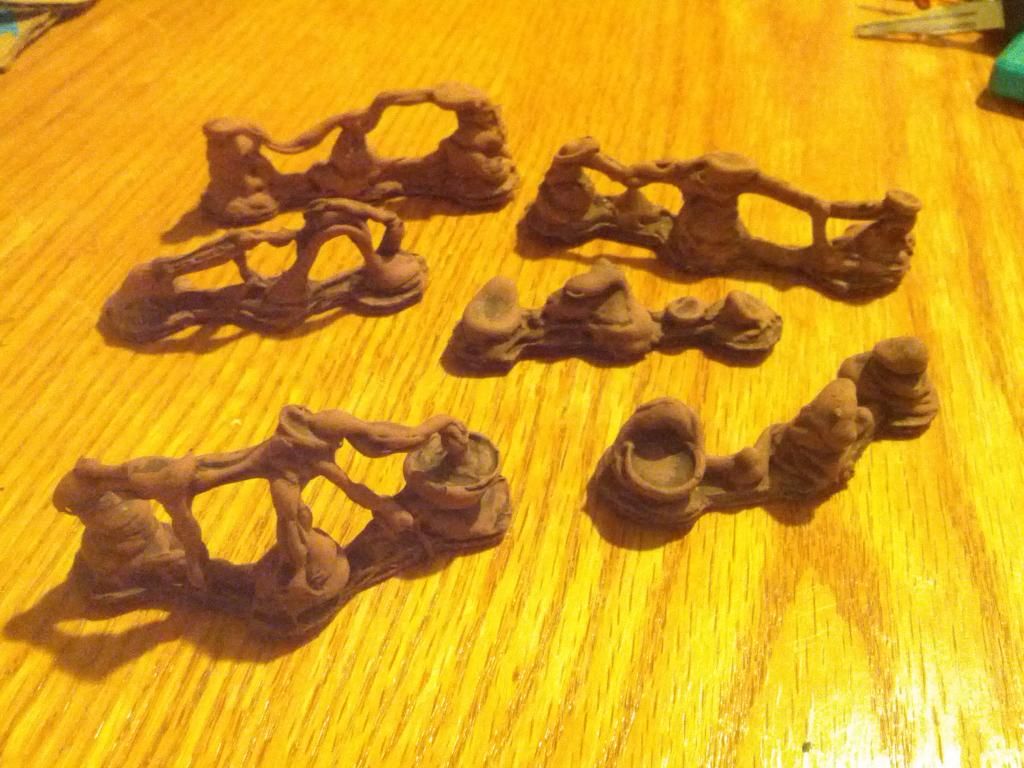 |
|