|
|
Post by Erasmas on Sept 26, 2014 15:50:22 GMT
|
|
|
|
Post by Erasmas on Sept 26, 2014 16:08:12 GMT
Wraith Project{Spoiler} One the projects that I worked on as of late is a Wraith Tank (from the Halo universe). Many of the players in my D&D group, including myself, have been avid Halo fans since the first game came out over 11 years ago. We used to have a ton of LAN parties and a few core of us have remained hardcore players ever since. So much so, that we actually devised a system so that we could play Halo as a tabletop game. As such, the ActionClix Halo line of miniatures are great for this. However... there was a distinct lack of one of the most prolific vehicles to ever terrorize the battlefield - the Wraith. This purple hovering machine of lobbed death has been a staple and would have a great amount of presence on the table. So... I set my sights on making one from scratch. This is what one of these bad boys looks like, if you didn't already know. Warning, large pictures ahead! First off, my son had gotten an RC toy car that was amphibious (it drove around on the ground and then could float on top of the water like a boat). It worked for about a month... until my dog chewed off the antennae. So, I nabbed it because it had the shape that initially inspired this whole project. I knew I would not be able to create a genuine replica... but a close approximation would be more than enough to suffice.  You can see the evidence of the guilty party on the fin of the car. I took the whole thing apart, removed the wheels, said fin, the headlights, and I gutted the interior. 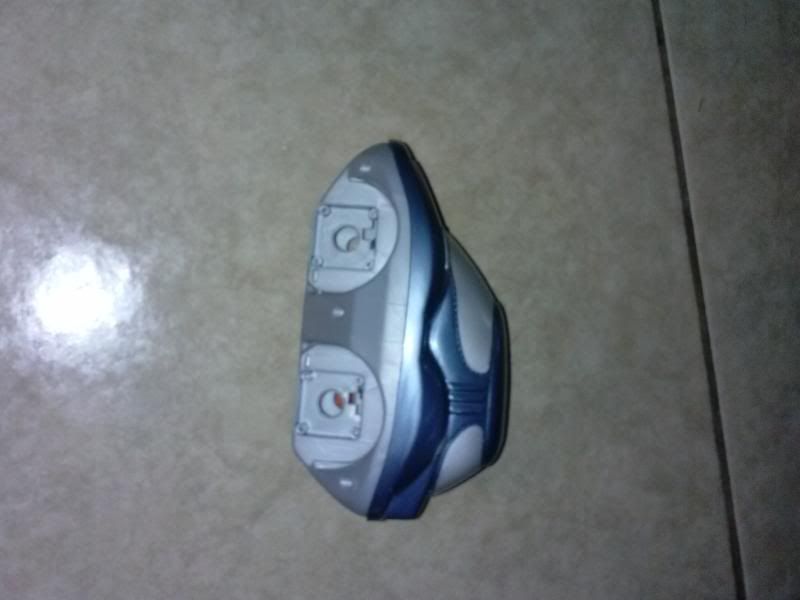 The second biggest contributor to this project was a McFarlane Toys Ghost (also from the Halo universe). My son likewise has one of these and my wife noticed that it had a lot of the pieces that I was desperately searching for. The pieces were the right size, had the right textures, and there was a certain amount of irony that it would be sacrificed in order to make another of its kind... so it was decided. I bought a used one off of Amazon (my son still plays with his). 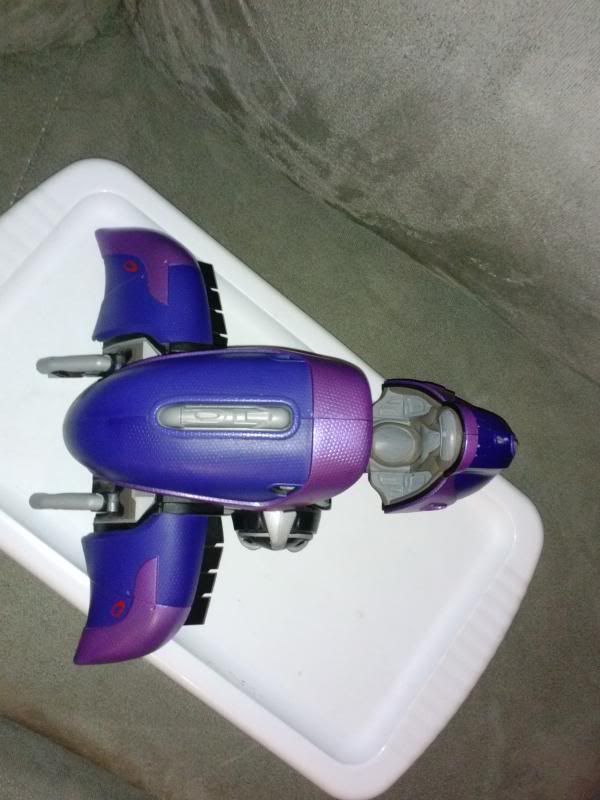 I then took this apart (with some help from my wife) and pulled aside the pieces that I was going to use. The rest of the pieces went into my "bits collection". 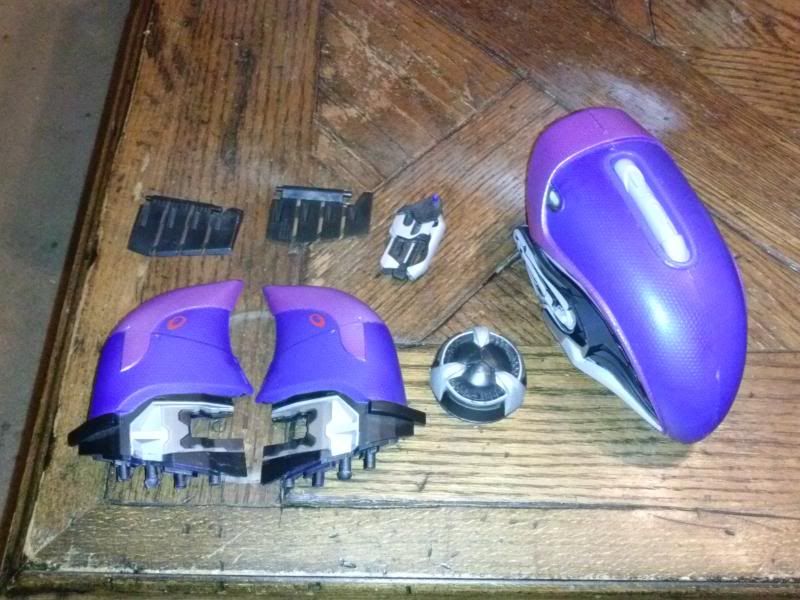 Next, I carved out the parts that either weren't needed or kept them from fitting together how/where I wanted them.  After a lot of cutting, cursing, fitting, and gluing... things are starting to take shape. I decided to forgo having the secondary plasma turret on this thing, as there simply was not enough room. It is also around this point that I realize that it is about 50% too big for proper scale, but again - an approximation is perfectly fine.  And the backside (displaying the rear thruster)...  The plasma cannon (main gun) on the top. The weapon's 'head' was an old toy gun (Ninja Turtles, I think) that was heavily chopped on, another of the pieces from the Ghost, and two plastic oil painting spatulas. The 'arm' was the handle from one of the same spatulas.  Next was the rear fin assembly, which I think fulfill some kind of directional steering. The black things are also from the Ghost, the green bits were from a kid's paintbrush handle, the clear things are water bottle caps, and the black things filling up the wheel-wells are from a computer monitor stand. 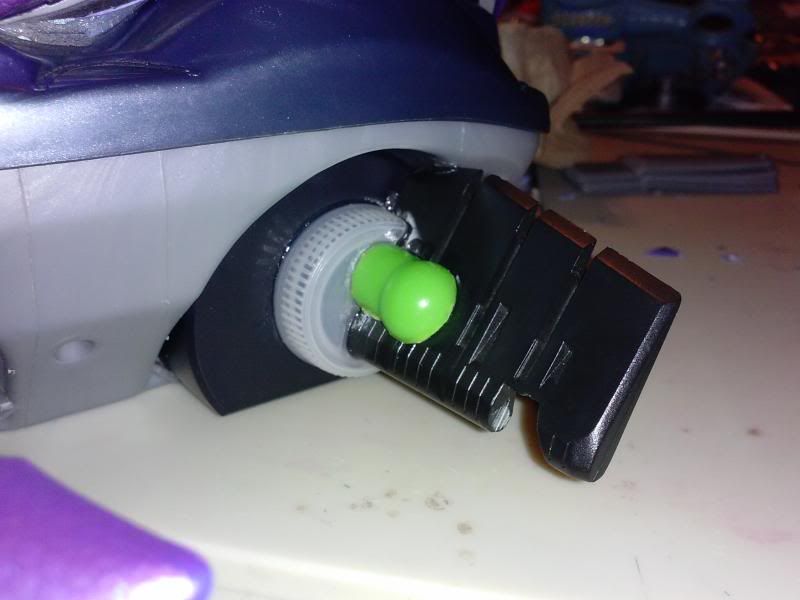 With how much detail was on the Ghost portions, the remainder of the empty space looked way too plain. I have seen cardboard details used to great affect in a lot of awesome terrain, so I decided to give it a try here. I just used cereal box cutouts to fill in some gaps and add some texture. There are also random bits of plastic spru and other bits throw in there for good measure.  And then I based the bad boy and primed the whole thing in a grape purple color. This is how far this project has gotten, and it is sitting on my shelf just screaming at me to paint it! 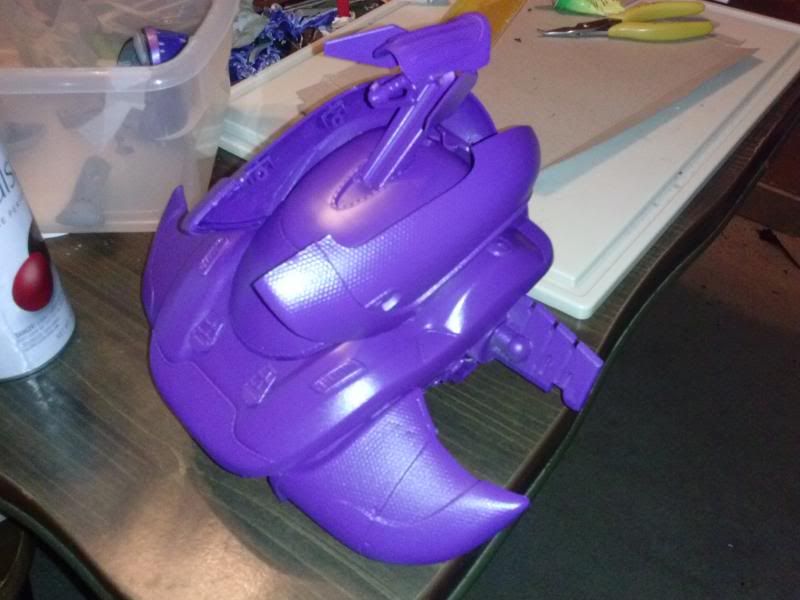
|
|
|
|
Post by Erasmas on Sept 26, 2014 16:33:30 GMT
Release the Kraken!{Spoiler} This one was born of an interesting mechanic idea I had seen a long time ago, somewhere in the dusty corners of the internet. Most monsters (and other things you face) in a miniatures battle are usually either one piece or at least sit on one solid base. The idea that I had come across was for a kraken-style sea monster who had a main body on one base and separate bases for each individual tentacle. I thought that this had a lot of interesting potential to lend a different angle to the same old kind of fights. So, I shelved the idea away and went on about my merry life. And then, somewhat recently, I got an item offline for a game that I am going to be running soon. Included with the item was a bright magenta octopus bathtub toy - the kind of thing where you squeeze it to suck in water and then squirt it out... usually at your parents and/or the bathroom floor. My first reaction was to just toss the thing. However, upon looking at it closer, the sculpt on it was amazingly detailed! He had this fantastic furrow to his brow and these deep creases and bumps everywhere (exactly the kind of thing you want when painting a mini). I had kept the plastic cover to an electrical box I had installed for a ceiling fan a while back because I thought it would make a good base for a larger miniature at some point. As it turned out, he was going to fit on there perfectly. Now, the tentacles that came with him were awful for what I was doing with him - they were hollow on one side (lacking suction cups) and were made of a very flaccid rubber... so they went in the trash with the intention of replacing them later on. 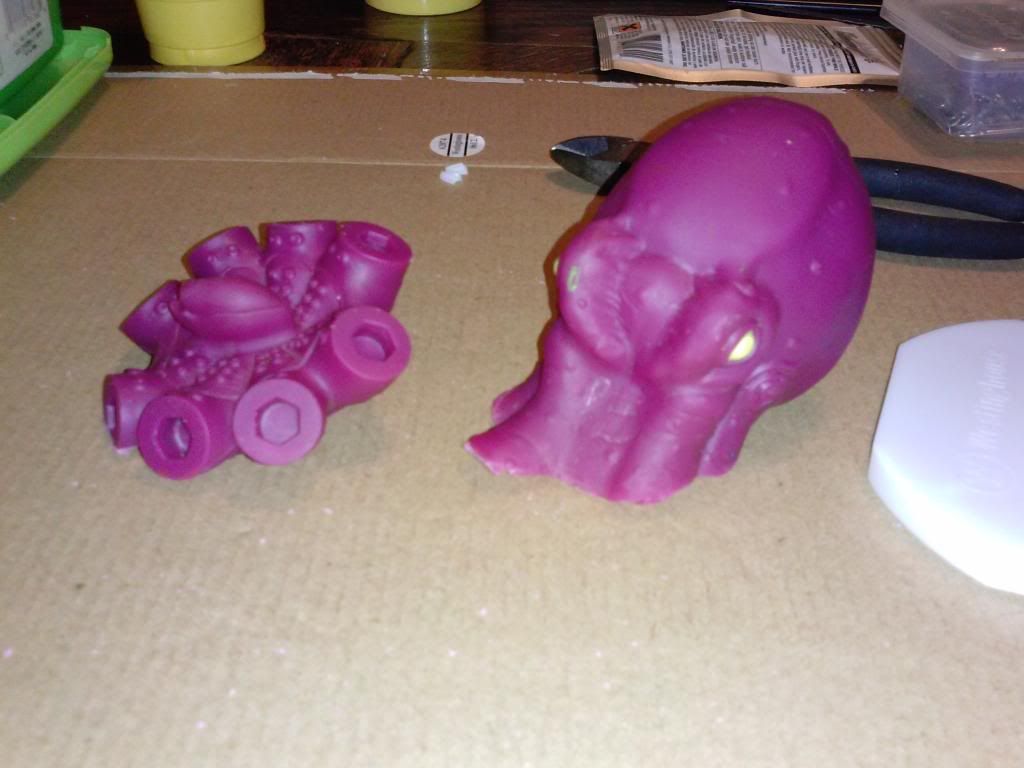 And the dry fit. 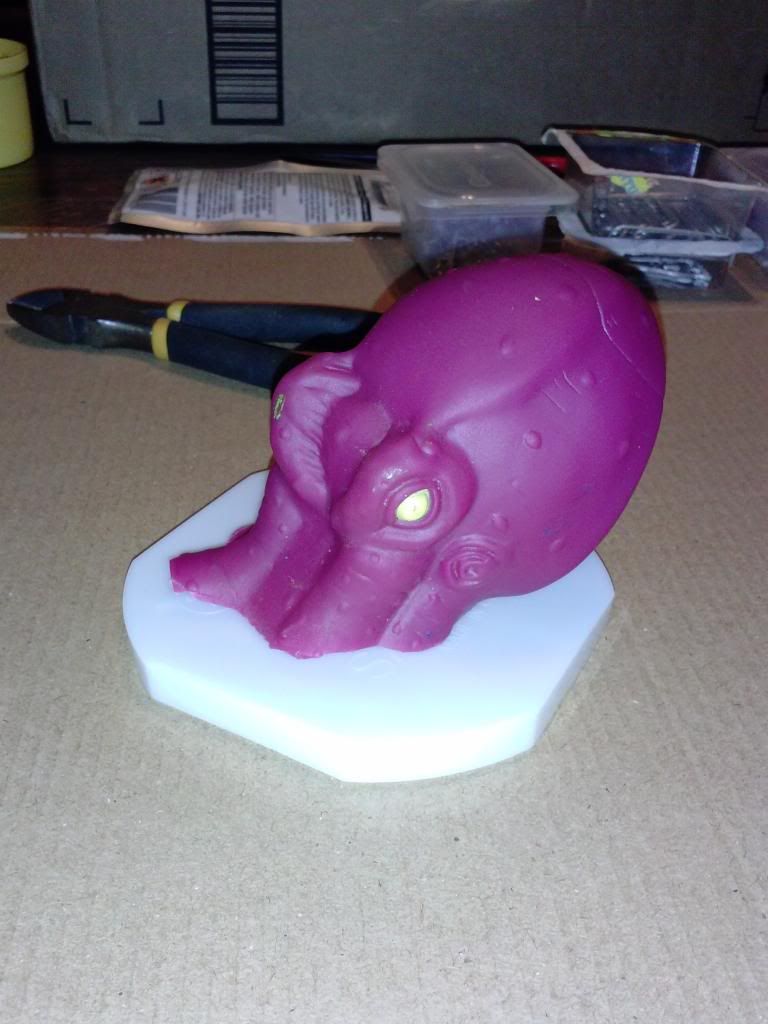 Next, since the head was hollow, he needed reinforcement. I filled the cavity inside his head with expanding spray insulation foam, let it cure, and then cut off the excess. I then inserted three bamboo skewers into the body and cut places for them to be inserted through the base (not shown) to add stability and effectively "pin" him to the base, instead of relying solely on the glue. 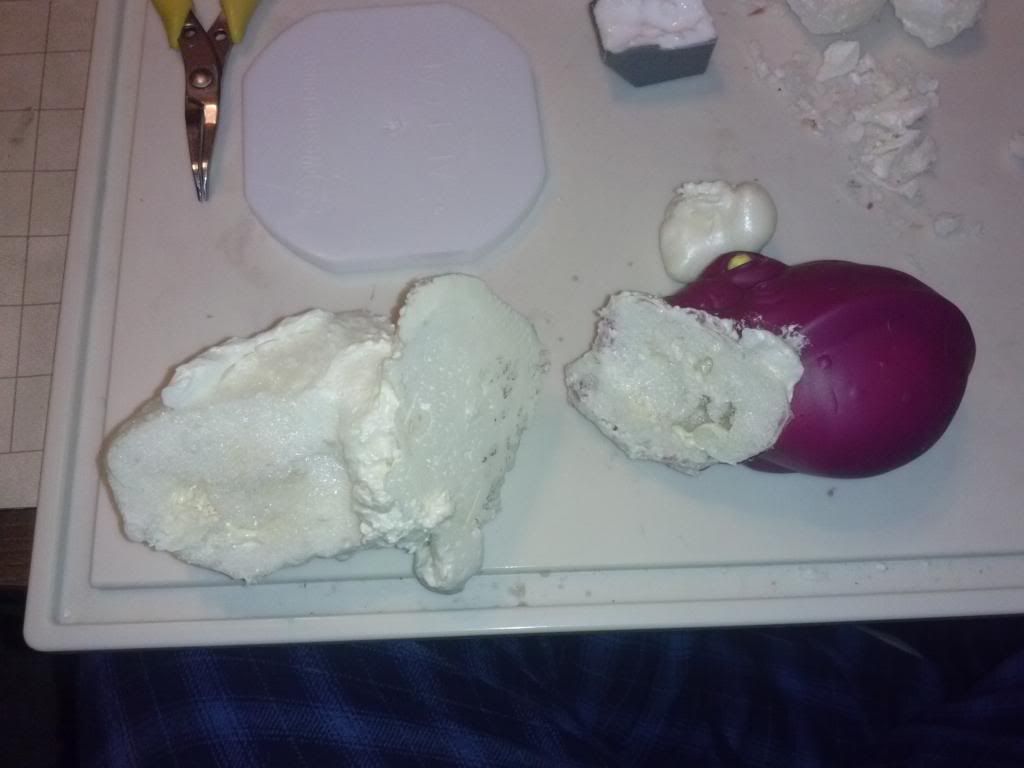 Another of the steps that I failed to get a picture of was the reinforcement of the base itself. With it being fairly thin plastic (and the nature of what kind it was), it had a lot of "warp" to it and flexed way too much. I was worried that it would end up breaking free from the mini once it was all finished. So, my wife made a Sculpey insert that we baked and then glued in place. This added not only the desired stability but also a good amount of weight. In the next step, you can see where I started sculpting the waves around his body. This was done both to hide the transitional gap between the two pieces (and the lettering on the cover-turned-base), as well as add to the illusion of him coming out of water. Now, I had never really used Green Stuff before this and I just jumped in with both feet. I was very pleased with how it turned out. This picture is part-way through the process. 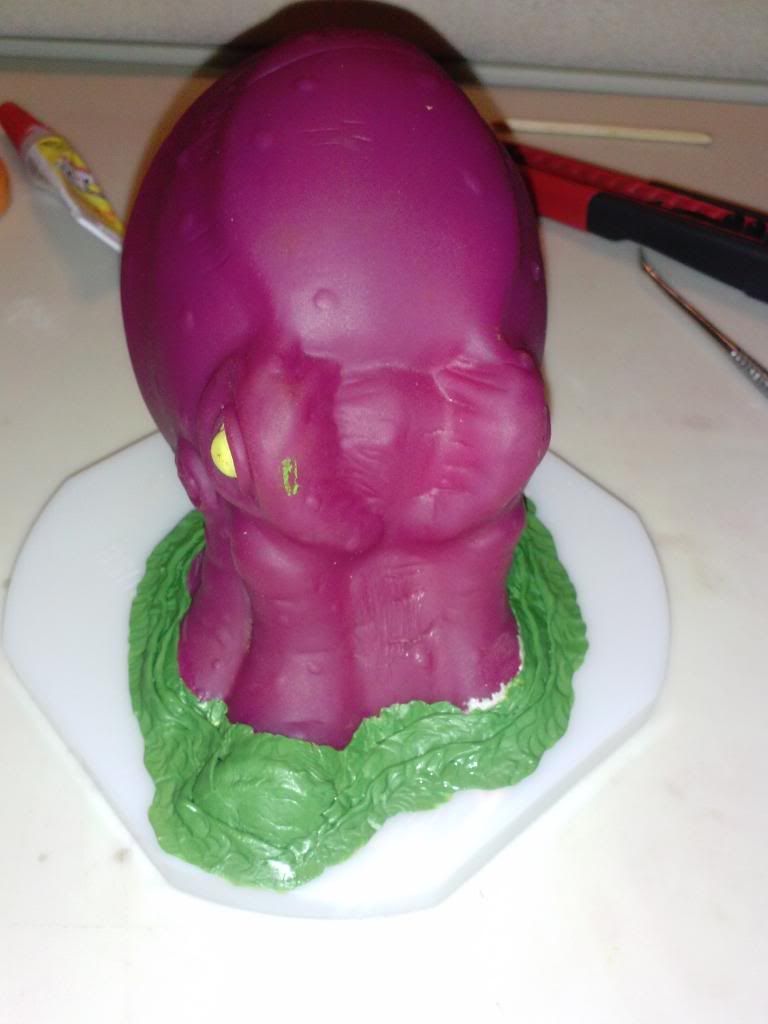 And finished! A detailed shot of the waves. I later went back and added smaller "rippling" with PVA glue around these.  The next stage was the tentacles. I shopped around a bit and could not find what I was looking for in the right size, material, or design. Finally, I found the Kraken model that MegaBloks put out with the Pirates of the Caribbean set awhile back. It was an impressive sculpt and the tentacles were exactly what I was looking for (mostly)! Here he is in all of his glory. 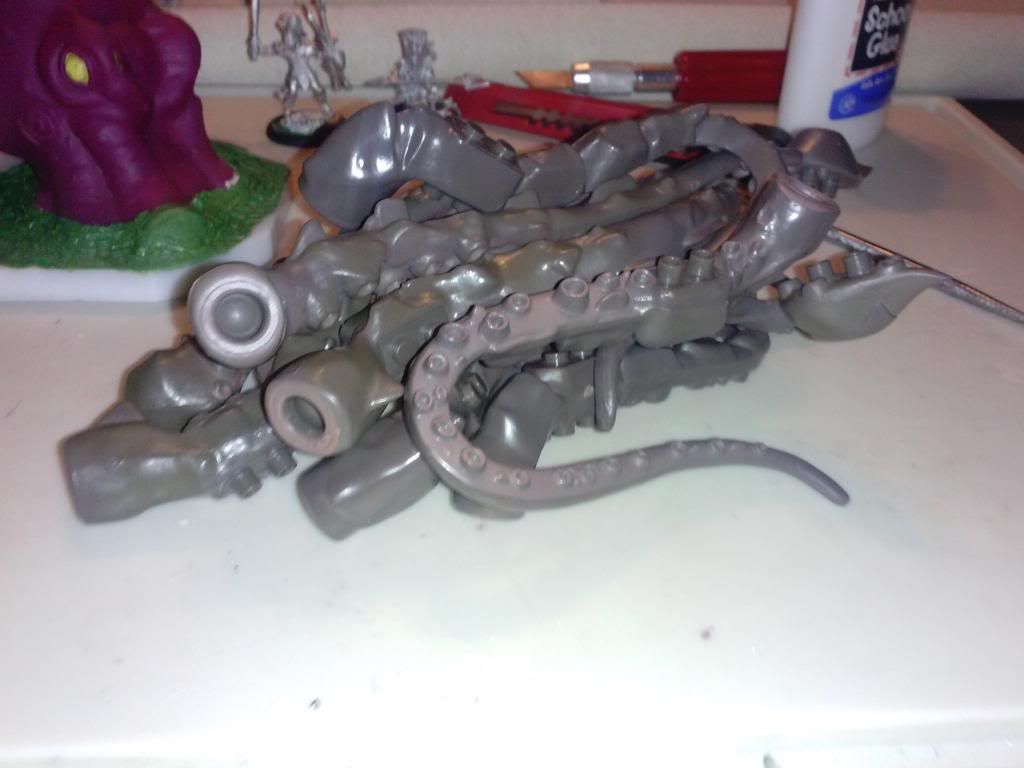 So then I had to remove the places where they attached to the old model and base them individually. I found the plane that I needed to cut them each on so that they would stand up how I wanted them (which also included making sure that their center of gravity was directly over their base). The bases were each prepped and then they were pinned in place. The same wave effect was done with Green Stuff on these later on. 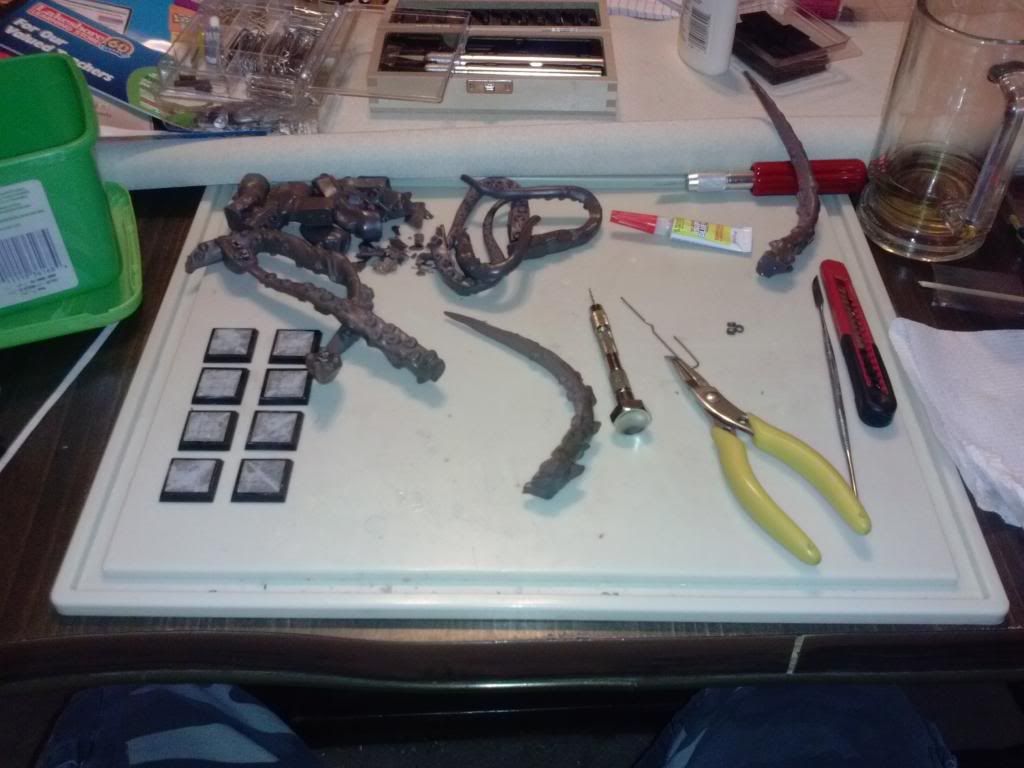 One of the issues with using the MegaBloks model was that it had some very obvious building brick parts on the ends of the "spade" tentacles (presumably so that the kraken could "grab" other things and shake them about violently). They were just too uniform for my uses, so they needed some modification. They were already about the same size and shape as the other suction cups and if I removed them entirely, the empty space they left behind would look strange. So, I cut them to be shallower, warped their outer rims with my needlenose pliers, and filled them with glue. The picture below was taken before I finished with the "hiding" process. After this, I also built up the outside of them with more Green Stuff to give each a more 'volcanic' look as opposed to straight sides, and then coated the whole area with PVA to smooth it all out. 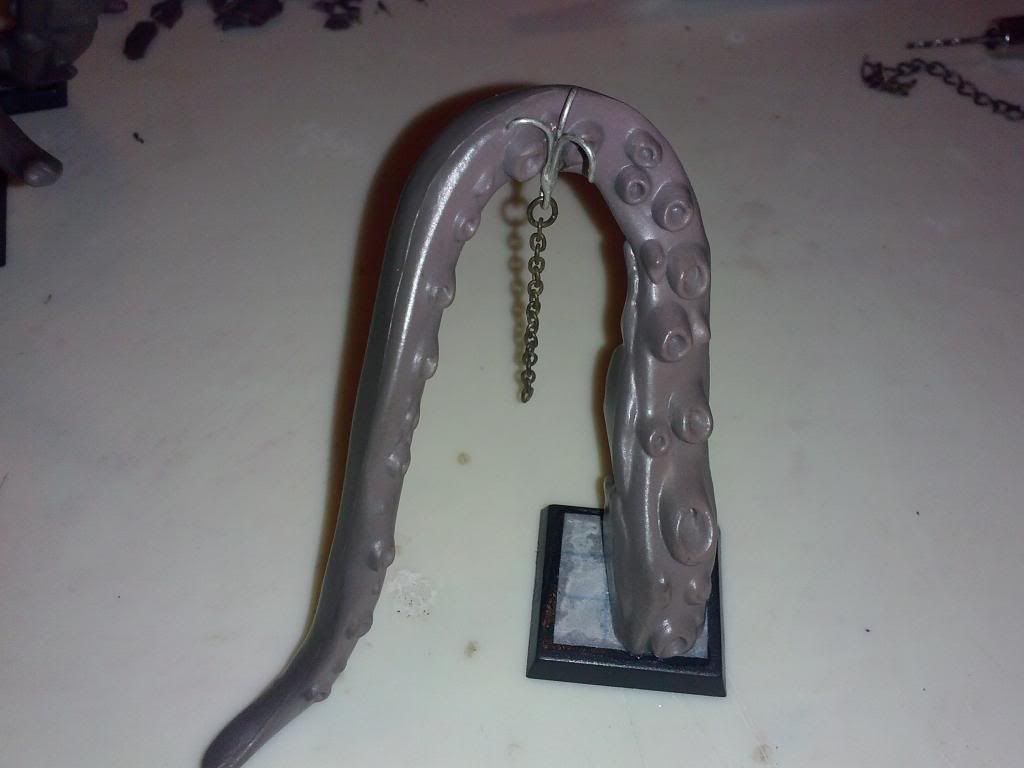 And here the pieces were all arranged to see how everything was coming along. As you can see, the Green Stuff waves still had not been added to the bases of the tentacles yet. 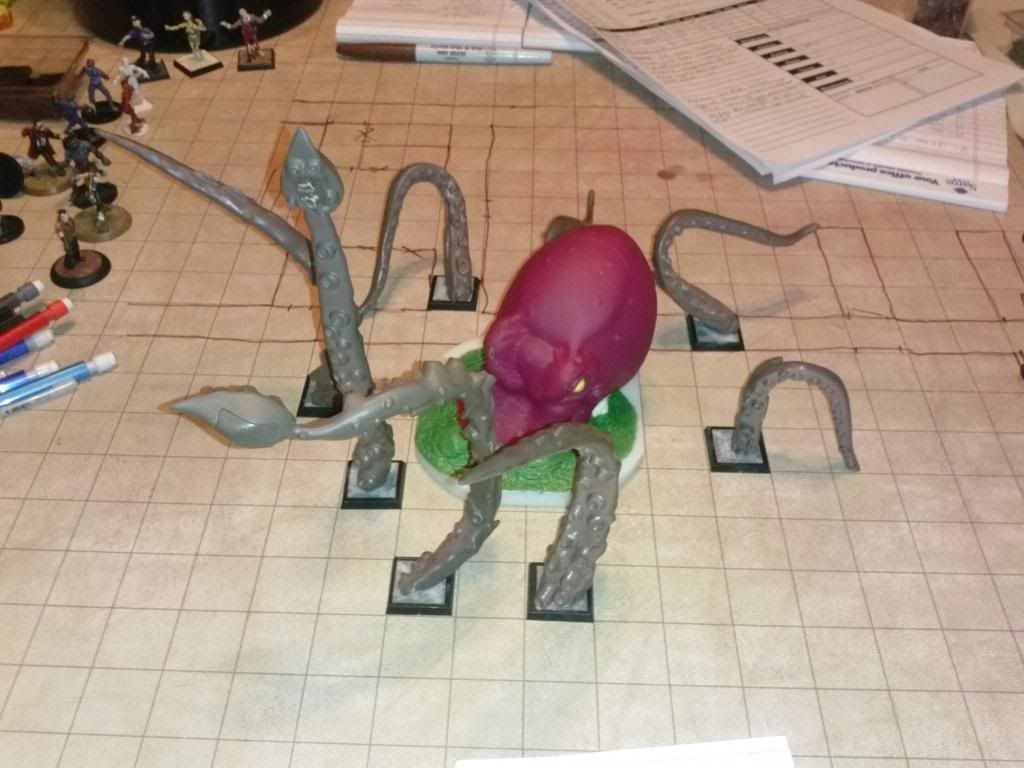 Once all of that was done, it was time to start painting him! First up, he was primed black. The faded coloration is just a reflection from the bright pink napkin he was sitting on. One issue with spray priming this material is that it (unbeknownst to me beforehand) does not cure all of the way and remains indefinitely tacky... much like my Uncle Phil. Just kidding, I don't have an Uncle Phil. 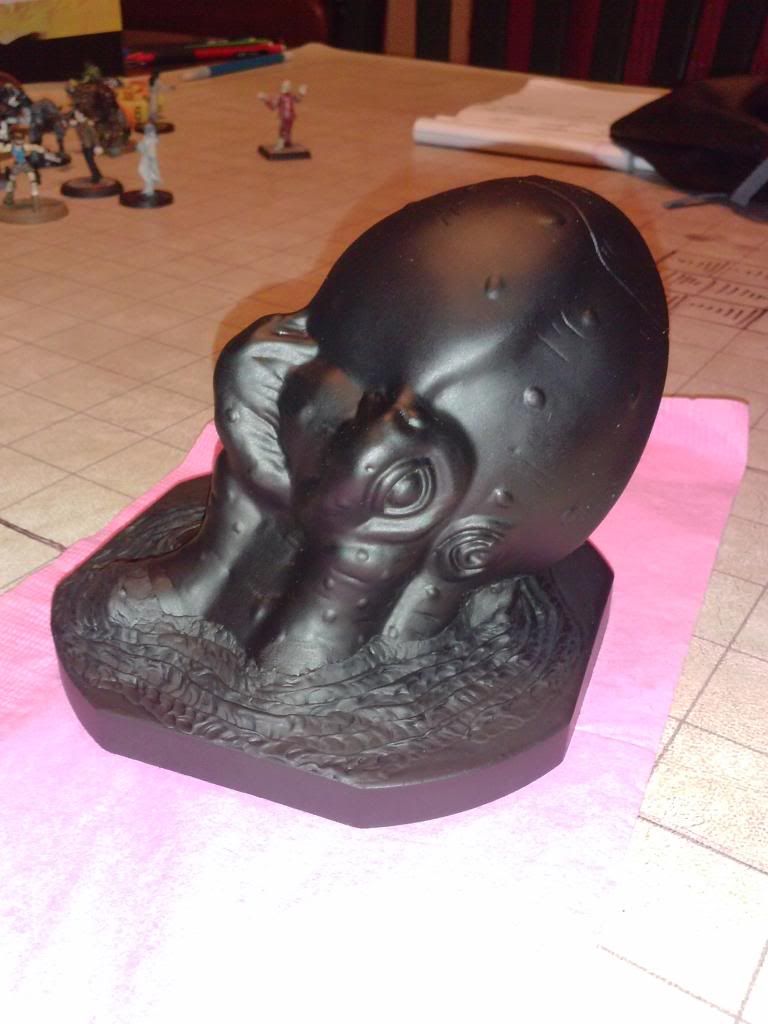 Instead of painting the next major colors on him by brush, I opted for another layer of spray paint to avoid brushstrokes over the large "blank" areas of color. I used a black cherry type color initially and then selectively spritzed and faded some areas with a rusty orange. This ended up giving him a nice variegated color that I liked a lot. I then mixed up a similar orange color with my acrylics and drybrushed him to pick up those great wrinkles and raised 'warts'. This picture was taken after I had also painted the eye, which can be seen better in the second picture. Now, squid eyes are very dull looking and uninteresting. I wanted something more... primal and bestial... so I looked at different eye "designs" and found that a goat's eye had the look I wanted. And I wanted a yellow/orange/amber kind of appearance for the iris. So, I slapped all of that down and then put a black wash over it to tone back the brightness of the color and to get it into the recesses of the eye socket. 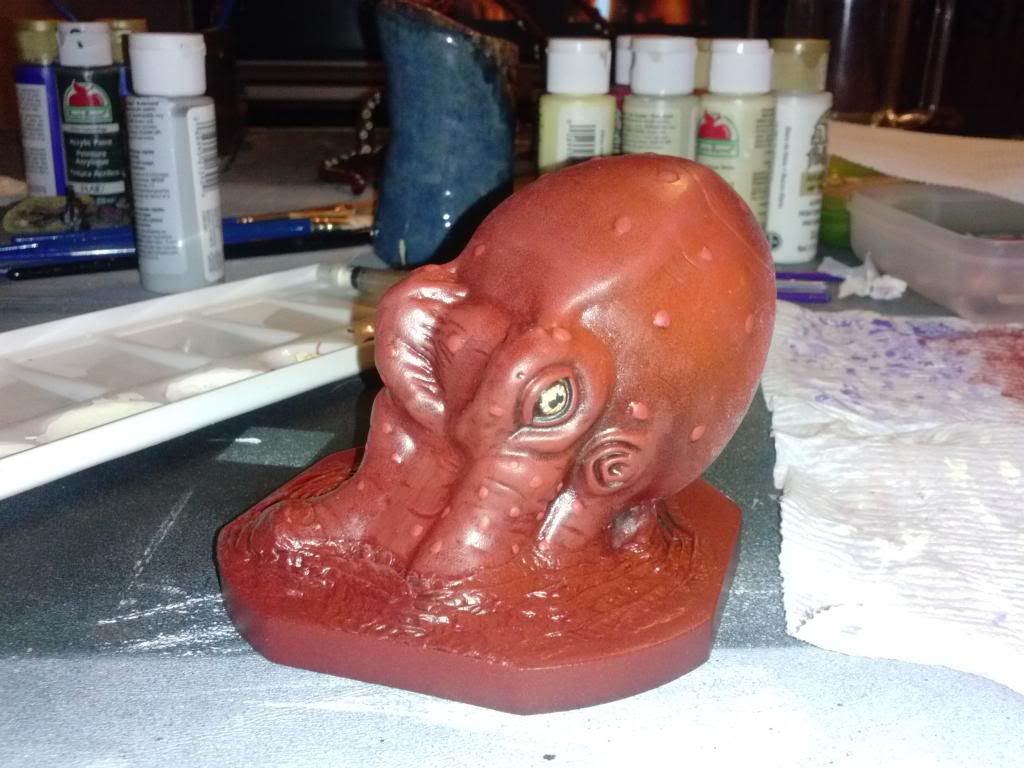  And then the water. This picture is just the first coat of color for that. I will try and get the finished pictures posted here, with the beautiful drybrushing that my wife gave (she was helping me finish the project in order to meet the deadline for play) to the water that really makes those waves pop! 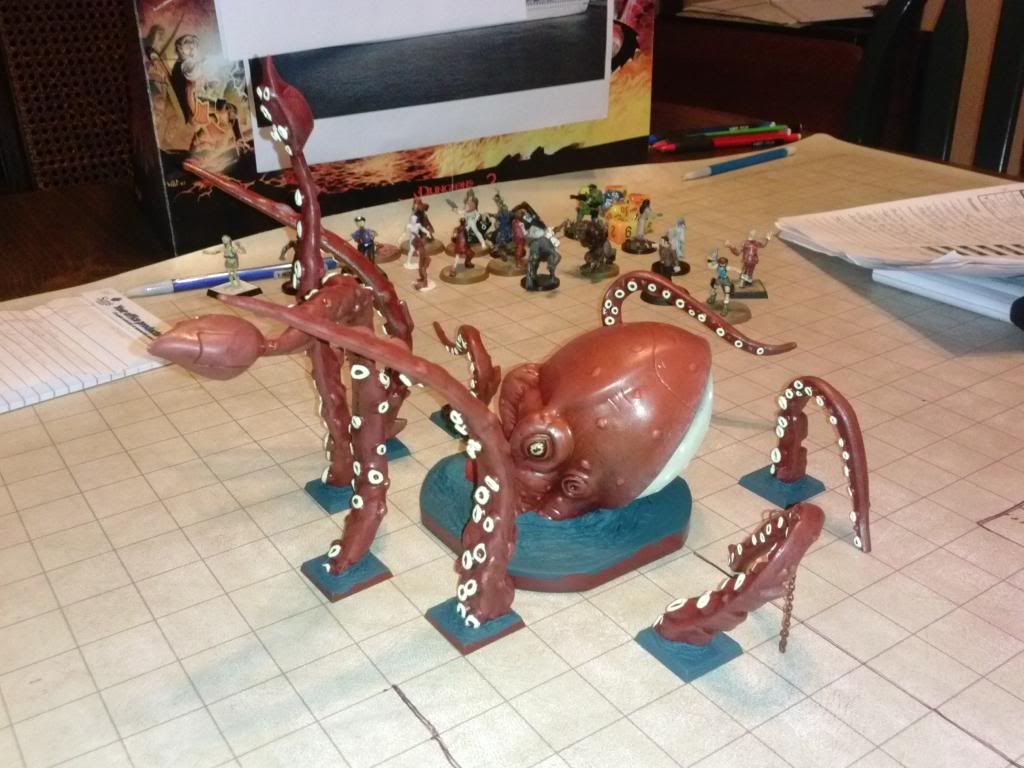 UPDATED PICTURES
I just realized that, even though this has been finished for some time now, that I did not have any pictures of the completed paintjob! So, here they are. You can see the highlights on the waves (painted by my wife), with the sides of the bases finished off with black. I also sprayed the entire beastie with a coat of gloss enamel, to give it a wet shine. 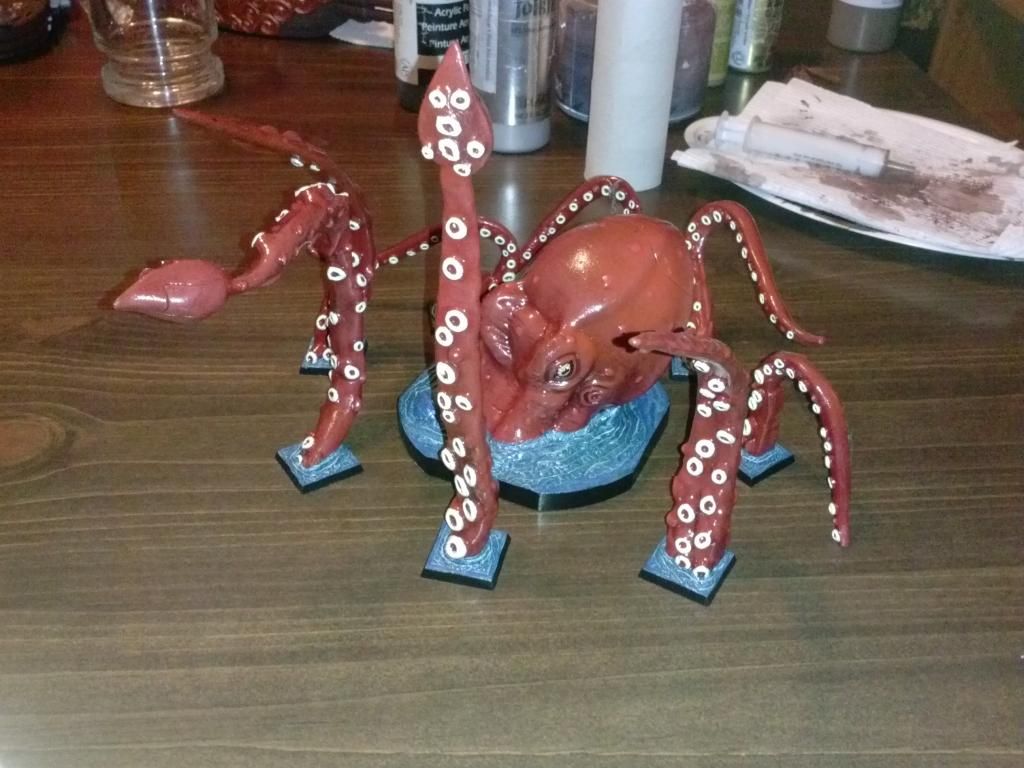 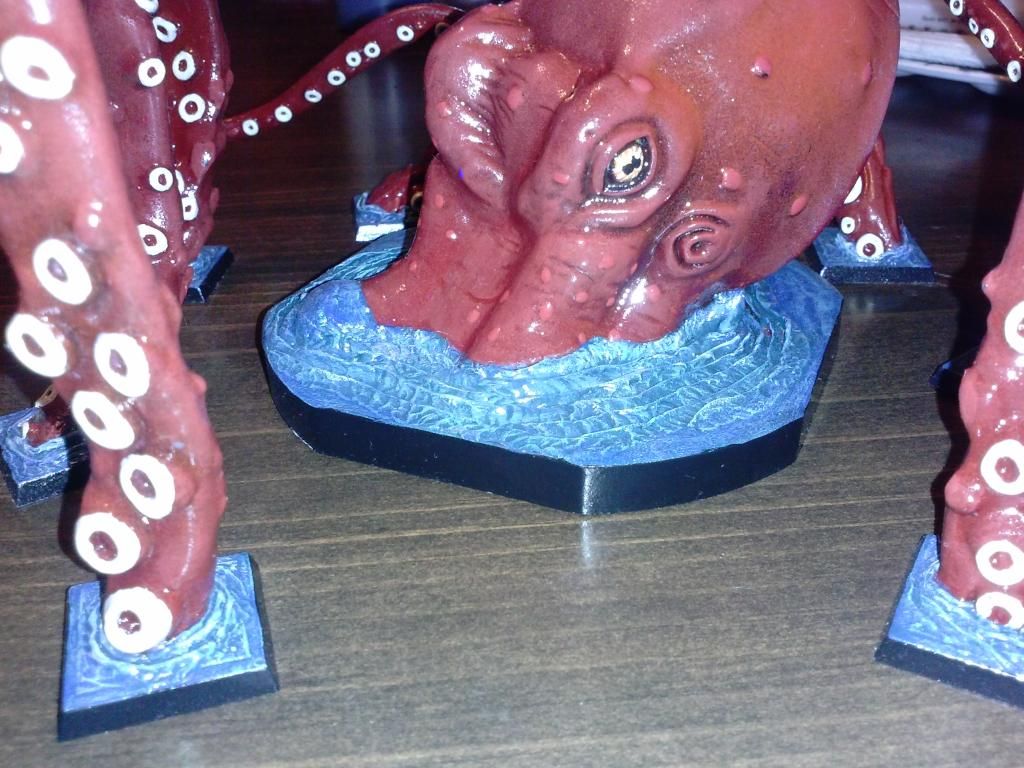 Here you can see the grappling hook and chain after it was finished as well. I give it a rusted metal coloration, to give the impression that he's been carrying it around with him for some time. I was going to do some seaweed hanging from it, all tangled up within the links, but at the time I couldn't figure out anything that would capture that well without completely and totally gunking up the entire chain to the point where you lost what it was supposed to be. 
|
|
|
|
Post by beetlewing on Sept 27, 2014 15:23:56 GMT
This thing is awesome. One of the best krakens I've seen!
Kudos.
|
|
|
|
Post by gnomezrule on Sept 27, 2014 18:30:14 GMT
Really cool.
|
|
|
|
Post by Erasmas on Sept 27, 2014 18:31:08 GMT
Thank you, very much! Admittedly, there was very little that was built from scratch about him. But, I was still very, very pleased with how he came out.
I updated the post with new pictures, showing the completed paint job!
|
|
|
|
Post by beetlewing on Sept 27, 2014 18:46:40 GMT
I updated the post with new pictures, showing the completed paint job! For the seaweed you could use tiny bits of pulled cotton ball that have been smeared with white glue. Shove it into a link using a toothpick, then let it hang down. Paint after it dries. |
|
|
|
Post by Erasmas on Sept 27, 2014 19:00:40 GMT
That's a fantastic suggestion, Beetlewing!
That would probably work really, really well, actually. If I get some time in the future, between all of the other projects I've got in the pipeline for my upcoming games... I might just try to do this.
Thank you!
|
|
|
|
Post by beetlewing on Sept 27, 2014 21:30:23 GMT
I might just try to do this. Thank you! I just did a little experiment for something similar... In the tiny amounts you'd need, you can skip the water and the glue. Simply tear a small piece of toilet paper, separate it if it's 2-ply and roll it around in paint with a toothpick. You end up with a fibrous green mess that you can sculpt and drag around. The paint will dry and act as the glue. Finish with a glossy clear coat. |
|
|
|
Post by Erasmas on Sept 27, 2014 21:51:13 GMT
Also an excellent recommendation!
And the alternating twists in the strips should mimic the shape of a kelp-like plant very nicely.
|
|
|
|
Post by Erasmas on Sept 29, 2014 17:46:45 GMT
The Icarus{Spoiler} Next up is a project that I created for my current game that is winding down to a close. I decided to run a steampunk-esque, League of Extraordinary Gentlemen-ish, Victorian London adventure... centered around investigating the Whitechapel Murders. As the players finally discover Jack the Ripper's true identity, they learn that he has fled London en route to Budapest. In order to get there as soon as possible, they must request that the Bureau for Human Affairs (the organization whom they all work for) procure them a means of speedy travel. And so, Captain Ahab is called in - aboard his steam-powered airship... the Icarus! It was intended to have a worn and used look to it, like it had seen some stuff happen a time or two, a bit like the Millennium Falcon. Now, I debated with myself back and forth about whether I wanted to create the balloon above the ship. As a crafter, I was looking forward to the challenge and the "prestige" of having a sharp-looking, finished piece. Ultimately, however, the DM/player in me won the day and I decided to forego it - figuring that it plus the rigging that went with it would hinder play too much and it would save me time by not making it. Instead, I opted for the mast to be a cross-section type thing, where it's just truncated on the model. Okay, now onto the nitty gritty. I bought an incomplete Playmobil pirate ship off of eBay on the cheap, since only the parts that I did not need were missing or broken. This is not my picture, but it is one that I nabbed off the webs of the same ship. 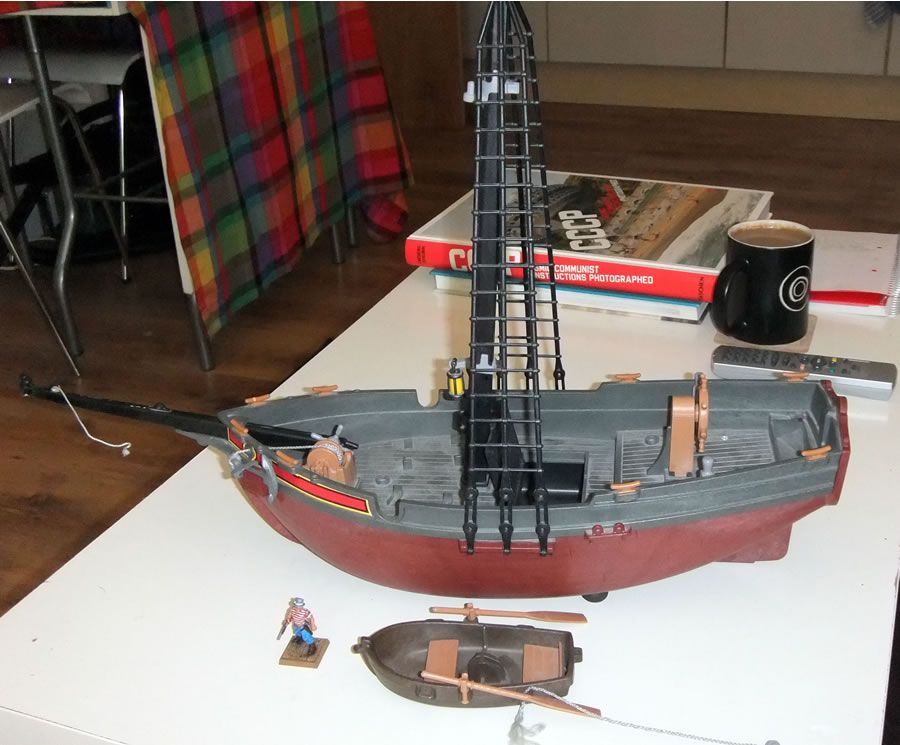 So, the first thing to do was to try and get rid of the ship's keel (which kept it from sitting flat on the tabletop). This required a lot of work with the hand sander and some chiseling with my superduty Xacto blade - which, by the way, is a champ. I highly recommend one of these if you are going to work with hard plastics. In the end, however, the curve of the underside of the ship was just a little too pronounced and even after removing all of the keel, it still had some wobble to it. After everything was painted and finished, I ended up (at the suggestion of my wife) putting felt furniture "feet pads" on the underside and that did the trick. 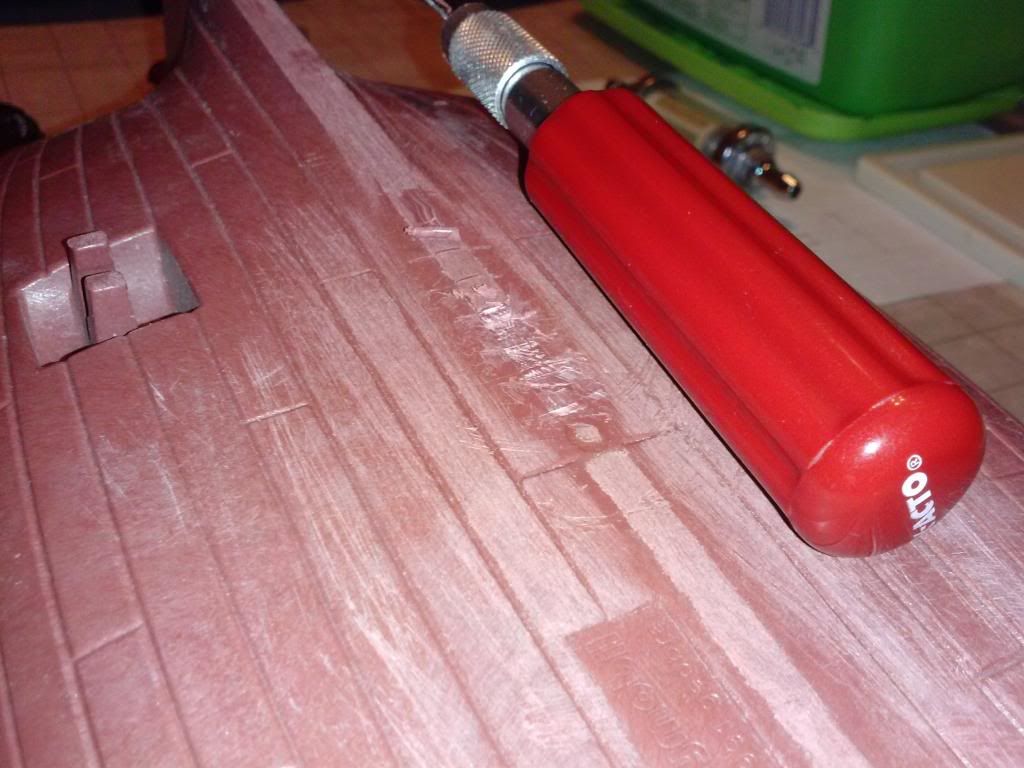 There were also some features deckside that I wanted to get rid of to increase the amount of playable space. There was going to be a mast and two cannons on deck, so I needed the room where I could get it. So... more work (and some cursing) to chisel that off as well. You can also see where I penciled in the grid pattern, to allow me to plan accordingly. I left the large block on the left, as well as the rings... as they were either too difficult to remove or because they were unobtrusive enough. The D-shaped hole near the bottom of the picture is where the mast goes, and I will be using it for the same purpose in the final build-out. 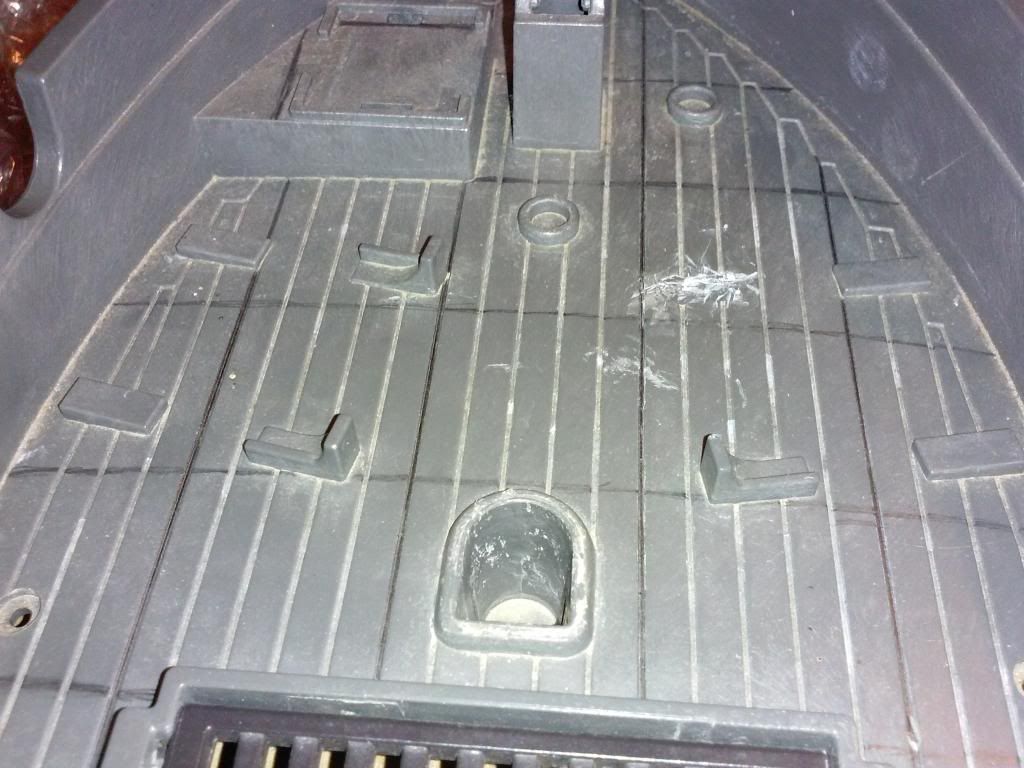 Speaking of the mast, here is the main part of it. I actually have no real clue as to what this is... it's something that my wife found lying in our street and was kind enough to save for my junk collection. I think it might be some kind of filter for pneumatic tools or something. 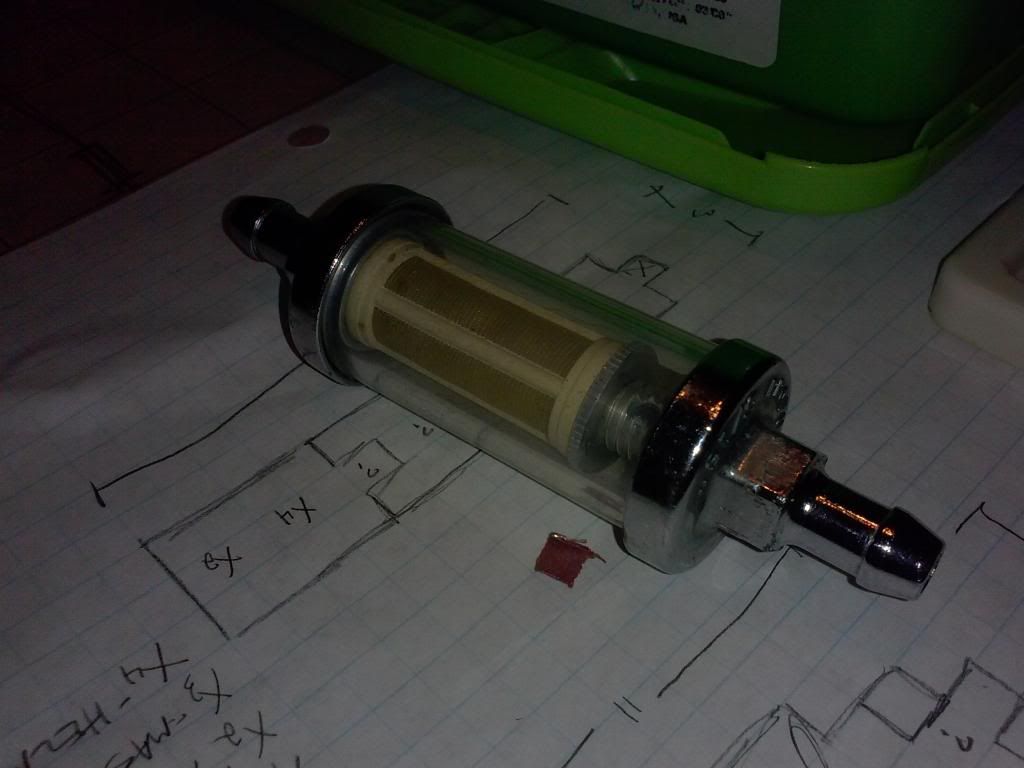 Next, the gathering of bits and baubles from the junk collection continued... giving me these two pieces (as well as plenty of others) that would go towards a steamwork paddlewheel type thing that I decided to mount on the side of the ship. After I had made the decision of placement and got past the point of no return, I realized that the physics would have the wheel turning the wrong direction, but just said 'screw it' and carried on. The enormous neon green wheel was from the interior of a bubble-blowing crank toy and the gray flared piping was the shaft to an old computer microphone. <img src="http://img.photobucket.com/albums/v71/Erasmas/Miniature%20Projects/The%20Icarus/CAM00529_zps79274dde.jpg~original" style="max-width:100%;" alt=""><br><br>The piece cut and the other piece that I will marry it to, in order to form the exhaust pipe that will "feed" the wheel steam from the boiler below the deck. I'm not sure where the brass ring came from, but the white plastic piping is from the toilet tank re-filling mechanisms that I replaced from both of the toilets in our house a few years back. That set-up had no shortage of interesting pieces and with some soap and water... they were good to go. Just to clarify (for any that may not realize it), the water inside of a toilet tank is clean... not potable, mind you, but clean. So, these parts never came into contact with waste of any kind, the staining that you notice is rust and mineral build-up from years of sitting in hard water. I'm just sayin'. 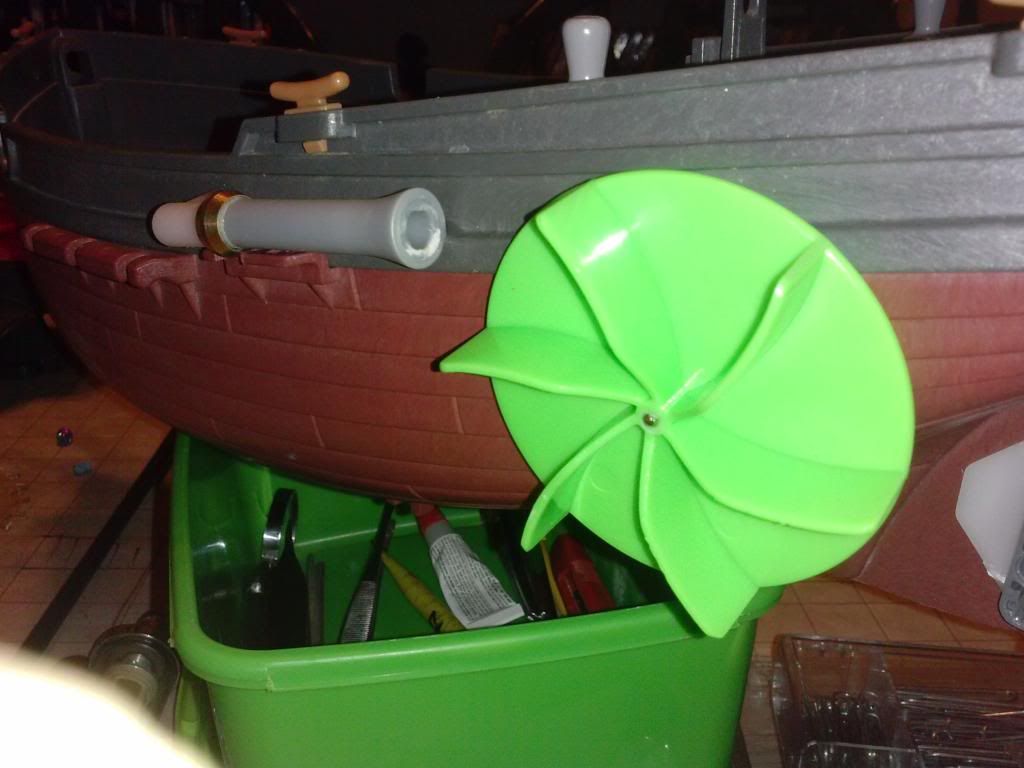 Next up was the rudder. It was just way too plain and was begging for some more steampunk adornments. Now, for my own personal tastes, I dislike steampunk things that simply have gears and whatnot glued to the outside of things without any real thought to purpose or functionality. But, I had this cool-looking LEGO piece that (at one time) fired little plastic eye-gougers missiles that had a great Victorian era steam engine look to me. So, rear propeller it is! Here, you can see the "engine" mounted onto the rudder (with some decorative filler to widen out the rudder enough to make the LEGO piece a tighter fit. You'll also notice the section of pipe that I was test-fitting into the top, as well as the "port hole" like washer that I installed for where the other end of the pipe will go into the ship. 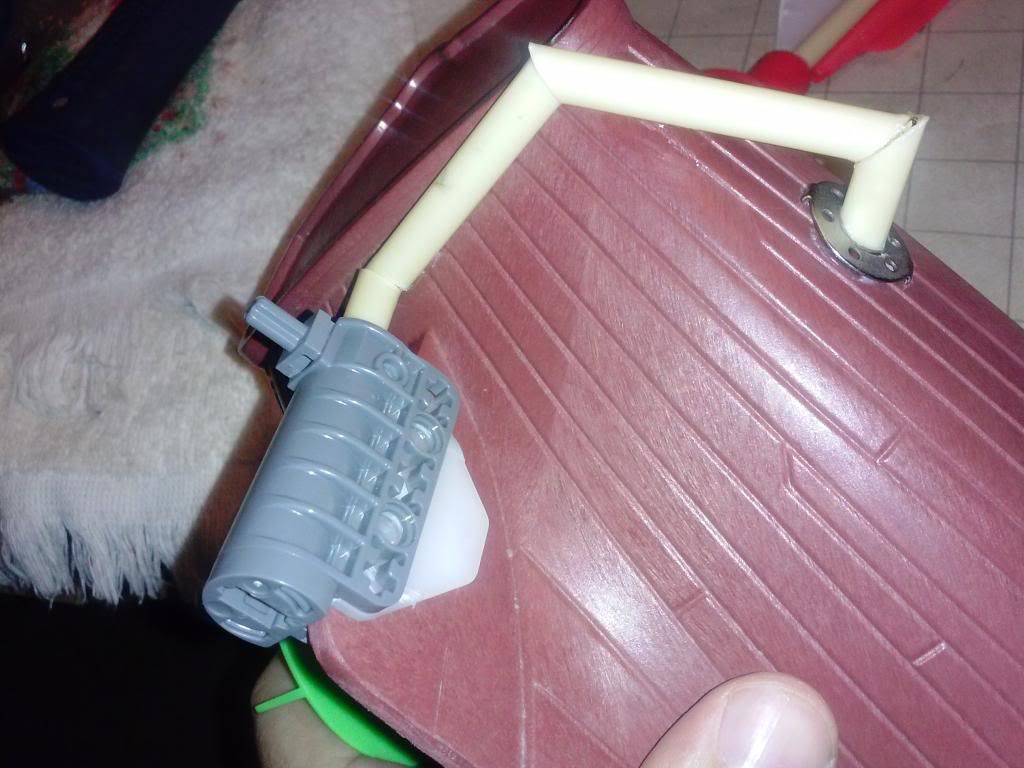 The propeller itself was made from the same taken from a toy helicopter. I just used the central 'hub' and attached some blades that I made by cutting down some kind of strips that came with a Mattel race track. The blue piece in the center was one of the innards from some kind of water toy. 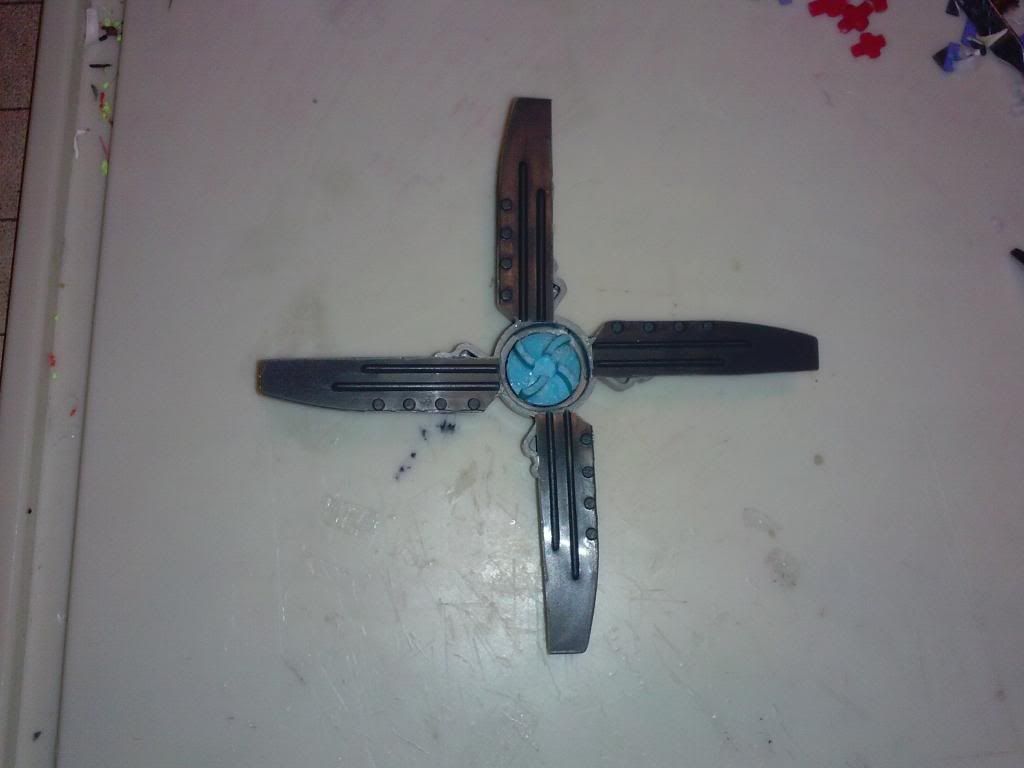 The mast topper was constructed out of various plastic bits that were all left over from medical respiration stuff that the NICU sent home with us when my son got out of the hospital. I needed to cover up the stamping in the steel of the main mast piece and this stuff lent it a large scale industrial look.  For the figurehead, I wanted something a little different. In this setting, Ahab's leg had been taken by an albino dragon instead of a whale (which many still refuse to believe that it actually exists). And since he is always chasing this creature... I thought it had a nice touch of irony to have it be a dragon. Plus, I had plenty of Mimrings left from when I played HeroScape all the time. Instead of his head, however, I opted for an unused head from a wargaming model gifted to me by a friend (it came with two, this was the one I hadn't used). I also decided to use Mimring's tail for the dragon's neck, since it had a better curvature to it for what I was going for. Here are the pieces laid out. 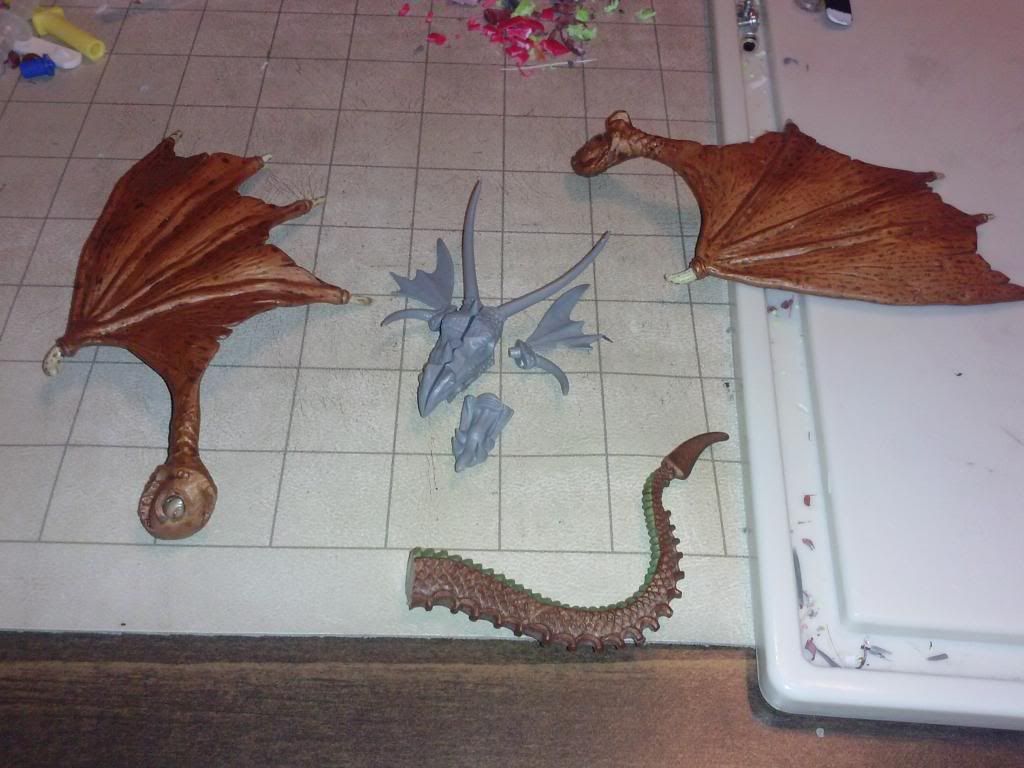 And then in place. 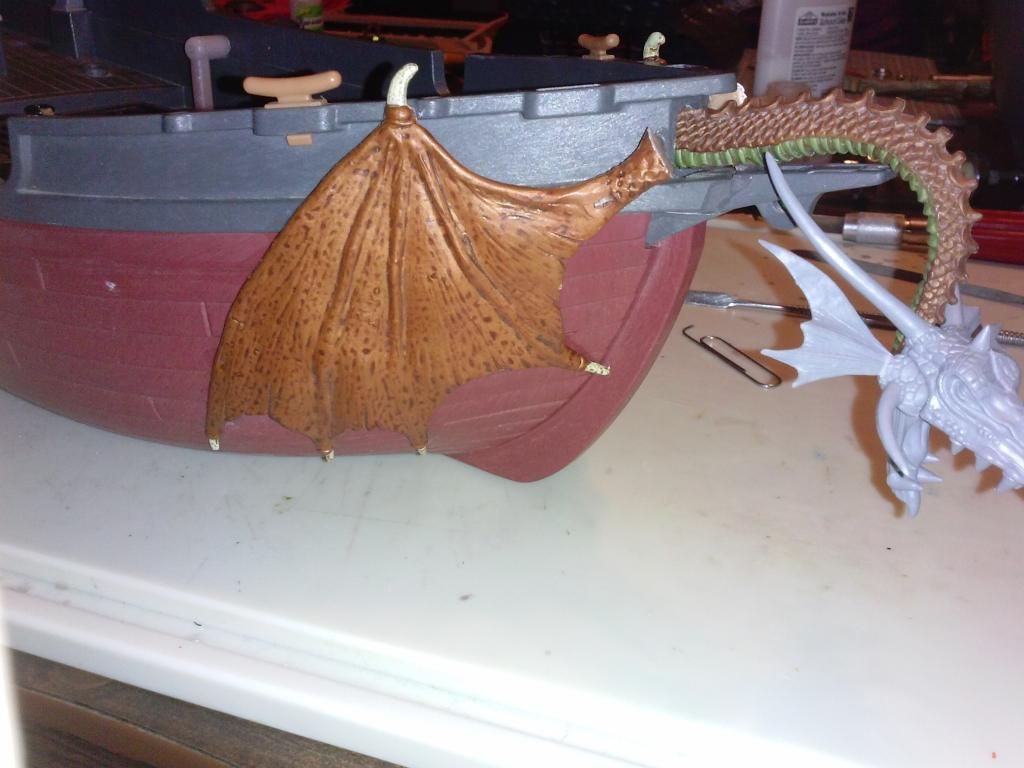 Now onto the helm. This was one place where I knew that I wanted some more steam-tech. I wanted the wheel to look like it turned a cog, attached to a bicycle chain like thing that disappeared below decks. Since the scale of Playmobil is way off from 28mm, I used a different wheel (taken from another part of the ship) and put a platform just below it. I then built a box around where the chain would "go below", in order to hide it better. This box was made out of more of the above-mentioned Mattel strips. I also had to carve into the helm stand, in order to allow the gears to fit. 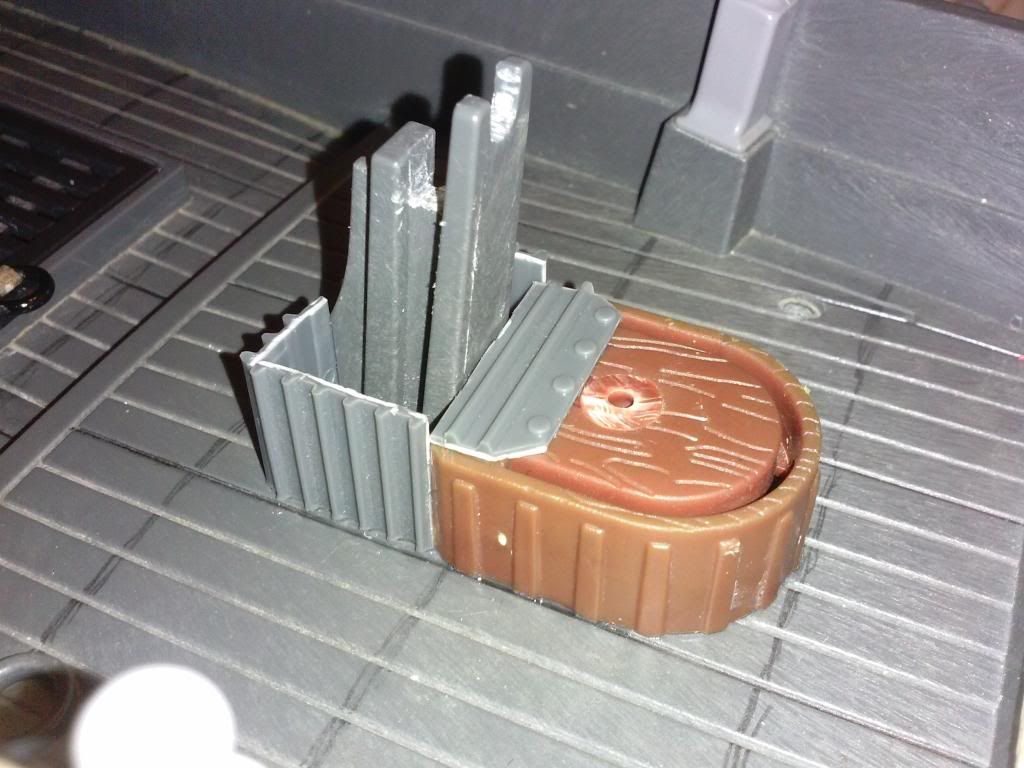 Now, I searched high and low for my chain (which I learned is called a rolling chain) that was small enough to fit onto the cogs that I had selected. Nowhere could I find one that was the right size. I looked online and found some that seemed like they would work... but it was out of the price range that I was willing to spend on this one part. I had just resigned myself to using normal jewelry chain and sucking it up. However, when my wife went through her junk jewelry stuff - she found this choker that was gaudy and falling apart (which is why is was junked in the first place). The separators happened to have just the right shape and size to form the "sides" of the chain. The only problem is that the chain would have to be constructed the rest of the way by hand... with sections of paperclip serving as the "bars" of the links. I exhaled heavily and was ready to just go back to using the jewelry chain. Luckily, my wife is equal parts stubborn and awesome - and she built that chain. 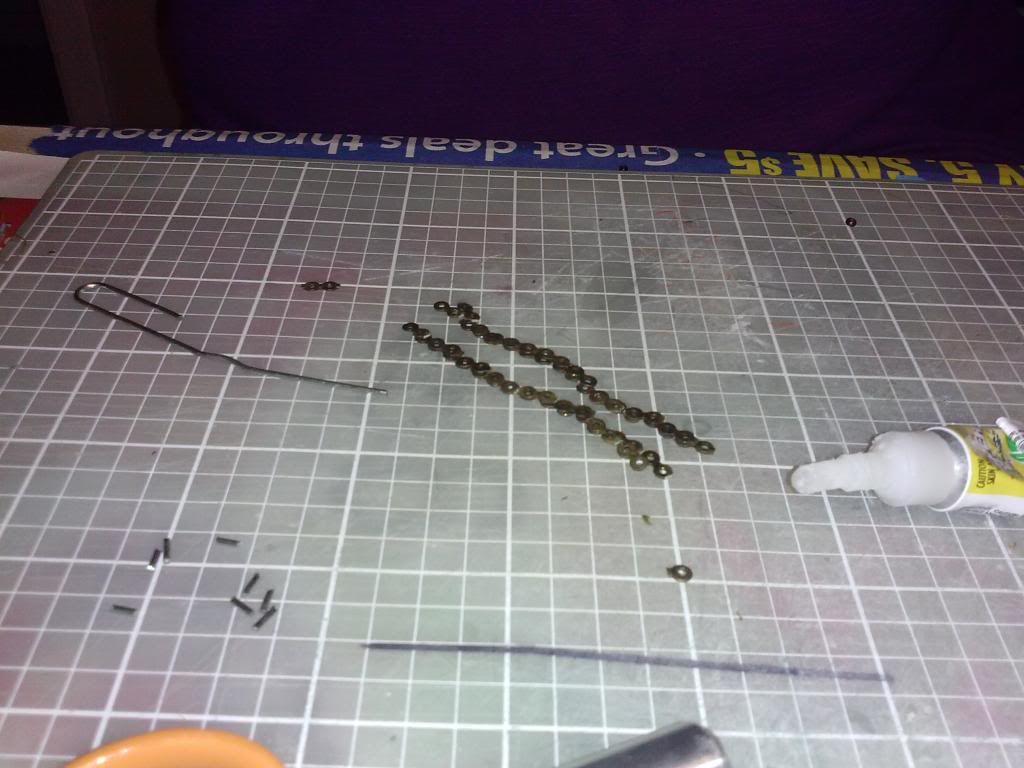  The entire helm, built and in place.  Finally, after hours and hours of work... she was ready to paint! After this picture, I basecoated it in a medium brown first (taken so that I could get my grid back after painting).  Now for the detail work. I wanted the figurehead to be copper, as well as several other things on the ship. So, I started with the patina color (again, this was supposed to be aged) since the patina would be from water and whatnot collecting in the recesses. A few years ago, I was experimenting and discovered this beautiful color recipe for copper/brass patina that I have been in love with ever since. So, it was time to mix up a batch of that! 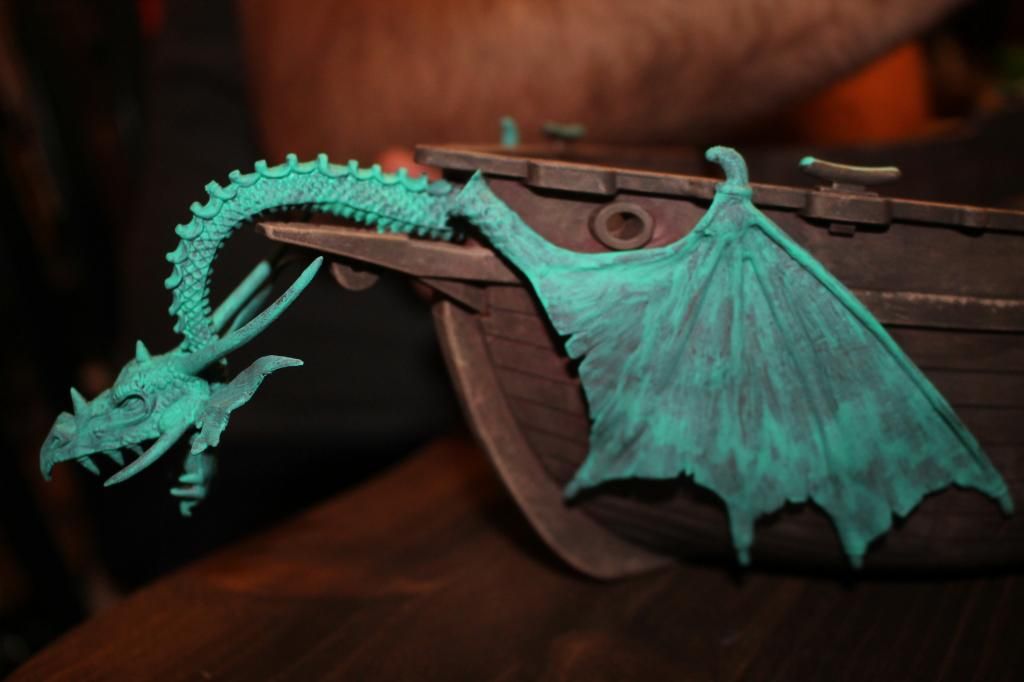 Painting the roses red... or, y'know... whatever. 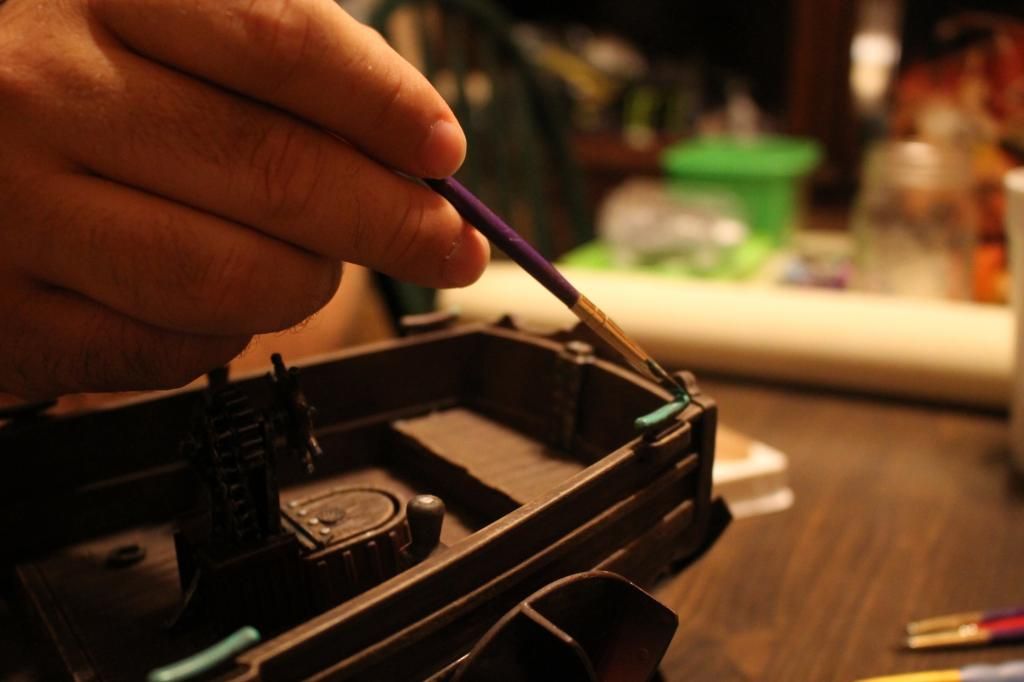 Some gunmetal and rust effects applied to other parts of the ship... and then a little bit of printer transfer/handpainting... and The Icarus is complete! 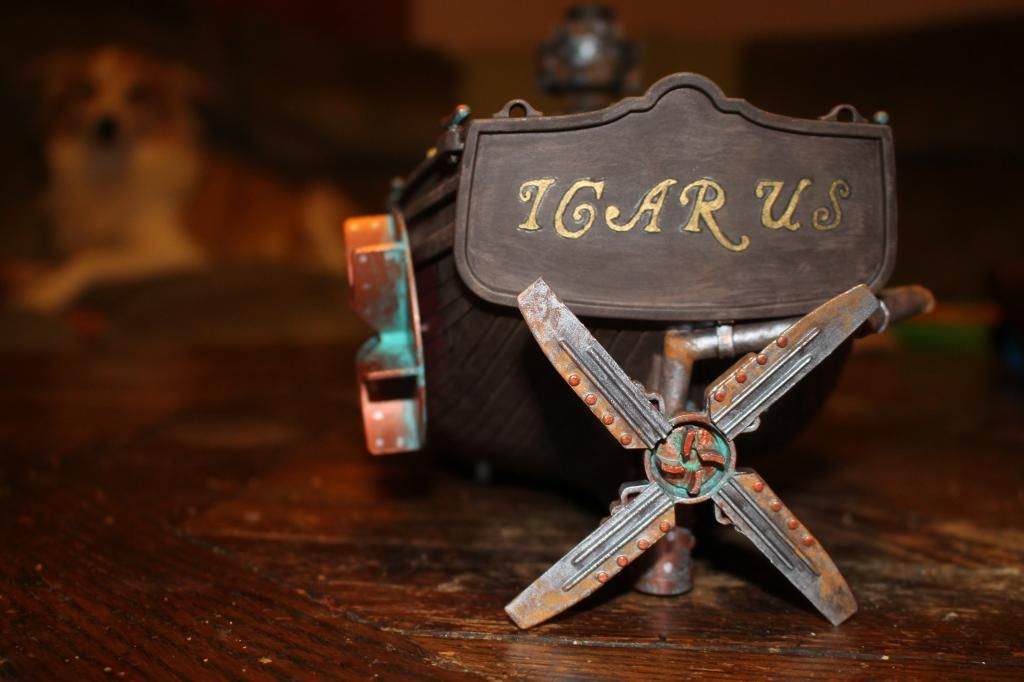  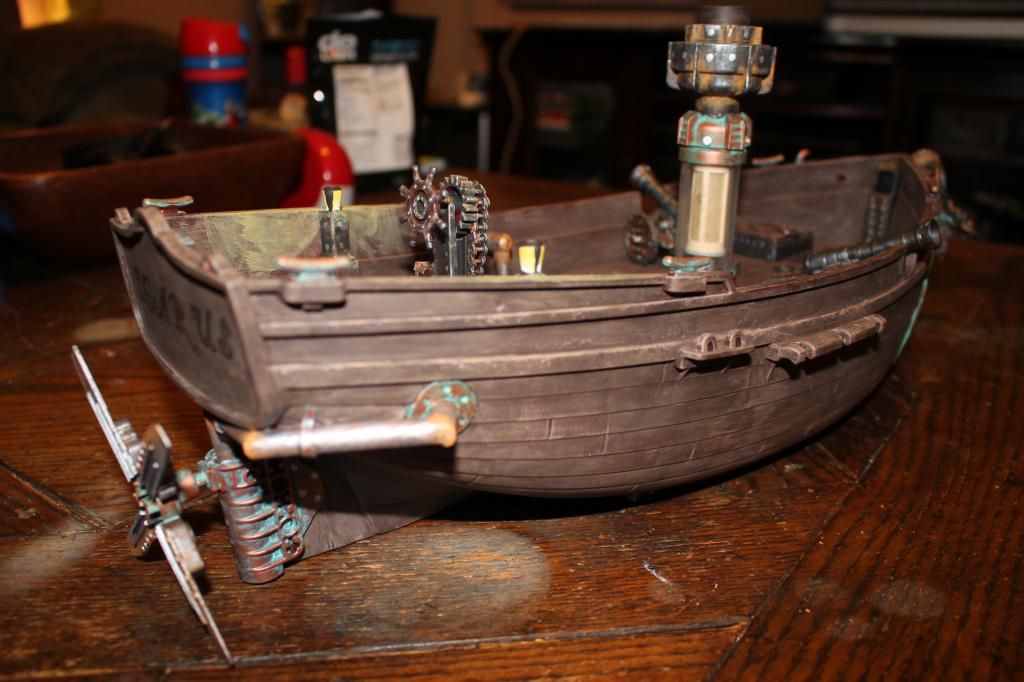 For presentation to the group, we put a bunch of dry ice in the little tray that came with the ship (directly below the deck hatch) and spraying it with warm water - for "authentic steam"! 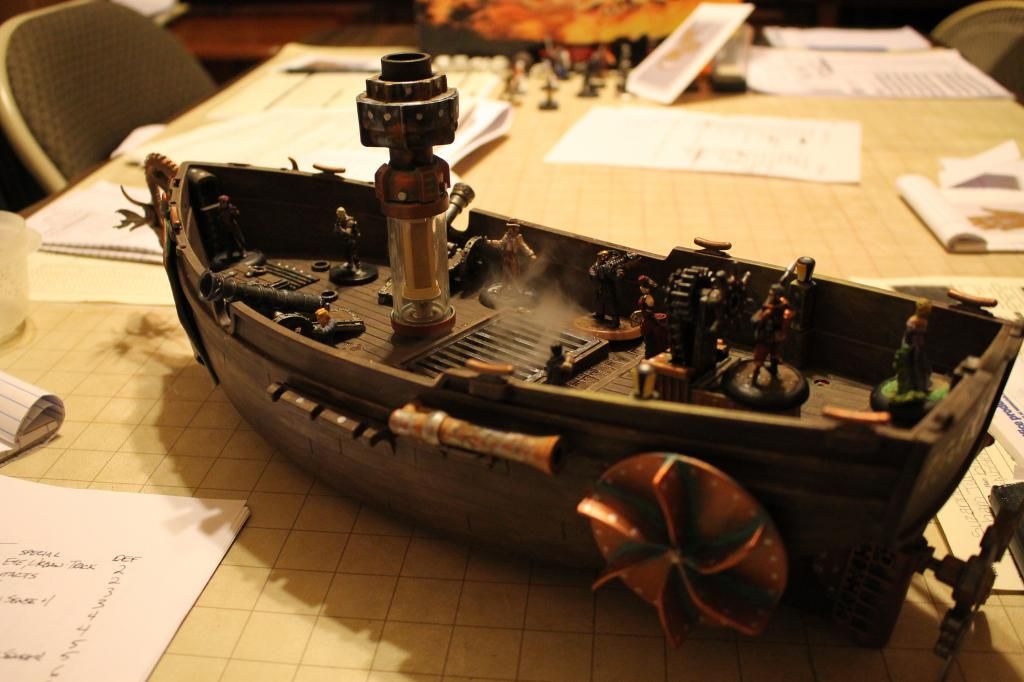
|
|
|
|
Post by beetlewing on Sept 29, 2014 18:54:41 GMT
Absolutely beautiful. My campaign will never need it, but now I want to build one and stick it in a bottle.  |
|
|
|
Post by Erasmas on Sept 29, 2014 19:31:18 GMT
Thank you, Beetlewing!
Make sure that you get a very big bottle.
LOL
I apparently failed to get a picture of the brilliant technique for putting a subtle grid layout into wooden floors (which I totally stole from Malifaux). I will have to get one of that in order to show how well it works... for those of us that use grids still.
|
|
|
|
Post by skunkape on Sept 29, 2014 19:50:56 GMT
The pieces look great!
|
|
|
|
Post by Erasmas on Sept 29, 2014 19:55:36 GMT
Thank you very much, Skunk!
I appreciate you guys taking the time to look through the rather lengthy posts and for leaving comments.
|
|
|
|
Post by beetlewing on Sept 29, 2014 20:10:32 GMT
Are you gonna share your magical copper patina method? If so, I'd recommend making it in it's own thread, in the tips & tricks section. |
|
|
|
Post by Erasmas on Sept 29, 2014 20:49:03 GMT
|
|
valas
Room Planner
 I'm being twisted, on the sideway down.
Posts: 459
|
Post by valas on Sept 29, 2014 21:52:09 GMT
Dude, that ship is just so sweet. Excellent job with it.
|
|
|
|
Post by Draklith on Sept 29, 2014 22:32:00 GMT
Very impressive works of art here  Superb jobs Superb jobs 
the kraken was veeeery inspiring for me, (added to list  ) that is all ready too long lol ) that is all ready too long lol
pretty amazing how you took the playmobile out of playmobile with the Icarus, very well done indeed, thx for posting |
|
|
|
Post by Erasmas on Sept 29, 2014 23:17:09 GMT
Thank you guys for all of the compliments! I am so glad to have found a community that can appreciate the time, effort, and energy that goes into these projects.
Such kind words from all of you in such a short time, and from such talented crafters in their own rights!
You guys are spoiling me.
|
|


 Superb jobs
 ) that is all ready too long lol

 Cheers!