|
|
Post by DMNate on Mar 3, 2014 21:13:08 GMT
Beaches/Lakes/Ocean TutorialBelow, I have several important points and lengths represented. 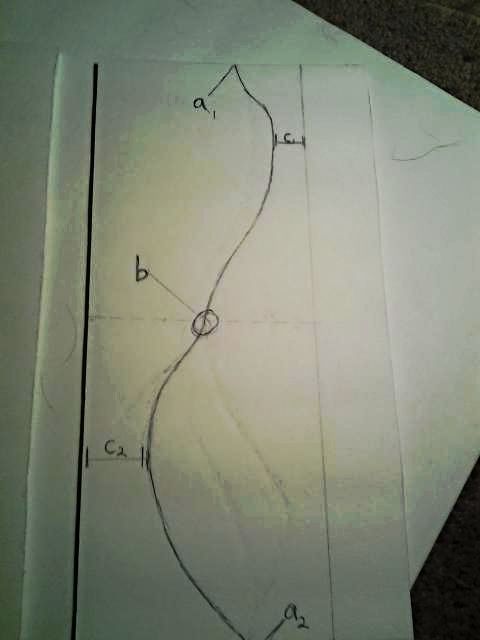 Simply take the sum of n((a 1/a 2)+(c 2-c 1)) where n=whole iterative tangents less than the value of b cos+2sin. Nah, I'm just Joshing ya. That's all crazy nonsense. It's much easier than all that. Cut a piece of foamboard 4.5" by 12" out and cut out the design of your beach making sure to start and end the sides at 3". (Below I cut this out of a 6"X12" piece and chopped off 1.5 inches from one edge) 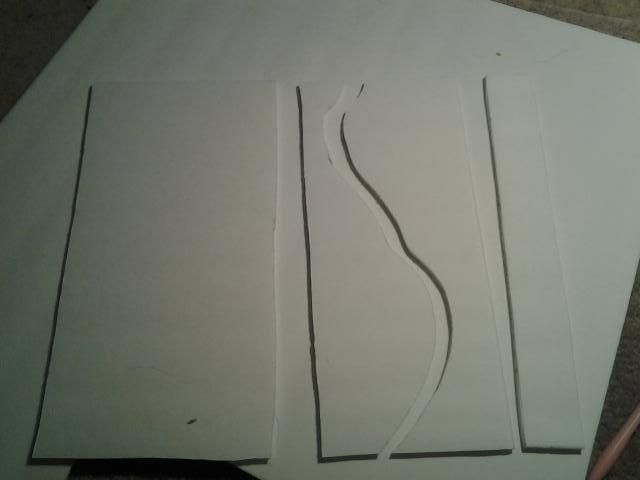 Stack them up and mark off the overlap of the smaller one. 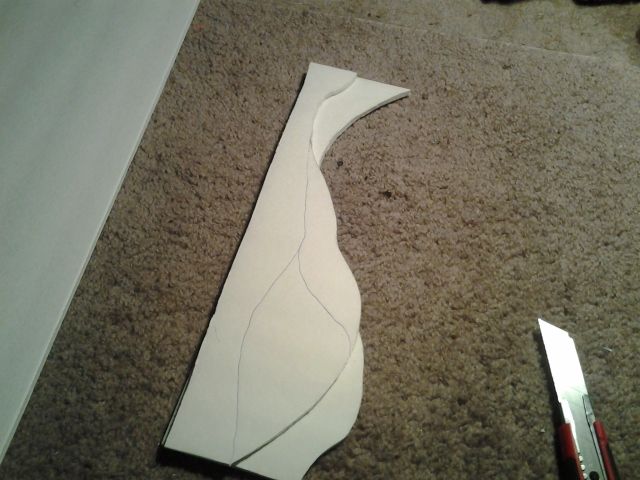 Cut off the excess. 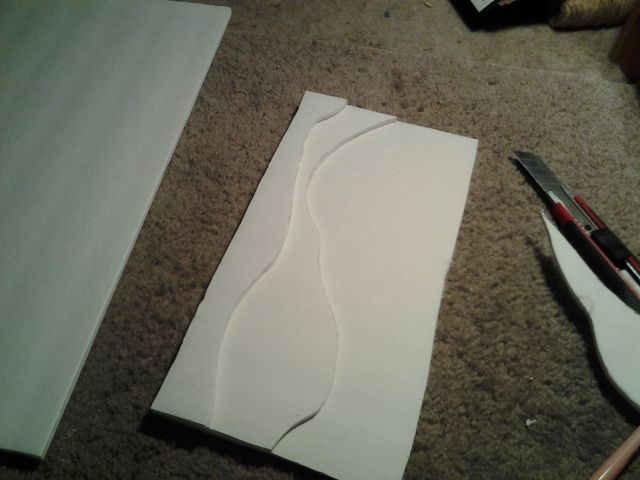 Take a razor and cut off the edge to make the step more gradual. Don't make it super even. It will look more natural if it's a little uneven. 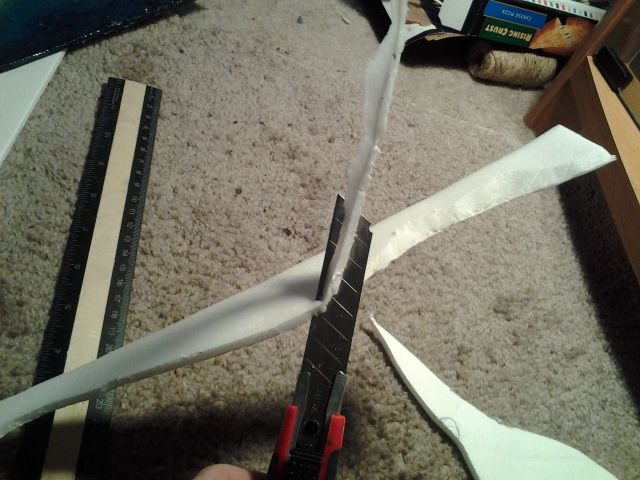 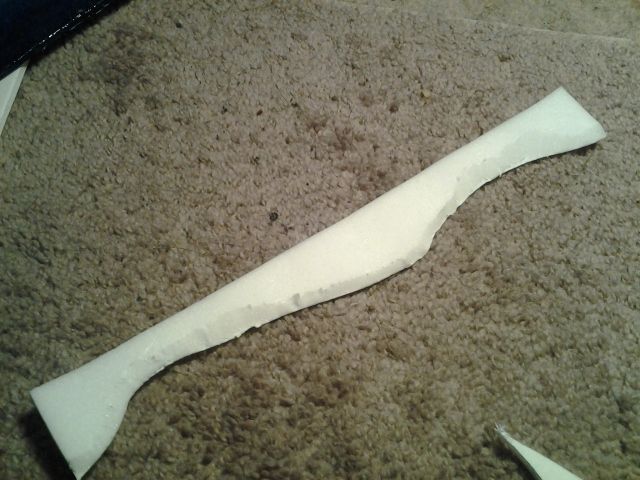 You can glue your pieces to a 6"X12" piece and start painting, but I opted to do some extra sanding. I really like how soft it made the beaches look, but you can get away with just painting them now. 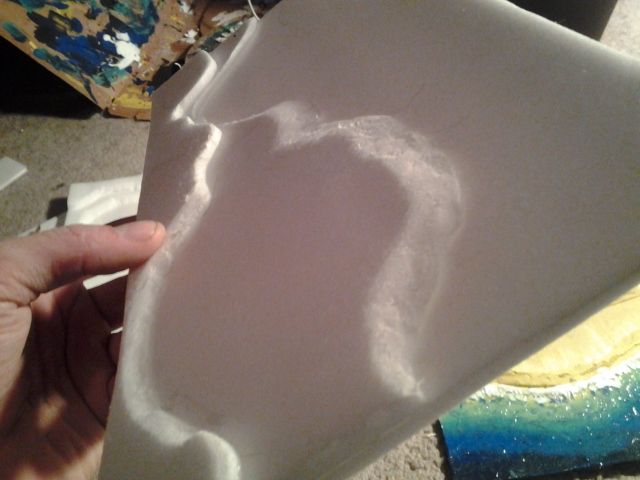 Paint the sand/dirt. Paint a little where the water will be. 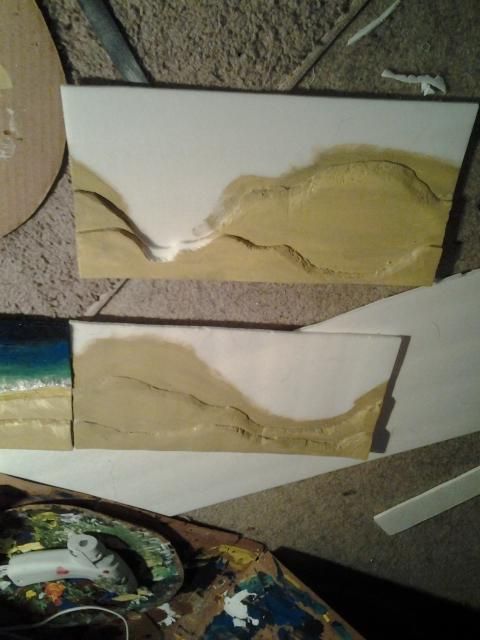 While the paint is still wet, start adding a bit of bright blue. It'll come out kinda green, but that's good. 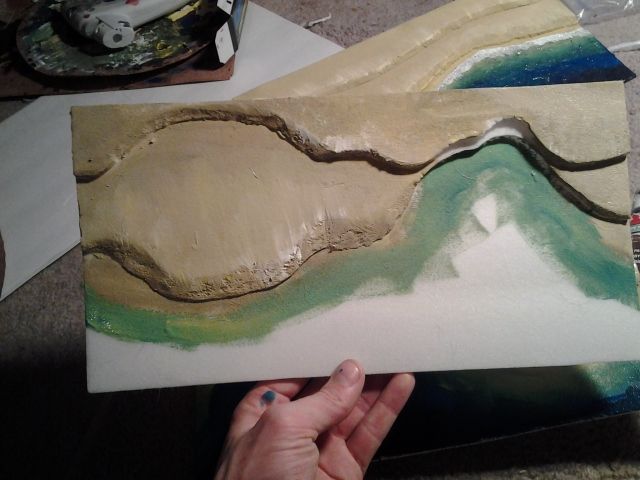 Keep adding blue and fade into the light blue color, then start adding dark blue. 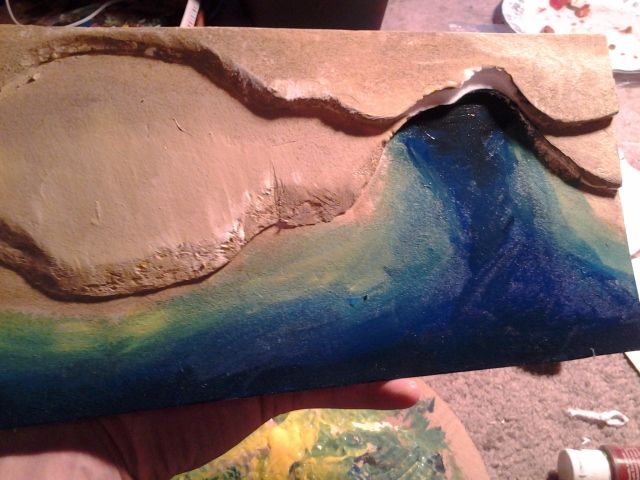 Finish by adding just a touch of black, especially on the edge. Keeping the edges consistent is important to match up with other water pieces. How fast you fade to the blues changes how steep it will look after the water is added. 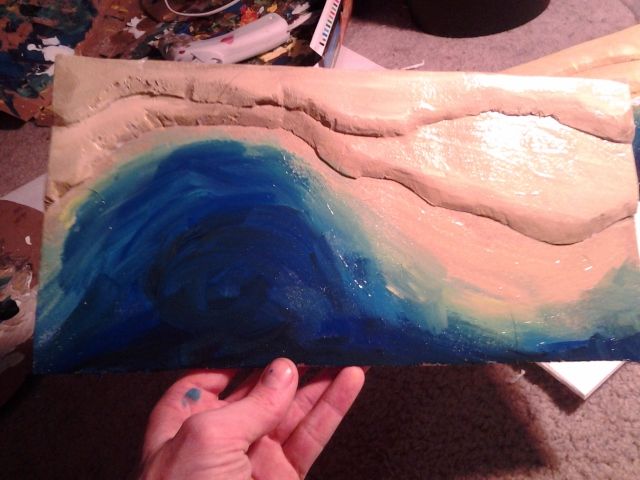 Let dry. Next, spread mod podge all over (very thin) and sculpt little waves and ripples in it. 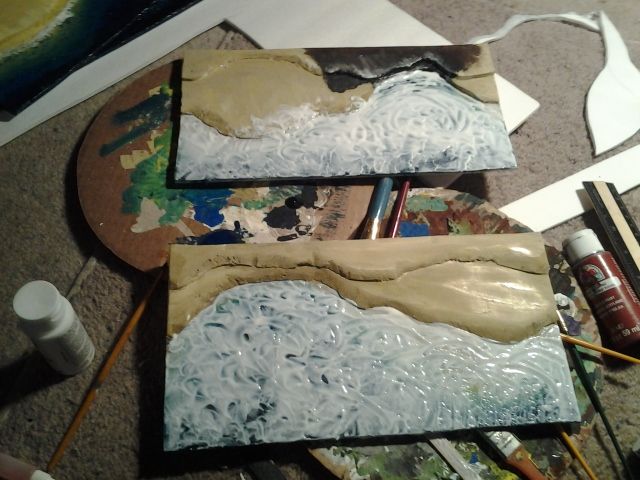 Let dry for about a day.  The larger pieces of water are pretty simple. I just paint the entire thing dark blue and while it's still wet, I drip bits of bright blue and black on it. You can swirl it around until you reach the desired homogenous level is reached. 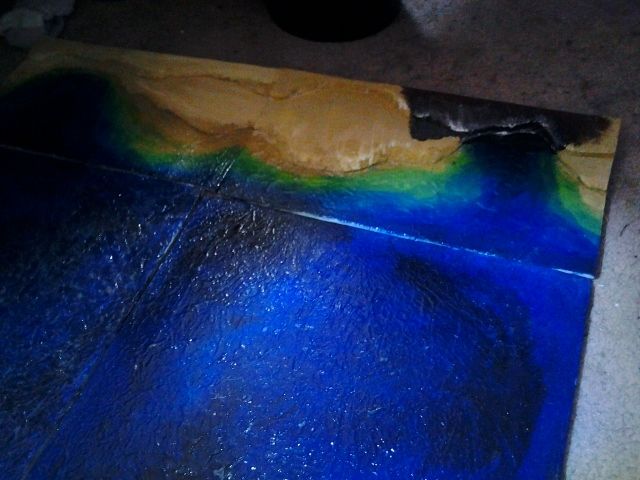 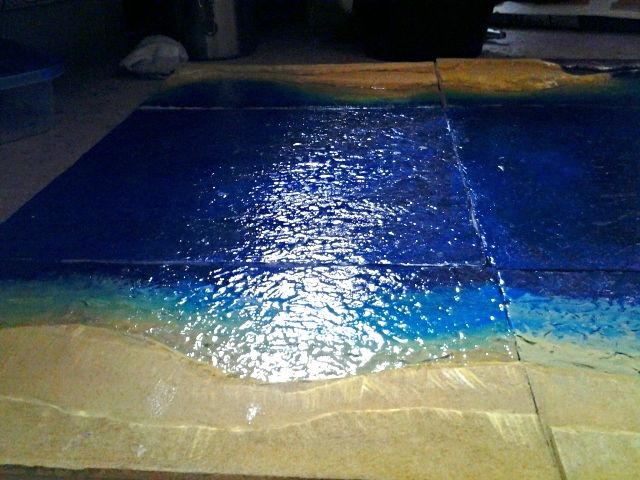 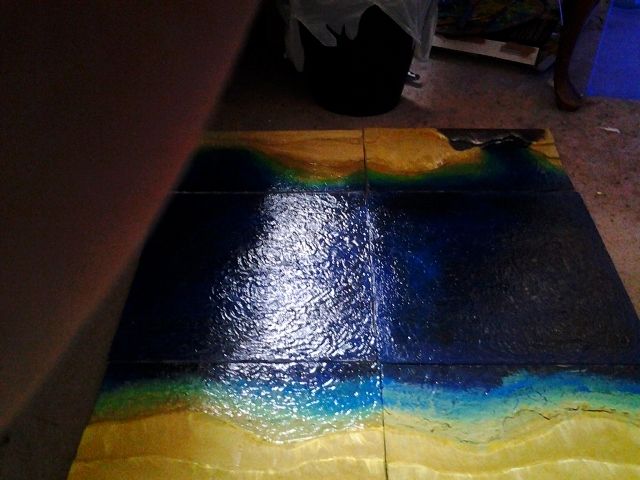 Water is fun and easy. *Note* The Mod Podge will stay slightly tacky. Yo can use a glossy acrylic sealer to solve this issue, but I usually don't worry to much about it. |
|
|
|
Post by skunkape on Mar 3, 2014 21:17:24 GMT
The finished piece looks great!
|
|
|
|
Post by sgtslag on Mar 3, 2014 21:49:08 GMT
Gorgeous!!! Thanks for posting your tutorial! Cheers!
|
|
|
|
Post by akondo913 on Mar 4, 2014 3:33:37 GMT
Wow pretty easy to pull off great looking water effects. Thanks for the tutorial!
|
|
|
|
Post by DMScotty on Mar 4, 2014 6:34:18 GMT
Love your work man
|
|
|
|
Post by DMNate on Mar 4, 2014 7:01:40 GMT
Love your craft, man.
|
|
|
|
Post by gallant on Mar 4, 2014 16:34:15 GMT
Great tutorial, thanks!
|
|
|
|
Post by grym247 on Mar 7, 2014 5:20:44 GMT
Great Work DMNate , as always excellent
|
|
|
|
Post by Sleepy Hollow Mike on Mar 7, 2014 10:16:43 GMT
Great work!
|
|
|
|
Post by ashrothedm on Mar 7, 2014 13:09:33 GMT
Those colors are fantastic.
I put the modge podge on a little thicker, and that takes about 3-4 days to completely cure. It's still only maybe 1/16th of an inch, definitely less than 1/8. I reworked all of my water pieces to use dark blue water and modge podge. It's worth it.
One additional note: When you texture modge podge, if you agitate it too much you can aerate the modge podge, and little air bubbles can get trapped in there. Most of the time that's a bad thing as the bubbles to scale look a little bit off, but depending on the liquid you are making, bubbles may be desired. Just be careful and don't go too crazy with stippling the modge podge unless you want bubbles.
Your color selection is always great, and perfect for this beach illusion. Definitely the most important step here. It creates the feeling of depth and volume, and the rippled modge podge further pushes the depth of the water away from the surface.
Anyone who has not yet modge-podged a liquid really should give it a try. The results are incredible, and cheap. For 2.5d, you can get by without scenic resin water, but gain all of the allure of it.
|
|
|
|
Post by earlteagrey on Mar 7, 2014 14:52:27 GMT
Those colors are fantastic. I put the modge podge on a little thicker, and that takes about 3-4 days to completely cure. It's still only maybe 1/16th of an inch, definitely less than 1/8. I reworked all of my water pieces to use dark blue water and modge podge. It's worth it. One additional note: When you texture modge podge, if you agitate it too much you can aerate the modge podge, and little air bubbles can get trapped in there. Most of the time that's a bad thing as the bubbles to scale look a little bit off, but depending on the liquid you are making, bubbles may be desired. Just be careful and don't go too crazy with stippling the modge podge unless you want bubbles. Your color selection is always great, and perfect for this beach illusion. Definitely the most important step here. It creates the feeling of depth and volume, and the rippled modge podge further pushes the depth of the water away from the surface. Anyone who has not yet modge-podged a liquid really should give it a try. The results are incredible, and cheap. For 2.5d, you can get by without scenic resin water, but gain all of the allure of it. Ditto. You nailed it. Take note folks, that was the best Mod Podge summary I've ever seen (and wish I had read before I starting on my first MP crafts). |
|
|
|
Post by DMNate on Mar 7, 2014 18:41:42 GMT
Be careful with making it thicker. It will start to make bubbles in it, the thicker you make it, after about 1 month. If you want more dramatic crests and waves, use the mod podge glossy spray as a starter layer, then add the mod podge as thin waves. The thinner you keep it, the better it will keep.
|
|
Ogre
Cardboard Collector

Posts: 2 
|
Post by Ogre on Apr 1, 2014 18:17:17 GMT
Really nice. Up to now I used Woodland Scenics stuff : long and expensive. Your results inspire me. Thanks.
|
|
leolad72
Paint Manipulator
 I am a DM; it isn't in my job description to "kid around"
Posts: 147
|
Post by leolad72 on Apr 5, 2014 19:47:30 GMT
Slow clapping the Hell out of this one....Killer piece!
|
|
|
|
Post by DMLuthgar on May 24, 2014 4:39:22 GMT
Great job! Time to break out some podge and give it a go.
|
|
|
|
Post by DMNate on May 24, 2014 7:48:12 GMT
Recent tests have changed my method a little. Before you put down the mod podge, but after the paint, put down a thin layer of PVA glue. This creates a thin layer that is air tight. It seems to solve the bubble issue I was having.
|
|
|
|
Post by rane on May 26, 2014 17:33:23 GMT
perfect timing! I just bought some Mod Podge over the weekend to try some neat water effects - thanks for the protip!
|
|
|
|
Post by Cyan Wisp on Jun 7, 2014 21:11:52 GMT
Great illusion! That water looks deep and cold - like you could immerse your whole hand in it. It really appears liquid. Bravo!
|
|
|
|
Post by DMNate on Jun 7, 2014 22:35:51 GMT
Thanks! I'm glad you liked it.
I just realized that I had made an update on my water effect, as after about a month or so, the mod podge starts bubble. This is because air travels up through the foam. Because the mod podge stays flexible, the air ends up being able to push it's way through. It ends up ruining the illusion (in my standards, but I'm very harsh on my own work.) To remedy this, you need to air proof the layer before you apply the mod podge. I used PVA glue. I t dries clear, so I could apply it after I painted, but you could do it with anything if you put it on before you painted. This seems to have fixed that issue. (Make sure you let the glue completely dry before applying the mod podge)
Another issue has been storage. When storing these, I can't stack them if anything painted is touching the mod podge, as it would stick to it, and you can't get it off the mod podge without sacrificing some of the waves.
By the way, If anyone else is using this method, please post your pictures in here. I'd love to see how other people's painting styles/methods/choices affect the overall look. I'm always looking to find interesting ways to apply these techniques
|
|
|
|
Post by rane on Jun 16, 2014 23:49:08 GMT
here are some fountains I made using your method   They look great in person, the mod podge gives a nice, and natural texture to the water - really makes it pop when in play. I was contemplating how to paint - I wanted to keep it a bit cartoony, so after painting the fountain tile in the stone work - I applied a watered down layer of bright blue, then brushed in some thicker sections of white (Bob ross happy little tree style) to simulate bubbles from the impact of falling water. The pictures are a bit darker than the way they look in person - but you can kind of see the murkiness effect to simulate some depth to the fountain (1ft in game world-ish) |
|


 Cheers!
 Cheers!