


Airbrush for birthday/Christmas
Dec 29, 2013 18:13:15 GMT
skunkape, miltonmurphy, and 2 more like this
Post by adamantinedragon on Dec 29, 2013 18:13:15 GMT
There have been a couple of threads going on about Christmas gifts, or airbrush advice that I have commented on about getting an airbrush for my birthday/Christmas. Since I'm not sure which of those threads would be most appropriate for this, I finally just wimped out and decided to create a new thread.
My wife purchased this airbrush setup for me for $99 from Amazon.com. It's a nice deal I think, three airbrushes and an auto-cutoff air compressor, along with hoses and a booklet on airbrushing.
I know that this is a 2.5D site and some people might object to the Hirst blocks I use, but here is the first project I completed with the new airbrush:
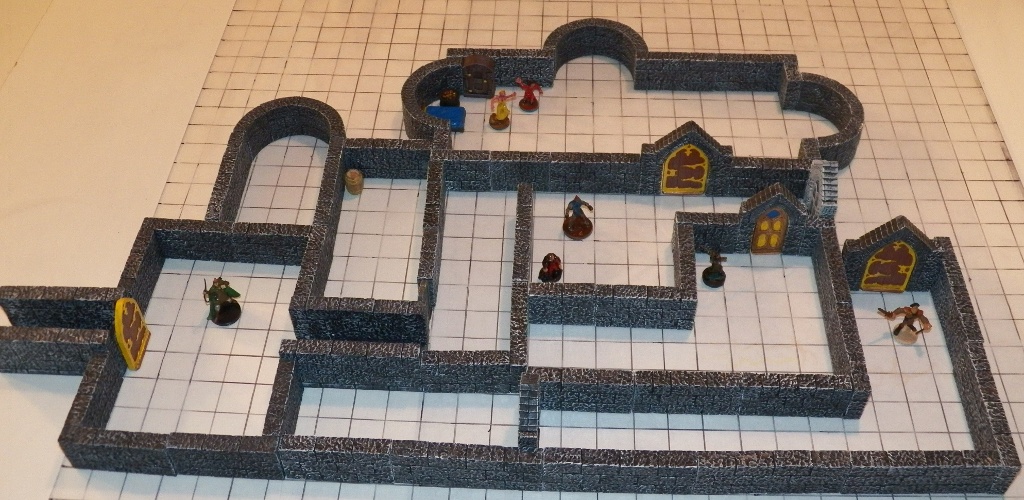
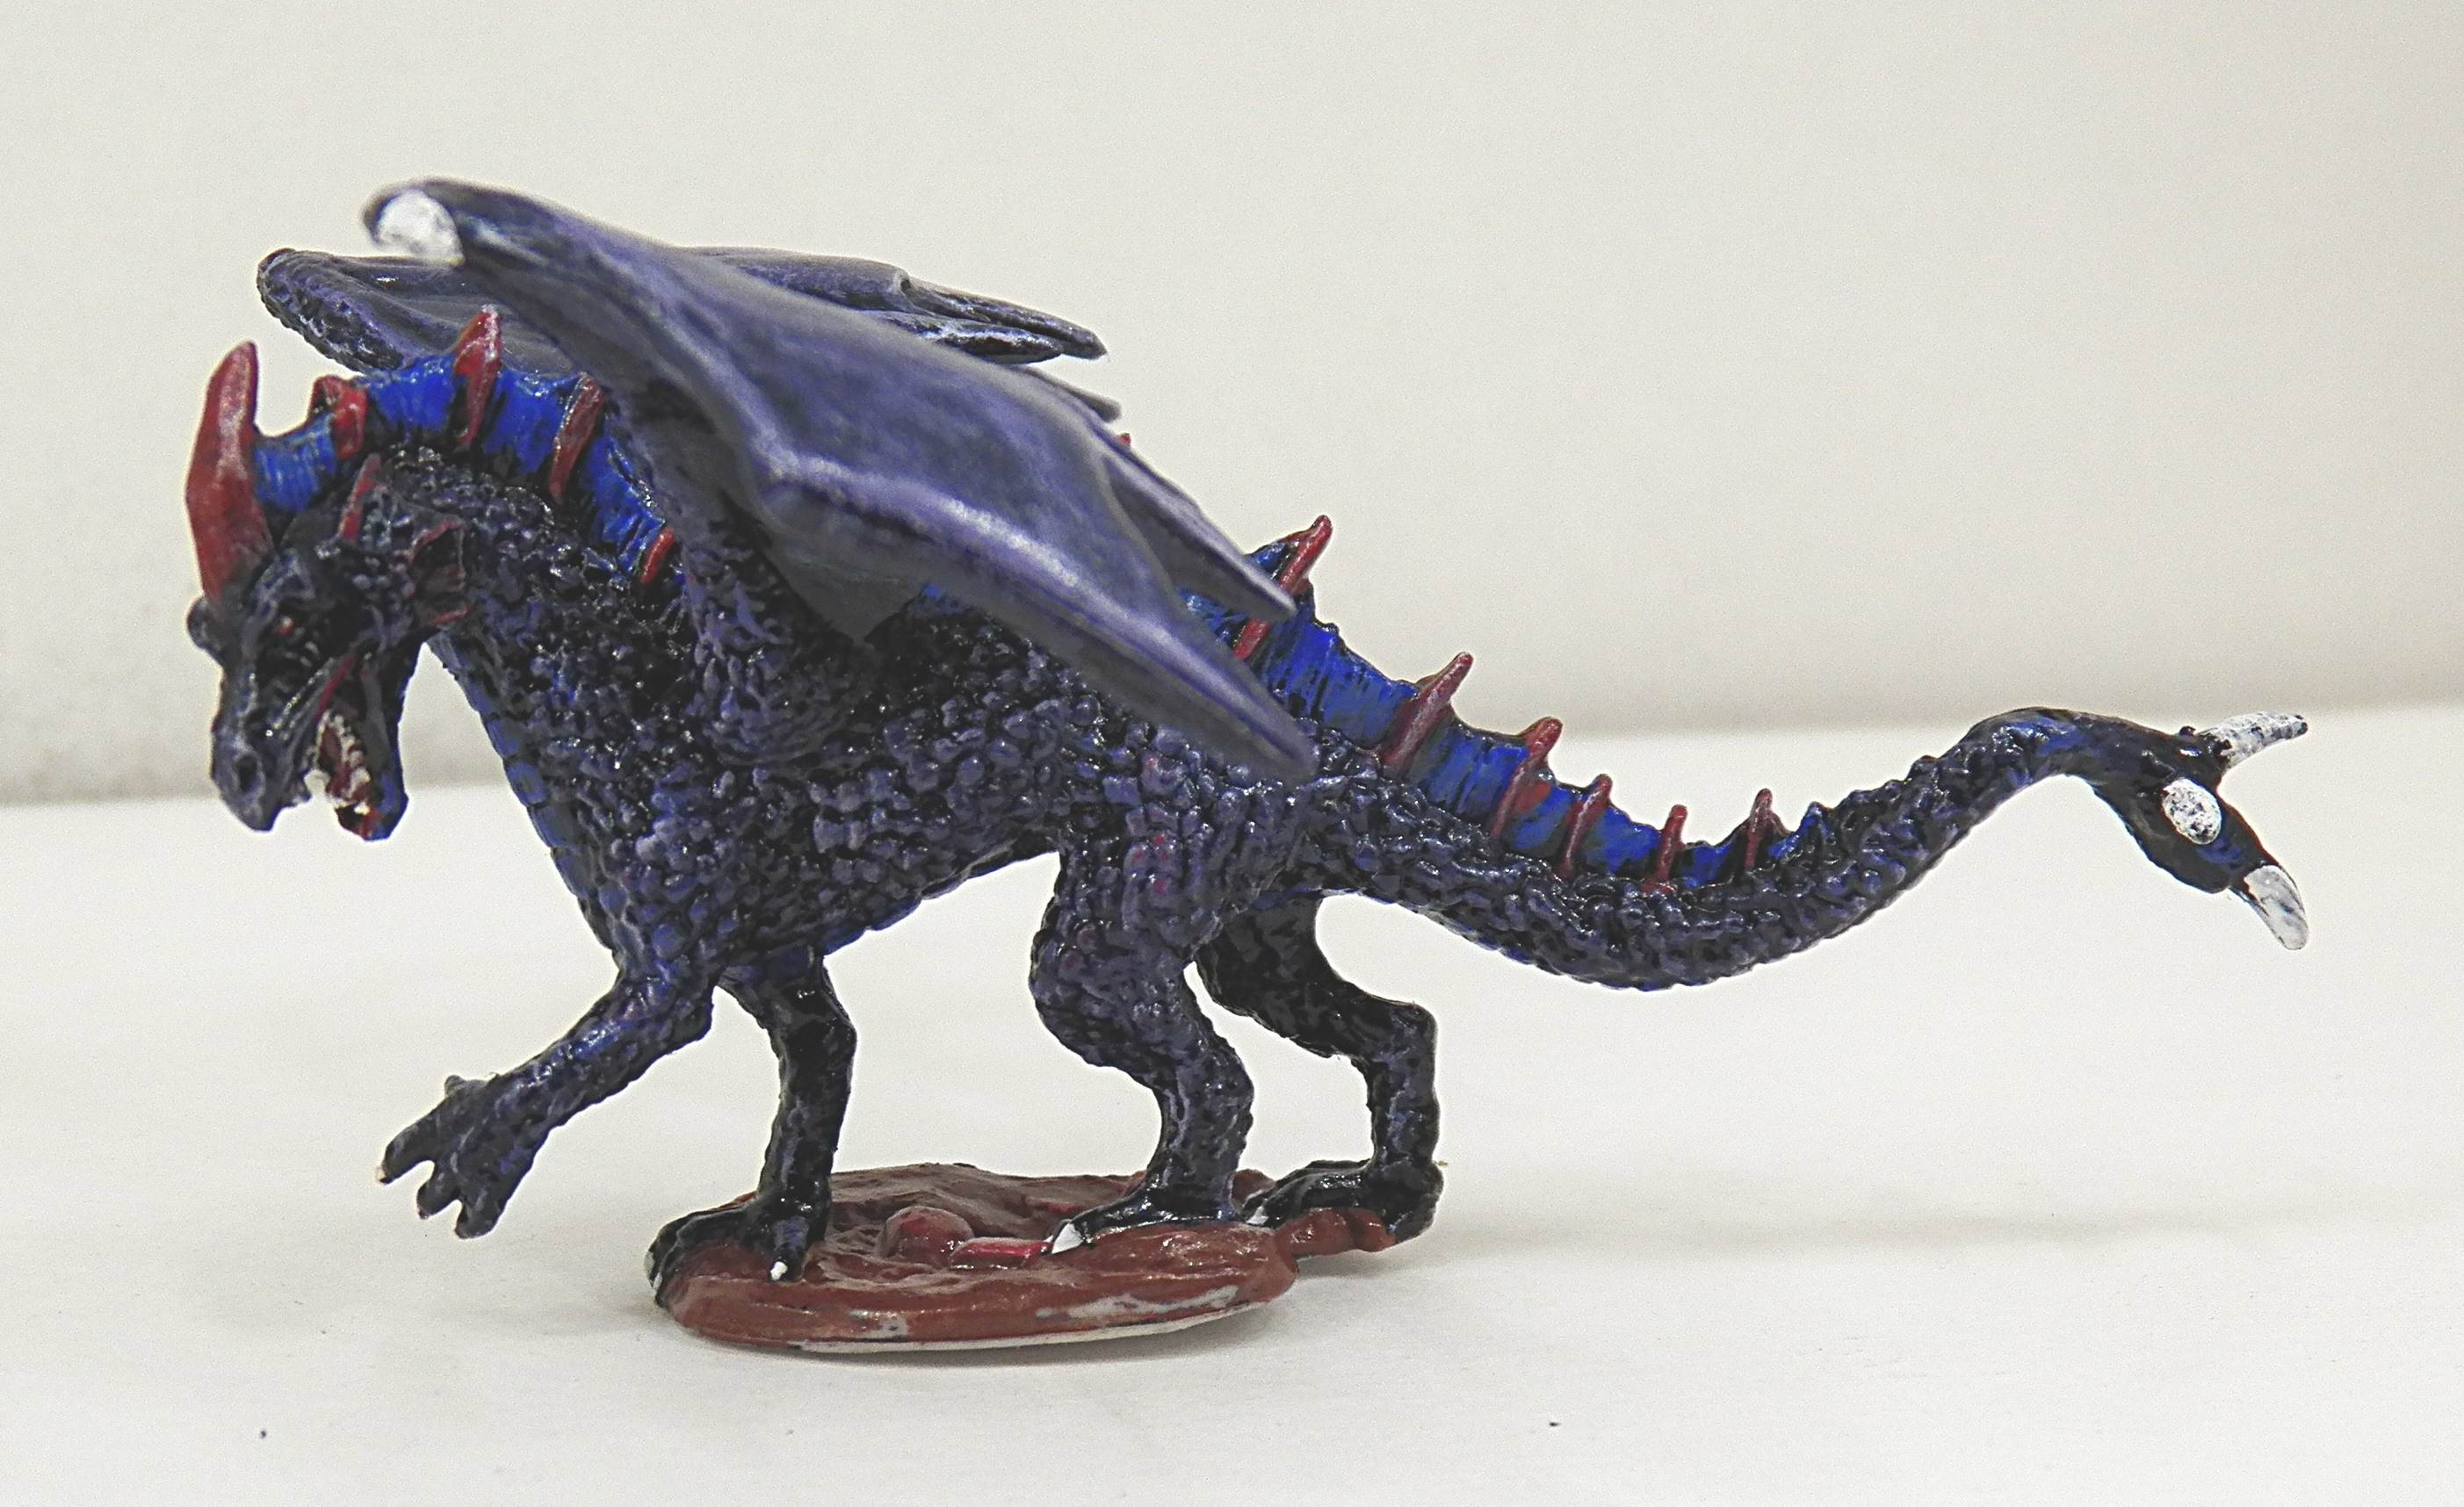
I learned a lot in doing this painting. First of all I learned that so far my only real value from the airbrush is to do base coats. I simply can't manage the level of detail needed for this scale of painting with an airbrush, so all of these (except the minis) were base coated with the airbrush and the drybrushing and detail work was done with brushes.
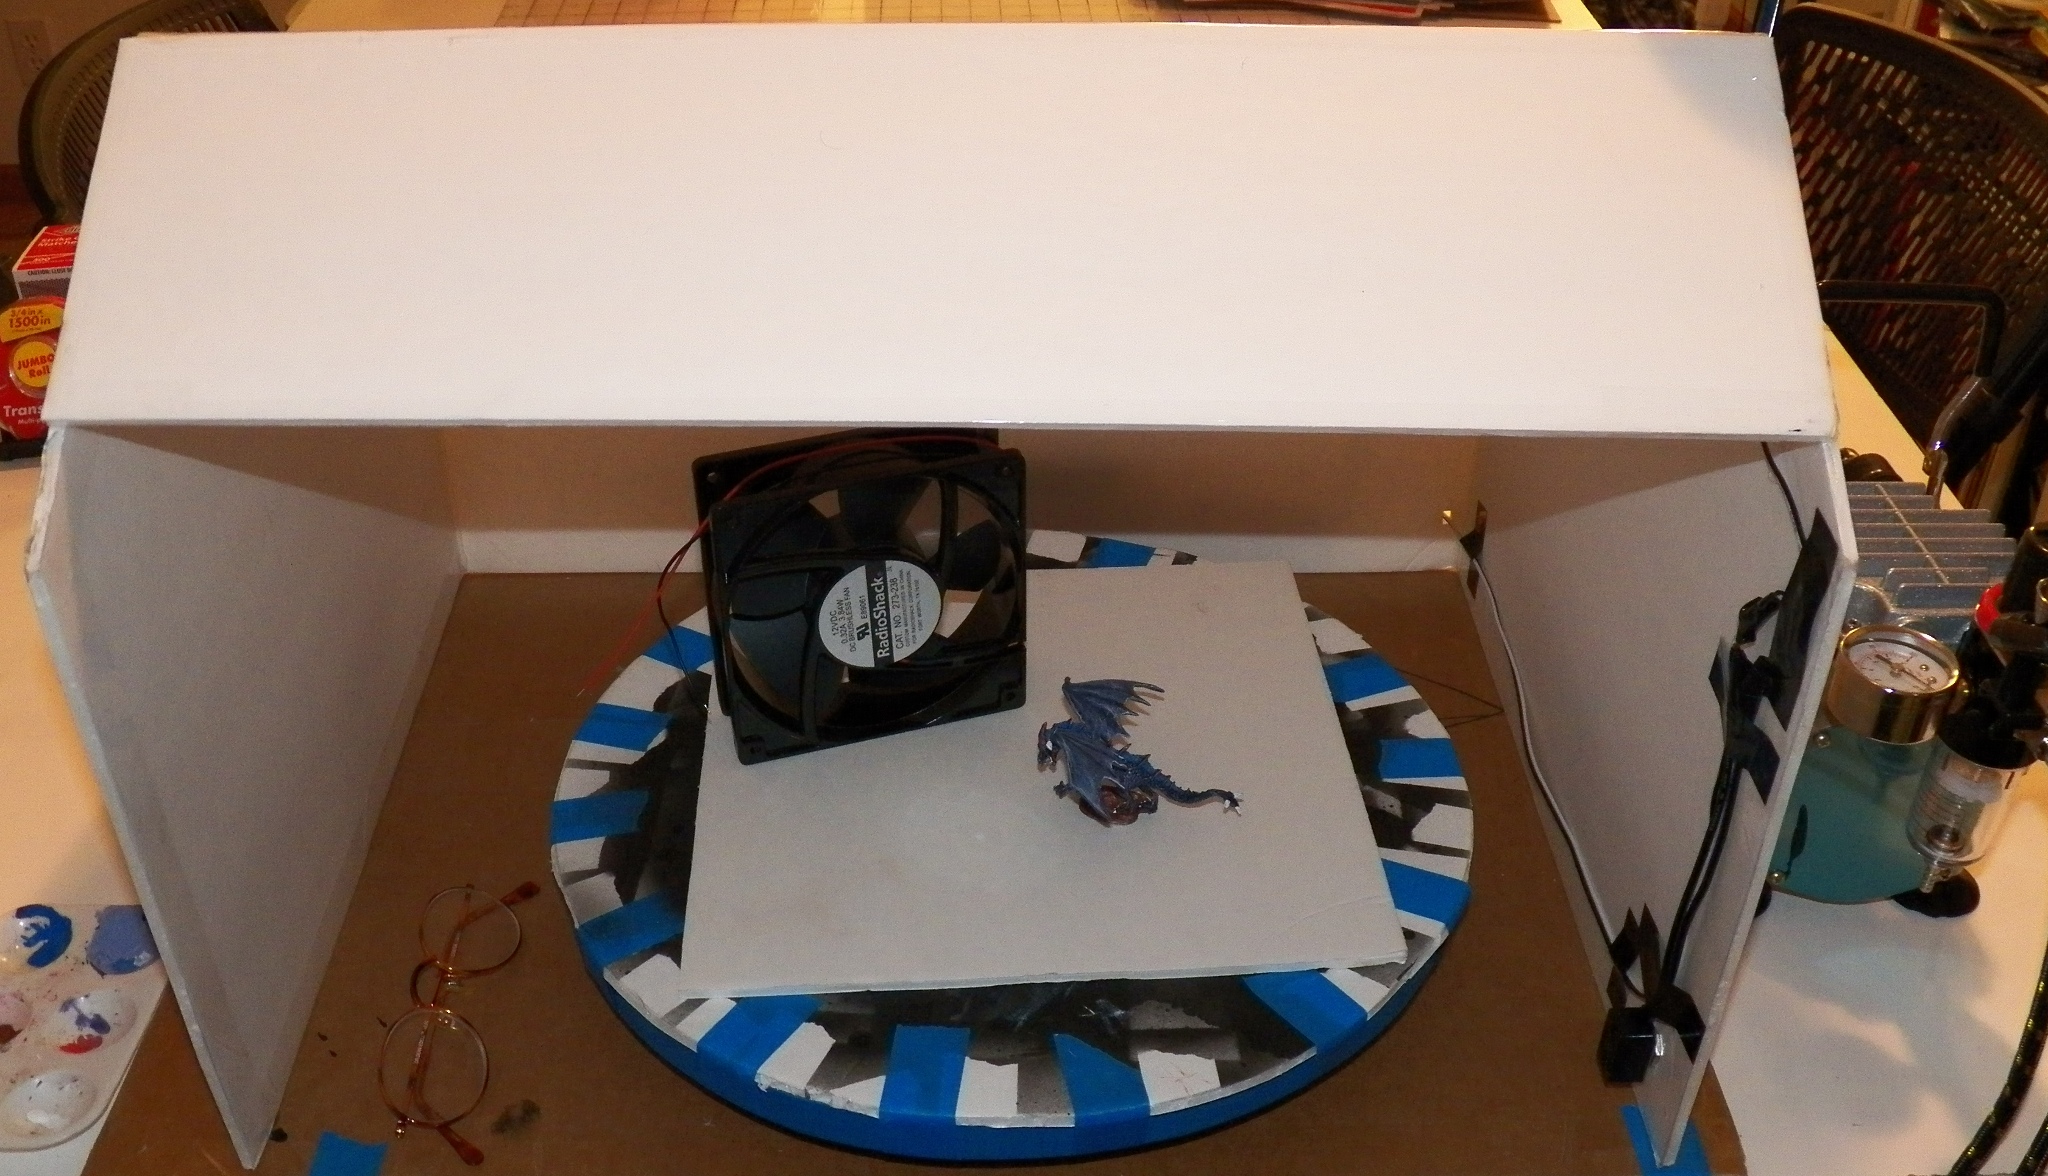
One of the things I did learn is that using an airbrush can be a mess. As is all too common with me, I didn't bother to learn that lesson early enough before making such a mess that I spent an hour or so cleaning it up, and now my craft room smells like paint cleaner. But last night I decided that I would not accept that sort of mess potential in the future, so I made this airbrush hood:
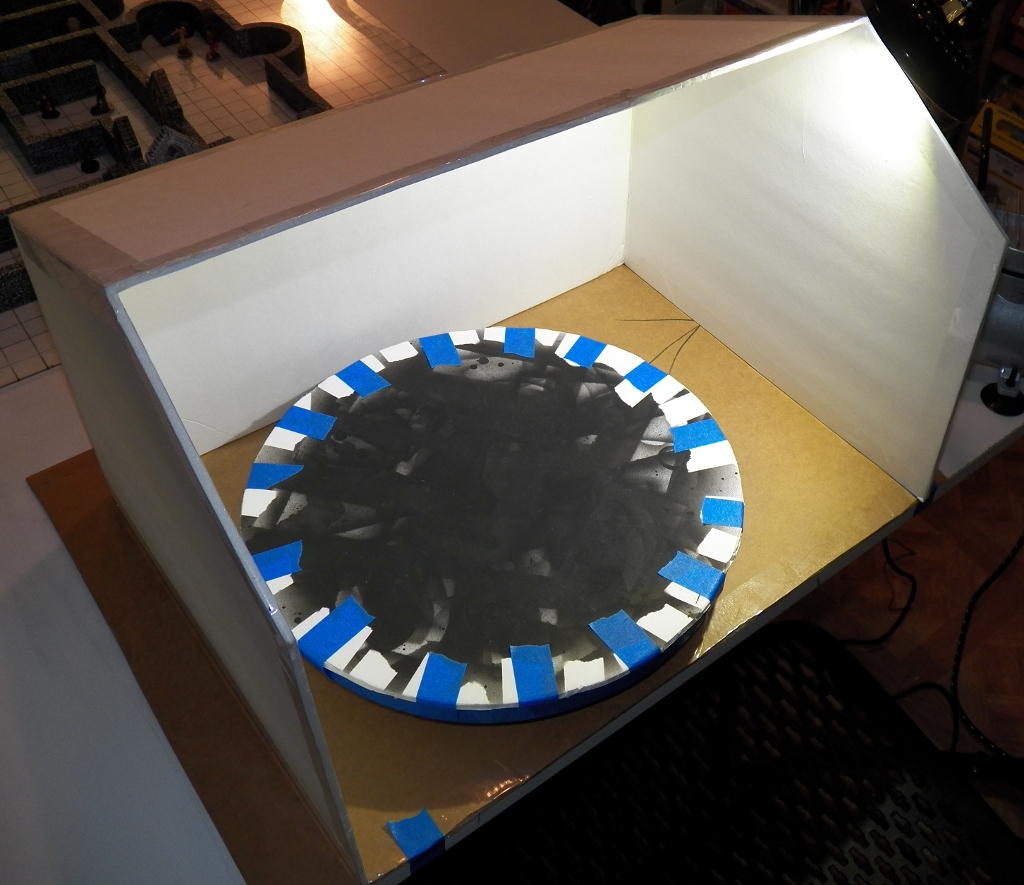
It's basically made out of cheap dollar store foam-core posterboard with the edges taped down with packing tape and sitting on a cardboard base. The round thing inside is a lazy susan I purchased at a thrift store for $3.99. I also sprayed the hood with outdoor sealant intended to make tents or shoes waterproof. It should last a while, I think.
Any other advice is appreciated. I feel like I am ready now for some real airbrush madness.
My wife purchased this airbrush setup for me for $99 from Amazon.com. It's a nice deal I think, three airbrushes and an auto-cutoff air compressor, along with hoses and a booklet on airbrushing.
I know that this is a 2.5D site and some people might object to the Hirst blocks I use, but here is the first project I completed with the new airbrush:
I learned a lot in doing this painting. First of all I learned that so far my only real value from the airbrush is to do base coats. I simply can't manage the level of detail needed for this scale of painting with an airbrush, so all of these (except the minis) were base coated with the airbrush and the drybrushing and detail work was done with brushes.
One of the things I did learn is that using an airbrush can be a mess. As is all too common with me, I didn't bother to learn that lesson early enough before making such a mess that I spent an hour or so cleaning it up, and now my craft room smells like paint cleaner. But last night I decided that I would not accept that sort of mess potential in the future, so I made this airbrush hood:
It's basically made out of cheap dollar store foam-core posterboard with the edges taped down with packing tape and sitting on a cardboard base. The round thing inside is a lazy susan I purchased at a thrift store for $3.99. I also sprayed the hood with outdoor sealant intended to make tents or shoes waterproof. It should last a while, I think.
Any other advice is appreciated. I feel like I am ready now for some real airbrush madness.


 Cheers!
 Cheers!