|
|
Post by Deleted on Dec 20, 2013 11:00:08 GMT
Witness the inspirational power of a fully armed and operational crafting network  pedrodevaca, outstanding work! The bit about taking all the paint chips from the store had me laughing; that is a pretty sneaky bit of resourcing! |
|
dmzook
Cardboard Collector

Posts: 45
|
Post by dmzook on Dec 20, 2013 17:37:35 GMT
Pedro, I have got to tell you how impressed I am with the Licktoad village. I have a brother who is an architect and I used to visit school and see his models. Your work immediately reminded me of walking into the architecture studios--your model is that cool. The raised walkways, the homes on stilts, the variety of the structures, the funky angles, the rope/thread wrapped fences... I'd been working on a Licktoad village for the We Be Goblins! module and I am glad I hadn't finished yet. Having now seen yours, I still have time to make improvements!  I'll be excited to see how the cave system turns out. And good on you for trying to follow the module's published cartography as a guide, but not being afraid to be flexible. On doors: those little boogers can be very tricky. They have to fit, y'know? While making mine I was all of the sudden very glad I was not a carpenter having to make full size ones. Thanks for sharing- Z |
|
Bael
Room Planner
  
Posts: 288
|
Post by Bael on Dec 20, 2013 17:55:10 GMT
BAAAAAM!! Really nice.
|
|
|
|
Post by thedmg on Dec 20, 2013 20:35:50 GMT
Need to kill Goblins rising!
|
|
|
|
Post by pedrodevaca on Dec 20, 2013 21:39:32 GMT
MoFoto! I wanted to put up photos of the entire model of Walthus' house, and I finally got my camera up and running and took the time to set up some shots. This is for bloodchoke or anyone else curious about the design of this model. A shot of all 4 pieces, separated and self-standing. 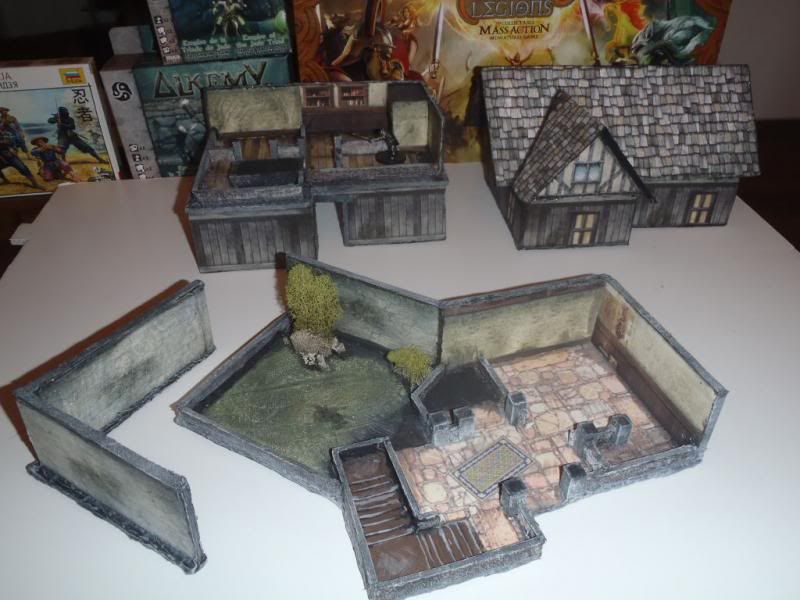 A shot of the assembled model./The front walls are attached to the structure above it and are meant to be removed as one piece. You can see some of the fitment issues I had trying to implement that idea. 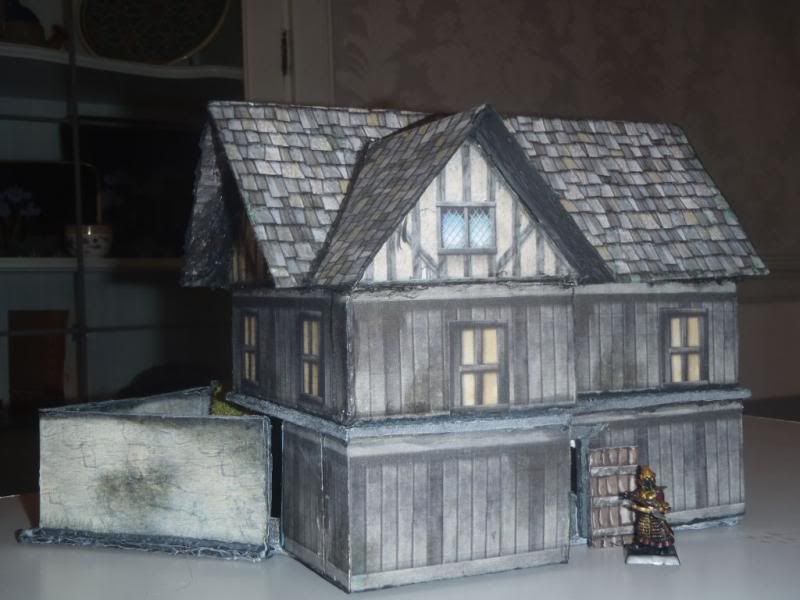 Shot of the ground level with all the little bits and cool-guy stuff in place. 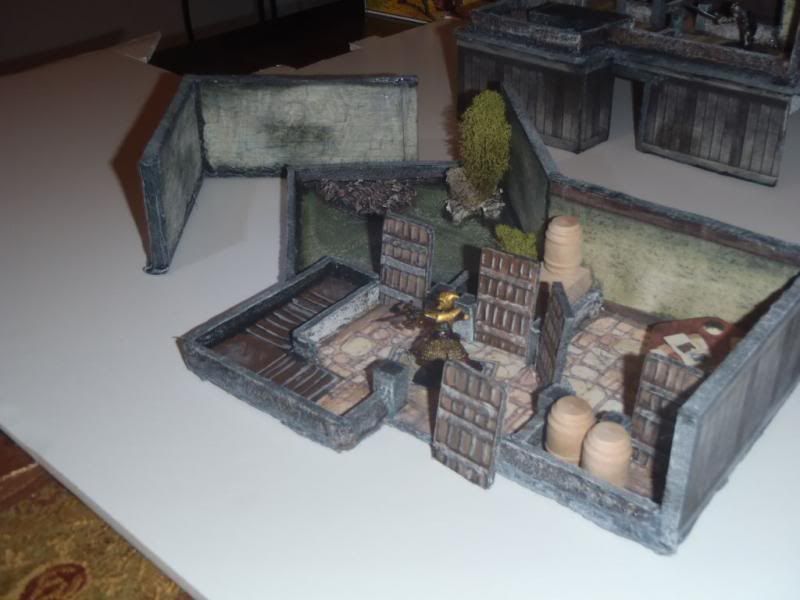 The top level with cool-guy bits and pieces added in. 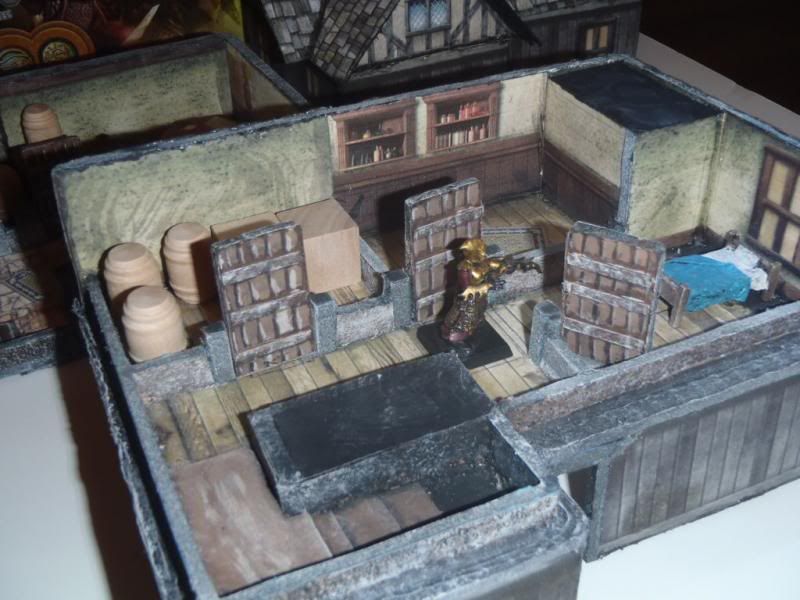 The secret room revealed (yes that is a stolen paint chip... shhhhh!) 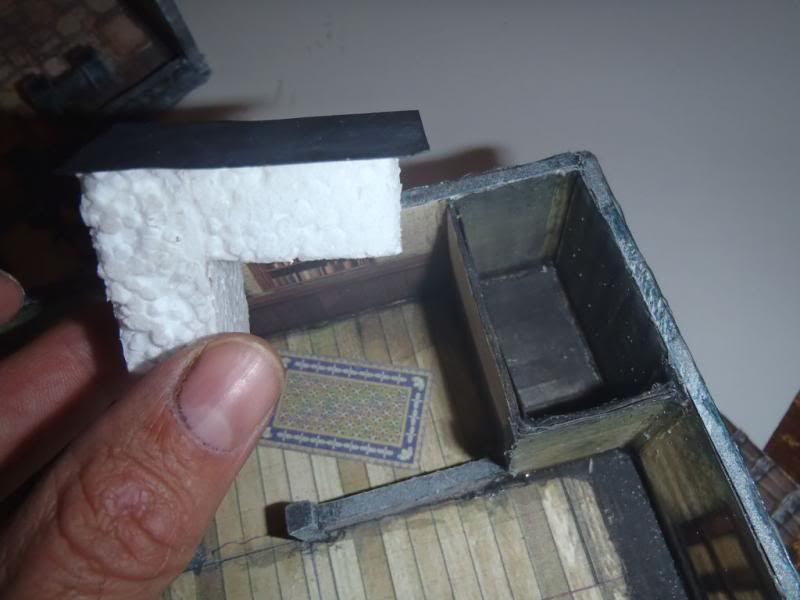 Finally some shots of the underside of the roof and upper level to reveal the bracing, guides and brackets I used to get the model to fit together and stay together. 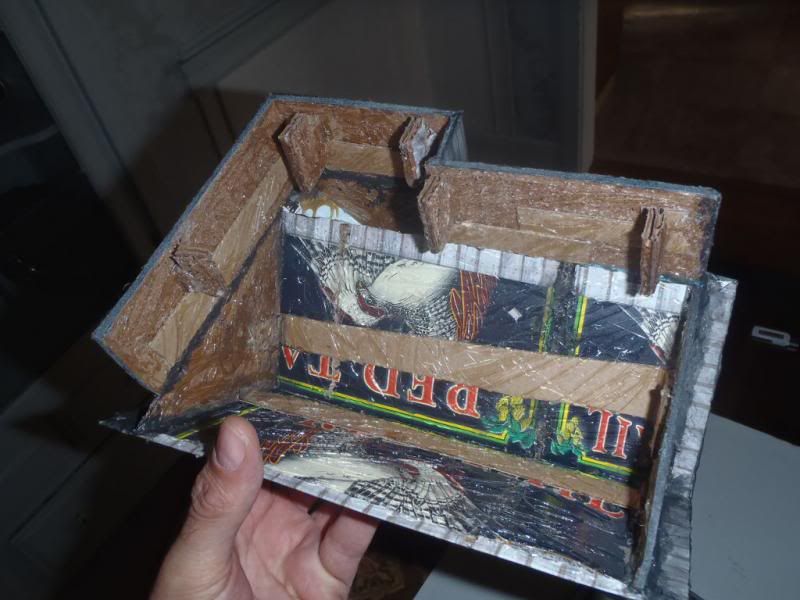 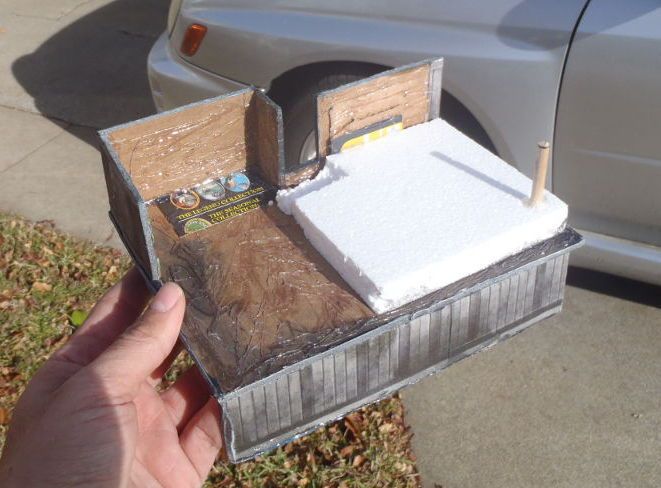 Cheers, Pedro |
|
|
|
Post by pedrodevaca on Dec 20, 2013 22:03:34 GMT
Brinestump Caverns Early WIP 2.5d layout cut and sanded out of 1/4" plywood 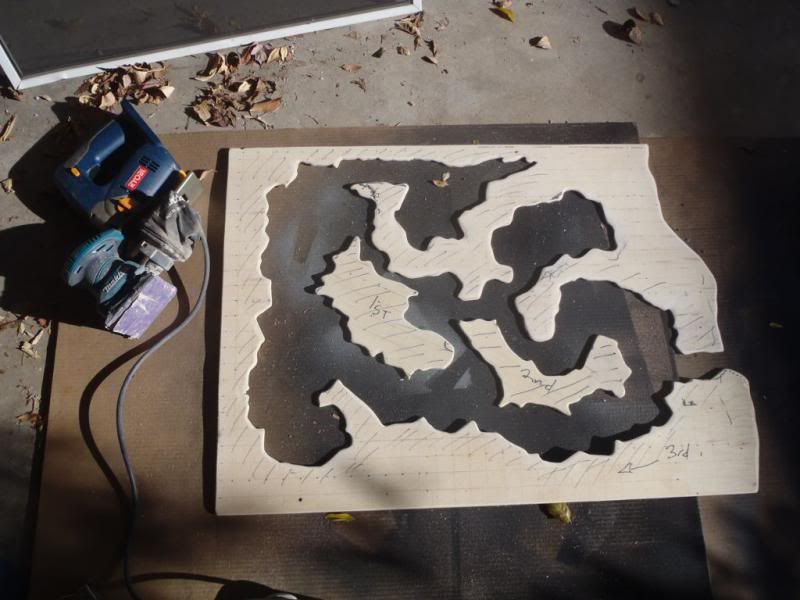 Glued and tacked in place to 1/4" plywood base.... 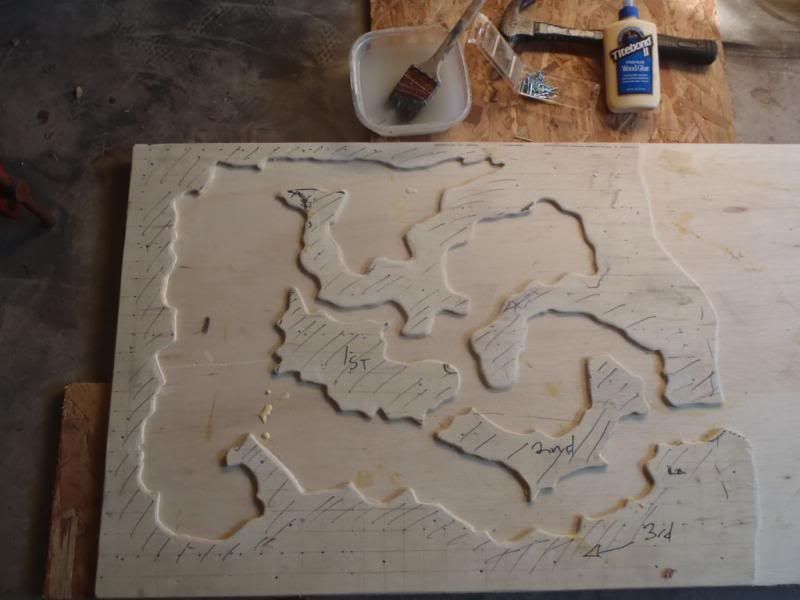 whoops plywood sure was a bad idea. I thought when the sheets were glued together the whole thing would stiffen up, but it isn't much stiffer than a single sheet. I didn't think to cross the grains which might have helped significantly. Well poop!. I should have used mdf from the get go... So here is the final base, the two plywood pieces glued to 1/4" mdf and trimmed up, ready for foam and plaster work. The whole thing is much thicker and much heavier and also cost $10 more than I intended. Lesson learned - use mdf from the get go. 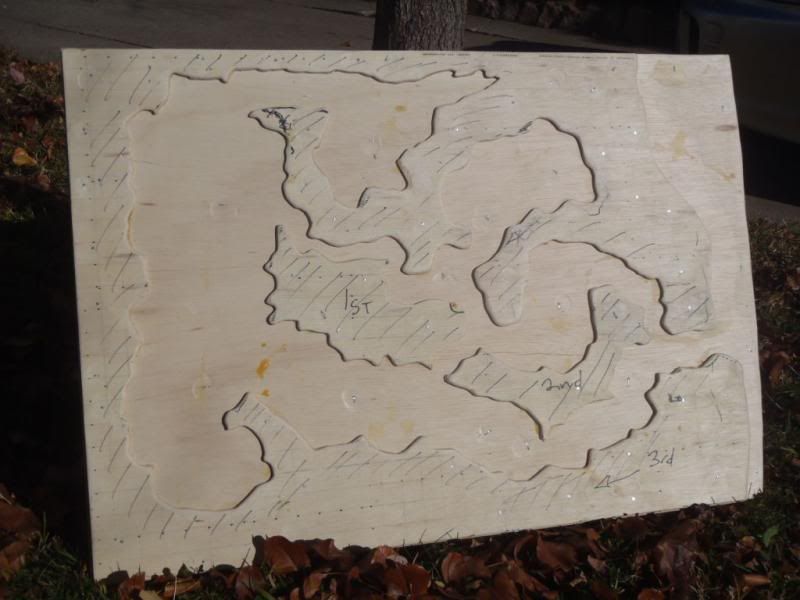 Finally, the results of some experimenting with Foamular. The photo flash really flattens out the piece and doesn't show as much texture and interest as there actually is, but I think you can get a sense of what it will look like. I got this eroded, badlands type effect using a steak knife and a hobby knife and a bunch of random tiny cuts. I then went back over using the flat of the hobby knife and 'pried' out chunks in patterns that seemed random but natural to me. I painted the whole thing in diluted PVA, let dry and then shot it with spray paint. I also did 1 side textured the same way but coated in ReadyPatch and then spray painted. The ReadyPatch fills in alot of the detail texture leaving a more solid rock like surface. I like both effects, but for the interior of the cavern I'll be using the PVA glue. 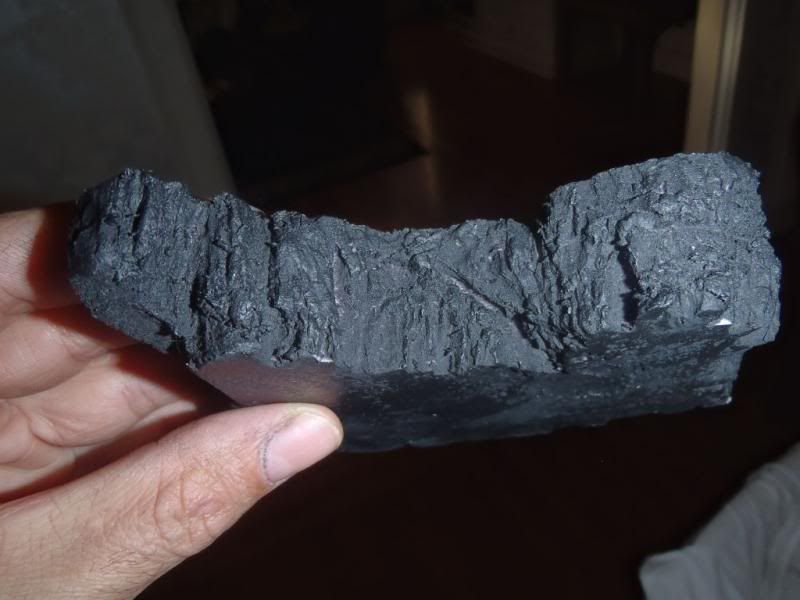 Thanks for looking! -Pedro |
|
|
|
Post by thedmg on Dec 20, 2013 23:49:27 GMT
That is really cool!
|
|
|
|
Post by pedrodevaca on Dec 21, 2013 16:49:42 GMT
Got started last night on the crystal island lure and the giant amoebas for the Brinestump Caverns. Crystals hijacked from some wedding decorations sold at Hobby Lobby. Took the crystals and embedded and glued them in to some broken styrene pieces. Let it dry then coated the styrene in very thin spackle, spraying water to allow the spackle to run into cracks. Let it setup a bit then added lightly diluted spackle with coffee grounds mixed in for texture around the base. The camera just throws its hands up in confusion when trying to focus on crystals. I'm not savvy enough with it to get it to do something it doesn't want to, but perhaps when its painted it will focus better. 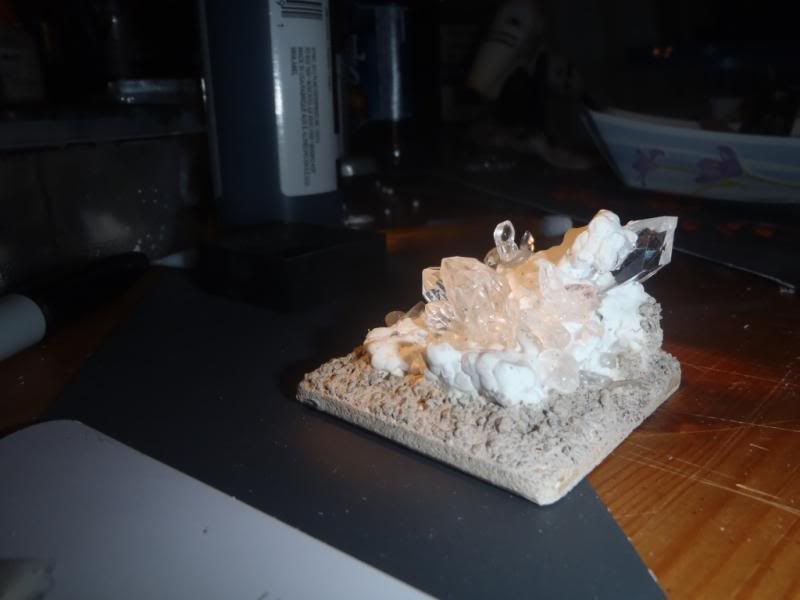 And the giant glue balls... errm I mean amoebas with tiny blue beads dropped in the hot glue pile to serve as a nuclei. I have some painted skeleton pieces drying that I am going to drop into the next amoeba. 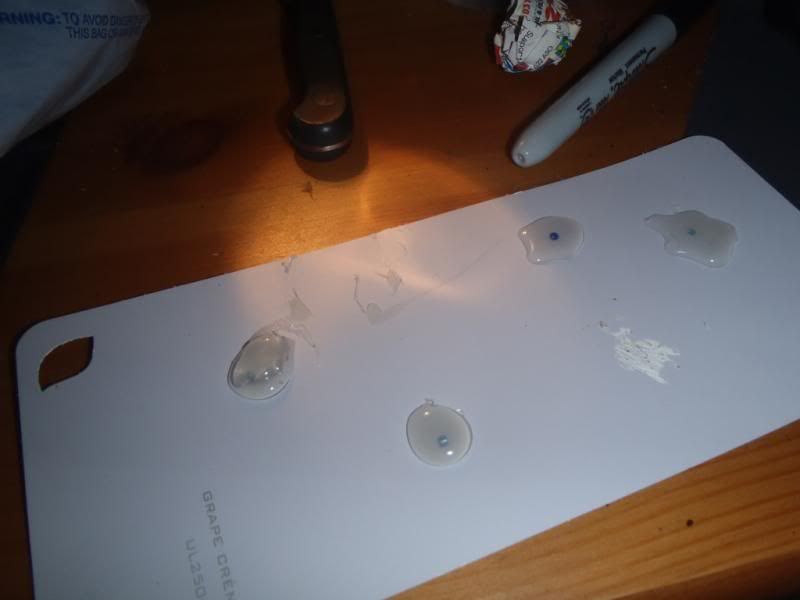 Lastly, just wanted to show off a cool find from the Hobby Lobby cake section - 3 inch Grecian cake pillars. A pack of 4 columns costs $3.50 at Hobby Lobby. They are cast in white plastic and only need a cap on top to cover a hole, and some paint. They sell them in a variety of heights (larger pillars are more expensive obviously) and two styles - Roman and Grecian. I'd bet something like this pops up at the Dollar Store occasionally as well. 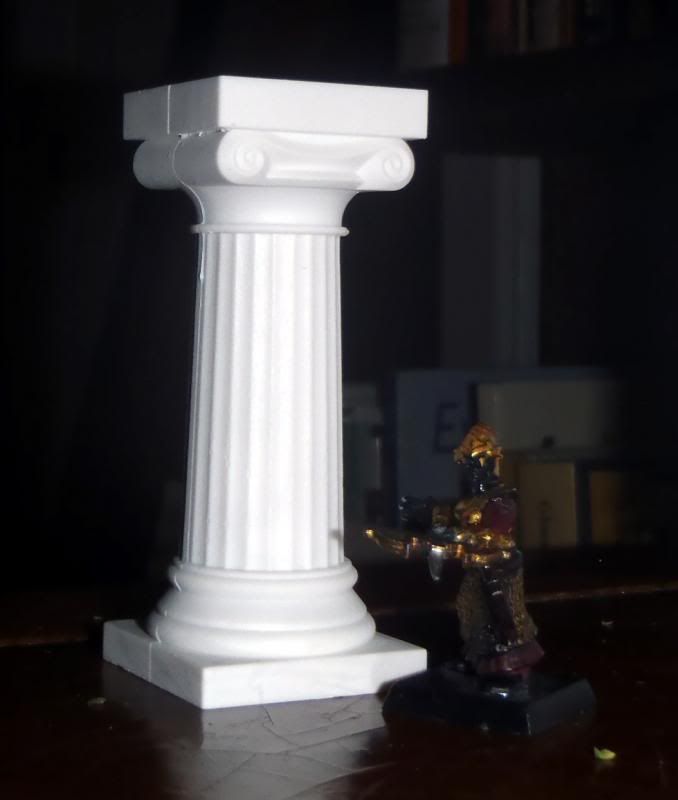 Merry Kwanza, Pedro |
|
neil
Paint Manipulator
 
Posts: 134
|
Post by neil on Dec 21, 2013 17:05:40 GMT
pedrodevaca - When is game night? I want to play RPG's on your creations! Seriously excellent work
|
|
|
|
Post by dmdubbledee on Dec 21, 2013 18:17:39 GMT
amazing stuff--I use the 5" pillars. I think 4 cost me 6.99, which is a little steep but I'll be able to reuse them forever.
|
|
|
|
Post by skunkape on Dec 22, 2013 3:02:47 GMT
Those are some great looking pieces there! Love the complexity of the buildings!
|
|
|
|
Post by pedrodevaca on Dec 22, 2013 3:09:36 GMT
Pedro, I have got to tell you how impressed I am with the Licktoad village. I have a brother who is an architect and I used to visit school and see his models. Your work immediately reminded me of walking into the architecture studios--your model is that cool. The raised walkways, the homes on stilts, the variety of the structures, the funky angles, the rope/thread wrapped fences... I'd been working on a Licktoad village for the We Be Goblins! module and I am glad I hadn't finished yet. Having now seen yours, I still have time to make improvements!  I'll be excited to see how the cave system turns out. And good on you for trying to follow the module's published cartography as a guide, but not being afraid to be flexible. On doors: those little boogers can be very tricky. They have to fit, y'know? While making mine I was all of the sudden very glad I was not a carpenter having to make full size ones. Thanks for sharing- Z That's super cool. I'd love to see how your Licktoad Village turns out. I'll be running We Be Goblins! very soon as well. I'm fitting it in as a one off scenario into my Jade Regent campagin. After the my players sack the Licktoad Village, I'm certain they will interrogate any survivors (they like doing that). The story told them by their goblin captive will be the We Be Goblins! module and the players get to pick goblins and play out the flashback scene rather than listen to me recount the story. |
|
dmjonny
Paint Manipulator
 
Posts: 133 
|
Post by dmjonny on Dec 22, 2013 12:51:31 GMT
Amazing stuff dude :-) really like WOW!!!
|
|
|
|
Post by drathirbarrastudios on Dec 22, 2013 14:03:53 GMT
Wow! Fantastic builds cant wait to see more of them!
|
|
|
|
Post by bloodchoke on Dec 23, 2013 0:07:27 GMT
Wow, Walthus' house is incredible! Thank you for taking the time to put those pictures up. I have made a papercraft building playable like this also, but NOT NEARLY as masterfully as you have. Really awesome work man. Excited to watch the caverns progress.
|
|
|
|
Post by pedrodevaca on Dec 27, 2013 20:19:52 GMT
Quick update on what I have been working on over holiday vacation. And a paint related query to Ye merry crafters. Here's an overview. Based 2.5D ship tile for Paizo's free We Be Goblins! scenario. Base painted mushroom set pieces. Base painted giant amoeba hot glue balls. Nearly complete limestone stalagmites. Nearly completed limestone cave wall. Fully painted crystal island that looks more like a christmas tree than anything else... 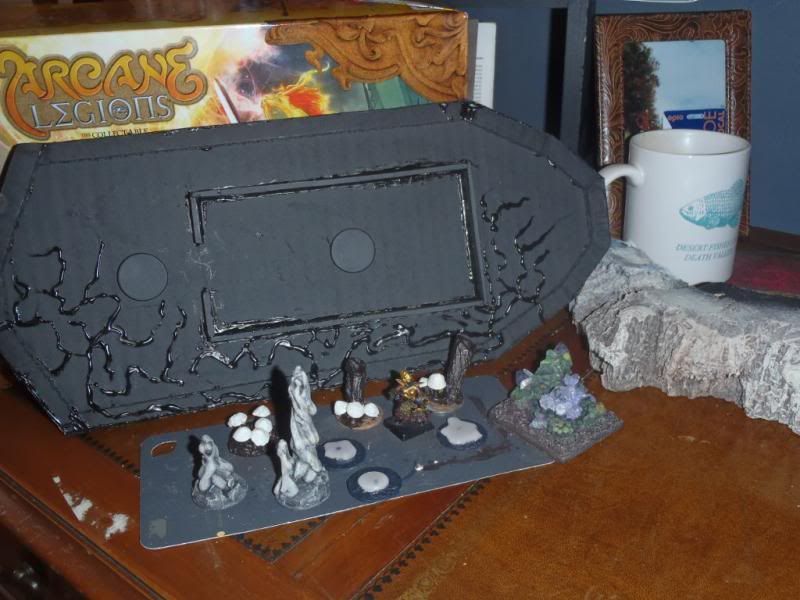 Closeup of the set pieces. Stalagmites are chopsticks shoved in foam, glued to a washer, spackle over the foam, hot glue dripped down the chopstick. Mushrooms are brass tacks with molded hot glue blobs on the top. Thin drips of glue down the business end of the tack. Snipped to varying heights, painted and glued to the base. Giant turd looking fungus are cardboard cones textured with glue and painted. Amoebas are hot glue blobs with a blue bead dropped in the blob. Glued to a washer with flexible modeling paste shoved around into a water-ish looking effect. Everything was based with wood glue tinted with paint to make a thick skin and hold everything together. 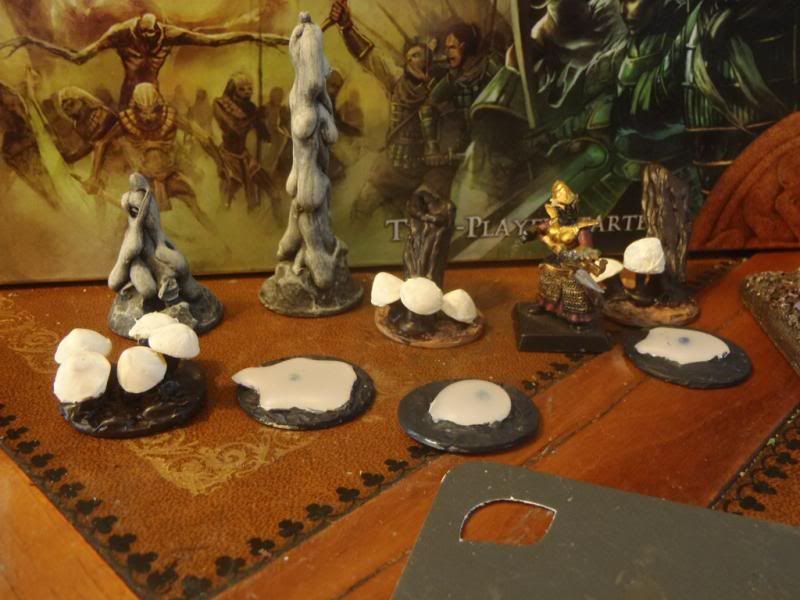 Closeup of the Crystal Island Lure and a limestone cavern wall. The island is placed in a water room and is a lure of modest value to draw the PCs into the water where they are vulnerable to attack from the giant amoebas. I want to repaint it because it looks like a Christmas tree, not at all like a moss and mushroom covered island with crystals growing out of it =/ It will take a long time to paint around all the crystals though, so I don't want to do it unless I have a paint scheme that is obviously going to be superior. Anyone have any ideas to get rid of the Christmas tree look with the minimal amount of effort? The limestone cavern wall is really hard to photograph, but I think you can see the paint scheme I am moving forward with unless someone has a better idea. Its based in brownish gray, dry-bushed in light yellow-ish and green-ish grays and then washed in black. The final step will be to add an orange-ish wash in a few places to give that limestone oxidizing look. I don't think it looks terrible but if anything it looks more like old, weathered limestone rather than actively depositing limestone in a wet cavern. The picture I was using for inspiration for carving and coloring is here. I'm relatively happy with the carving as I have lots of drippy bits and tiny stalactites which don't show up in my point and shoot photos. But for the colors, I have painted this piece 5 times now and you can see I still haven't gotten anywhere near those colors from the natural cave. Any suggestions would be welcome.... 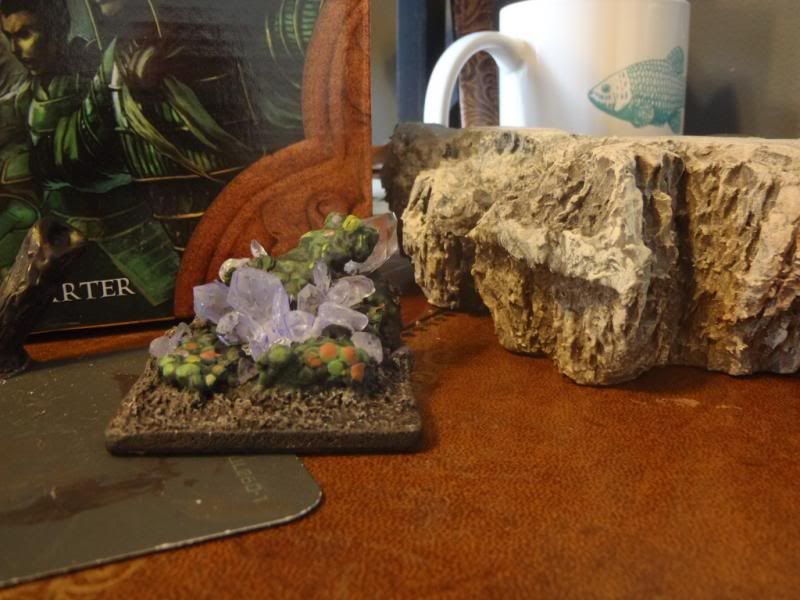 Thanks for looking! -Pedro |
|
javenspell
Paint Manipulator
  Is this your Character sheet Larry?
Posts: 166 
|
Post by javenspell on Dec 27, 2013 23:25:03 GMT
Awesome Crafting Bro....your a definite pro!
|
|
|
|
Post by grym247 on Dec 28, 2013 1:59:00 GMT
Oozing awesomeness dude.....all of it is great work
|
|
|
|
Post by monkeywithtacos on Feb 11, 2015 23:45:22 GMT
Pedro, I had completely forgotten you had done this. I am planning out ideas based loosely around some pf the stuff in the Jade Regent adventure path. How far did you end up getting with it with your group and did you do much more crafting with it? I'd love to see what you have done...
~MwT
|
|
|
|
Post by SpielMeisterKev! on Feb 12, 2015 2:48:11 GMT
Howdy,
Somehow I missed this?
EXALT BUTTON!!!
Kev!
|
|