|
|
Help!
May 8, 2018 0:50:04 GMT
via mobile
Post by angie1985 on May 8, 2018 0:50:04 GMT
|
|
|
|
Help!
May 8, 2018 7:28:49 GMT
Post by margaret on May 8, 2018 7:28:49 GMT
What were you using? Was it too thick?
|
|
guppy
Paint Manipulator

Posts: 202 
|
Post by guppy on May 8, 2018 8:33:37 GMT
If you made the wash your self remember; A wash need to be really, really thin and have something to help break surface tension to let it creep into all little cracks and crevices ( a drop of diswash will do the trick ) otherwise it will only stain the entry of the crevice and dry there never reaching the bottom.
If your using a store bought product they you will need to tell us what you did when applying it.
|
|
|
|
Help!
May 8, 2018 12:09:21 GMT
via mobile
Post by angie1985 on May 8, 2018 12:09:21 GMT
I did not know about having to have something to break surface tension. That explains it. Was just thinned down black. Kept thinning it more when it didn't work. Thank you !!!
|
|
|
|
Help!
May 8, 2018 12:14:16 GMT
Sam likes this
Post by sgtslag on May 8, 2018 12:14:16 GMT
At arm's length, I bet it looks just fine... I am an army painter (painting multiples of each figure casting/pose; painting dozens of units, of 50+ figures each), so my standards are not up to painting contest levels. All I care about, is how my mini's look at arm's length. Sorry if that does not help.
To me, it looks fine. It definitely looks like a paint wash. I am a dyed-in-the-wool, fan of The Dip, so take my comments in their proper context. By the way, I started with black paint washes, before I learned of The Dip; since I learned of it, it is pretty much all I use -- that, and Magic Wash. I walked away from paint washes because I feel that Magic Wash and The Dip, are superior -- for my needs, as an army painter. Again, I think it looks just fine, regardless of technique used. Cheers!
PS:
Try using an acrylic extender, rather than water. The pigment tends to clump when too much water is added to it.
|
|
|
|
Help!
May 8, 2018 14:14:18 GMT
Post by erho on May 8, 2018 14:14:18 GMT
Great suggestions so far!
Add some liquid dish soap and water and youre good.
If you want it to stay extra clean on the high points, hit it wiht a gloss coat first, then do the wash. It will only end up in the low spots.
|
|
|
|
Help!
May 8, 2018 17:32:39 GMT
Post by sgtslag on May 8, 2018 17:32:39 GMT
Excellent point, erho ! Craft paints, in particular, are very granular, with their pigment. When I apply The Dip, it gets adhered, microscopically, to the entire surface of my figures (I use craft paint, almost exclusively), darkening the whole, but particularly the recesses, where it really accumulates. If I would bother to paint them with Pledge Floor Gloss (add acrylic paint to it, and you have Magic Wash, for custom shading/tinting/washing), first, the surface would be microscopically smoother, and the overall darkening effect would diminish, drastically. Instead, I paint them two shades lighter than what I want, knowing that The Dip will darken them two shades... I paint to the GEtGW standard ( Good Enough to Game With). YMMV. Cheers!    |
|
|
|
Post by erho on May 8, 2018 19:58:23 GMT
Saved my butt while painting Storm Troopers, it worked well with minimal clean up with white. 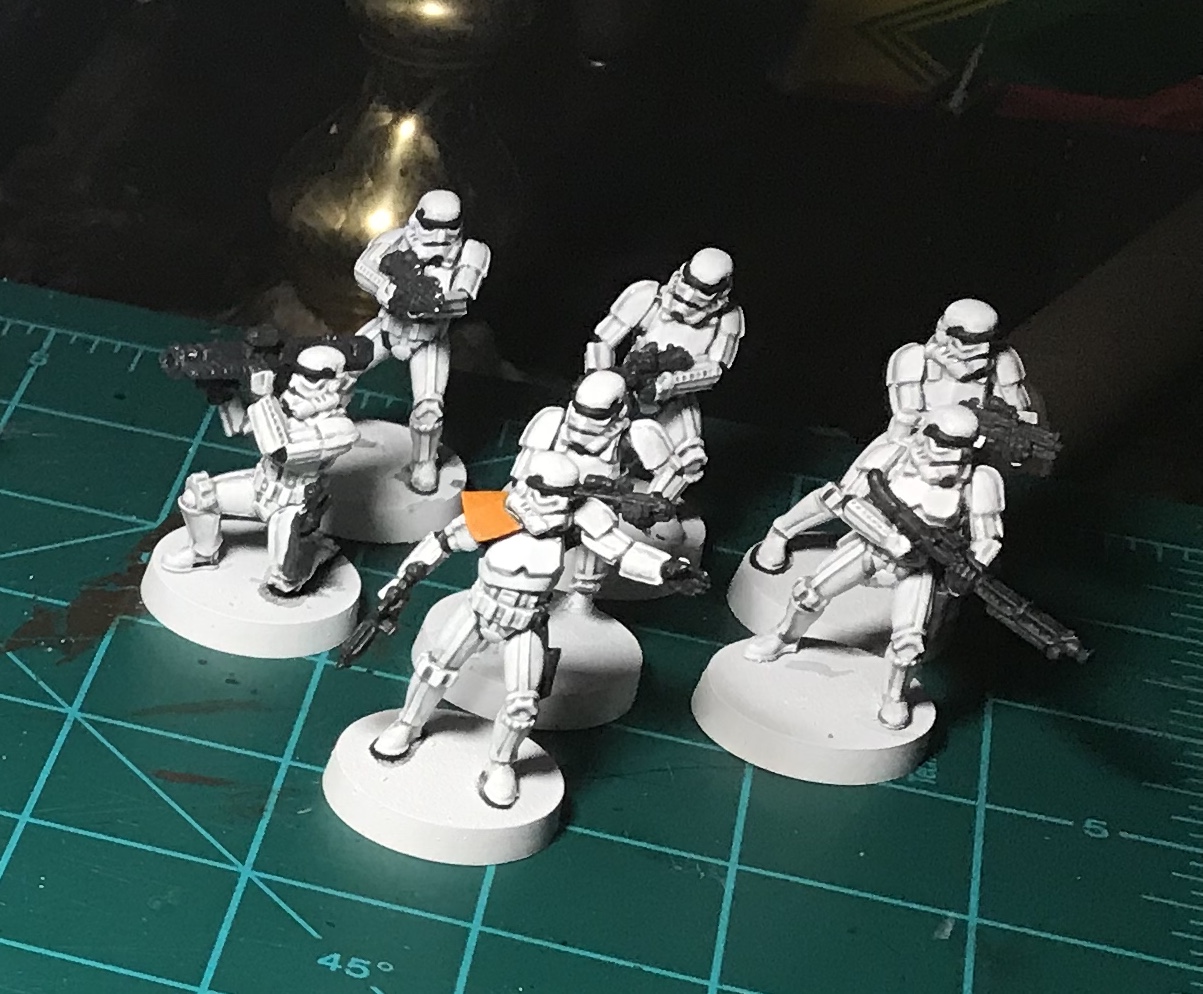 |
|
|
|
Help!
May 9, 2018 1:43:03 GMT
via mobile
Post by angie1985 on May 9, 2018 1:43:03 GMT
Ok, the dip? That would be...  I'll def be trying a drop of dish soap. I was so disappointed he looked just dirty instead of what I was visualizing!! The only thing I have tried to wash before was skeletons, and I wanted them to look old and dirty... Thanks all for the help and suggestions. As for the acrylic extender...looked on Amazon and a ton of products came up. What exactly am I looking for? Thanks again !! |
|
|
|
Help!
May 9, 2018 1:44:23 GMT
via mobile
Post by angie1985 on May 9, 2018 1:44:23 GMT
Sorry about the emoji...that was a question mark when I typed it. Don't know where that came from.
|
|
|
|
Help!
May 9, 2018 1:45:29 GMT
via mobile
erho likes this
Post by angie1985 on May 9, 2018 1:45:29 GMT
Your storm troopers look so real life...awesome job  |
|
|
|
Post by sgtslag on May 9, 2018 13:34:29 GMT
So the extender I am thinking of/suggesting, is something like this, from Michael's. The Dip, is Minwax Polyshades Urethane Stain -- Tudor (black) or Royal Walnut (dark, dirty, just dug up from the grave, brown). Get the Pint can, not the Quart... The Dip is simple to use, but, just like the Magic Wash, it will stick in the microscopic cavities of the rough surface of craft paints, darkening the whole model. To minimize this effect, first paint the mini with pure Pledge Floor Gloss, to smooth the surface, microscopically, which will prevent so much general darkening of the figure. Experimentation is King, Baby! Get yourself some of these products, and practice with them. If you do not have any minis you wish to practice on, buy a bag of plastic Army Men figures, whatever genre you prefer, and practice the shading techniques on them. I suggest using some medieval knight figures -- you may be able to use them as statues/golems in your fantasy games later... Buy a set of 30 school paint brushes, for a dollar, at Wal-Mart. Thoroughly mix up the can of Minwax before opening... The pigment settles to the bottom, and that becomes a problem very quickly. Brush on The Dip (avoid actually dipping the figures into it -- too heavy a coating, too much work to remove the excess), full strength, to just the bare plastic figure. Use the edge of a paper towel to soak up the puddles on the base, and other spots, as needed -- check the figure about 10 minutes after brushing on the Minwax. Gravity will pull it down; surface tension will help it accumulate in the folds, and recesses, of the figure, creating shading -- it is amazing to see before/after figures... It is quite easy after that: just wait for it to dry. I used to recommend baking Dip'ed figures in an oven, at 170 F, for 30 minutes... However, after consulting the MSDS (Materials Safety Data Sheet), I learned that Minwax Polyshades Urethane Stain has a flashpoint of 117 F! I have been incredibly fortunate in never having had it catch fire! Instead, just wait 2-3 days for it to fully cure -- it is oil-/solvent-based. Let me know if you have any other questions. Cheers! |
|
|
|
Post by erho on May 9, 2018 16:05:04 GMT
|
|
|
|
Help!
May 9, 2018 19:53:48 GMT
via mobile
erho likes this
Post by angie1985 on May 9, 2018 19:53:48 GMT
Thank you so much! That is exactly what I needed...step by step explaination with links...Amazon delivery will be here in 2 days I have about a bazillion skeletons laying around as well as a huge lot of a 54mm knights I picked up at the thrift store not long ago...think will use those for practicing Also have picked up prob better than 1500 LOTR Risk figures, want to try mass scale army painting techniques on them. In the future lol...not like I don't have a million projects on the fire right now At least they are very small and store easily...found a couple deals on them I just couldn't pass up! |
|


 I'll def be trying a drop of dish soap. I was so disappointed he looked just dirty instead of what I was visualizing!! The only thing I have tried to wash before was skeletons, and I wanted them to look old and dirty...


