|
|
Post by jennifer on Mar 18, 2016 11:02:35 GMT
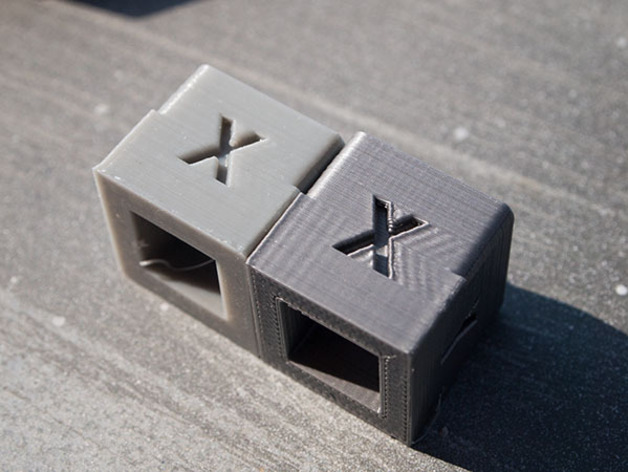
Printed out x axis belt strap and belt spacer (holds the two screws in place in front and behind the belt eyelets). This has helped quite a bit with the edges of the printed object on the x axis; prints were a bit sloppy on the x axis sides before--now they are just about perfectly smooth. Link to the parts: www.thingiverse.com/thing:1261720 . The two parts are among many parts in the set provided at the mentioned link. Here is a youtube video discussing these printable parts. He starts talking about these two x axis belt parts at 4:31 minutes into the video. Also included in the set--that I intend to print and install--is a belt spacer/strap pair for the Y axis belt. [He also has some brackets, Y idler brace and soem cable managment printables -- which I probably don't plan on printing because they probably won't integrate with the Z axis mod set I am printing out now.]  |
|
|
|
Post by jennifer on Mar 19, 2016 22:16:40 GMT
Performed the Azza Z-Brace mod for this printer. The Z tower was really wobbly before these reinforcement rods. It's ROCK SOLID now and the Z tower is perfectly square. Read more details about my make here: www.thingiverse.com/make:205384  |
|
|
|
Post by adamsouza on Mar 20, 2016 16:44:14 GMT
Jenn, I can't tell you how fortunate I feel that you've taken such an interest in this printer and sharing your progress.
This thread is becoming an invaluable resourse for Monoprice Maker Select 3D / Wanhao Duplicator I3 owners.
Please keep up the great work !
|
|
|
|
Post by jennifer on Mar 20, 2016 17:17:41 GMT
|
|
|
|
Post by jennifer on Mar 20, 2016 22:57:39 GMT
Did the popular extruder gear replacement mod on this printer. The original extruder gear has dull brass teeth -- and few. The replacement has more than two times the teeth and are sharper grabbing onto the filament better. The difference between the two is pretty impressive according to JetGuy. Here are some photos of mine as I did the mod:    Did the estep test as instructed, and it was perfect -- no calibration needed. |
|
|
|
Post by jennifer on Mar 20, 2016 23:03:06 GMT
Did the quick and easy angled fan mod that directs the air correctly to the nozzle: (Simply loosen the right screw, remove the left screw, rotate fan, place left screw back in, rotate fan back, tighten both screws down; the left screw securely grabs onto the edge of the plate above it when tightened.)  |
|
|
|
Post by jennifer on Mar 20, 2016 23:07:27 GMT
Tidied up both of the fans' wiring -- was all over the place -- with two black cable ties.  BEFORE: |
|
|
|
Post by jennifer on Mar 20, 2016 23:59:02 GMT
|
|
|
|
Post by jennifer on Mar 21, 2016 0:10:09 GMT
Ordered Raspberry Pi 2 Model B --$36 on ebay including heatskinks-- for Octoprint, printer power relay, smoke detector & camera. My printer doesn't have an auto off feature, so I can turn it off with Octoprint triggering a script on the Pi that deactivates the relay the Wanhao is plugged into. I am going to design & print a custom enclosure for the pi, which also houses the power connectors, pi power supply, relay(s), sensor(s) and the camera. It will be mounted on the left front side of the Z tower -- using existing screw holes only --with the integrated camera angled (on a swivel) towards the bed. |
|
|
|
Post by jennifer on Mar 21, 2016 9:38:55 GMT
Okay, did my first print in white and of a mini. Printed at .1 layer height. I am really happy with the result. (ignore the 2 blackish grey dots on the right side of the base.. it was from the black filament I had in the unit prior to this print)  The bottom of the back legs don't have any sagging like I was getting with the Monoprice Maker Architect 3D printer. And I already know why I was getting sagging on that printer: inadequate cooling possibly along with the higher extruder temp. I was printing at 220C on the Architect 3D if I recall; I printed this one at 210C; but I really do think it was the cooling fan more than anything, or perhaps settings in the slicer I used for the Architect 3D: there needs to be sufficient time between layers for cooling (especially without adequate cooling fan) and this is adjustable.. I never paid attention to this before. I think the Architect 3D heater fan could benefit from a mod perhaps -- but curufin, wilem and meph haven't really been complaining about the sagging like I was with that printer -- maybe it was just mine. |
|
|
|
Post by jennifer on Mar 21, 2016 13:07:06 GMT
Glass & Hair Spray Build Plate I have glass sitting on my original build plate (with z endstop switch moved up). It's coated with two thick coats of Aqua Net Unscented hair spray. Under the glass between the aluminum build plate (covered with buildtak) are 4 thermal pads cut to about 1.5" square (large sheet for a couple dozen squares was about $10 -- $14 for the borosilicate glass). www.amazon.com/gp/product/B007PPEW52www.amazon.com/gp/product/B00QQ5Q3BISeems to be working fine. Printing at 210C with 60C heated bed.  |
|
|
|
Post by jennifer on Mar 21, 2016 14:23:15 GMT
It finished and adhered perfectly. Print turned out gorgeous as well.. Scaled down from 40mm to 35mm even. Ignore the print line near the bottom 20% or so.. I was playing around with the glass plate and lifting the printer then .. to put foam feet under it.  I had some vibrations and thought it was the glass.. so I was pressing down on the glass.. that's why there was a gap.. turned out to be the printer was in need of some feet Fixed problem!  |
|
|
|
Post by jennifer on Mar 22, 2016 19:00:56 GMT
Adjustable Z Endstop Switch Mod
Now I can print with any plate, or stacking of plates, and simply adjust screw to accommodate -- bed springs are at a nice comfy tension now as well. I will reprint in black once I get the right length grub screws -- and protective black tape will be concealed. Details here: www.thingiverse.com/make:206267
|
|
|
|
Post by jennifer on Mar 23, 2016 9:10:23 GMT
Printed out a Quadcopter frame on my Wanhao and painted it with a post-apocalyptic rusted metal theme. Was really easy and I couldn't of done this just 3 months ago -- thanks to all the crafting advice I've gotten here in the past months. Details: www.thingiverse.com/make:206438 |
|
|
|
Post by SpielMeisterKev! on Mar 23, 2016 15:10:56 GMT
Howdy,
There was a time when you would have been burned as a witch!
I mean that ONLY in the MOST complimentary interpretation.
Keep amazing us with your powers,
Kev!
|
|
|
|
Post by jennifer on Apr 1, 2016 21:05:45 GMT
Printed out Pi case and installed my Pi 2 Model B as octopi server. Using a $4.50 (free shipping) PS3 eye cam (in new condition) -- I like it better than the official raspberry pi cam: 1/4 the cost, sharper, wider angle and much much better brightness; I also like it has a strong shielded usb cable instead of short thin ribbon cable. Using short 1 foot long mini usb cable from pi to the front right side of the controller unit -- so the cable doesn't hang down at all. The pi case is secured to the control unit using existing hole on case corner (made for mounting) and existing bolt hole on the top of the controller. Then I secured everything else to the pi with zip ties. So it acts as one unit when I move it around, which is nice. 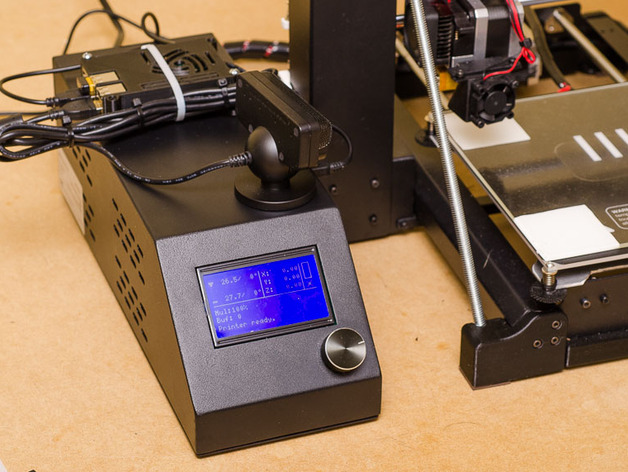 www.thingiverse.com/make:209091 www.thingiverse.com/make:209091 |
|
|
|
Post by margaret on Apr 2, 2016 5:34:42 GMT
That's really cool!. Sigh... I used to know quite a bit about computer components, but all this new micro-mini stuff has left me behind.
|
|
milojaggerson
Paint Manipulator
 Laying tile on the floors...
Posts: 161 
|
Post by milojaggerson on Jul 19, 2016 19:04:18 GMT
I've had the Monoprice version of the i3 for a few weeks now, and I am loving it! Put an all metal hot end on it right out of the box, did the Z-brace and thumb screw mods, and am waiting for the black surface tape placed on the heated build plate at the factory to wear out before I put down some silicon pads and glass plate down on the surface. I'll be adding a Raspberry Pi and Octoprint to it soon. I really like the idea Jennifer had in using a PS3 camera. I'll have to go pick one up at GameStop for less dollars than the cost of the Pi's camera. Excellent job!
|
|
|
|
Post by jennifer on Feb 27, 2017 21:46:57 GMT
I don't think I mentioned it in this thread. But I found the best way to make things adhere to the glass. $1 can of Aquanet Unscented Hair Spray which you can get at Walmart for example. Just remove the glass from the printer and move it away from the printer, over the floor or sink or whatever. Couple coats of spray then place back on 55C bed and let dry 5-10 minutes on it. After you do a print job, you only need to remove the glass from the printer, and spray the small area it just printed to with 1 little coat. Then place back on the printer for 5-10 mins to dry.  |
|
|
|
Post by Deleted on Feb 28, 2017 22:17:59 GMT
I found a gap in the knowledge base when I first got my printer, just a general description video of what the parts of the printer are called (like "This is the X axis, it makes this bit go in this direction or that direction"), and simple information on how to level your printer bed, move the bits around using the control software, etc.
Once past that simple set up stage, there is a wealth of information (almost too much), so I think there needs to be more "3D printers for Dummies" videos out there.
|
|


 I had some vibrations and thought it was the glass.. so I was pressing down on the glass.. that's why there was a gap.. turned out to be the printer was in need of some feet


 Cheers!
 Cheers!