Post by skunkape on Apr 15, 2017 3:17:03 GMT
I'm not quite that good a painter to do the shaft!
As far as the rails, I tried a bunch of different things for scratch building rails and ties, but could never get a look that I liked. So I finally broke down and bought 3 pieces of HO flex track at my neighborhood model train store. I still have 1 and 3/4 pieces of the track left. In the long run, I like the look a whole lot better than when I was trying to scratch build it.
I took some more photos, this time on my wood floors, I'm amazed at how much the white table darkened the pieces, and I even studied photography in college, so I should have known better!
Below is a photo of the 4 way and 4 straight pieces.

The tile on the left is one of my tunnel pieces the other 4 are for building large cavern spaces, so they don't have the short walls on them.

I wanted to have a 4 way intersection piece, but this is for the big cavern spaces so not walls on the edge.

Here is a straight rail piece, this is again for a large cavern section of the mine. When using it for a game, I'd place some other items, barrels/boxes etc around on it so that the any creatures in the area would have cover from the PCs.

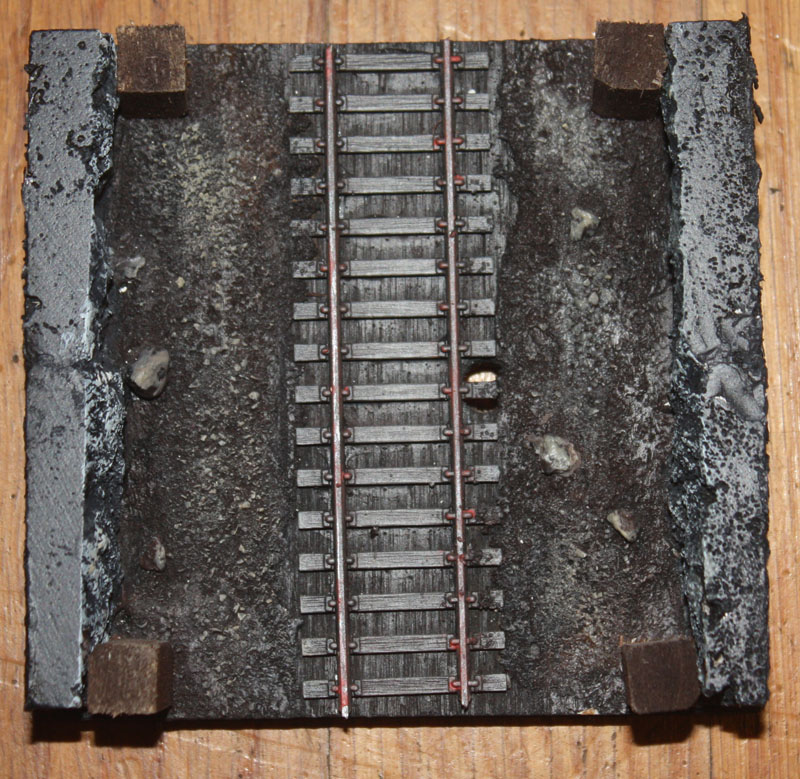
This pieces has a straight rail system, but is for a tunnel section of the mine. I used some square wood pieces for the support beams you see them at each of the corners near the ends of the tile. The walls are from a tile piece that you use for a kitchen or bath back splash. They are just about the right size for the job and have a nice rough rock texture on one side.

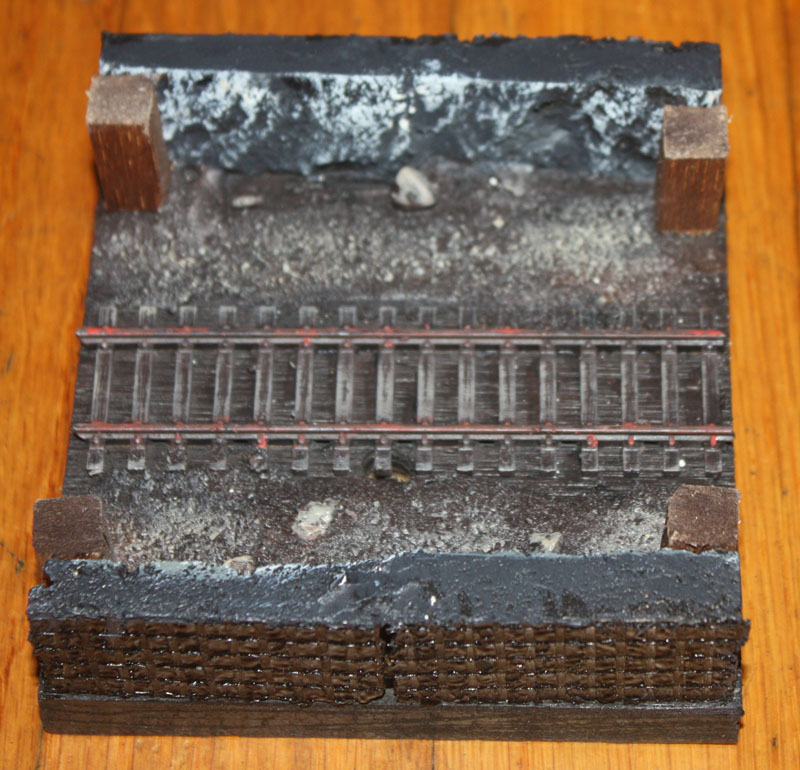
The same piece as above, but taken at an angle so that you can better see the walls. Some of the color variation is of course lost because of the brightness of the flash. When I was planning out the pieces I knew the wood posts would help sell the fact that it's from a mine!

This is also for a large cavern area, no rails on it because that tile would go at the bottom of the photo, closest to the camera. The rock pieces didn't quite fit on this tile, I guess I didn't select the right ones, so if you look at the left hand side of the wall, that small block behind the wooden post, is actually a piece of pink foam, cut to look like the rest of the rock, then painted up. I did that in a few places but it works well with the rest of the tile.

Of course my large rooms need corners so I made some corner pieces as well.

The elevator tile with the elevator present. I made it so I could lift out the elevator, because when the PCs first arrive at this tile, the elevator car isn't there. So the space where the car sits has the shaft image on it. As I said in my earlier post, I tried painting it, a medium gray, then making it darker as it got closer to the center, which I made black, but I just didn't like the look, so I pasted the printed piece there and was very happy with the results.

Finally the elevator winch mechanism. It's a weird west game, which is from a campaign I was running until recently, we're on hiatus as I need to recharge a little. But the winch is made of a couple of pieces of pink foam, it makes the main body, a few pellets that you shoot from a pellet gun, some wire that you use in a car stereo, some gears that I picked up from Michael's, Granny grate, the large wheel on the pulley part, which you really can't see, is a base from a Heroclix mini, and the pulley belt is just a large rubber band, cut then glued on to the two wheels. The 'rusted' texture on the pink foam was caused when I purposely sprayed the black paint to close to the foam to black bomb it. I wanted a rust texture and I knew if I held the can too close I could get it if I was careful enough. Another angle of the winch is the picture below.

Oh and the base is made from Popsicle sticks.
As far as the rails, I tried a bunch of different things for scratch building rails and ties, but could never get a look that I liked. So I finally broke down and bought 3 pieces of HO flex track at my neighborhood model train store. I still have 1 and 3/4 pieces of the track left. In the long run, I like the look a whole lot better than when I was trying to scratch build it.
I took some more photos, this time on my wood floors, I'm amazed at how much the white table darkened the pieces, and I even studied photography in college, so I should have known better!

Below is a photo of the 4 way and 4 straight pieces.

The tile on the left is one of my tunnel pieces the other 4 are for building large cavern spaces, so they don't have the short walls on them.

I wanted to have a 4 way intersection piece, but this is for the big cavern spaces so not walls on the edge.

Here is a straight rail piece, this is again for a large cavern section of the mine. When using it for a game, I'd place some other items, barrels/boxes etc around on it so that the any creatures in the area would have cover from the PCs.

This pieces has a straight rail system, but is for a tunnel section of the mine. I used some square wood pieces for the support beams you see them at each of the corners near the ends of the tile. The walls are from a tile piece that you use for a kitchen or bath back splash. They are just about the right size for the job and have a nice rough rock texture on one side.

The same piece as above, but taken at an angle so that you can better see the walls. Some of the color variation is of course lost because of the brightness of the flash. When I was planning out the pieces I knew the wood posts would help sell the fact that it's from a mine!

This is also for a large cavern area, no rails on it because that tile would go at the bottom of the photo, closest to the camera. The rock pieces didn't quite fit on this tile, I guess I didn't select the right ones, so if you look at the left hand side of the wall, that small block behind the wooden post, is actually a piece of pink foam, cut to look like the rest of the rock, then painted up. I did that in a few places but it works well with the rest of the tile.

Of course my large rooms need corners so I made some corner pieces as well.

The elevator tile with the elevator present. I made it so I could lift out the elevator, because when the PCs first arrive at this tile, the elevator car isn't there. So the space where the car sits has the shaft image on it. As I said in my earlier post, I tried painting it, a medium gray, then making it darker as it got closer to the center, which I made black, but I just didn't like the look, so I pasted the printed piece there and was very happy with the results.

Finally the elevator winch mechanism. It's a weird west game, which is from a campaign I was running until recently, we're on hiatus as I need to recharge a little. But the winch is made of a couple of pieces of pink foam, it makes the main body, a few pellets that you shoot from a pellet gun, some wire that you use in a car stereo, some gears that I picked up from Michael's, Granny grate, the large wheel on the pulley part, which you really can't see, is a base from a Heroclix mini, and the pulley belt is just a large rubber band, cut then glued on to the two wheels. The 'rusted' texture on the pink foam was caused when I purposely sprayed the black paint to close to the foam to black bomb it. I wanted a rust texture and I knew if I held the can too close I could get it if I was careful enough. Another angle of the winch is the picture below.

Oh and the base is made from Popsicle sticks.


 Cheers!
 Cheers!