|
|
Post by lebaron on Feb 8, 2016 17:55:49 GMT
Hi, it has been a while since I posted here as my crafting was on hold, but I recently started again, with better techniques! I have a question though since on one of my piece (2 pieces actually), the flock is shedding by "chunks". This is mostly due to the fact that I put a second layer (the grass) over the first one (dirt and sand) while the first one was not completely dry (which I thought it was...). I used water down PVA glue for both layer and since the one on top dried by being exposed to the air, the bottom layer is still "wet" and did not stick to the foam/board. I covered most of the "holes" by adding bushes and vegetation, but I can not do that over the entire piece. Any idea how I could fix the problem? I did not fix my flocking for now as I feared it would make thing worse. I was thinking on spraying "wet water" (water with soap in it) to make both layers kinda mix together and let them dry again, but I'm not sure this would make the bottom layer stick to the foam/board. I would fix everything once this problem will be solved. I hope one of you can help because it's the biggest project I did since I started crafting and it is mostly done. I do not want to start it over.  PS: Here are some pictures of the "holes" it create if it can help you figuring out what my problem is. 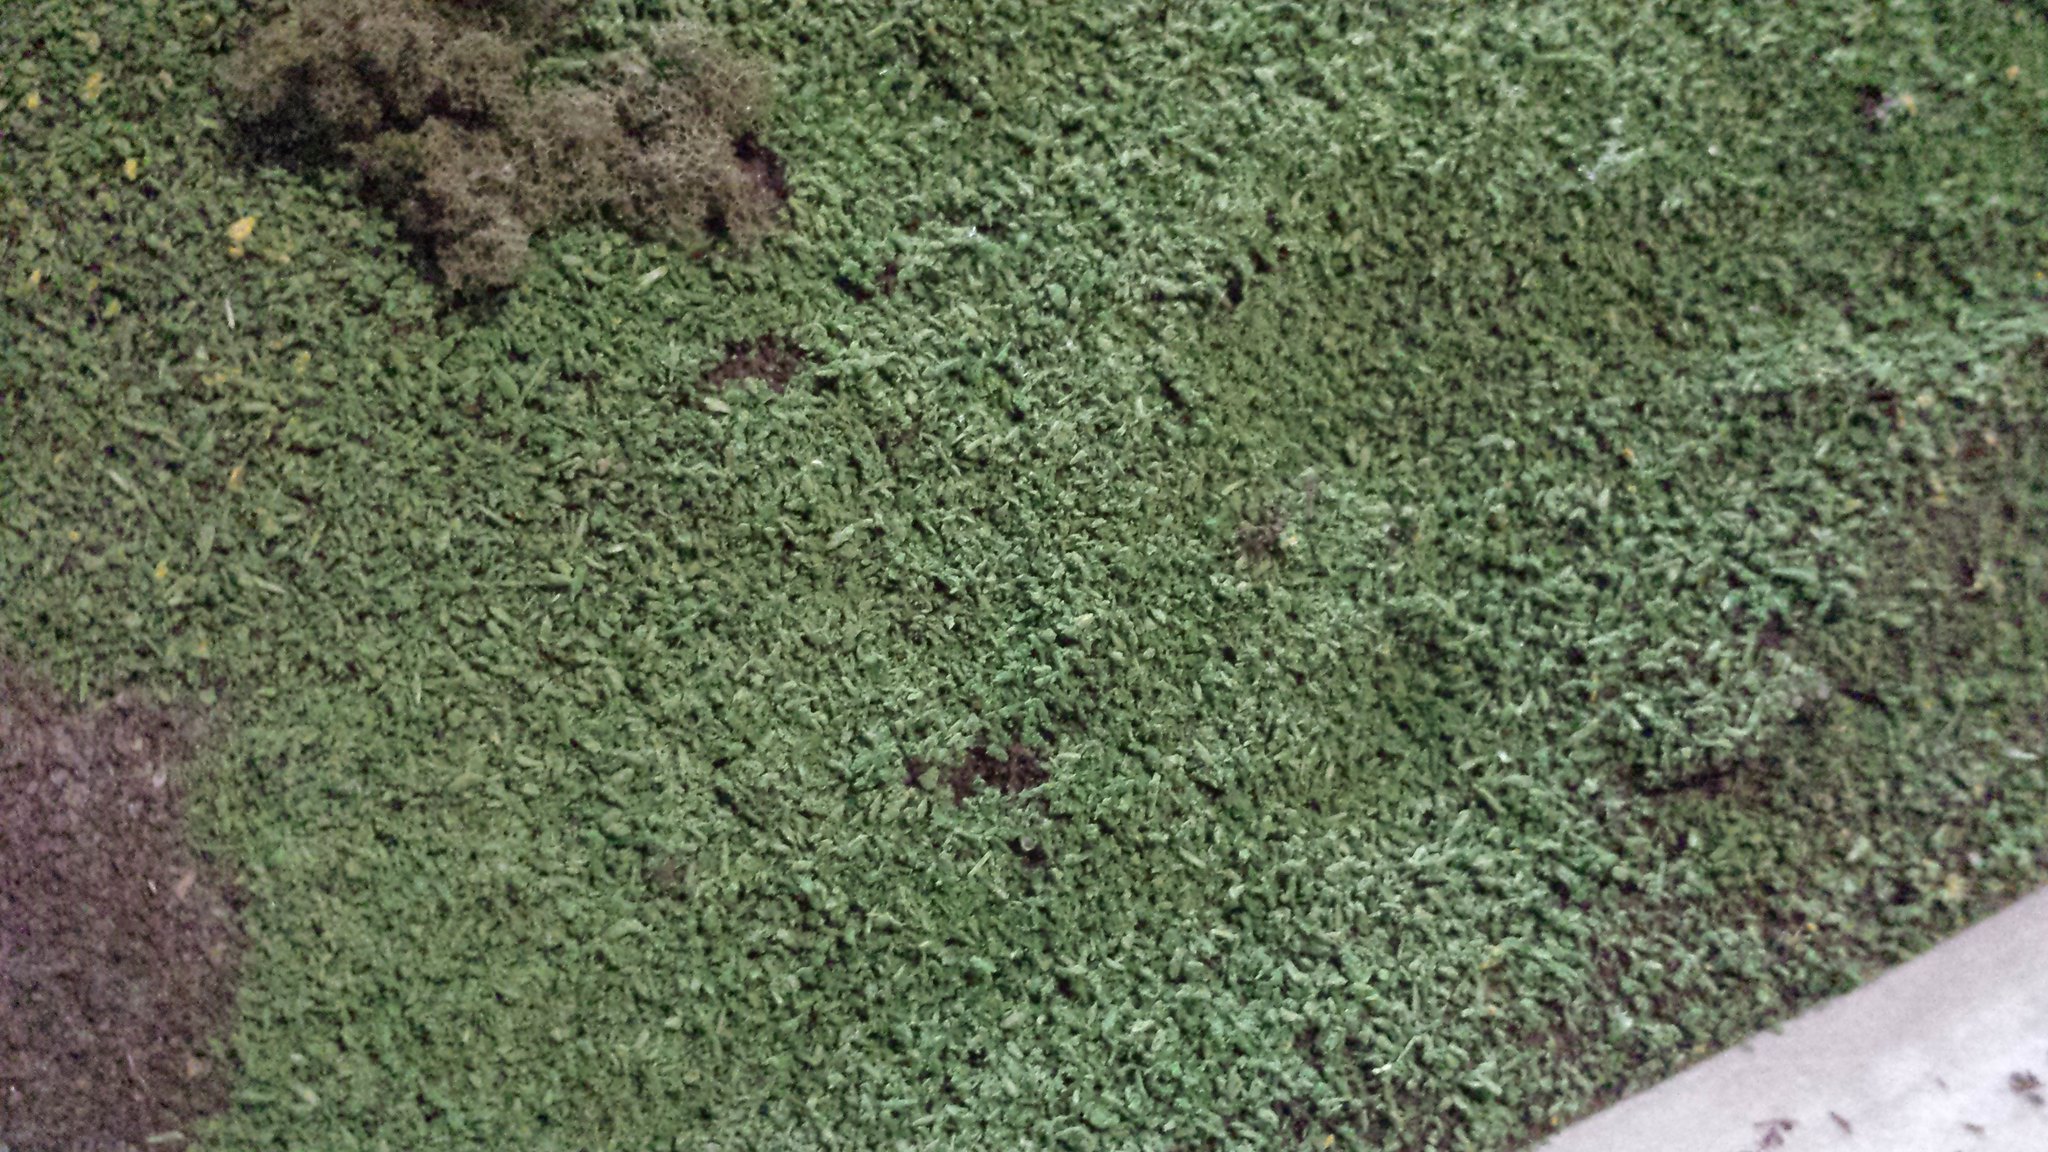 20160208_114137 20160208_114137 by Jonathan Roy Marois, on Flickr 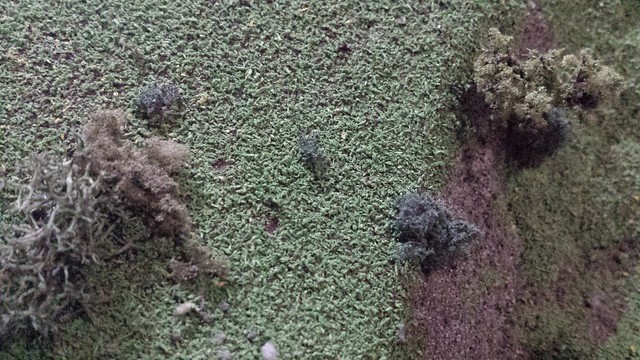 20160208_115824 20160208_115824 by Jonathan Roy Marois, on Flickr |
|
|
|
Post by l7arkness on Feb 8, 2016 18:17:27 GMT
Honestly little holes in the flocking are more realistic but as for your question patching with a single layer would be easiest then depending on how you want your flocking to look i would suggest doing a light spray with either a spray adhesive, or water/glue mixture and let that completely dry. then do a few more coats with a little light flocking.
Personally i would cover the bare spots i didnt like with rock formations or tint the grass around them to yellow so that it has a nice gradient to the green
btw if the scale of that flocking was a little smaller i wouldn't be able to tell the second photo was terrain and not a drone shot of some hillside, damn good job
|
|
|
|
Post by lebaron on Feb 9, 2016 12:21:19 GMT
I realize my question was not clear. What I meant to ask is how do I stop the shedding from happening again on this piece. Filling up the holes will be easy as you said but I do not want more chunks of grass to fall off. Any idea? PS: Thanks for the compliment!  |
|
|
|
Post by curufin on Feb 9, 2016 13:23:06 GMT
I think the problem might be using watered down PVA glue. Try a test piece using full strength PVA (no water). Once that is completely dry, try scrapping the flock off with your finger nail. If it still comes off, you could add a layer of watered down PVA over the flock to help seal it.
|
|
|
|
Post by sgtslag on Feb 9, 2016 17:12:16 GMT
I'd recommend a couple of light coatings of Scenic Cement, from Woodland Scenics (Yes, I know it is basically watered-down PVA Glue, but they got it right!). Full-strength PVA will likely leave a semi-glossy, armor-like coating over the whole surface it is applied to. Experiment on a test piece, first. If I am wrong, no foul, and my apologies. Cheers!
|
|
Matt
Tool Gatherer

Posts: 76 
|
Post by Matt on Feb 9, 2016 19:03:47 GMT
You can make your own scenic cement by watering down white glue 2 parts water to 1 part glue* and a drop of dish soap.
If you have a spritzing bottle dampen the area with water with a drop of dish soap and then spritz on the glue-water mixture. It'll immediately suck into the flock thanks to the dampened surface. Don't overspray either just a dampening. The dish soap in both reduces the surface tension.
* Different glues are of different quality and can be stretched further. Sadly you'll have to experiment to find the perfect ratio for your glue and your spritzing bottle. 2:1 is probably a good starting point.
|
|
|
|
Post by lebaron on Feb 9, 2016 19:54:57 GMT
So I should just go ahead and put watered down PVA on everything. Good! I was afraid that by doing so, it would cause more chunks to come off the surface by reactivating the glue beneath the layers.
I will try this tonight and only on a small area and let it dry completely before doing the whole piece (2 pieces of 2'x1'). Will try and keep you all updated if it worked or not. Let's hope it does!
|
|
|
|
Post by sgtslag on Feb 9, 2016 20:08:52 GMT
A few light coats will not dissolve the existing PVA. If you soak it, it will all soften. Do a few lighter coats of watered-down PVA Glue, and you should be fine. Make sure it is completely dry between coats, or you will soften the underlying coats... Cheers!
|
|
|
|
Post by DnDPaladin on Feb 9, 2016 21:07:04 GMT
I have the same problem with all flockings i do. somehow they all just always ends up shedding, even if i put full strenght white glue.
so what i do is this...
i use full strenght pva glue.
flock the thing
remove the excess
wait for it to cure completely
seal it with modpodge and a bit of water. modpodge can be replaced with pva glue.
another way of sealing that can be good is to buy a spray sealant. its like spray paint but for sealing stuff. works great too and barely visible afterward.
|
|
|
|
Post by khazadum on Feb 11, 2016 21:12:42 GMT
Like Paladin said above, I use flat (or 'satin') acrylic clear coat once everything's flocked and dried. Seems to hold up pretty well so far.
|
|
|
|
Post by skunkape on Feb 12, 2016 14:31:15 GMT
I agree with the sealing method. Model railroad builders often spray alcohol on their flocking them use watered down PVA/Scenic Cement/Etc over the flock to seal it to the boards! As sgtslag says, be careful with what you are using, you want it to form a protective layer but not make a glossy armored coating on the terrain!
|
|
|
|
Post by Sleepy Hollow Mike on Feb 19, 2016 4:26:26 GMT
I use a similar method. After I initially glue it down I let it dry for at least a day then I go back with a 50-50 PVA and Water mix (one drop of dishwashing liquid) and apply with a syringe . After that dries its a liberall spray of matt finish
|
|
|
|
Post by DnDPaladin on Feb 20, 2016 7:08:18 GMT
simple note on modpodge. that thing will make your stuff look like plastic from up close !
i swear my rocks could easily pass for cheap kids toys !
Tip, if you use mod podge, stipple dont brush. stippling make sure everything is entering the cracks and the likes and it soaks up excesses. so its a better method then say watering it down and wait.
|
|
|
|
Post by skunkape on Feb 24, 2016 17:36:15 GMT
simple note on modpodge. that thing will make your stuff look like plastic from up close ! i swear my rocks could easily pass for cheap kids toys ! Tip, if you use mod podge, stipple dont brush. stippling make sure everything is entering the cracks and the likes and it soaks up excesses. so its a better method then say watering it down and wait. You could try to add a little dish soap to the modpodge, it will help break the surface tension and allow it to flow better. |
|
|
|
Post by jennifer on Feb 29, 2016 4:03:15 GMT
I make my own scenic cement with 20% white glue and 80% water. Works well for me. I use it on miniatures, trees, terrain. Holds everything together. I just spray and shake off.. and blow off with compressor or mouth as well sometimes as it dries.
|
|


 Cheers!
 Cheers!