|
|
Post by curufin on Feb 14, 2016 15:33:01 GMT
I used two pieces of wire for each grating, leaving one open square between the wires. I looped each wire through, and then gave it a couple twists to secure it. I then twisted both twisted wires together, then hot glued it inside the tube. Then I poked a hole in the wall and then hot glued the tube in the hole.
Edit: I used two wires for each grating. There was just a grid line between them, NOT a full square.
|
|
|
|
Post by jennifer on Feb 18, 2016 19:04:18 GMT
I keep looking at these every few days, they are so gorgeous! I have a question. What is the average height of all these wall segments ? They all look about the same height. I am making a form for my tp mache masonry for wall segments and want it to be the right height.
|
|
|
|
Post by curufin on Feb 18, 2016 20:07:02 GMT
These wall segments don't interact with anything, so their height could be anything you want. I arbitrarily settled on 2" for the cardboard piece that sits on the tile walls, making the overall height of the wall segment from floor to top about 2 3/16".
|
|
|
|
Post by Sleepy Hollow Mike on Feb 19, 2016 6:04:56 GMT
I used two pieces of wire for each grating, leaving one open square between the wires. I looped each wire through, and then gave it a couple twists to secure it. I then twisted both twisted wires together, then hot glued it inside the tube. Then I poked a hole in the wall and then hot glued the tube in the hole. Edit: I used two wires for each grating. There was just a grid line between them, NOT a full square. I use the popsicle stick method so I am guessing after I use the wire and thread it thru the small tube I then just attach it to the poppy stick? Brilliant!But how do I get it flush so it doesn't stick out?Maybe furrow a channel? My wall height is about an inch and a half. I know it should go higher but that is about the length my patience will take me. I have to consider playability! |
|
|
|
Post by curufin on Mar 11, 2016 19:02:06 GMT
I had a thought about adding even more modularity to the already modular wall segments. Enter magnets. Now just create a wall segment with a magnetic receptive front, and anything you can glue a magnet to, you can stick to the wall segment. I attached a small magnet to the back of this shelf. Now I can display all manner of items...perhaps a mcguffin ? 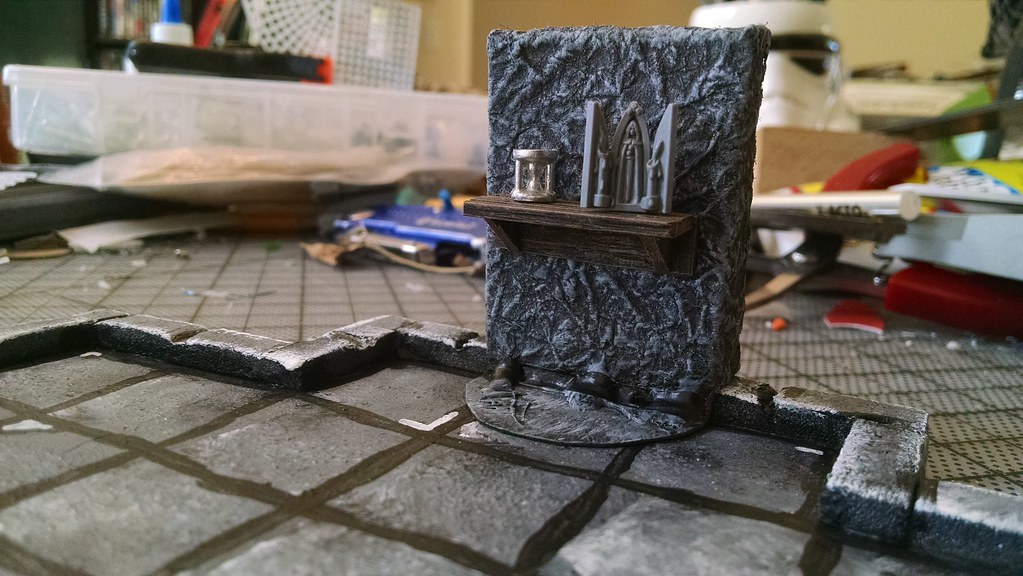 Or I can flip the shelf upside down and it becomes a book shelf. 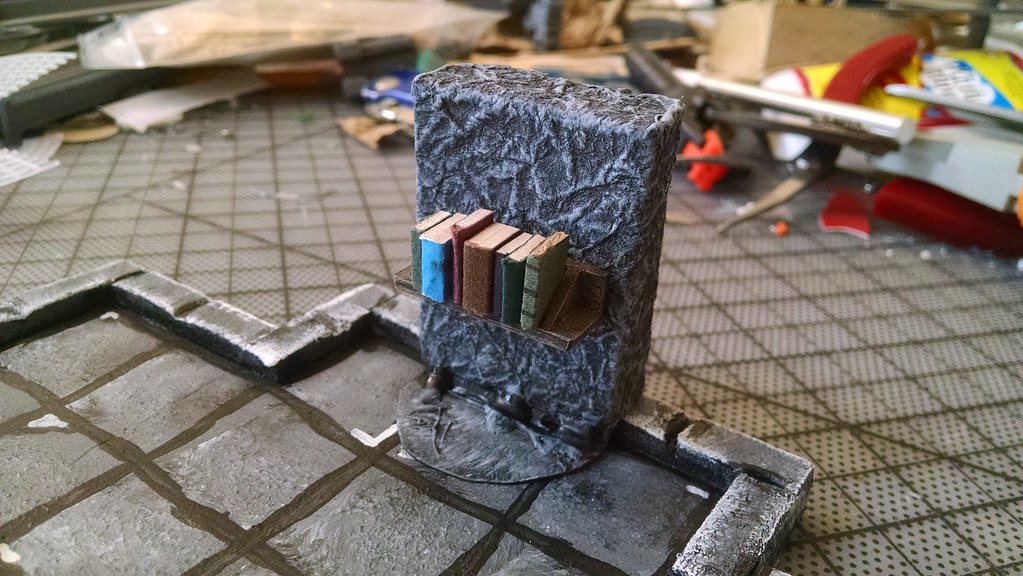 The Walkthrough: I started with a normal DMG wall segment. To create the magnetic receptive front I turned to a soup can. I cut up the can with tin snips and then turned to household scissors to trim it to size. BE CAREFUL, the metal edges are sharp! 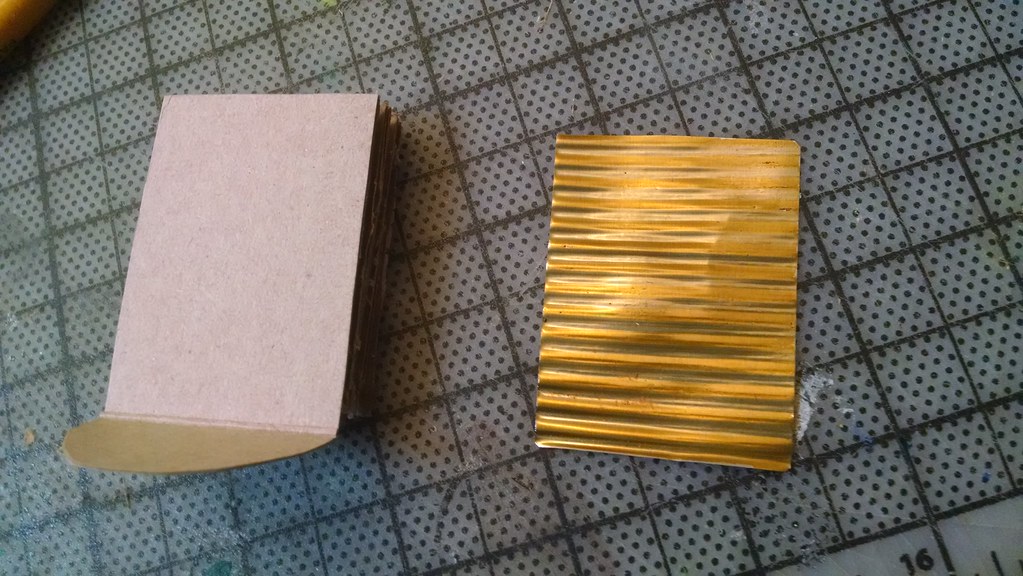 I glued the soup can piece to the wall segment using E6000. I then crumpled up a water soaked brown paper bag, uncrumple it, and let it dry. You can see more examples of the paper bag method here and here. 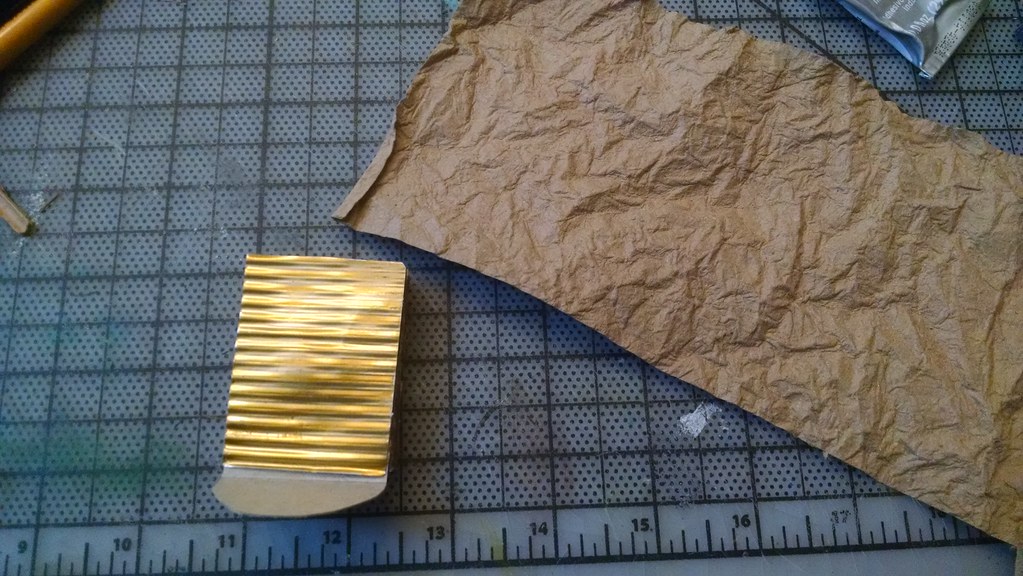 I glued the paper bag to the soup can using E6000. I then switched to hot glue to continue wrapping and gluing the bag to the wall segment's sides, back, and top. 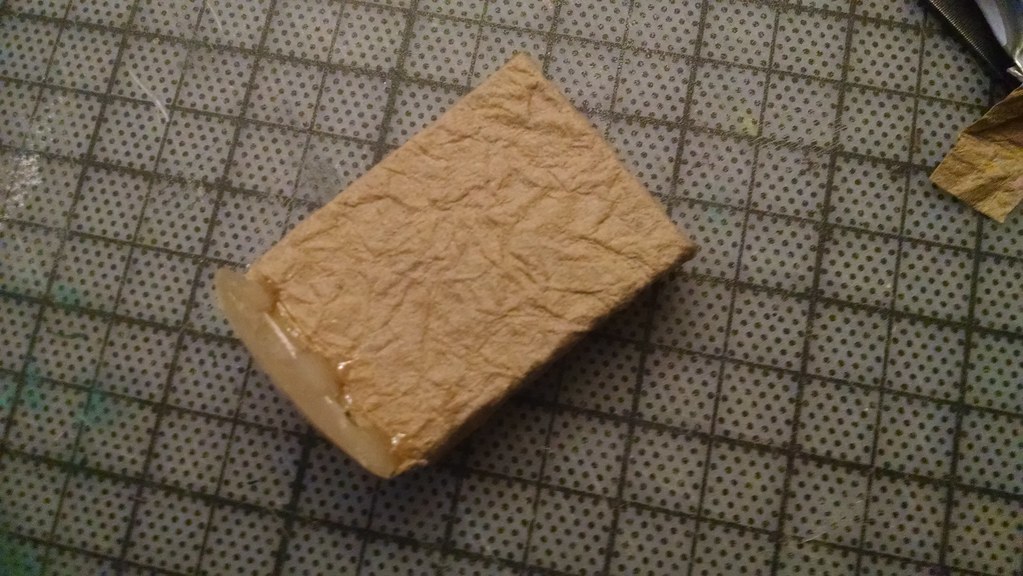 Paint to taste. 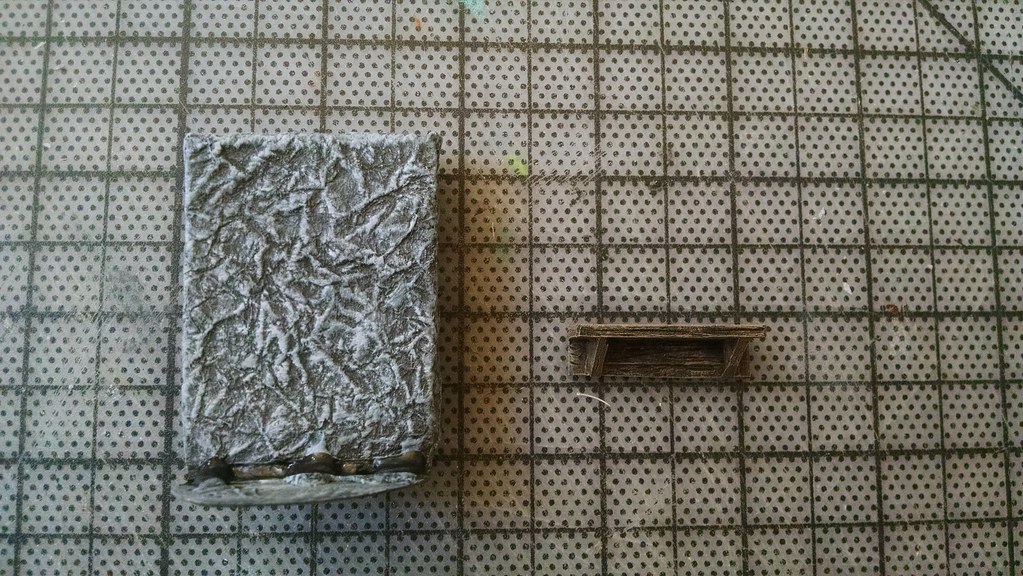 And now your drunken dwarves will be able to hang a shelf to store all of their books. 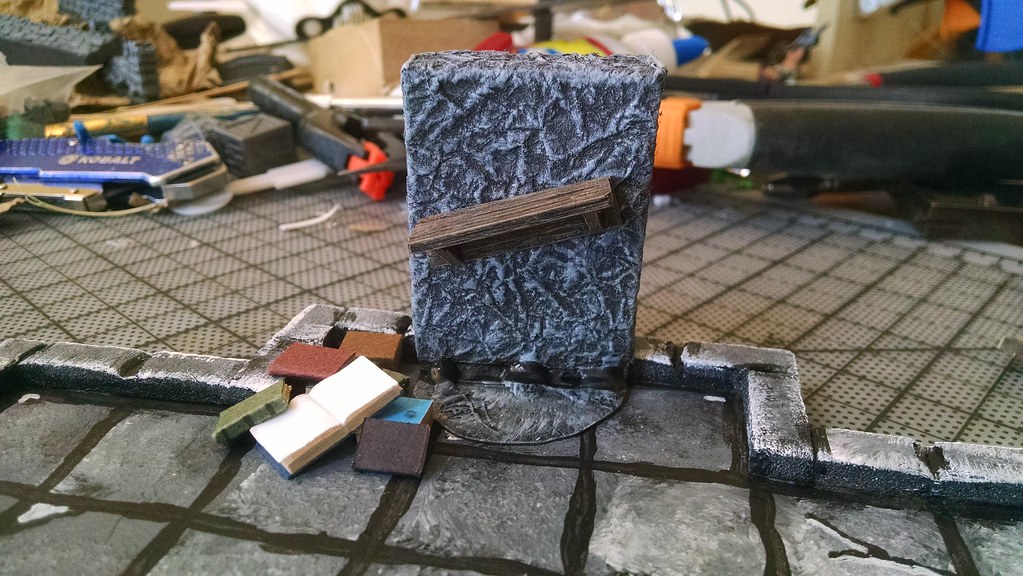 |
|
|
|
Post by margaret on Mar 11, 2016 20:55:05 GMT
Love it!
|
|
|
|
Post by jennifer on Mar 11, 2016 22:50:08 GMT
Wow, that's awesome curufin!  Can't wait to see all your magnetic attachments |
|


 Can't wait to see all your magnetic attachments

 Cheers!
 Cheers!