


Everyone can make electrical stuff [WIP]
Apr 7, 2015 0:00:13 GMT
DMScotty, tauster, and 6 more like this
Post by daveyjones on Apr 7, 2015 0:00:13 GMT
[UNDER CONSTRUCTION]
ok this is going to be a mess until i finish it, so please be patient.
you way want to just ignore this until i do.
This thread is meant to illustrate the use of electronics without the need for soldering
and to be a guide on how to use electronics in your projects for people without prior electronics knowledge
and provide only the info you need without wasting your time with superfluous information.
Electronics and crafting
first let's look at what kind of electronics we might want to incorporate in a craft project.
Lighting:
The most obvious thing really.
lighting up your projects is easy, cheap and can have a dramatic effect on your projects.
The best way to do it of course is using LEDs. they are cheap, easy to use and due to the
low heat generated by them can be safely built into flammable materials such as cardboard,
paper and such. and they come in many colours, as well as special types of LEDs with little
circuits built in to make them do special things such as the flickering candle LED you find in
electric tea lights.
we will look into LEDs more in the components section.
Animation:
next we may want some parts of our project to move. for this we need small
electrical motors. this can be a bit more complicated depending on what you want
to achieve. making something spin really fast is easy, but if you want it to go slow,
or you want to spin an object with some weight to it you may need gearing, and for
extreme precision you might need a special type of motor called a 'stepper motor'.
more on various motors in the components section.
sometimes you may want something to go back and forth instead of rotating, in which
case you will need a servo. this is even more complicated because they need to
receive digital signals to operate.
more on servos in the advanced section.
Control:
of course once we put in the lights and motors we will need some ways of controlling them.
we will want to switch things on and off, activate things by pushing buttons or triggering sensors, timing events,
or perhaps we might even want to control more complex projects remotely.
some of this is easy, some is more complicated and some of it requires a microcontroller and
some programming.
more on switches, buttons and sensors in the components section.
more on timing and remote control in the advanced section.
Power:
or course we will also need a way to power it all.
not much to say here, there are 2 basic options:
batteries or wall wart. the advantages and disadvantages of each are obvious.
we will discuss both options in the components section.
The circuit:
Lastly we will need some means of connecting the components and building our electrical circuit.
the default option is of course to solder, and if anyone wants an explanation of what that entails
let me know and i will make a separate post for that.
the other options is called 'wearable electronics'.
Here is a video explaining how to hook up and LED to a battery
and use a snap as a switch with conductive thread:
so there you have it, instead of soldering everything you just sew it together.
the supplies that will be relevant to crafting are:
-the conductive thread of course.
-battery holders made for use with the conductive thread. regular ones usually do not have an appropriate surface to sew to.
-snaps for use as switches
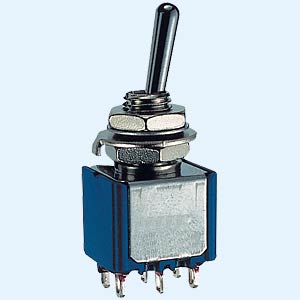
-large switches (see image, contacts have holes allowing it to be sewn.)
-regular 'trough hole' components. (these have long leads like the LEDs in the video that you can sew to)
-suitable microcontrollers such as the 'arduino lillypad' (more on these in the advanced section)
-basically anything you want to use as long as its contact points are suitable to be sewn. that means lots of exposed metal and a hole or room to drill one.
one place where you can the conductive thread and compatible components is:
www.adafruit.com/category/65
add more sources
Components:
LEDs:
There are many types of LEDs, lets look at the ones that might be of interest to us:
Regular LEDs:
these come in various colours and intensities and varieties.
-colours red, green, blue, yellow, orange, purple, white, warm white
-diffused and clear
-various sizes, 3mm and 5mm are most common for through hole, but you can also get really big ones too.
-various shapes, most common and useful are 'straw hat' which is the typical shape and pre wired SMD/SMT.
SMD or SMT stands for surface mount components, the tiny tiny thingies without leads that you find in most
modern electronics these days. you can buy these sometimes pre wired and insulated. these are expensive but
can be just the thing you need for extremely tight spots.
8, 5 and 3mm strawhat LEDs:

pre wired, insulated SMD LED:

Bi-coloured LEDs are LEDs with multiple colours. these have 3 leads; one common and one for each colour.
they come in 'common cathode' and 'common anode' varieties. this refers to the common pin;
'common cathode' means the common lead is ground (the - side of a battery) and you light up each colour by applying
power to the corresponding pin, 'common anode' means the common pin is positive (the + side of a battery) and you
have to connect it to power to the common pin and light up each colour by connecting it's corresponding
pin to ground(-).
There are also LEDs that can make every colour called 'RGB' LEDs.
RGB stands for 'red, green, blue' and these LEDs work the same way as the bicoloured LEDs
except they have 4 leads; one common, one red, one green and one blue.
as with the bi-colour LEDs there is 1 common pin and one for each colour.
only with these LEDs you can create every colour you want by mixing the 3 available colours.
There are also other types of bi-coloured and RGB LEDs that only have 2 leads.
These LEDs have a tiny circuit built in that either fades or blinks between colours.
Then there are the flickering LEDs. these come in all the colours but yellow is the most common.
this is what is in those LED thee lights. they have a little circuit built in that makes them blink in
a random patter that creates the flicker effect.
lastly there are UV LEDs.
these are pretty cool as they put out actual UV light and can light up invisible ink.
which you can make by flushing the ink out of a highlighter.
there are also infra red LEDs but these are not really useful for crafting as they do not
put out any visible light. mostly these are used for remote control and light sensors.
this is what is in a TV remote.
all it takes to use an LED to light something up is a power source such as a battery, an LED, a resistor and a means of connecting them.
obviously the battery provides the electricity and the LED emits the light, but the resistor is also necessary
due to a quirk in the functioning of LEDs.
There are exceptions to this, notably: special fading or blinking lights might be immune to the issue because they are never
on long enough.
another exception is if you are using certain small batteries as a power source. all batteries have a limit to the amount
of current they can deliver at once, and for coin cells like the cr2032 this is not enough to burn out most LEDs.
but if you are using regular LEDs with a larger power source you will need the resistor
because an LED will always try to use all the current it can, even if it is more then it can handle.
so if you give it too much it will burn itself out. for this reason you have to add a resistor between
the LED and the battery. it does not matter at which side. what does matter is the value
here is how you calculate that value:
use this calculator, or one of many others on the web: led.linear1.org/1led.wiz
there are 3 values you need to fill in here.
'source voltage' is what comes out of the battery you are using. for example a cr2032 coin cell puts out 3 volts, an AA 1.5.
'diode forward voltage' says something about what the LED uses to operate, you need to get this info from where you buy the LEDs.
online stores will have it in the description.
'diode forward current' is what we need to limit with the resistor to prevent the LED from burning itself out.
also this is the value that determines how bright the LED will shine.
find the 'maximum forward current' from the specifications of the LED and chose a value based on that and enter that value in the calculator.
the result you get out of the calculator is the value in ohm of the resistor you need to use.
so for example if you have an LED with a forward voltage of 2.6 a maximum forward current of 40mah and you want it to shine at half brightness
on a 3 volt coin cell you enter the following:
-source voltage: 3
-forward voltage: 2.6
-forward current: 20
the result is: 22 ohms.
now the way to connect it up is simply this:
-connect the resistor to the positive end of the battery
-connect the other end of the resistor to the positive end of the LED (the positive is the longer lead)
-connect the negative end of the LED to the negative end of the battery.
adding a switch:
if you make the circuit this way, it will always be lit when a battery is inserted.
an on/off switch is really nothing more then a device that interrupts the circuit by disconnecting part of it.
instead of connecting the positive end of the battery directly to the resistor connect one half of a conductive snap to the
positive end of the battery and the other side of the snap to the resistor.
now you can turn the LED on and off by fastening and undoing the snap.
ok this is going to be a mess until i finish it, so please be patient.
you way want to just ignore this until i do.
This thread is meant to illustrate the use of electronics without the need for soldering
and to be a guide on how to use electronics in your projects for people without prior electronics knowledge
and provide only the info you need without wasting your time with superfluous information.
Electronics and crafting
first let's look at what kind of electronics we might want to incorporate in a craft project.
Lighting:
The most obvious thing really.
lighting up your projects is easy, cheap and can have a dramatic effect on your projects.
The best way to do it of course is using LEDs. they are cheap, easy to use and due to the
low heat generated by them can be safely built into flammable materials such as cardboard,
paper and such. and they come in many colours, as well as special types of LEDs with little
circuits built in to make them do special things such as the flickering candle LED you find in
electric tea lights.
we will look into LEDs more in the components section.
Animation:
next we may want some parts of our project to move. for this we need small
electrical motors. this can be a bit more complicated depending on what you want
to achieve. making something spin really fast is easy, but if you want it to go slow,
or you want to spin an object with some weight to it you may need gearing, and for
extreme precision you might need a special type of motor called a 'stepper motor'.
more on various motors in the components section.
sometimes you may want something to go back and forth instead of rotating, in which
case you will need a servo. this is even more complicated because they need to
receive digital signals to operate.
more on servos in the advanced section.
Control:
of course once we put in the lights and motors we will need some ways of controlling them.
we will want to switch things on and off, activate things by pushing buttons or triggering sensors, timing events,
or perhaps we might even want to control more complex projects remotely.
some of this is easy, some is more complicated and some of it requires a microcontroller and
some programming.
more on switches, buttons and sensors in the components section.
more on timing and remote control in the advanced section.
Power:
or course we will also need a way to power it all.
not much to say here, there are 2 basic options:
batteries or wall wart. the advantages and disadvantages of each are obvious.
we will discuss both options in the components section.
The circuit:
Lastly we will need some means of connecting the components and building our electrical circuit.
the default option is of course to solder, and if anyone wants an explanation of what that entails
let me know and i will make a separate post for that.
the other options is called 'wearable electronics'.
Here is a video explaining how to hook up and LED to a battery
and use a snap as a switch with conductive thread:
so there you have it, instead of soldering everything you just sew it together.
the supplies that will be relevant to crafting are:
-the conductive thread of course.
-battery holders made for use with the conductive thread. regular ones usually do not have an appropriate surface to sew to.
-snaps for use as switches
-large switches (see image, contacts have holes allowing it to be sewn.)
-regular 'trough hole' components. (these have long leads like the LEDs in the video that you can sew to)
-suitable microcontrollers such as the 'arduino lillypad' (more on these in the advanced section)
-basically anything you want to use as long as its contact points are suitable to be sewn. that means lots of exposed metal and a hole or room to drill one.
one place where you can the conductive thread and compatible components is:
www.adafruit.com/category/65
add more sources
Components:
LEDs:
There are many types of LEDs, lets look at the ones that might be of interest to us:
Regular LEDs:
these come in various colours and intensities and varieties.
-colours red, green, blue, yellow, orange, purple, white, warm white
-diffused and clear
-various sizes, 3mm and 5mm are most common for through hole, but you can also get really big ones too.
-various shapes, most common and useful are 'straw hat' which is the typical shape and pre wired SMD/SMT.
SMD or SMT stands for surface mount components, the tiny tiny thingies without leads that you find in most
modern electronics these days. you can buy these sometimes pre wired and insulated. these are expensive but
can be just the thing you need for extremely tight spots.
8, 5 and 3mm strawhat LEDs:
pre wired, insulated SMD LED:
Bi-coloured LEDs are LEDs with multiple colours. these have 3 leads; one common and one for each colour.
they come in 'common cathode' and 'common anode' varieties. this refers to the common pin;
'common cathode' means the common lead is ground (the - side of a battery) and you light up each colour by applying
power to the corresponding pin, 'common anode' means the common pin is positive (the + side of a battery) and you
have to connect it to power to the common pin and light up each colour by connecting it's corresponding
pin to ground(-).
There are also LEDs that can make every colour called 'RGB' LEDs.
RGB stands for 'red, green, blue' and these LEDs work the same way as the bicoloured LEDs
except they have 4 leads; one common, one red, one green and one blue.
as with the bi-colour LEDs there is 1 common pin and one for each colour.
only with these LEDs you can create every colour you want by mixing the 3 available colours.
There are also other types of bi-coloured and RGB LEDs that only have 2 leads.
These LEDs have a tiny circuit built in that either fades or blinks between colours.
Then there are the flickering LEDs. these come in all the colours but yellow is the most common.
this is what is in those LED thee lights. they have a little circuit built in that makes them blink in
a random patter that creates the flicker effect.
lastly there are UV LEDs.
these are pretty cool as they put out actual UV light and can light up invisible ink.
which you can make by flushing the ink out of a highlighter.
there are also infra red LEDs but these are not really useful for crafting as they do not
put out any visible light. mostly these are used for remote control and light sensors.
this is what is in a TV remote.
all it takes to use an LED to light something up is a power source such as a battery, an LED, a resistor and a means of connecting them.
obviously the battery provides the electricity and the LED emits the light, but the resistor is also necessary
due to a quirk in the functioning of LEDs.
There are exceptions to this, notably: special fading or blinking lights might be immune to the issue because they are never
on long enough.
another exception is if you are using certain small batteries as a power source. all batteries have a limit to the amount
of current they can deliver at once, and for coin cells like the cr2032 this is not enough to burn out most LEDs.
but if you are using regular LEDs with a larger power source you will need the resistor
because an LED will always try to use all the current it can, even if it is more then it can handle.
so if you give it too much it will burn itself out. for this reason you have to add a resistor between
the LED and the battery. it does not matter at which side. what does matter is the value
here is how you calculate that value:
use this calculator, or one of many others on the web: led.linear1.org/1led.wiz
there are 3 values you need to fill in here.
'source voltage' is what comes out of the battery you are using. for example a cr2032 coin cell puts out 3 volts, an AA 1.5.
'diode forward voltage' says something about what the LED uses to operate, you need to get this info from where you buy the LEDs.
online stores will have it in the description.
'diode forward current' is what we need to limit with the resistor to prevent the LED from burning itself out.
also this is the value that determines how bright the LED will shine.
find the 'maximum forward current' from the specifications of the LED and chose a value based on that and enter that value in the calculator.
the result you get out of the calculator is the value in ohm of the resistor you need to use.
so for example if you have an LED with a forward voltage of 2.6 a maximum forward current of 40mah and you want it to shine at half brightness
on a 3 volt coin cell you enter the following:
-source voltage: 3
-forward voltage: 2.6
-forward current: 20
the result is: 22 ohms.
now the way to connect it up is simply this:
-connect the resistor to the positive end of the battery
-connect the other end of the resistor to the positive end of the LED (the positive is the longer lead)
-connect the negative end of the LED to the negative end of the battery.
adding a switch:
if you make the circuit this way, it will always be lit when a battery is inserted.
an on/off switch is really nothing more then a device that interrupts the circuit by disconnecting part of it.
instead of connecting the positive end of the battery directly to the resistor connect one half of a conductive snap to the
positive end of the battery and the other side of the snap to the resistor.
now you can turn the LED on and off by fastening and undoing the snap.


 thx for sharing your knowledge on this


 ?
?
 Cheers!