|
|
Post by skunkape on Nov 4, 2014 18:00:35 GMT
Didn't comment on the thread before, just liked the images but wanted to say that I like what you've done with the printed textures, very good job!
|
|
kris
Paint Manipulator

Posts: 164
|
Post by kris on Nov 4, 2014 19:12:12 GMT
I am really amazed with the sacks and rubble. I have never seen that done before. To be honest I really didn't think the rubble idea would work - so I was quite surprised that they turned out as well as they did  ...wanted to say that I like what you've done with the printed textures, very good job! Thanks |
|
|
|
Post by astralplaydoh on Nov 5, 2014 13:16:55 GMT
Amazing! These are wonderful. I'm going to make a set or two today. I have a small request. Would you be able to make a few color variants? Maybe a darker dungeon, eerie, etc...
|
|
|
|
Post by dungeonmistress on Nov 5, 2014 16:22:31 GMT
I love what you've done. Wish I could afford the ink. I will probably have a go at your sacks and rubble. Very nicely done, all of it!
|
|
kris
Paint Manipulator
Posts: 164
|
Post by kris on Nov 5, 2014 18:28:25 GMT
...Would you be able to make a few color variants? Maybe a darker dungeon... It's not too much hassle to make the main floor pattern a bit darker ...so how much darker would you like them? 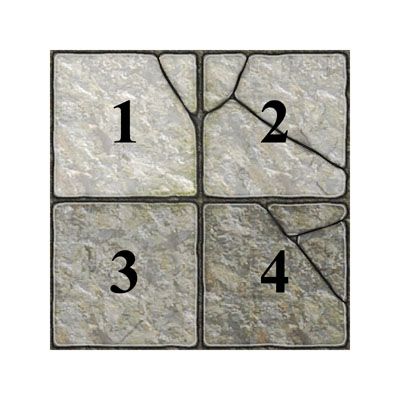 Note that No.1 is the way they currently look. |
|
kris
Paint Manipulator
Posts: 164
|
Post by kris on Nov 5, 2014 18:34:21 GMT
...Wish I could afford the ink... I know what you mean ...I've been printing them out in draft/ink-saving quality (with cartridges that I've probably refilled half a dozen times) - but they still look OK |
|
|
|
Post by astralplaydoh on Nov 5, 2014 18:58:38 GMT
Maybe a number 4. Are you creating everything in Photoshop? What would be exceptionally useful, would be a tutorial on how you're making the floor tiles. I understand if that would be too much work though. *hides*
|
|
kris
Paint Manipulator
Posts: 164
|
Post by kris on Nov 5, 2014 19:19:22 GMT
Here's the pdf: app.box.com/s/c8kiltmhbgl9fk226pbt...Are you creating everything in Photoshop? What would be exceptionally useful, would be a tutorial on how you're making the floor tiles... I'm using a combination of Inkscape & an old version of Photoshop for these ...though I doubt I'll get round to doing that kind of tutorial any time soon (but I'll add it to my to-do list ). |
|
|
|
Post by lyonhart on Nov 7, 2014 4:02:35 GMT
Very nice work!
|
|
|
|
Post by voodoo on Nov 24, 2014 2:31:28 GMT
I really like what you've done and thanks for the links. Just another option to add to the marvelous floor tiles you've created is to print them on different colored paper. I printed the floor tiles out on regular paper and a parchment (old looking paper/smoke stained/yellowy/brown)and placed them side by side. Although the photo doesn't show it clearly the tiles have a sickly hue to them. might be cool for a poised trap room. (or whatever sickly thing you can think of kinda room heh heh. Thanks again for everything. imgur.com/a/SBwLXEDIT: I have taken your pdf's you so graciously shared and have used your inspiration to build one level of an abbey, cathedral, whatever. I have two pieces almost identical. I have included the pics below. I will post everything when completed. Thanks again for the inspiration. Cheers for now. imgur.com/a/6QALX |
|
kris
Paint Manipulator
Posts: 164
|
Post by kris on Dec 14, 2014 14:42:01 GMT
I think it's been well over a month since I've made anything new for the 2.5d dungeon - and so this weekend I thought I would remedy that...  As you can see, I've had a go at making a few bits of furniture ...and so I thought I'd do another little 'how-to' - to show how I made 'em. Note that if you want to have a go at making a few of your own, the first thing you'll need to do is download the wood textures here: LINK* * * 1. Cut out the tabletop from thin (single corrugated) cardboard, and the legs from thick (double corrugated) cardboard.  In this example the tabletop is 1 & 1/8 inches wide by 1 & 7/8 inches long. For the legs I've cut a strip that's 2/8 of an inch wide (i.e. roughly the same width as the cardboard is thick), which I've then cut into half inch long pieces. * * * 2. Cut out a piece of the 'wooden planks' texture (from the pdf file provided above) that is big enough to cover (and wrap around) the table top.  * * * 3. Glue the cardboard to the underside of the paper, and cut out the 'tabs' that will fold around the sides.  * * * 4. Glue the tabs in place.  * * * 5. For each of the table legs, you'll need to cut out a piece of the 'plain wood' texture (from the pdf provided above) that is big enough to wrap around the circumference of the entire piece.  * * * 6. Glue the textured paper in place.  * * * 7. Use a hot-glue-gun to fix the legs in place.  * * * 8. For each bench, cut out a piece of thin (single corrugated) cardboard for the seat, and two thick (double corrugated) pieces of cardboard for the legs.  In this example I've used a piece 3/8 of an inch wide by 1 & 6/8 inches long for the seat, and for the legs I've used the same (2/8") strip I used for the table legs - but this time I've trimmed them down so that they are slightly shorter than the width of the seat. * * * 9. Cut out a piece of the 'wooden planks' texture large enough to cover (and wrap around) the seat, and also a strip of the 'plain wood' texture to go around the legs.  * * * 10. Note that this time, the legs are used in a different orientation - so the paper needs to be glued around the longest sides of the cardboard.  * * * 11. Glue the textured paper in place.  * * * 12. Use a a hot-glue-gun to fix the legs in place to fix the legs to the underside of the bench.  * * * And that's all there is to it! They might not be super durable, but I think they're ideal if you need to put something together quickly, or don't want to break the paints out (In addition, you might have noticed that the very first picture also shows a little shelf in the background - but this was made in much the same fashion as the seat of the bench - except that it uses the plain wood texture, and that you have to make sure you use enough paper to wrap around the entire piece - i.e. so no cardboard is visible.) |
|
|
|
Post by voodoo on Dec 20, 2014 20:48:06 GMT
Kudos as always! If anyone wanted to make them more durable may I suggest gluing some popsicle sticks for the bench and table? wonder if that would help? always good!!
|
|
|
|
Post by SteamTitan on Dec 20, 2014 21:05:07 GMT
This stuff is excellent! Awesome job. So many of them look three dimensional without being that way. The pillars I thought at first had actual ridges to them
|
|
kris
Paint Manipulator
Posts: 164
|
Post by kris on Dec 21, 2014 0:12:34 GMT
Thanks With any luck I'll get a couple of photos posted soon of a little layout that contains everything I've made so far. |
|
|
|
Post by voduchyld on Dec 21, 2014 14:32:19 GMT
i love everything you've put on this thread. nice usage of printable textures!
|
|
kris
Paint Manipulator
Posts: 164
|
Post by kris on Dec 22, 2014 23:03:52 GMT
i love everything you've put on this thread. nice usage of printable textures! Thanks I hope they prove useful to a few other folks out there that might not have the time/materials/inclination to go the painted route. |
|
|
|
Post by stroezie on Dec 23, 2014 10:02:18 GMT
Very cool!
You've gotten around my main gripe with papercraft terrain. I usually find it looks way to flimsy but done like this, with the cardboard backing, it looks great.
Kudos to you sir!
|
|
|
|
Post by astralplaydoh on Dec 23, 2014 15:13:55 GMT
Once again, awesome. I made up a set of your dungeon tiles for an RPG Secret Santa gift. Thanks!
|
|
|
|
Post by algardunraven on Dec 29, 2014 5:09:28 GMT
Everything looks awesome. I would like to start using these on my next project. Thanks for the PDF's and all your work.
|
|
|
|
Post by adrianmcknight on Dec 31, 2014 14:55:05 GMT
Thanks for posting the PDFs. Been so busy I can barely find the time to keep up with running the game, let alone crafting for it. No game this week though, so I'll use the time to put together some tiles I think |
|


 Cheers!
 Cheers!