|
|
Post by The Brave on Nov 24, 2014 8:57:00 GMT
|
|
|
|
Post by The Brave on Nov 23, 2014 16:00:49 GMT
|
|
|
|
Post by The Brave on Nov 18, 2014 12:30:46 GMT
|
|
|
|
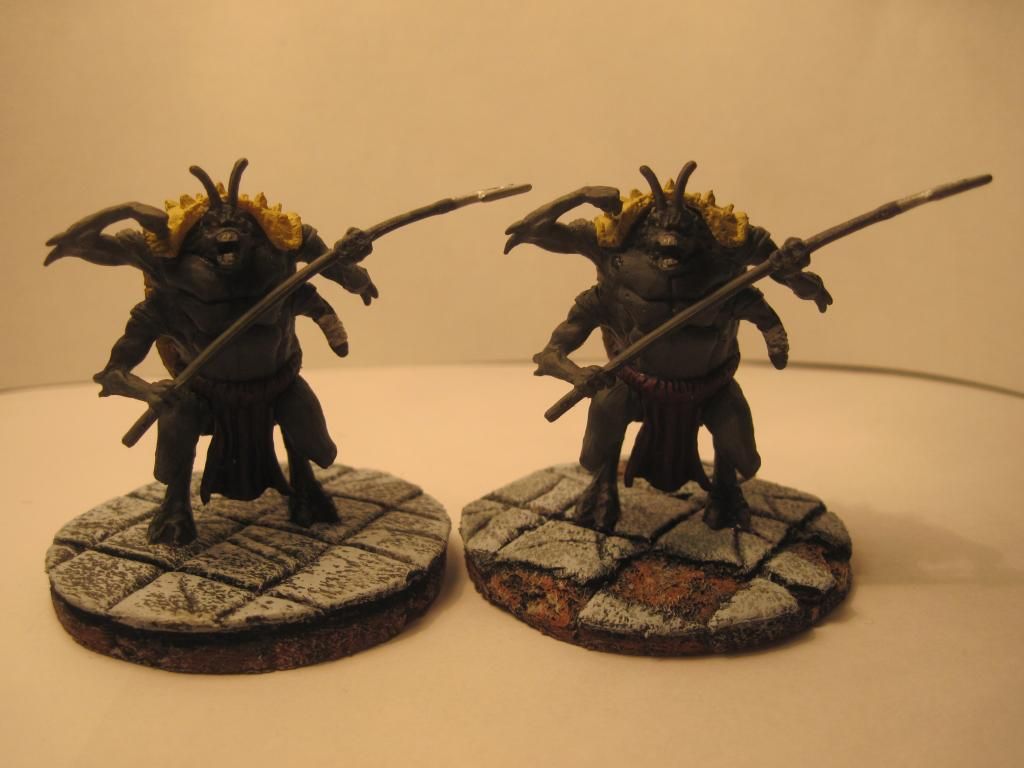
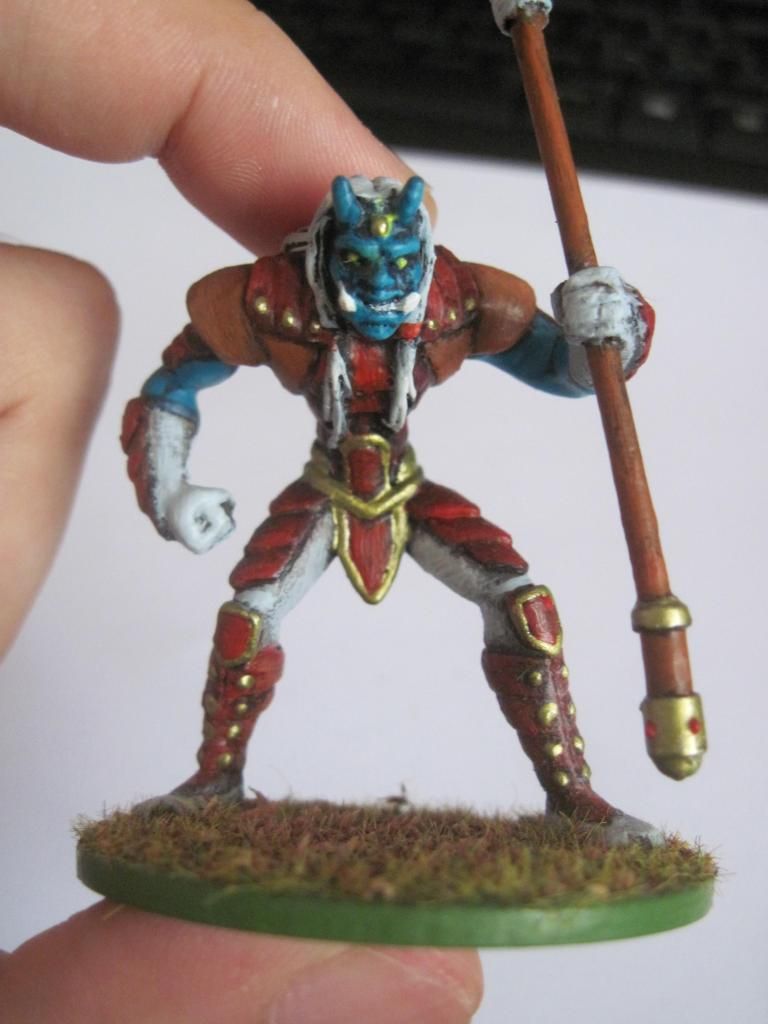
Post by The Brave on Nov 14, 2014 0:57:28 GMT
Again the treeman with a demon, originally a huntik toy. 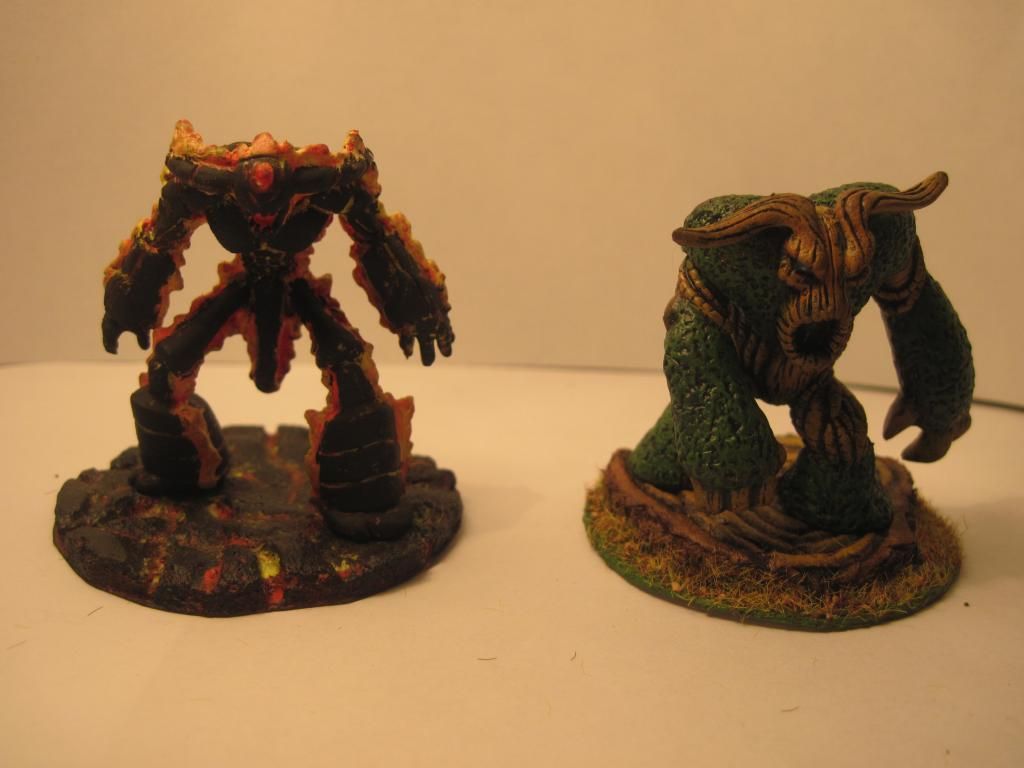 |
|
|
|
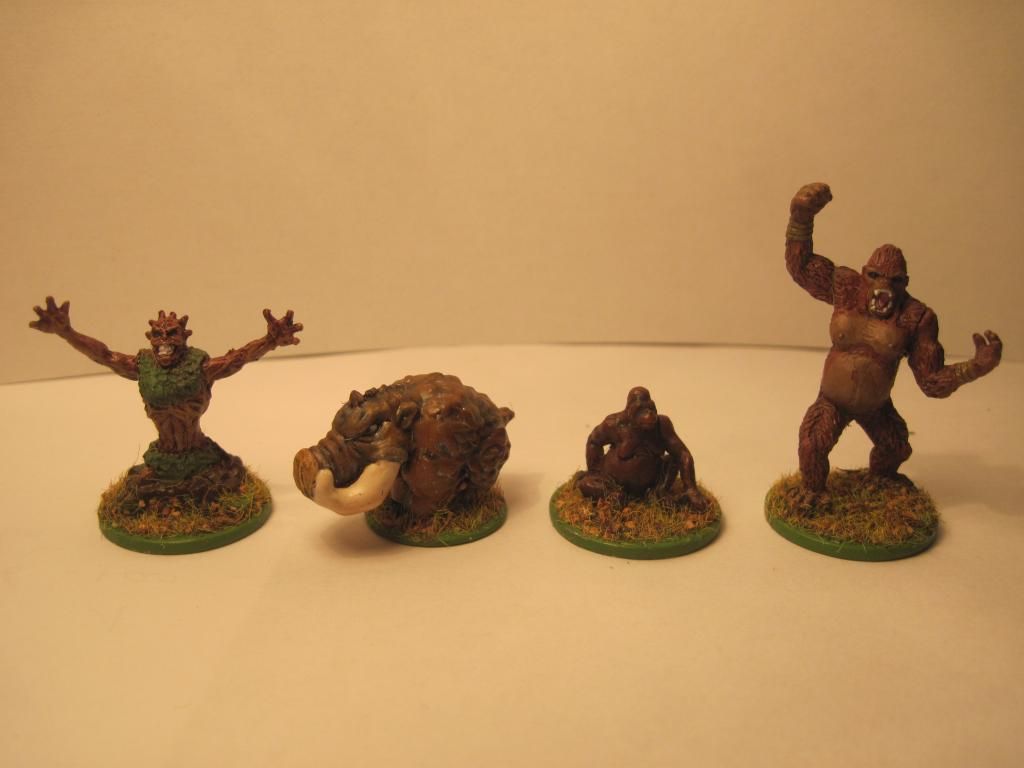
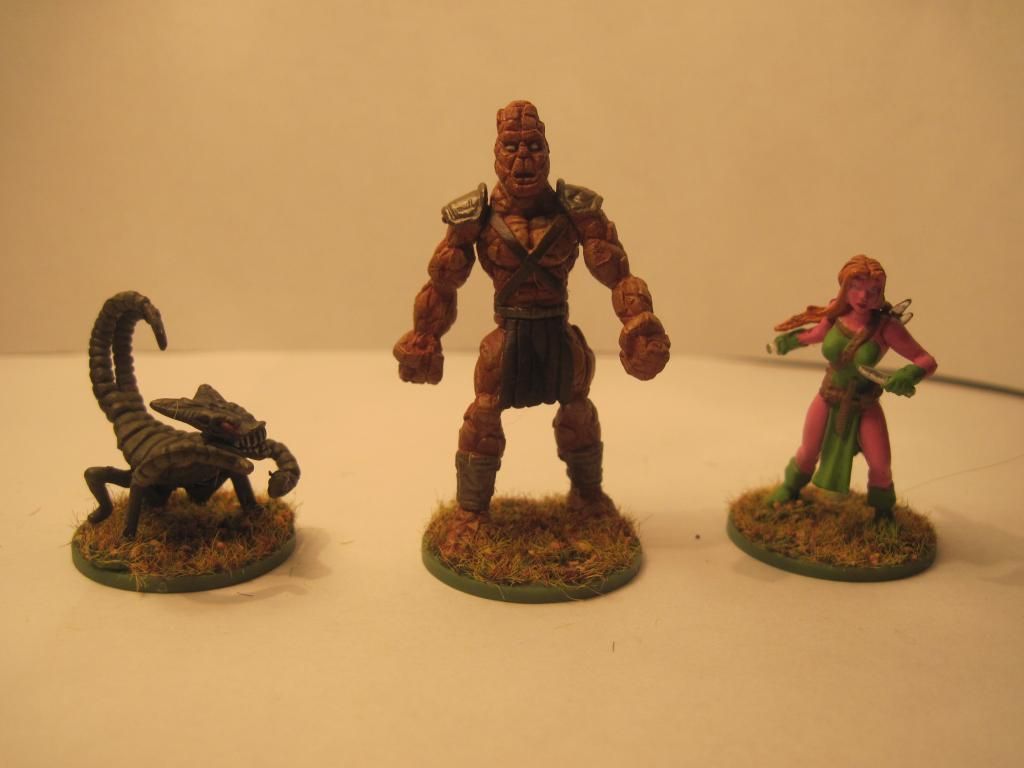
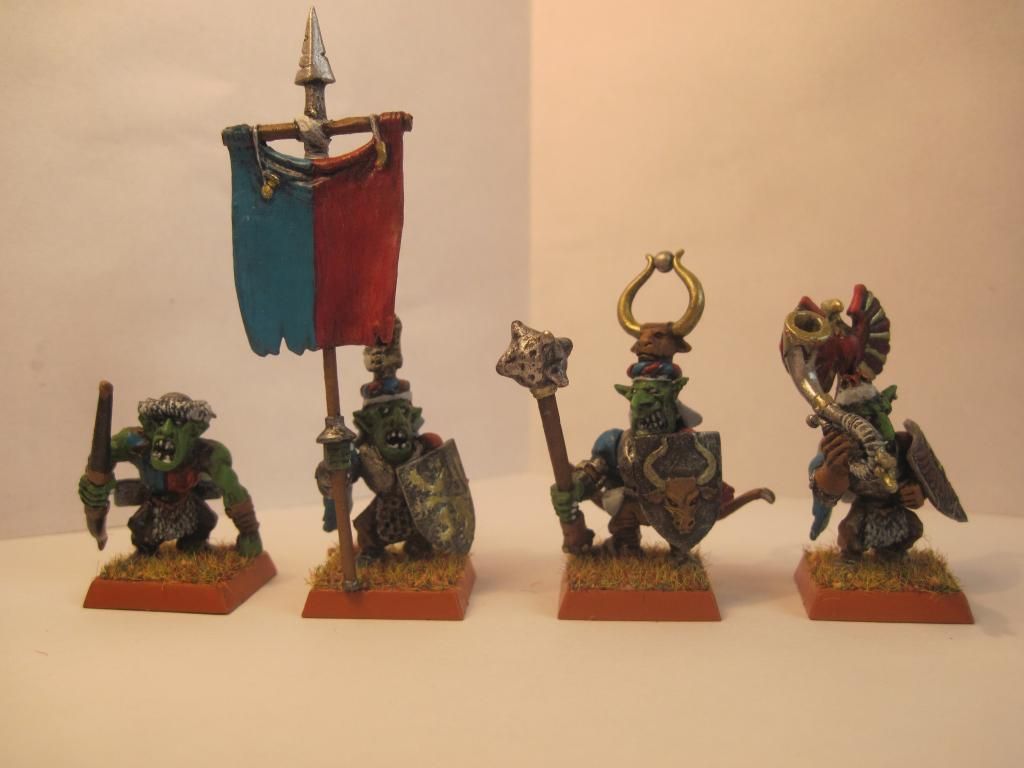
Post by The Brave on Nov 12, 2014 13:48:18 GMT
Gormiti's treeman. I really like this one, nice sculpt, nice price (1€), nice pose and easy to paint (only drybrush) 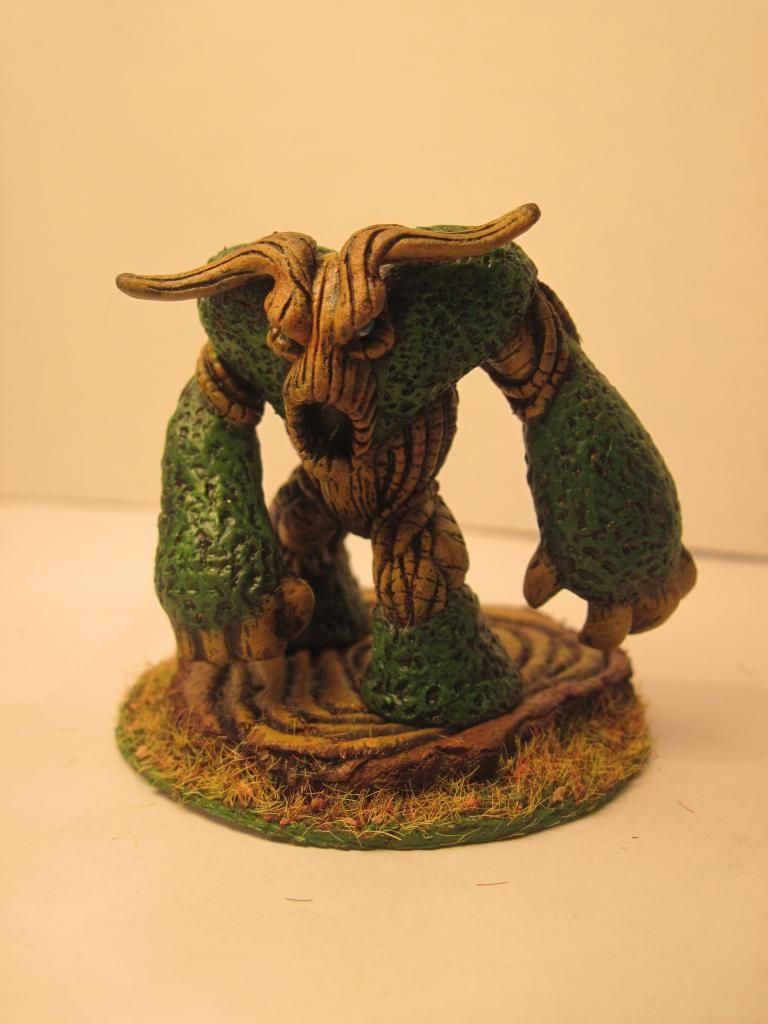 Full gallery here Full gallery here |
|
|
|
Post by The Brave on Nov 10, 2014 23:07:17 GMT
|
|
|
|
Post by The Brave on Nov 7, 2014 22:52:48 GMT
My last kitbash for a while, I finished the spare parts. For no known reason I had a old warhammer lizardman body in a drower, no head, no left arm, no weapons, only one shield. I took a warhammer goblin arm, removed the bow, add a spear made with a toothpick and some spare bits: the head for a toy dinosaur, some accessories and greenstuff. In the end it's your usual lizardman, but I'm really hapy with the result  Before 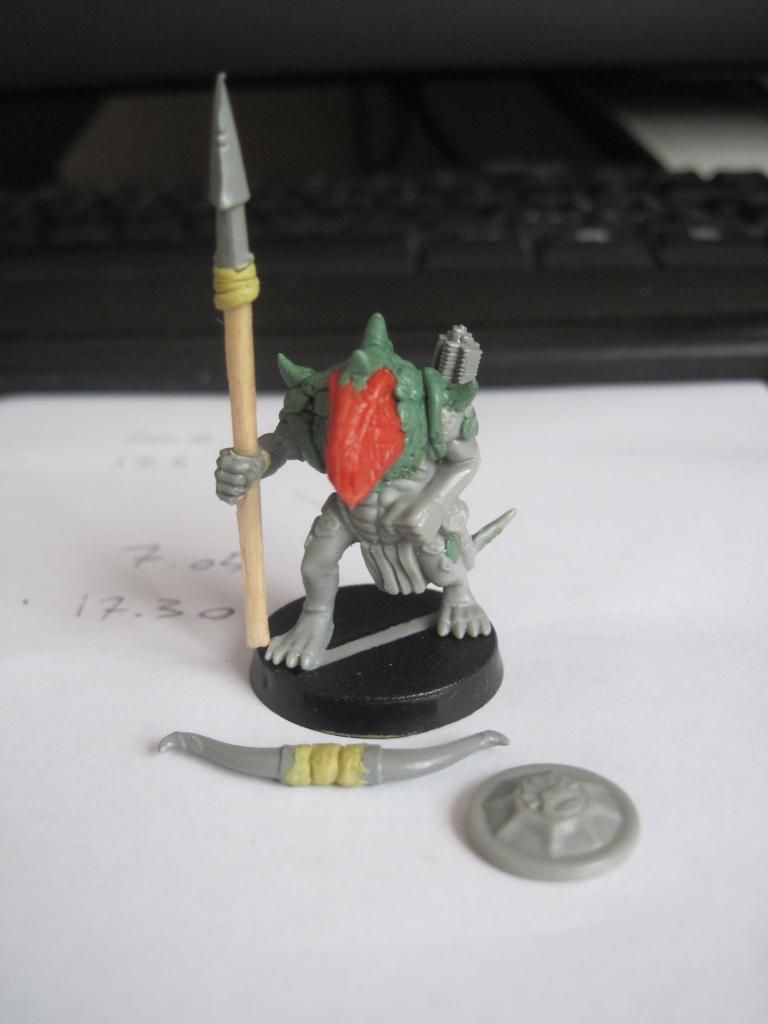 After 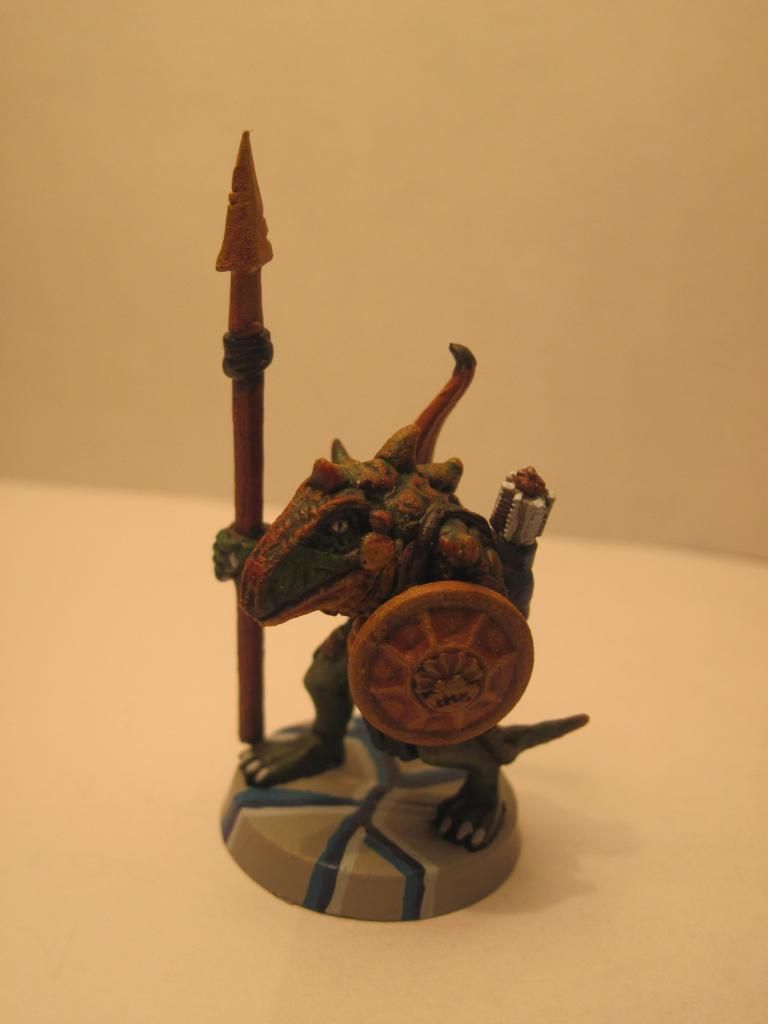 Full gallery here Full gallery here |
|
|
|
Post by The Brave on Nov 6, 2014 23:41:02 GMT
Clockwork horrors made with beads and random parts. 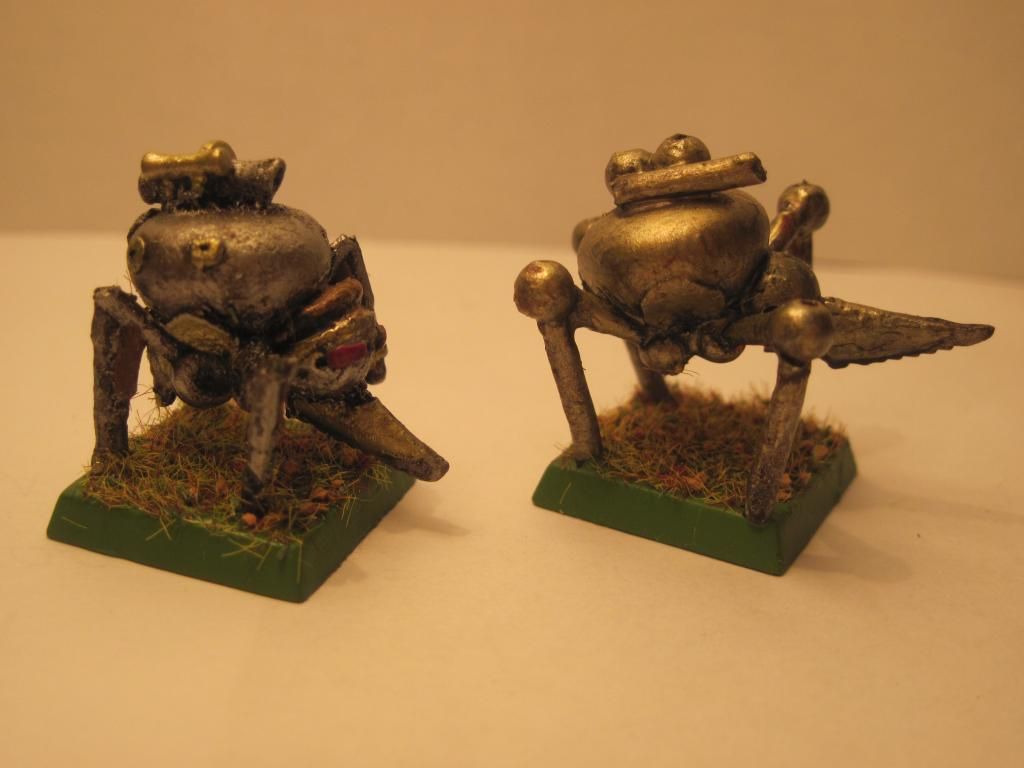 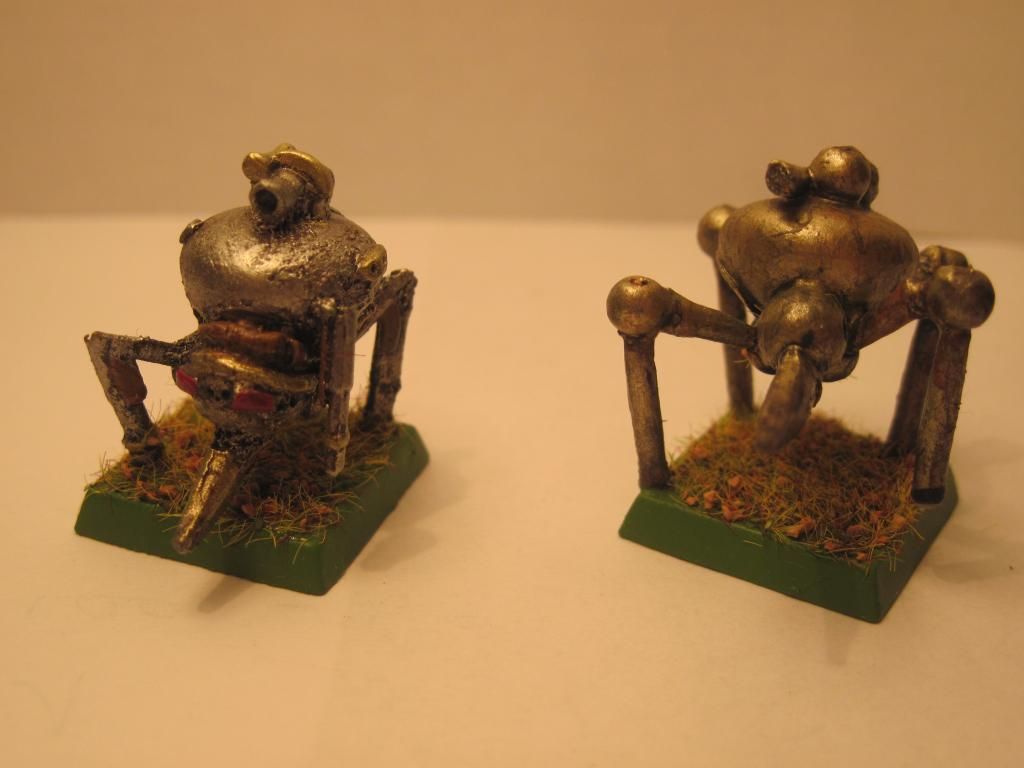 |
|
|
|
Post by The Brave on Nov 6, 2014 23:35:06 GMT
And this tecnique also works for bases. 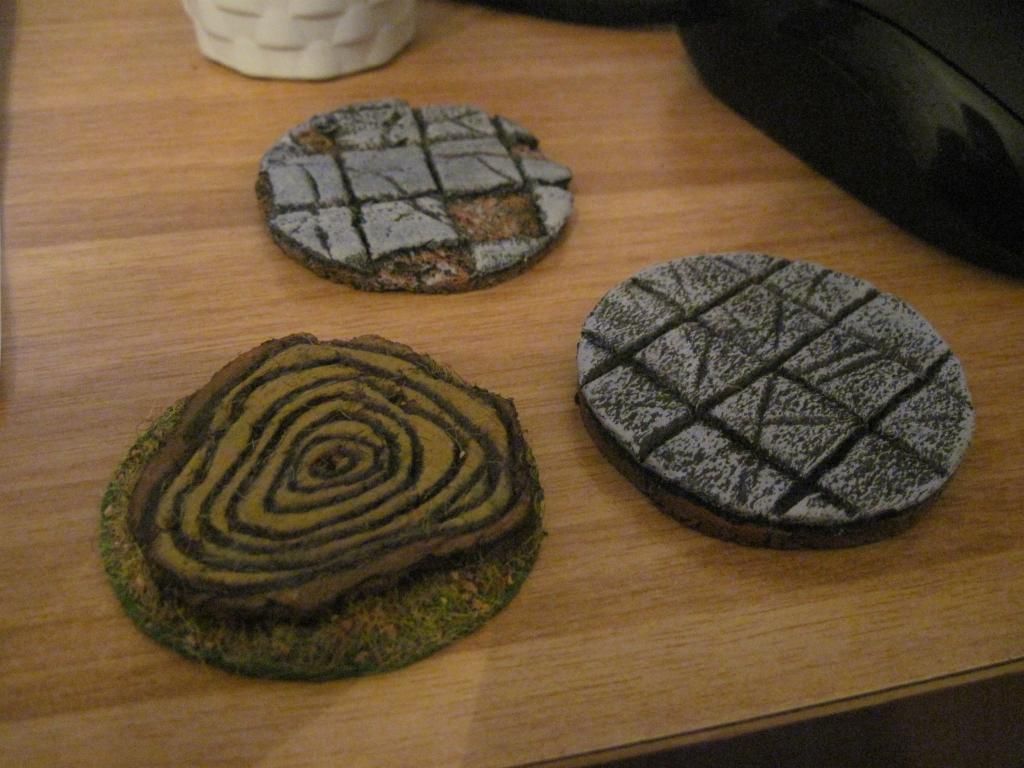 |
|
|
|
Post by The Brave on Nov 2, 2014 11:39:05 GMT
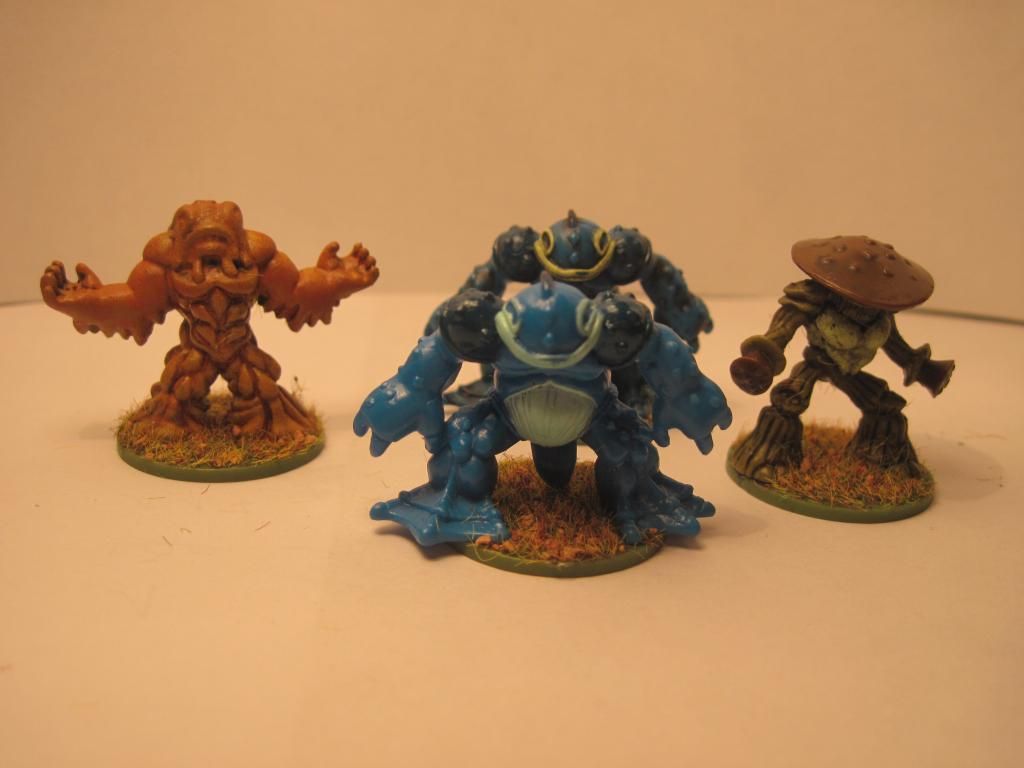
Some new cheap gormiti and heroclix, I found some Minigormiti that are perfect for medium size creature, in particular I love the little mushroom guy, it's the perfect myconid!  |
|
|
|
Post by The Brave on Oct 25, 2014 14:36:37 GMT
|
|
|
|
Post by The Brave on Oct 23, 2014 7:56:39 GMT
Goblin and bretonnia parts mixed together, and with these 4 dudes I finished to salvage my goblin heads and legs.  |
|
|
|
Post by The Brave on Oct 19, 2014 22:10:20 GMT
|
|
|
|
Post by The Brave on Oct 19, 2014 7:55:22 GMT
Exactly, just dark brown, then drybrush a lighter brown, then I use the pen for details.
|
|
|
|
Post by The Brave on Oct 18, 2014 16:12:50 GMT
Time to kitbash some stuff, I found some skeltons and goblins pieces (15 years old) so... zombie goblins. Full gallery here. |
|
|
|
Post by The Brave on Oct 18, 2014 15:59:54 GMT
Also boxes! 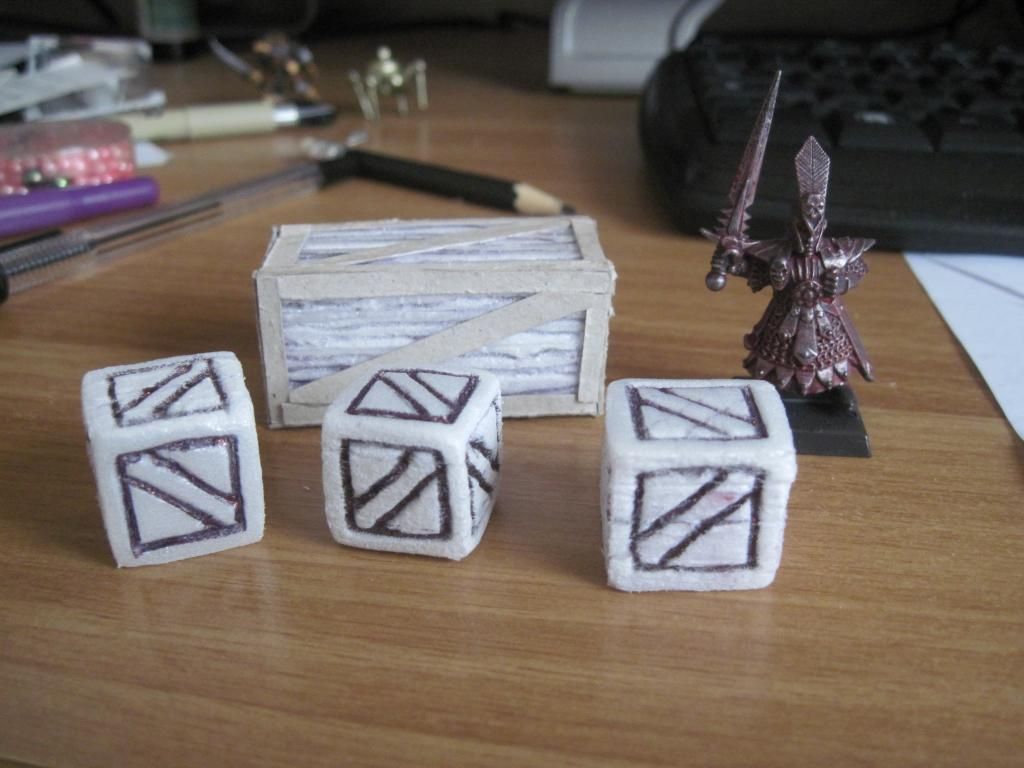 |
|
|
|
Post by The Brave on Oct 9, 2014 16:27:53 GMT
Kitbash a goblin with a toy turtle.
|
|
|
|
Post by The Brave on Sept 28, 2014 22:14:08 GMT
Amazin
|
|
|
|
Post by The Brave on Sept 28, 2014 21:56:23 GMT
Here my tecnique to make chests and other containers. This chest will be our model. 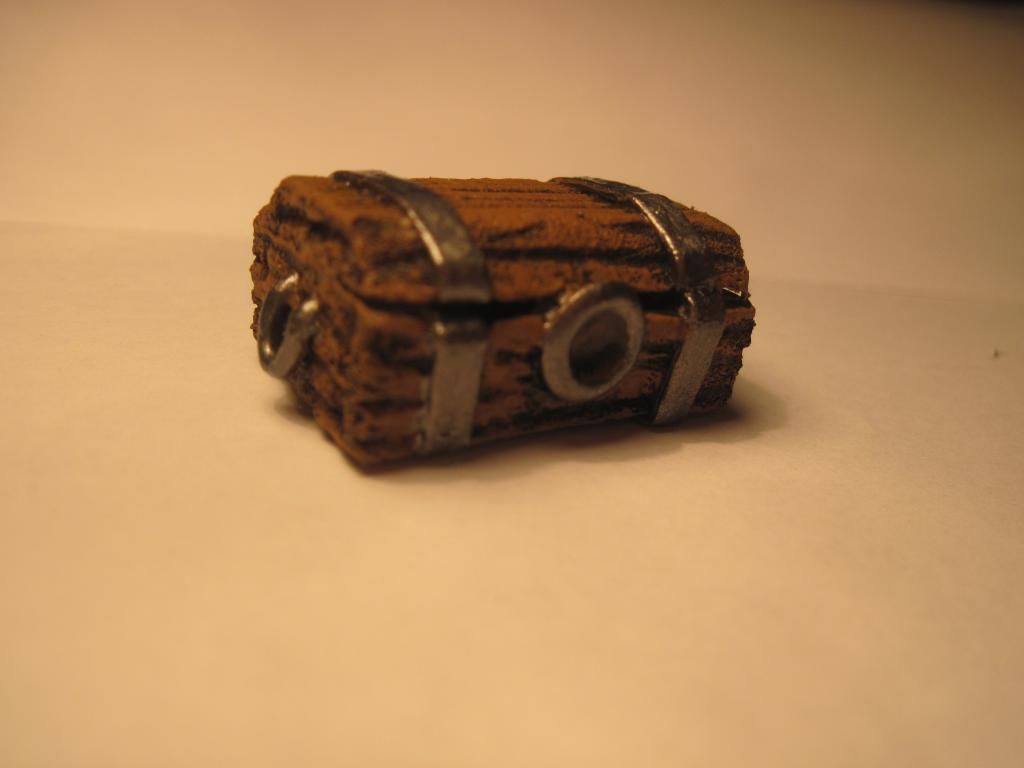 First of all the material, you mostly need one of these polystyrene food container. Any type of polystyrene is good enough, but let's be cheap  Cut 3 or 4 rectangular pieces, 3 cm x 2 cm. If you want to make a bigger chest, simply cut bigger shapes. Then glue them togeter, I use simple whie glue, please remember that some glues can melt the polystyrene, so, watch out and try before. 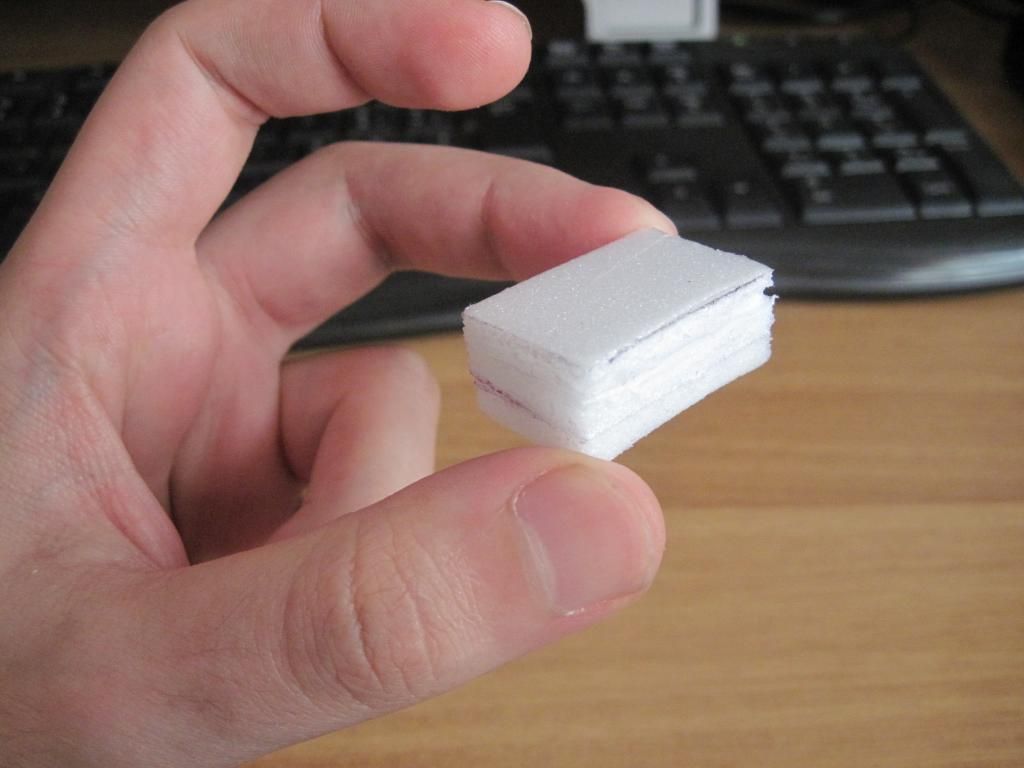 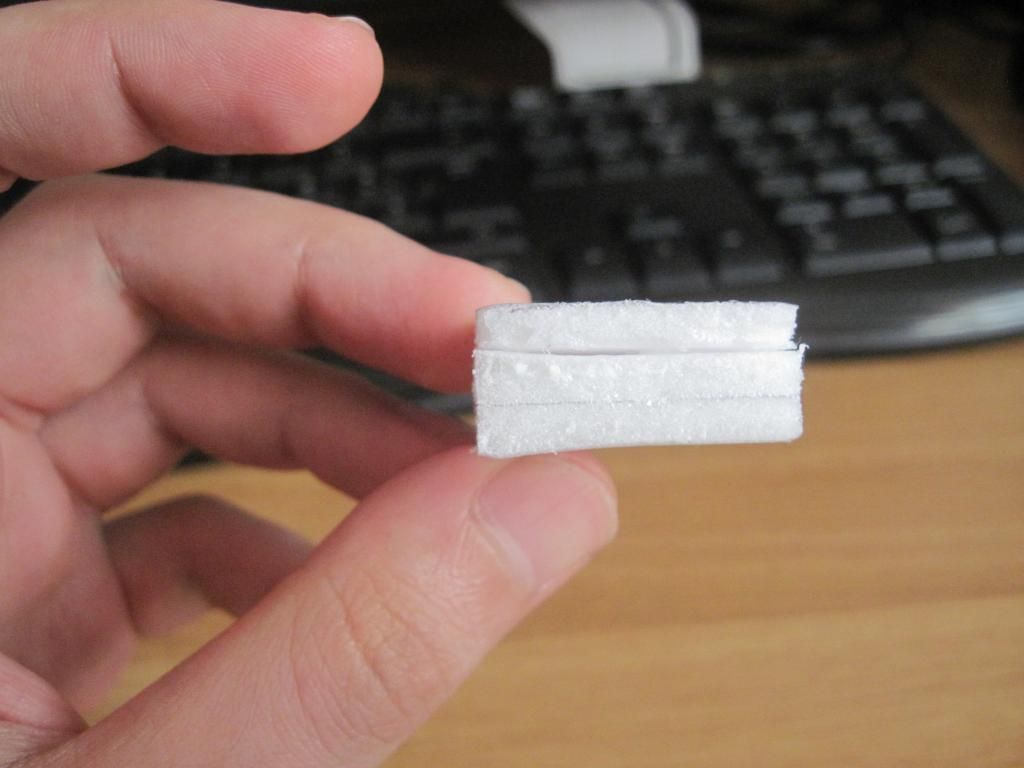 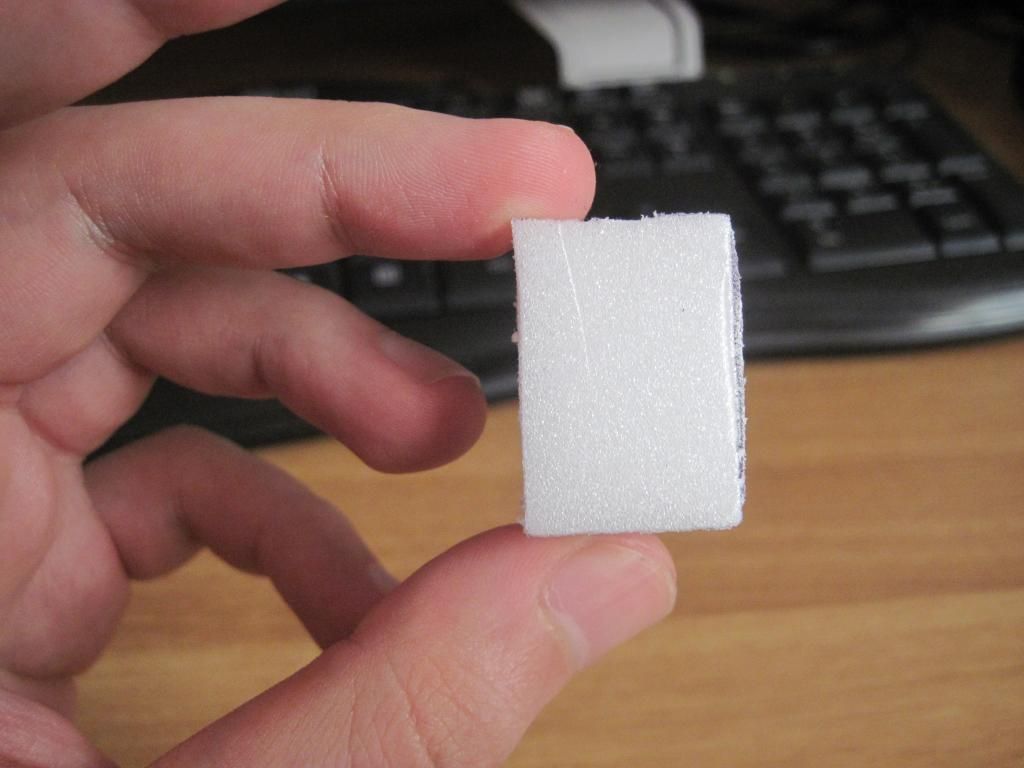 Now we start to cut the edges to give the shape we want. This one will be a closed chest, so we only need to make the top rounder. If you want you can cut the base too, it all depends of the design you have mind. 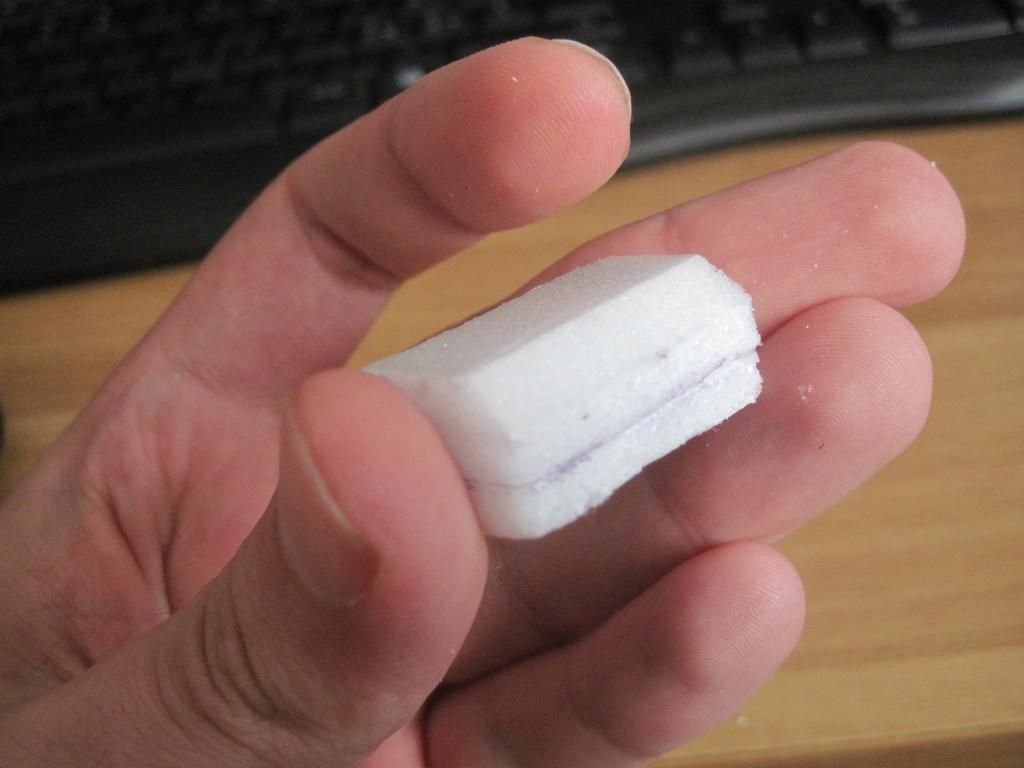 Now the funny part, take a pen and star drawing the texture, be rough! 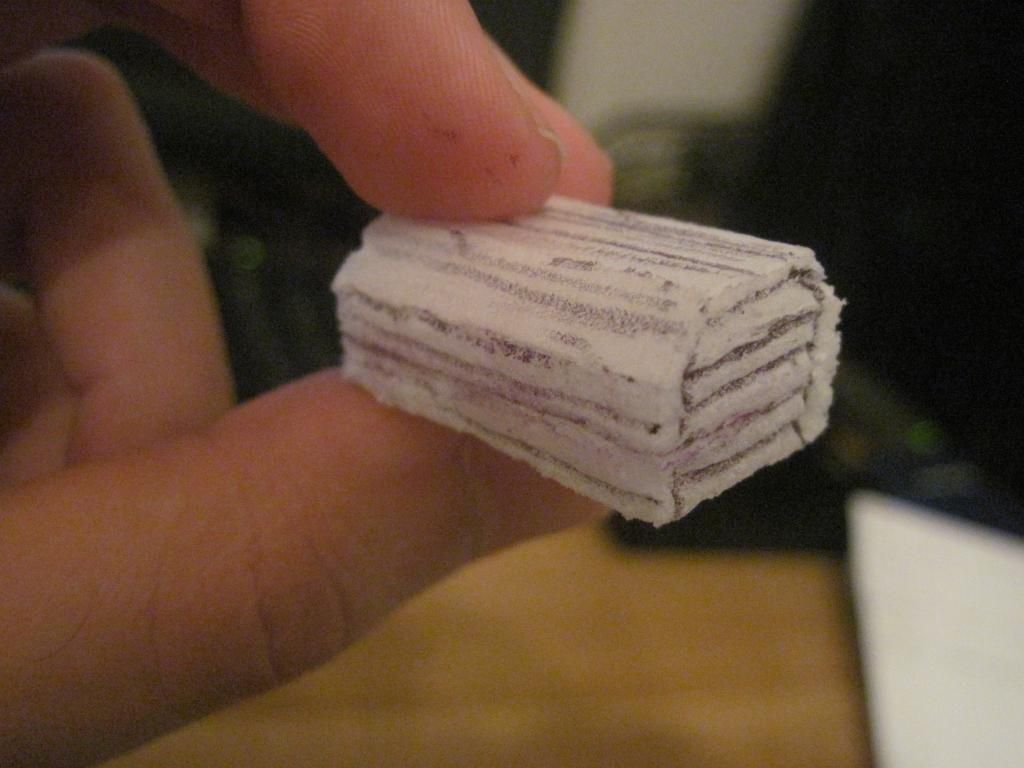 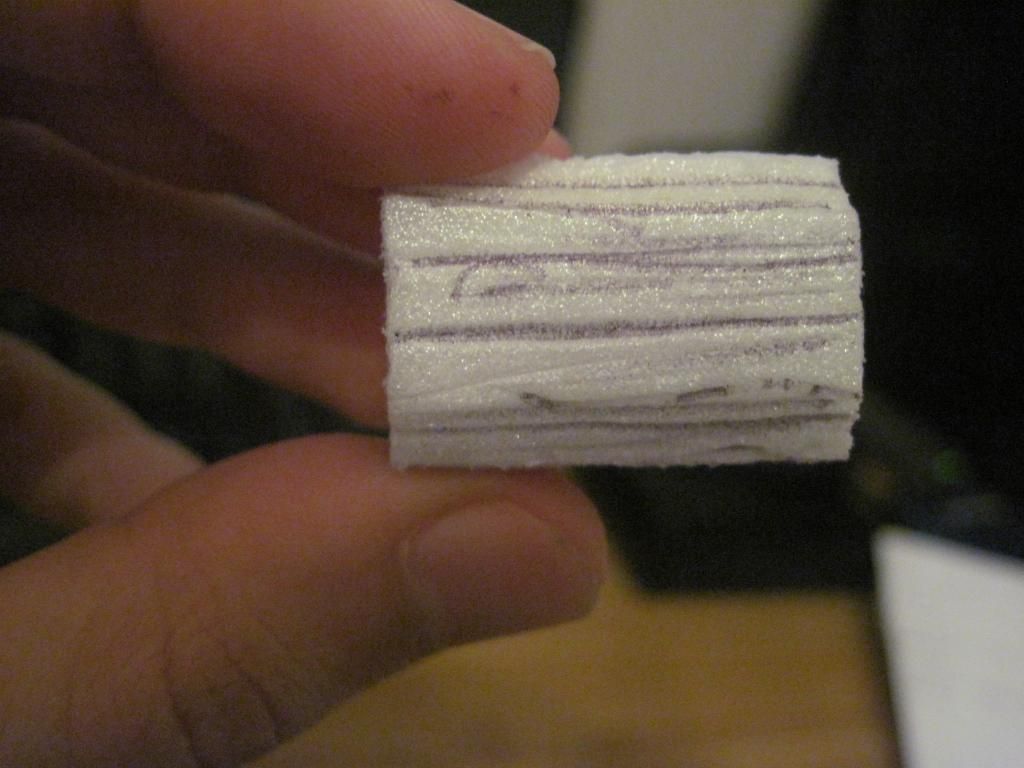 Now cut a 2mm wide string from a cereal box and glue it around the chest. (you can not make this passage if you want to carve the metal bands with the pen) 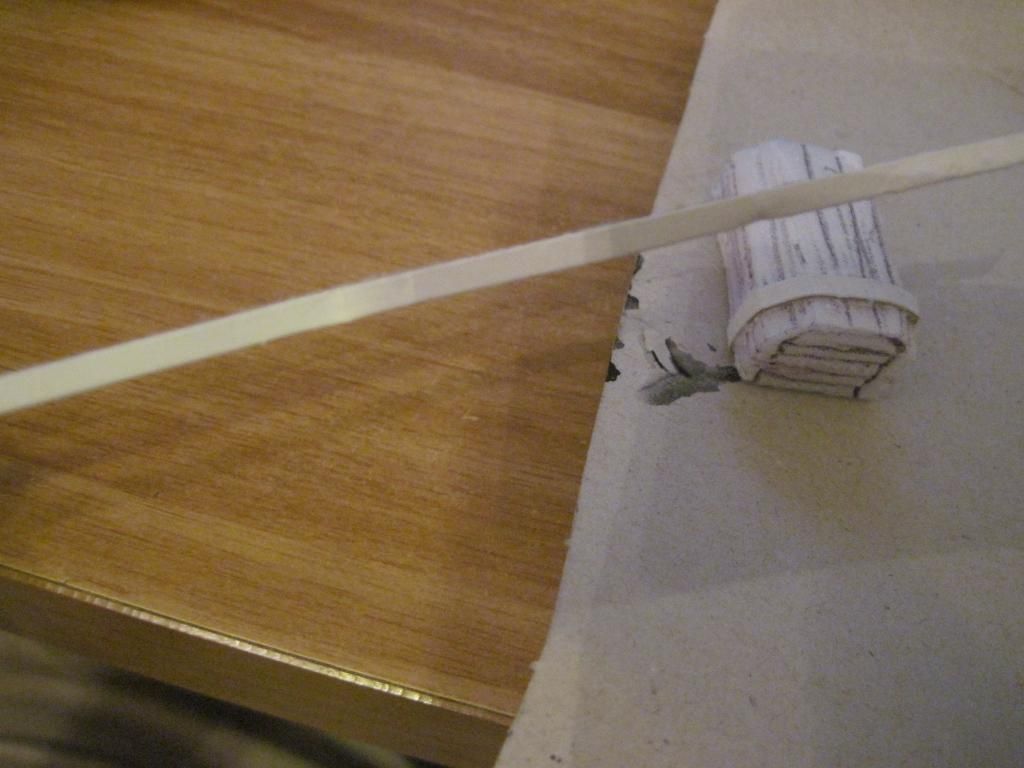 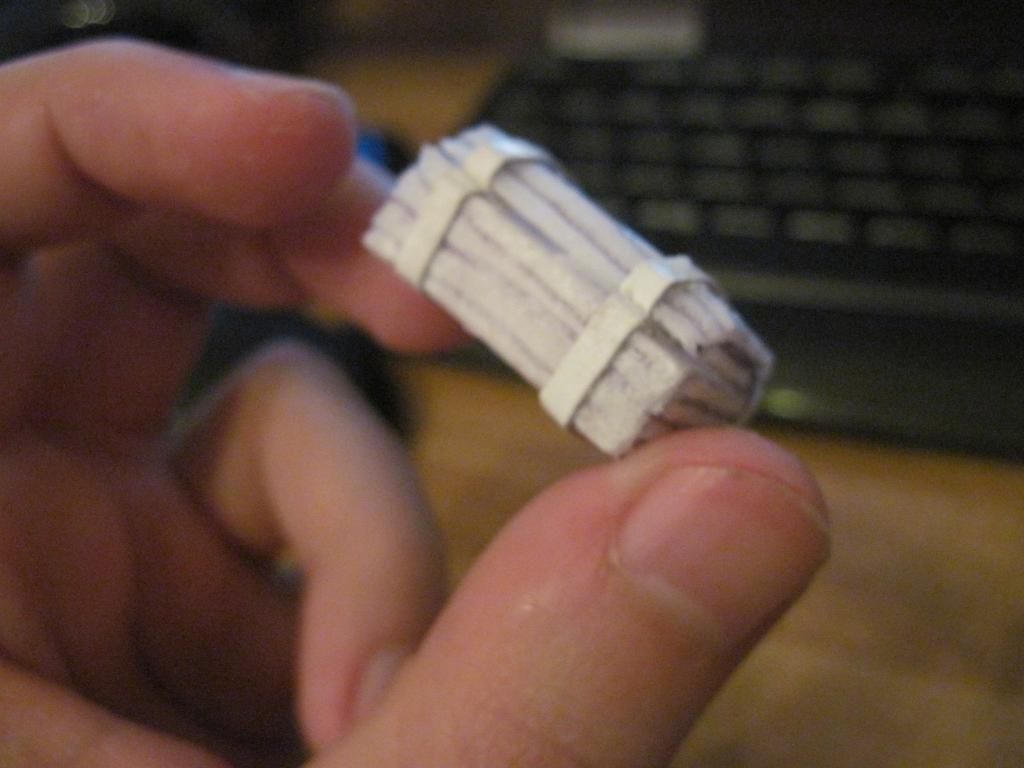 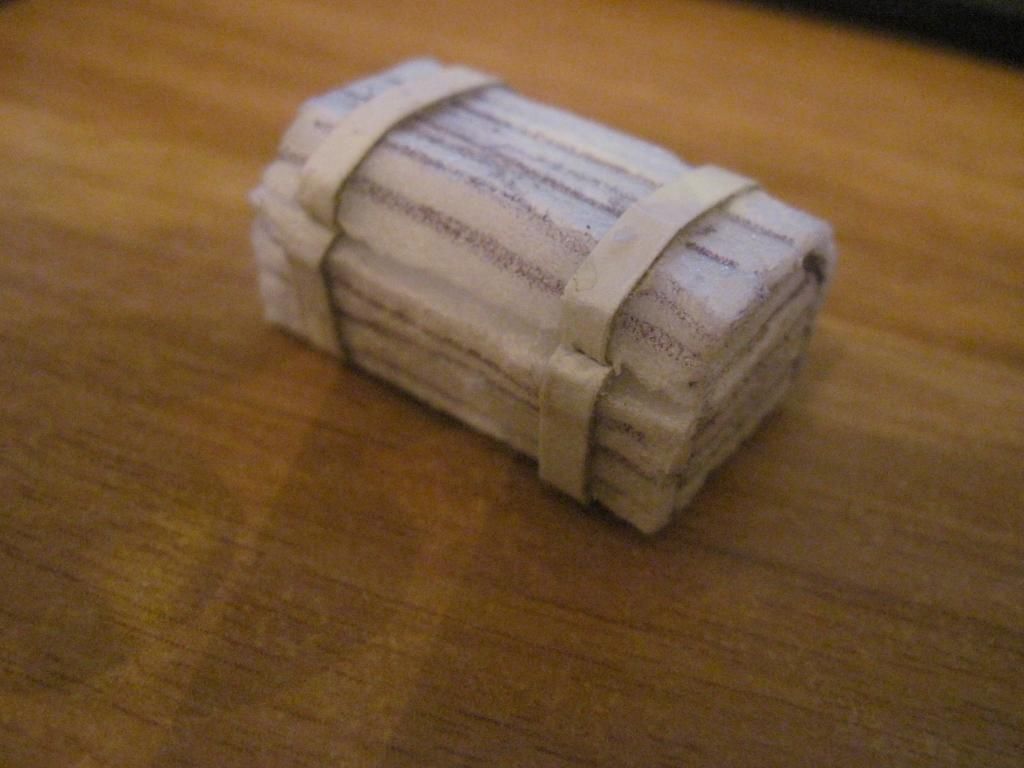 Now you can add the details, I used a bead for the lock and some wires for the handles, but you can use a cutted toothpick or some spare parts. 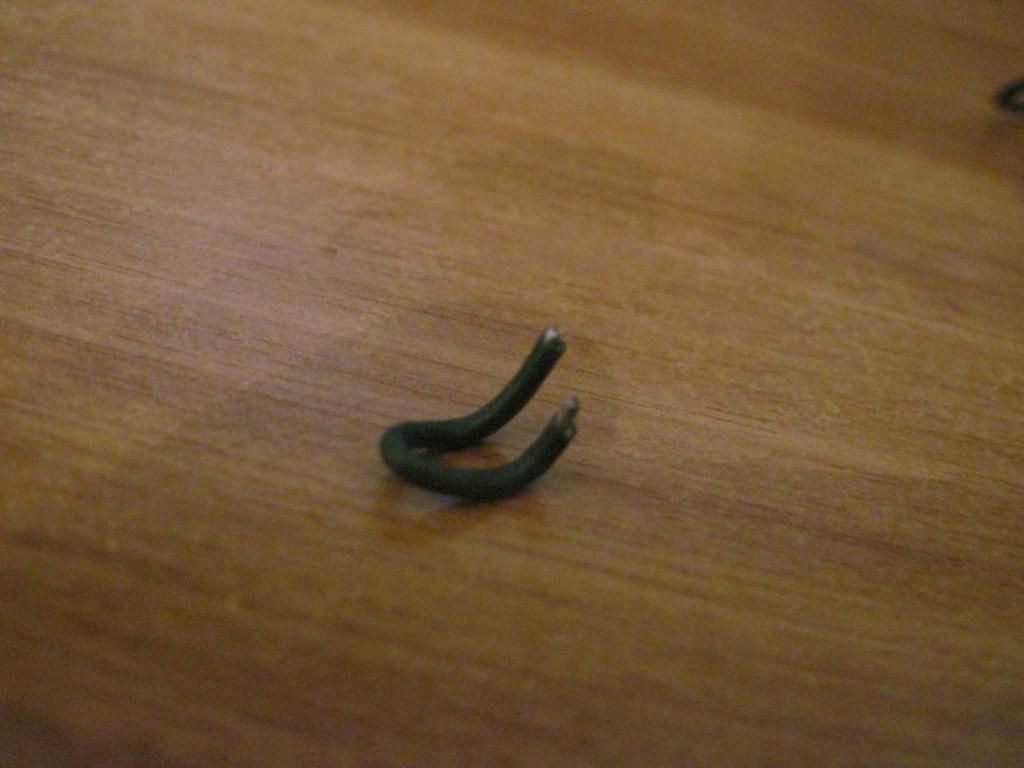 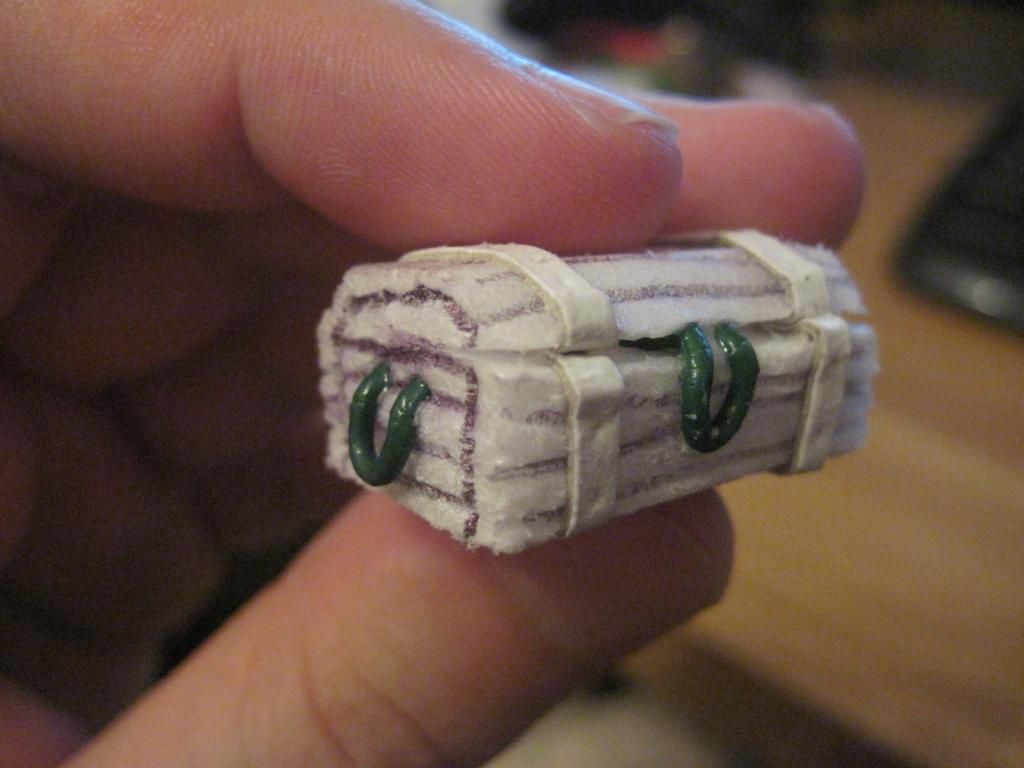 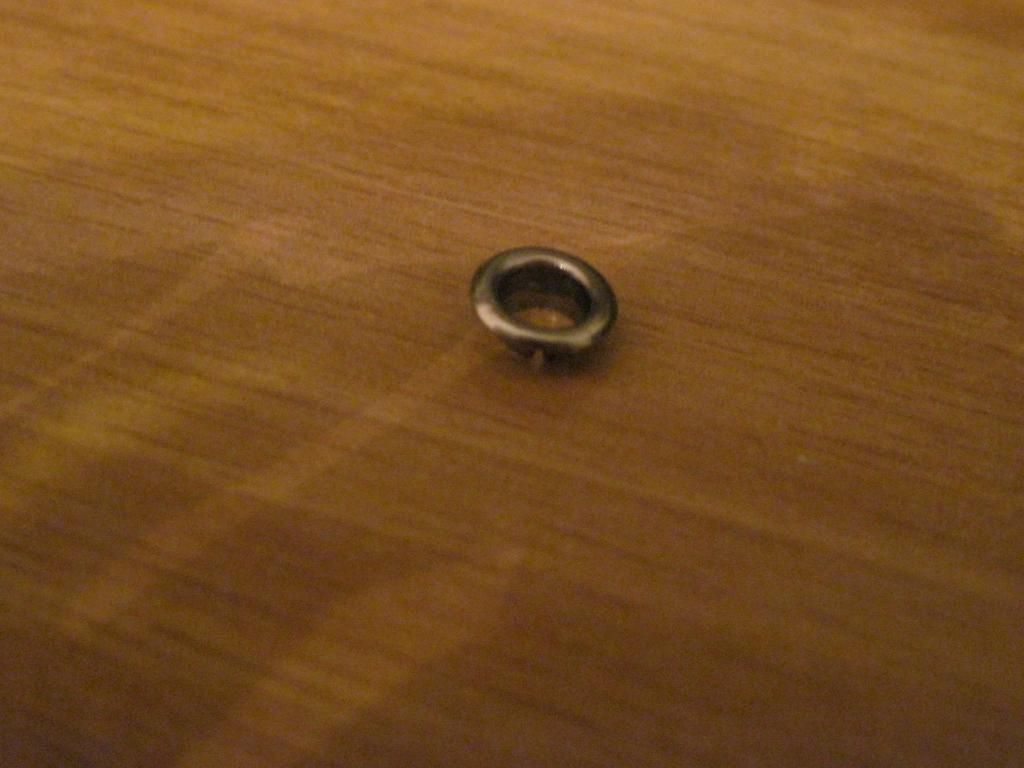 Now time to paint it. 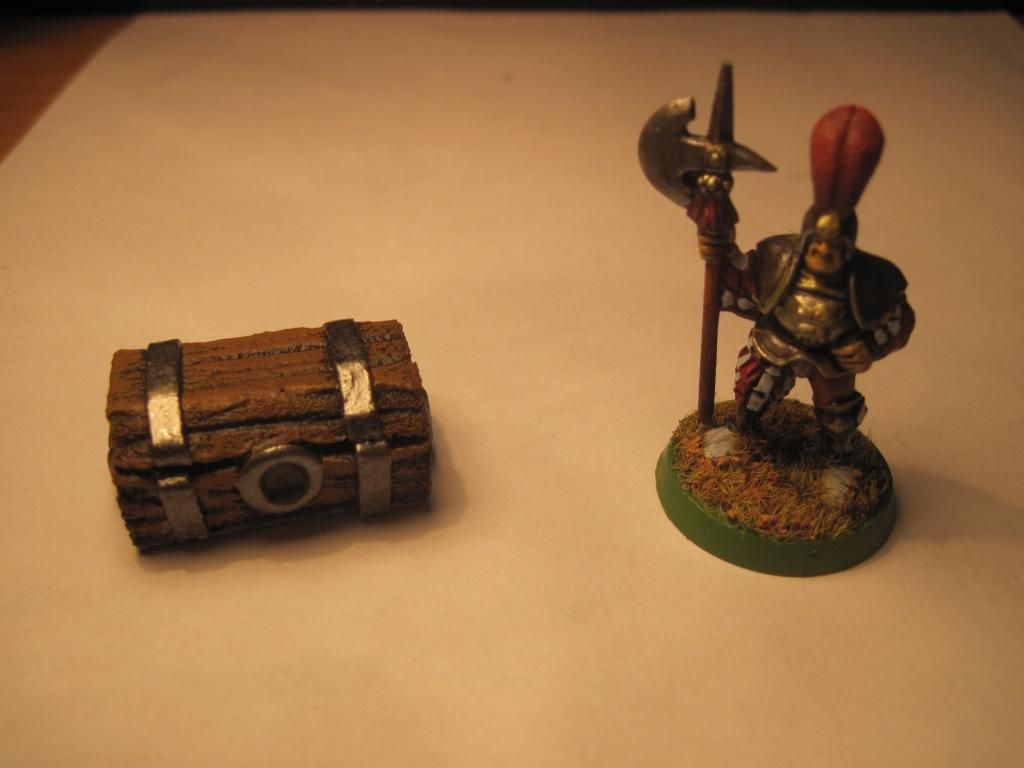 A quick tip, after you painted it, you can use a pen to bring that wooden texture out. 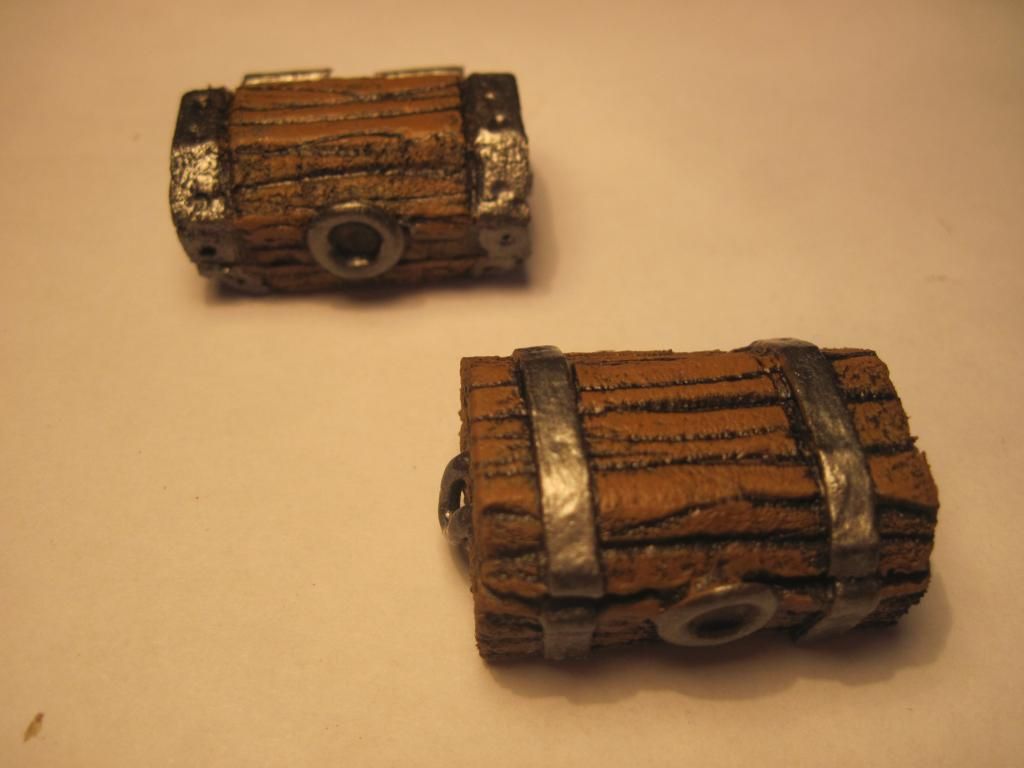 "And if I want to make an openchest?" It's really simple, cut 2 rectangles, then cut 2 more, but with a large square hole in the centre (basically cut a rectangular frame). Glue the rectangles with the frames. One set will be the container, the other one the top. Then shape and color it, then find something cool to put in. 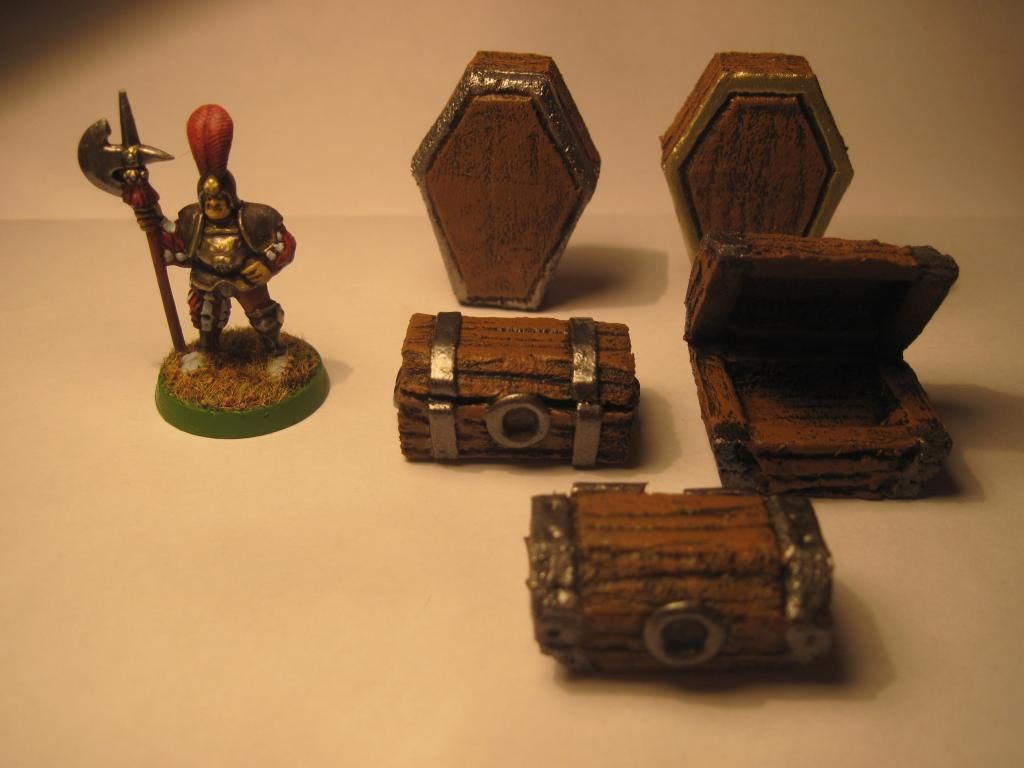 You can make any wooden or stone container with this tecnique. Here some examples. 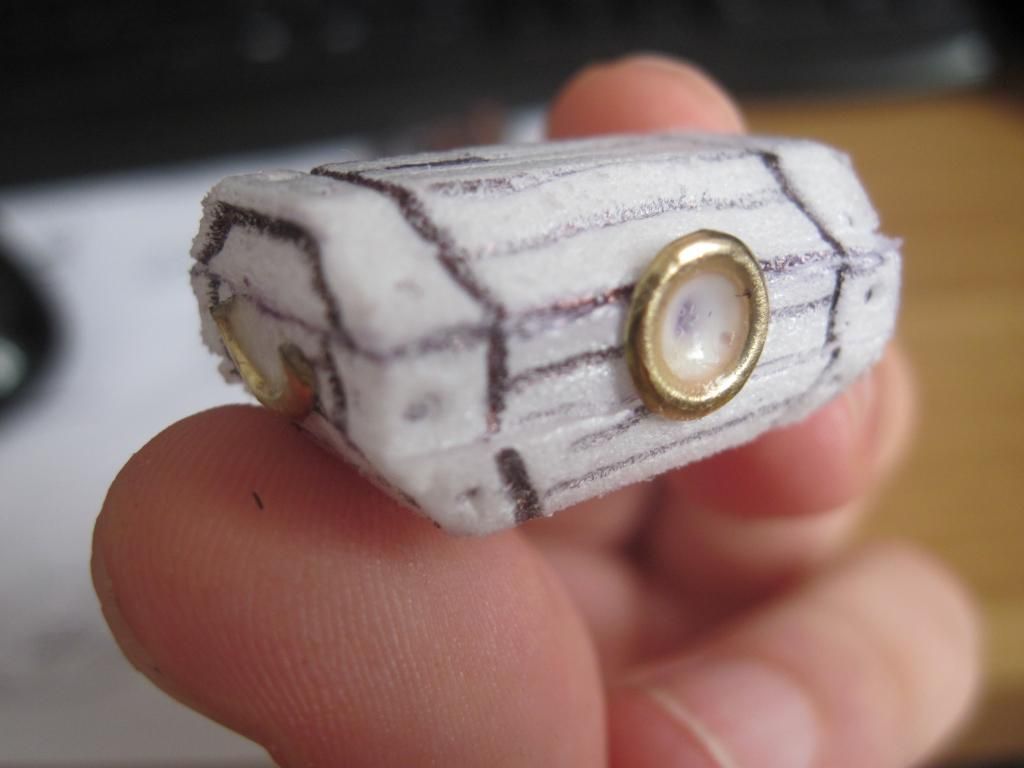 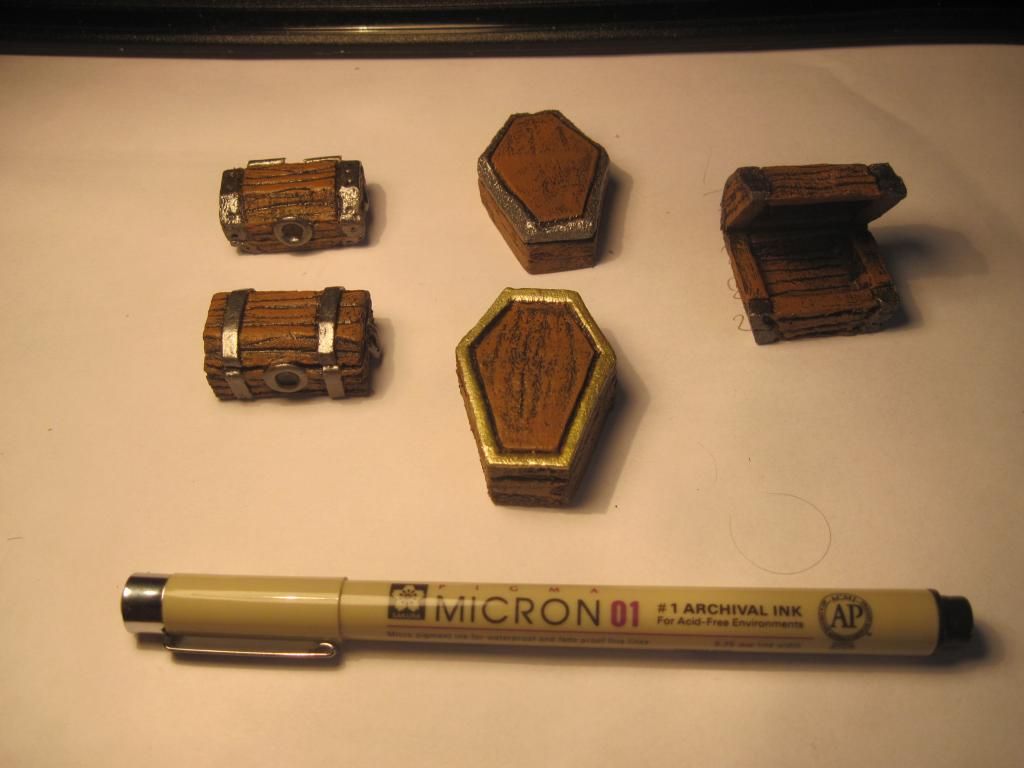 Full gallery here Full gallery here |
|
|
|
Post by The Brave on Sept 28, 2014 9:50:35 GMT
|
|


 Cheers!
 Cheers!