|
|
Post by thelibraryghost on Jun 8, 2019 17:19:28 GMT
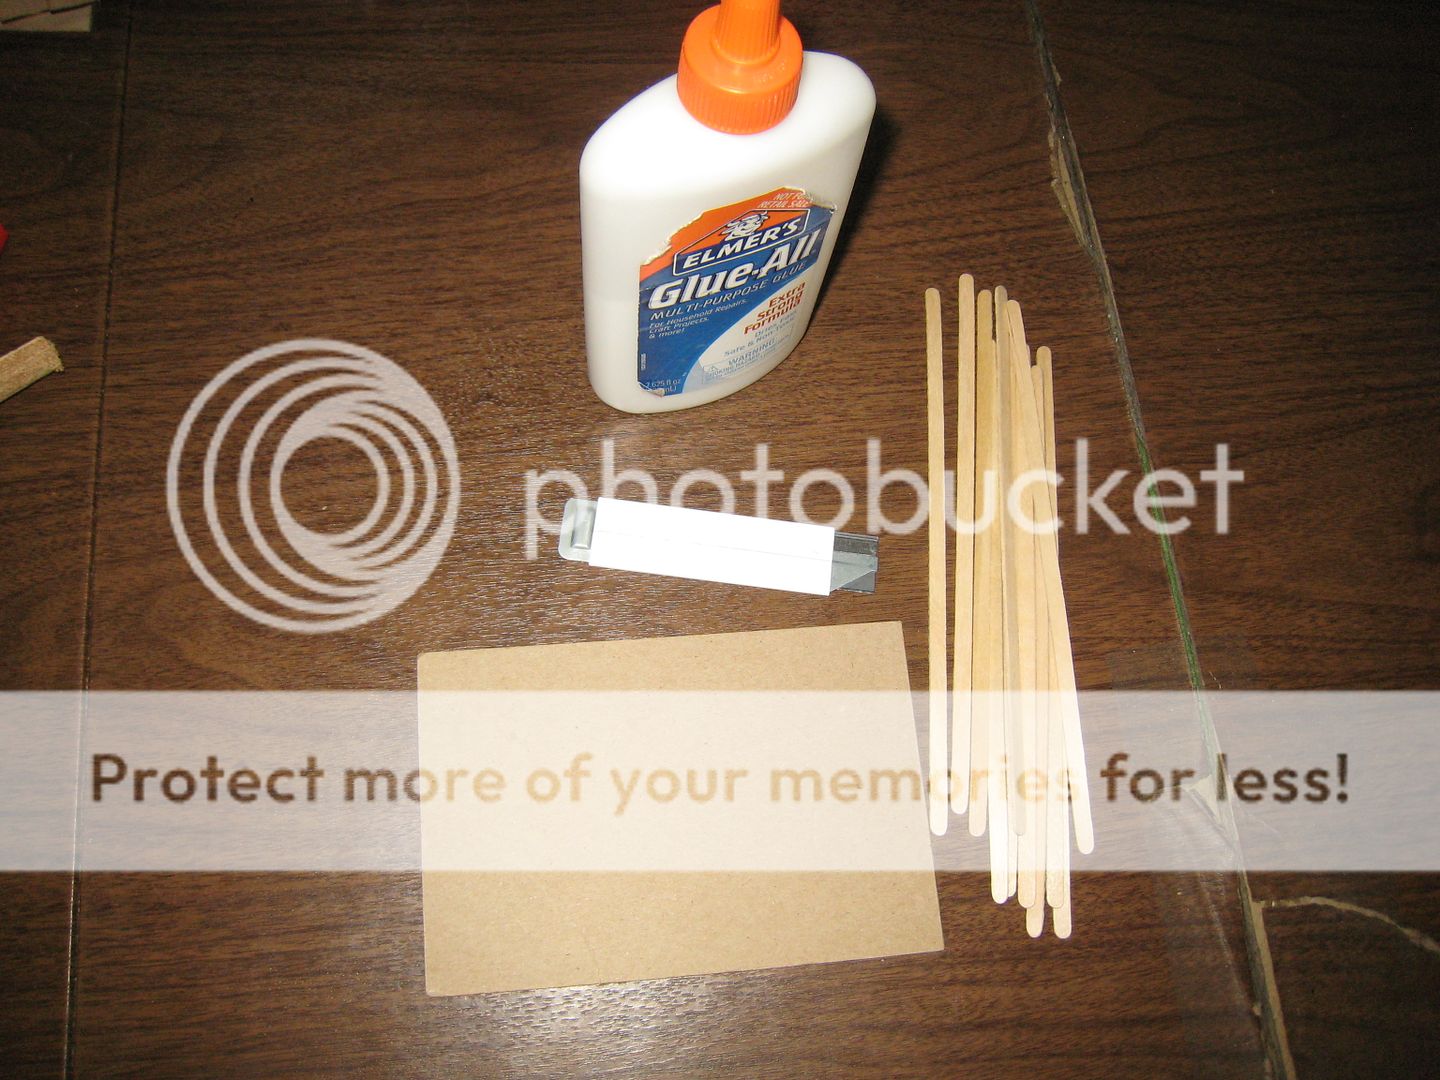
This is my very first time making my own terrain. I'm very excited to share my progress, and will probably mostly sometimes remember to take pictures. To begin, I tried making some modular wooden floor tiles. As the base, I used the cardboard backs from those 4"x6" memo pads, as well as wooden coffee stirrers for the boards.
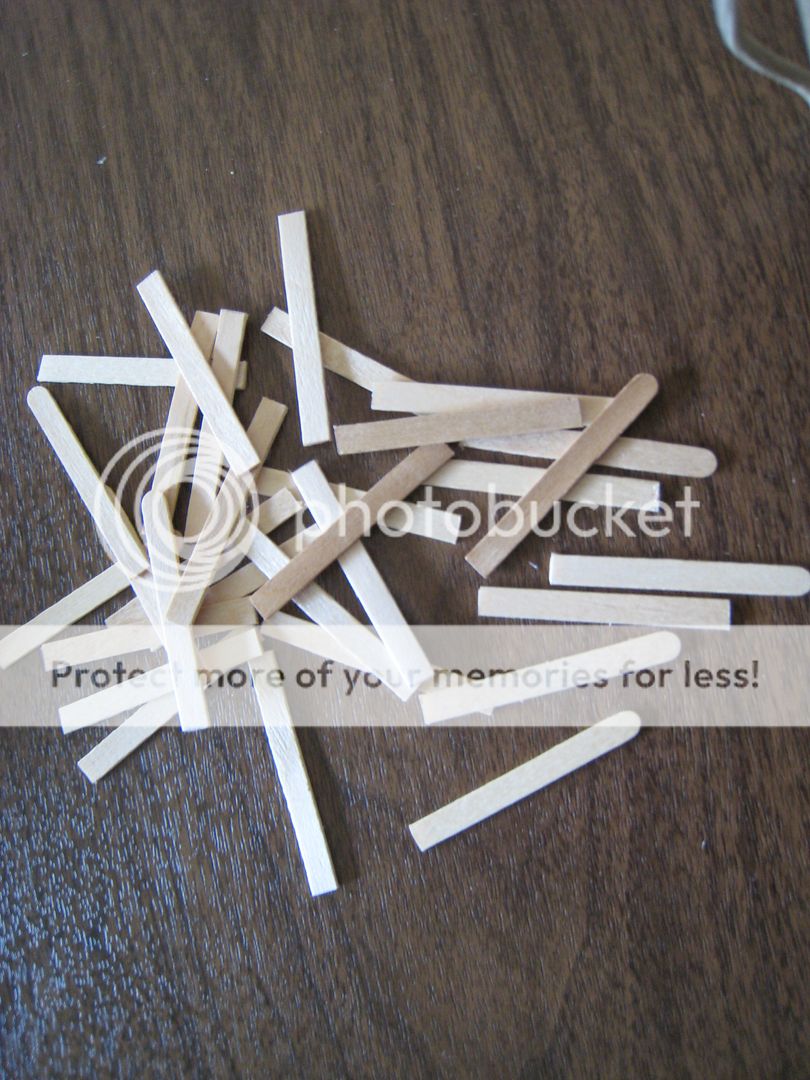
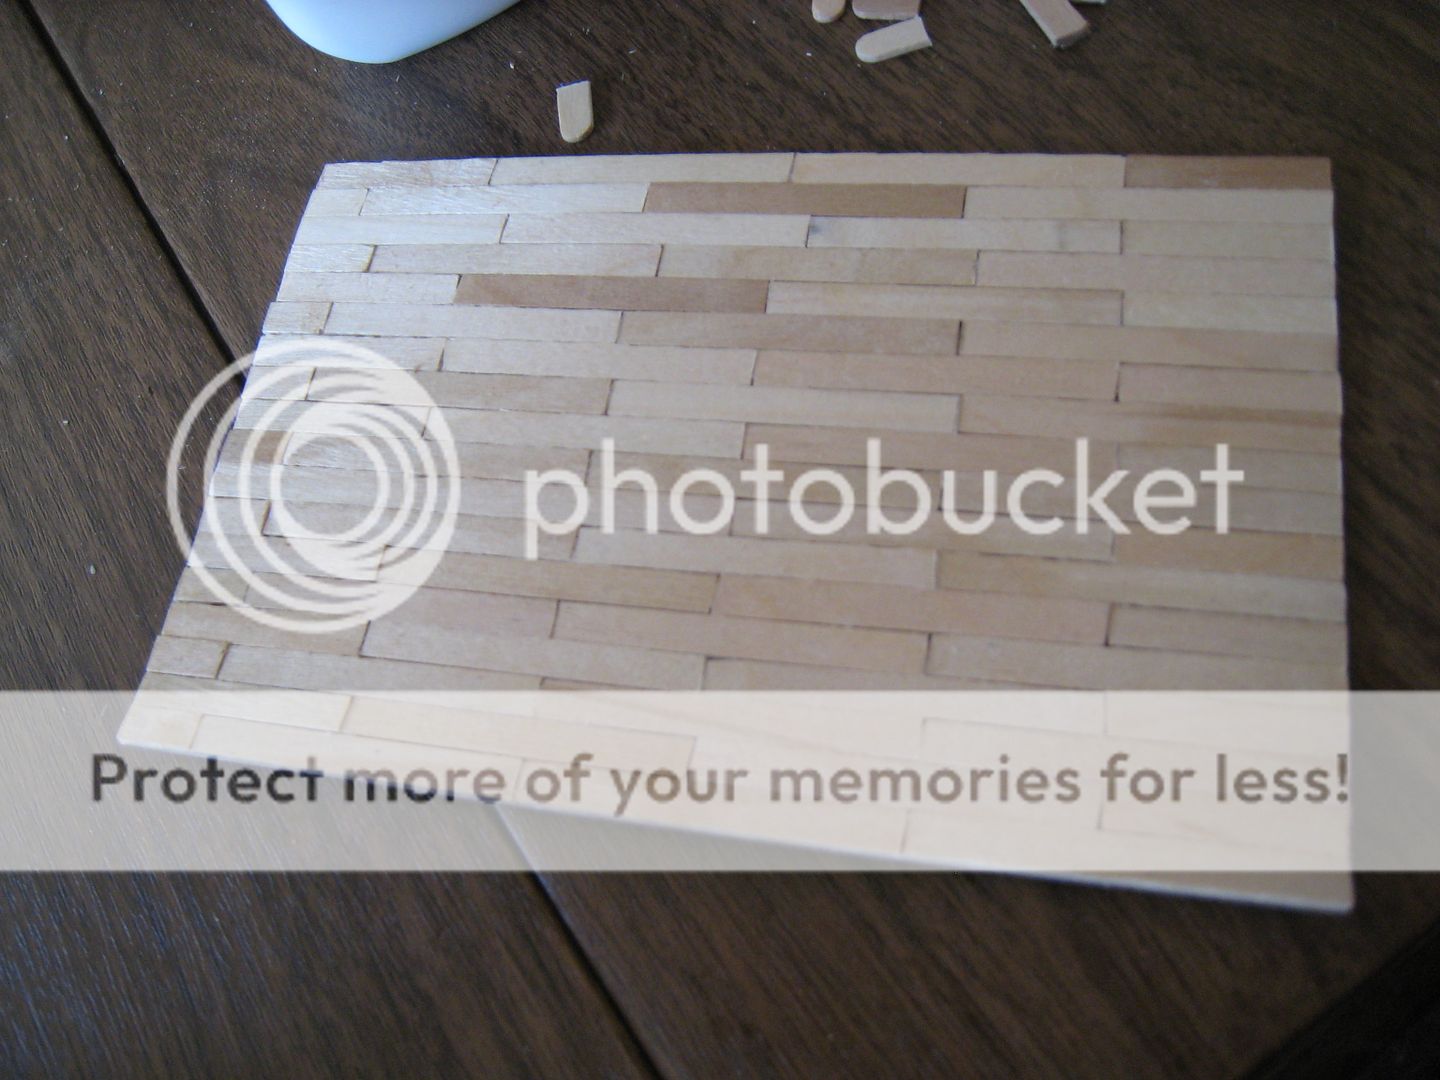
Then I cut the coffee stirrers in half. Mine were 19 cm, so I marked the midpoint at 9.5 cm with pencil and slowly, laboriously cut them with the box cutter. Kitchen shears would seem like the better choice, but they lead to splintering, so I'm avoiding them. I cut them in half again (4.75 cm); as you can see, some have rounded tips. These will be the edge pieces, and will be cut after gluing. It's difficult to see in this photo, but I picked a point about an inch from the edge and drew a straight line across in pencil. This way I can consistently offset the boards, as in a real wooden floor. I laid the square-tipped pieces flush with the edge, using PVA glue, and used the round-tipped pieces for the offset boards, as well as the small pieces at the end of each row. I forgot at first that the glue would soak into the cardboard and cause it to curl, so I had to place something heavy on it all night to flatten it out again! But I wouldn't use hot glue for this, nor wood glue. The idea behind these was that you can slap a bunch of these cardboard pieces on the table for various-sized rooms or hallways. I plan to do sand, dirt, and grass tiles on larger cardboard—the kind that backs 8.5"x11" notepads—and I will post pictures of my progress here. I also have a bunch of mosaic tiles to use up, but I'll probably have to cement those together in some kind of tray, so any advice would be much appreciated!
|
|
|
|
Post by margaret on Jun 8, 2019 19:55:56 GMT
Welcome to the forum and thanks for sharing your work!
You should have a nice-looking wood floor when you are done. If double-layered corrugated cardboard is not an option for you [it would warp less], you might see if you can find a heavier notepad backing. In the USA anyway, some notepads come with a heavier, denser chipboard backing that warps less than the thinner stuff. Spiralbound notebooks often have this denser stuff as a back cover.
|
|
|
|
Post by thelibraryghost on Jun 8, 2019 20:06:23 GMT
Welcome to the forum and thanks for sharing your work! You should have a nice-looking wood floor when you are done. If double-layered corrugated cardboard is not an option for you [it would warp less], you might see if you can find a heavier notepad backing. In the USA anyway, some notepads come with a heavier, denser chipboard backing that warps less than the thinner stuff. Spiralbound notebooks often have this denser stuff as a back cover. Ah! Thank you for the advice  I can probably find some of those lying about. |
|
|
|
Post by thelibraryghost on Jun 12, 2019 23:04:20 GMT
Updating my progress...
It's almost complete!
And here it is after trimming.
I also made a second one (still needs trimming) and am starting on a third.
Hopefully I can finish these in the evenings and start working on set pieces by the weekend!
|
|
|
|
Post by erho on Jun 18, 2019 12:41:53 GMT
Great start!
Be sure to glue it down to something more thick to avoid warping
|
|
|
|
Post by thelibraryghost on Sept 8, 2019 20:18:38 GMT
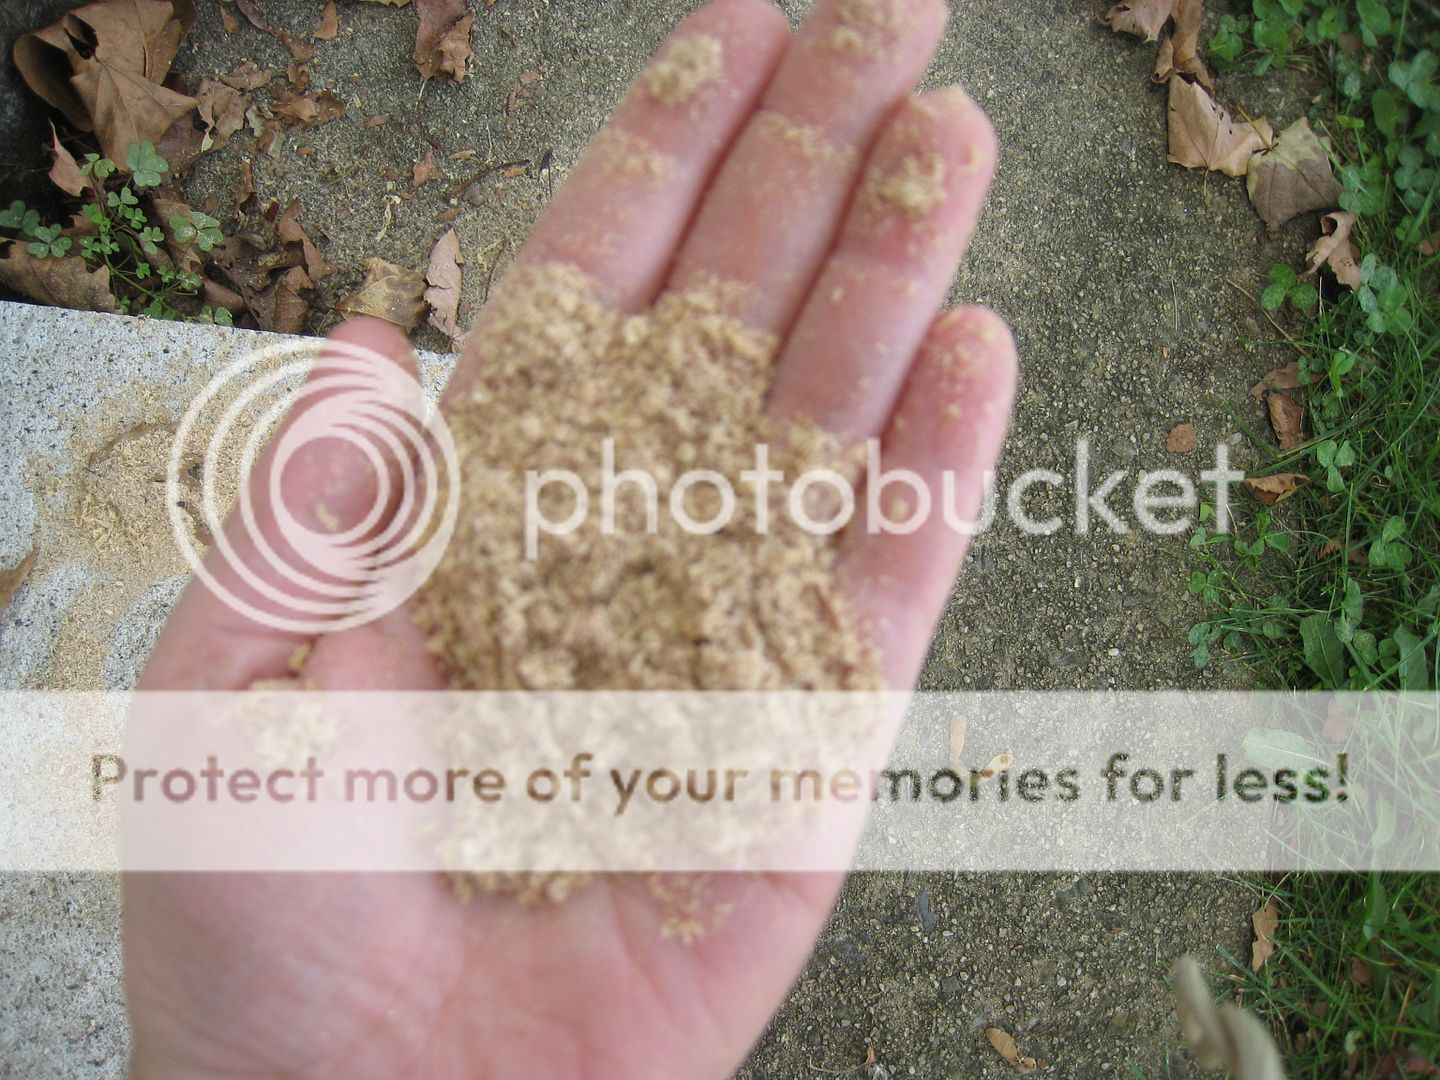
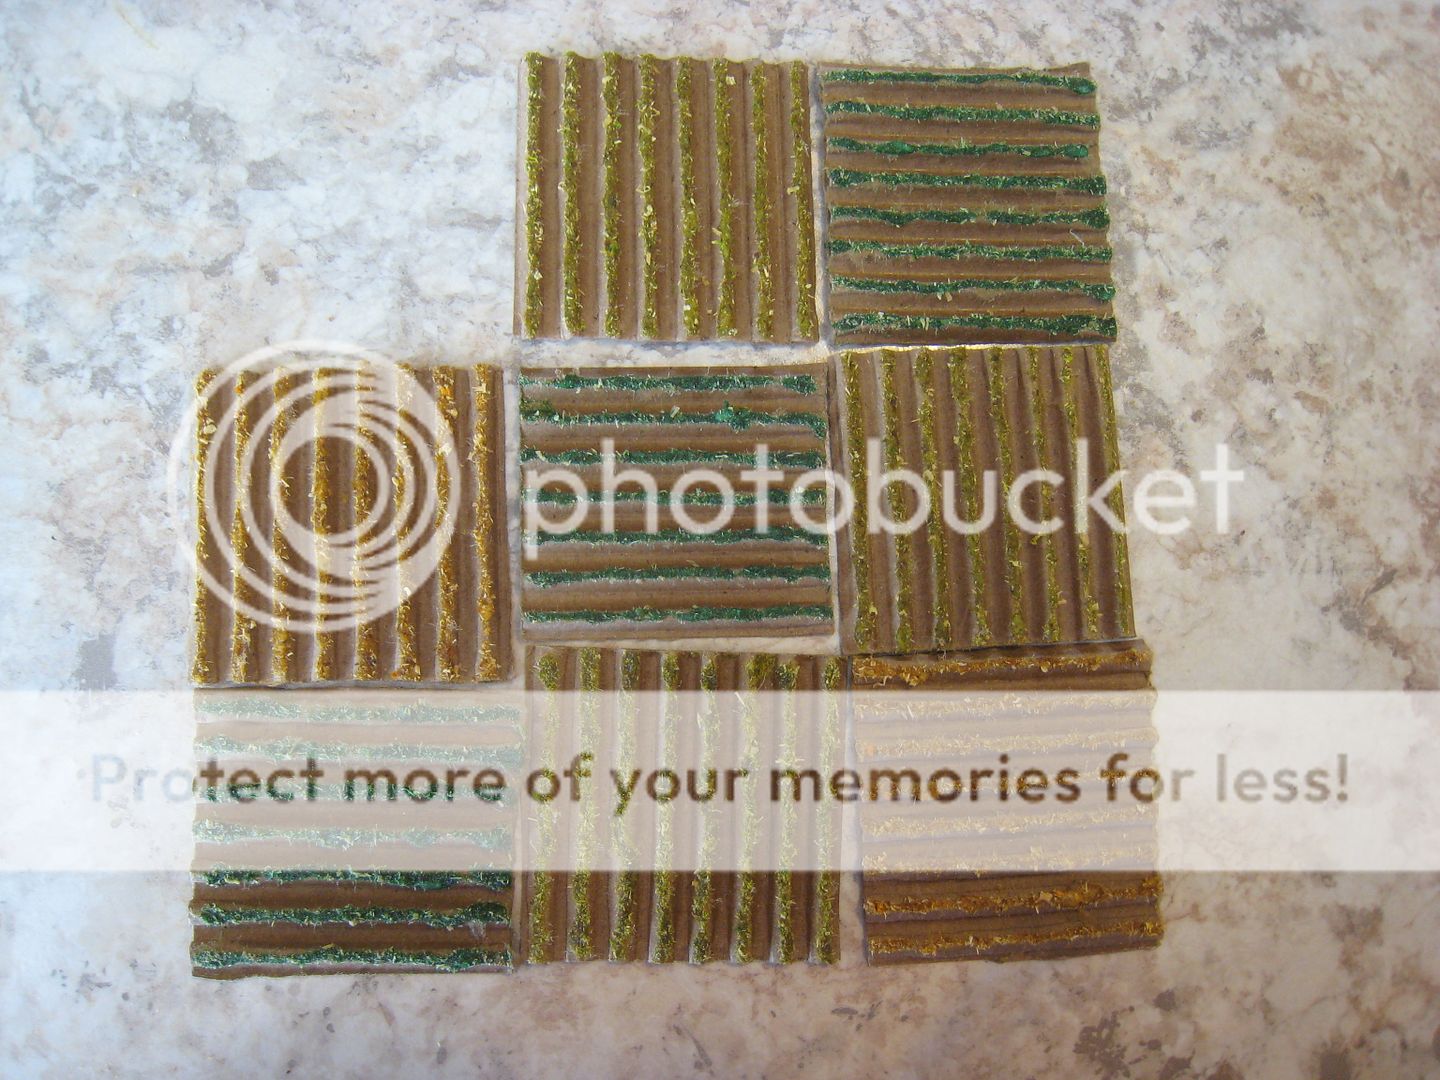
I'm back, with more terrain attempts! This time, I tried to make some crop fields, using corrugated cardboard. I peeled off the top layer to expose the corrugated "ruts" and cut the cardboard into rough squares. I chose small squares, since medieval fields were divided up by household into small plots, but early modern fields could be much larger. For the flocking, I used sawdust out of my dad's band saw collection bag.
(For some reason the camera wouldn't focus today...)
I used three colors of food dye to create three different colors of flocking: green and yellow from the "traditional" pack, and neon green from the "neon" pack. I mixed up batches in small cups, and stirred them with toothpicks.
The test piece!
The green, as you might be able to tell, was too dark and a bit unrealistic. I like the yellow for autumnal foliage, dead grass, and ripe crops, but the neon green surprised me by being the most realistic.
I ended up with eight tiles (yes, I wish I had a ninth!), and laid down stripes of PVA glue on each "ridge" of the cardboard. I placed the tiles in plastic tubs and shook out some colored sawdust over them.
Ta-da!
Once they dried, I sprayed on some fixative; I've been using Krylon and am very pleased with it, but I'm sure there are other/cheaper brands.
Next time: a grassy meadow!
|
|
|
|
Post by sgtslag on Sept 9, 2019 0:33:09 GMT
Very nice, small fields! I may need to make a number of these up, myself! Thank you.
Saw dust is wonderful for flocking material. DM Scotty (I think...) said to sift it using a kitchen sieve, to get consistently sized, very small bits of saw dust, for flocking. It sounds a bit hokey, but it really works -- superbly, as a matter of fact. My nephew is a professional carpenter. He gave me a bag full of it, and I tried the sieve, with surprisingly good results. Cheers!
|
|
|
|
Post by margaret on Sept 9, 2019 15:52:05 GMT
Looks good! Not sure how light-fast the food coloring is, but that shouldn't be an issue if you keep them in a dark box most of the time. And it gave you a good variety of colors quickly.
I have been using Krylon for decades - that brand seems to have cornered the market on clear sprays for hobby use. Possibly because it's reliable. There are a couple of others made for other purposes, but they aren't cheaper and may not come in a matte finish. You might be able to save a little by getting Krylon at Walmart. And certainly by using a hobby store's 40-50% off coupon.
|
|


 I can probably find some of those lying about.
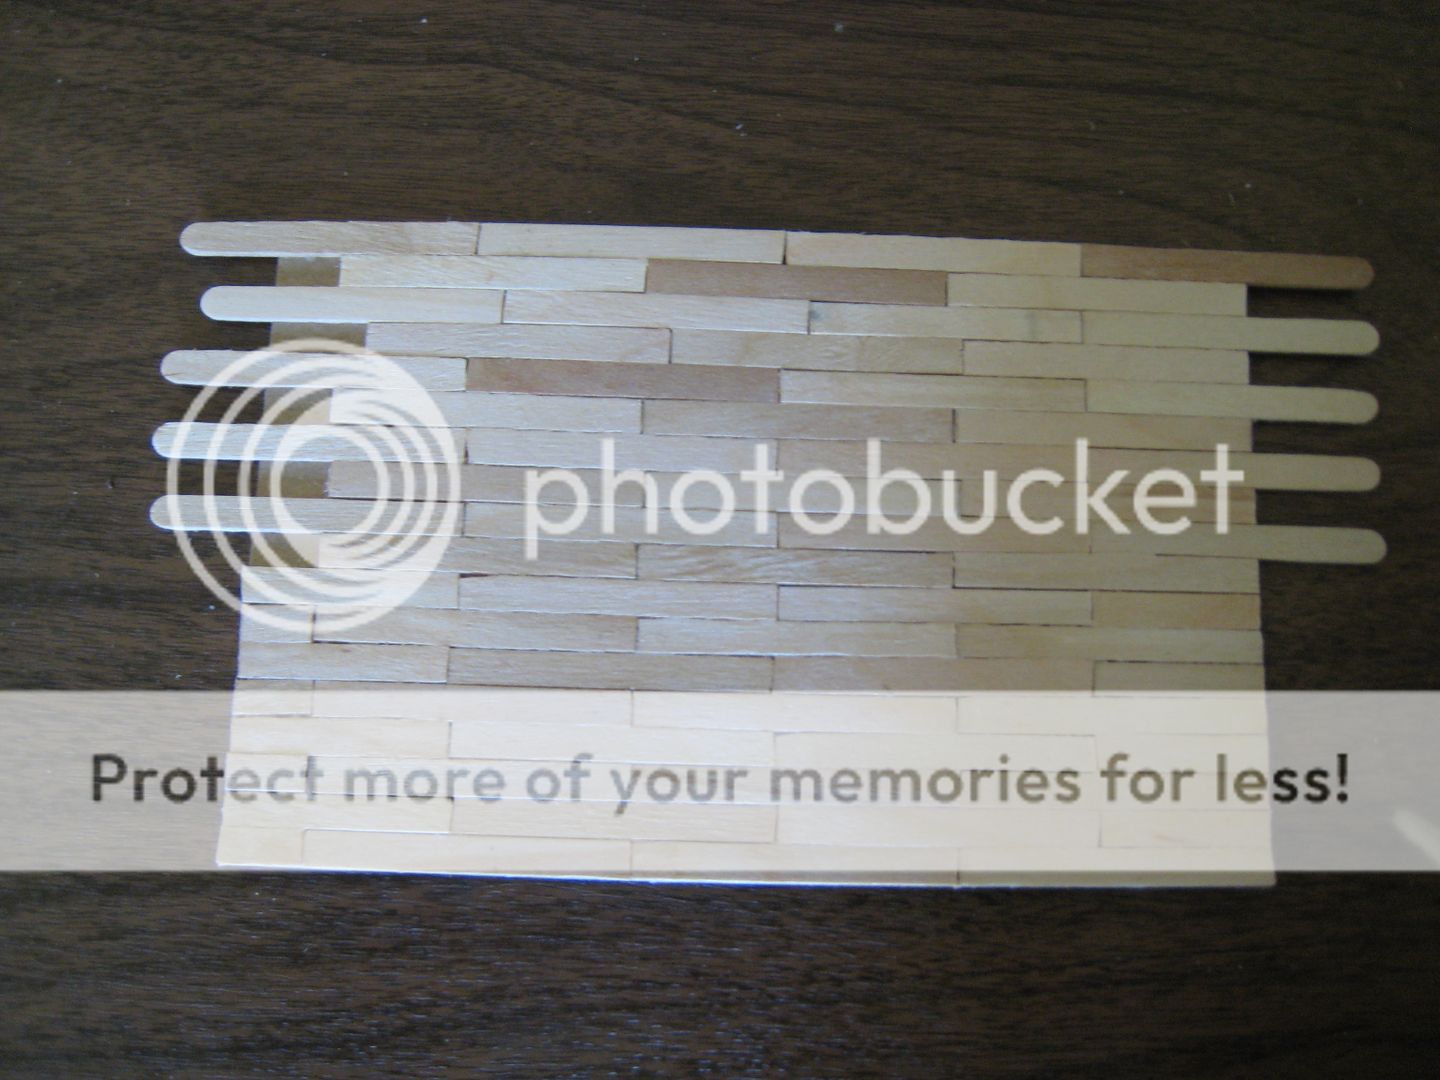


 Cheers!
 Cheers!