|
|
Post by bobtheskull on May 4, 2017 1:23:53 GMT
Wow! Great work, stelmaria. I think the earth elemental is my favorite. You really nailed the rocky look. Bravo!
|
|
galahad
Cardboard Collector

Posts: 4 
|
Post by galahad on May 26, 2017 8:52:26 GMT
Here are some mimics I've made made of cardboard, toothpicks and clay  |
|
|
|
Post by margaret on May 26, 2017 14:19:08 GMT
Nice-looking mimics. Is the central one a barrel?
|
|
|
|
Post by deafnala on May 26, 2017 15:26:25 GMT
This is one of those threads that always has something interesting, &, often, inspiring to see. That Door is the latest Thingy that I now need to try. GREAT WORK!
|
|
|
|
Post by tauster on May 26, 2017 16:15:50 GMT
Those mimics are great! The only one idea to improve them a teeny tiny bit more would be to glue one or two little metal scraps in and camouflage them under the paint. Then you could add neodym-magnetised tentacles after you replace the original door/chest/barrel with the mimics. The players will naturally fight the mimic, but when it suddenly sprouts tentacles in round two, they will face another surprise that they didn't see coming. My players would think that with replacing the original object with the mimic version, that's it. They wouldn't expect that it changes once again. *evil DM grin*  |
|
sotf
Advice Guru

Posts: 1,084
|
Post by sotf on May 26, 2017 17:01:03 GMT
Well, might as well post my prototype Shadow...I've got to make some more of them before running Death House. Shadow (Can be used for ghosts and similar as well)
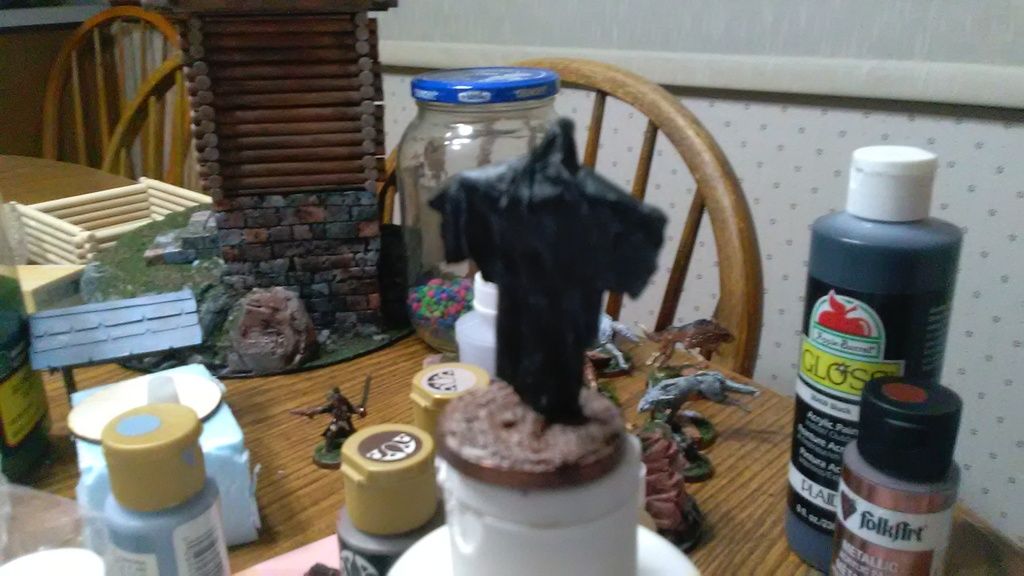 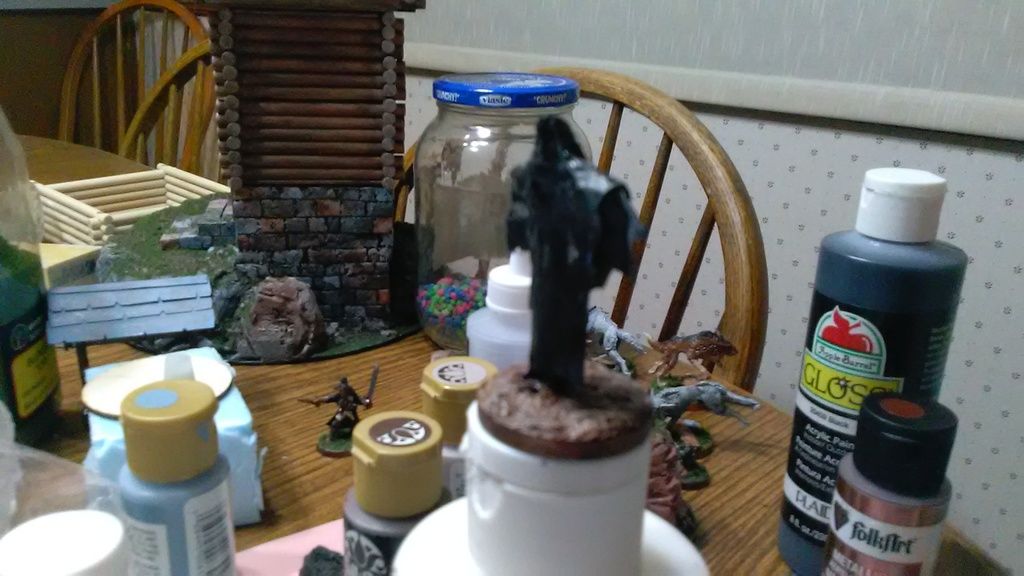 Started with one of the wooden discs that are about the thickness of a normal round base you get with a lot of things. Used a hobby, hand drill to go almost all the way through and mounted a toothpick in it. I then compared the height to one of my minis and added about a heads height on top of a normal human height and marked out where shoulder height would be at the same time. Trimmed the toothpick down to the height for the head and hotglued on another toothpick across the central one for the arms and shoulders. I also used hot glue to bulk up the chest, shoulders, and head slightly. I also textured the base. Then I took some tissue paper and white glue, tore strips and pieces of the paper to work out the shape and tattered, flowing cloth look until I liked the end result with each piece getting some glue under it as it goes down. When done there, I coated the entire thing in white glue and let it dry hard. Before that part, I could have broken the wood in the arms for other poses, with the last coat hardening them to keep the shape. Then I used a bit of white glue to put some sand down on the base as well to work things out. Primed it in black, then gave a heavy drybrush of a dark grey, then another lighter one of an even darker grey. Added a highlight in various areas of a mid grey (Namely tried to get around the rim of the hood, end of the sleeves, and the lower edges of the cloth. Base was a dark brown and then a drift wood drybrush (I tend to edge my bases in a copper) The big change I'm planning for the rest of them is to use some smaller beads to help bulk up the chest and head slightly and make things easier. |
|
|
|
Post by bobtheskull on May 26, 2017 22:30:46 GMT
Here are some mimics I've made made of cardboard, toothpicks and clay Great work, Galahad. Mimics are one of my favorite monsters to craft because they come in a lot of shapes. I made one that mimics a section of wall. Makes a great encounter *DM cackle*  |
|
|
|
Post by ageofgaming on May 26, 2017 23:07:54 GMT
Wow! Door Mimic.....I must attempt to make one looks great!, and the shadow mini is FANTASTIC!...always a great thread to check out.
|
|
|
|
Post by bobtheskull on May 27, 2017 2:41:57 GMT
Well, might as well post my prototype Shadow...I've got to make some more of them before running Death House. Man, that's a cool mini. I was thinking of a way to tackle one of these guys, I think might try one the next time I'm working on D&D stuff. |
|
sotf
Advice Guru
Posts: 1,084
|
Post by sotf on May 27, 2017 3:07:59 GMT
Well, might as well post my prototype Shadow...I've got to make some more of them before running Death House. Man, that's a cool mini. I was thinking of a way to tackle one of these guys, I think might try one the next time I'm working on D&D stuff. Just remember that for the tissue paper, use the type that's used for packing things rather than the kleenex type or toilet paper. Look in the section of the store that has wrapping paper...I lucked out and there was a lot of the stuff jammed into the pair of shoes I got recently. |
|
galahad
Cardboard Collector
Posts: 4
|
Post by galahad on May 27, 2017 6:04:36 GMT
Nice-looking mimics. Is the central one a barrel? Yep center one is a barrel. The tentcles become coppery around the back as if they had been the badning on the barrels. Yep the door mimic was the first one I made because I ran a one-shot which had a guy run through a door and then when the party tried to open the door it turned into a mimic. It was fun particularly when the wall behind the mimic door was a plain stone wall. (Never mess with a mage  ) |
|
|
|
Post by bobtheskull on May 27, 2017 6:32:02 GMT
Man, that's a cool mini. I was thinking of a way to tackle one of these guys, I think might try one the next time I'm working on D&D stuff. Just remember that for the tissue paper, use the type that's used for packing things rather than the kleenex type or toilet paper. Look in the section of the store that has wrapping paper...I lucked out and there was a lot of the stuff jammed into the pair of shoes I got recently. Cool. Thanks for the tip on that. |
|
sotf
Advice Guru
Posts: 1,084
|
Post by sotf on May 27, 2017 7:09:51 GMT
Just remember that for the tissue paper, use the type that's used for packing things rather than the kleenex type or toilet paper. Look in the section of the store that has wrapping paper...I lucked out and there was a lot of the stuff jammed into the pair of shoes I got recently. Cool. Thanks for the tip on that. The main reason is that it doesn't dissolve and collapse like the kleenex/toilet paper type which helps for cloth looks. It also works great for more normal cloth if you buy some "nude" dollies that are used for sculpting clothes and armor...and normally hair. It's not that hard to get workable robes and similar things if you want ancients type stuff. |
|
|
|
Post by bobtheskull on May 29, 2017 17:16:13 GMT
I was just looking at this guy the other day and decided to post him. This carrion crawler was my first attempt at using sculpey and it gave me the idea to try more monsters. The body is a roll of foil curved into an S shape with a thin layer of sculpey over it. I did all the work with a popsicle stick. The weird tentacles and the legs all came off a dollar store bug toy. In hindsight, I should have done more with the base.  |
|
|
|
Post by ageofgaming on May 29, 2017 23:22:15 GMT
That's a pretty neat looking carrion crawler (it's one of my favorite dungeon critters),I dig the pose & sculpt.... particularly the under belly
|
|
|
|
Post by ageofgaming on May 29, 2017 23:27:50 GMT
Here's a home brew monster I made by cannibalizing a few dollar store insects....I wasn't totally happy with the end result ...but had fun designing & making it .....and learnt from a few mistakes I made along the way...  |
|
|
|
Post by bobtheskull on May 30, 2017 3:13:55 GMT
I think it looks great! Really makes me think of a critter I saw on someone's gaming blog called a Blight Tick. I used it for a few games. The chitinous plates on the back look really cool.
|
|
|
|
Post by tauster on May 30, 2017 5:04:28 GMT
That beast is Awesome, with a capital A. And I love crittters that come with story seeds built in their names! |
|
|
|
Post by curufin on May 31, 2017 11:55:15 GMT
Water Elemental These Water Elementals we made from crumpled up aluminum foil covered in hot glue. These are probably the easiest and fastest monsters I have ever made. 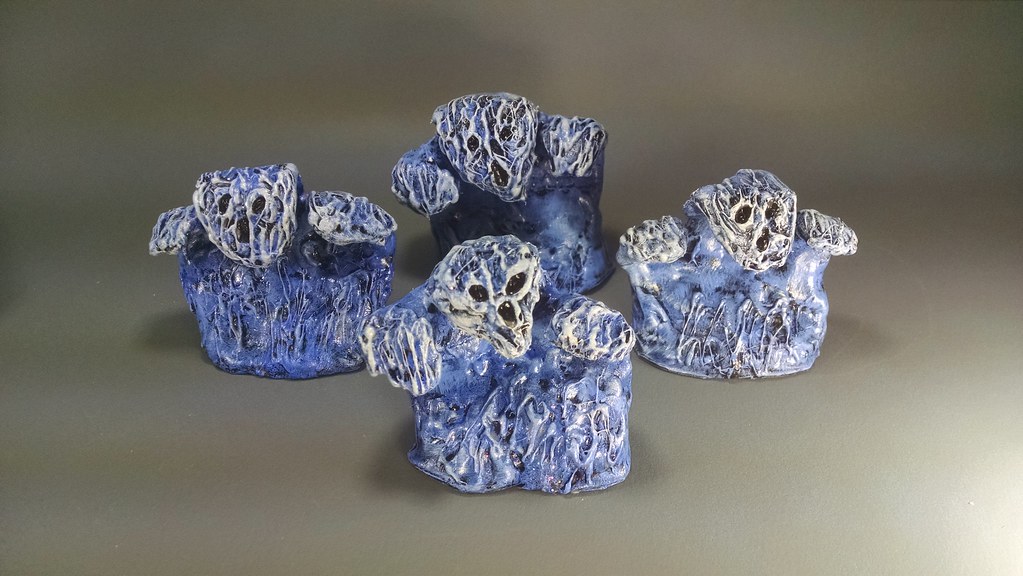 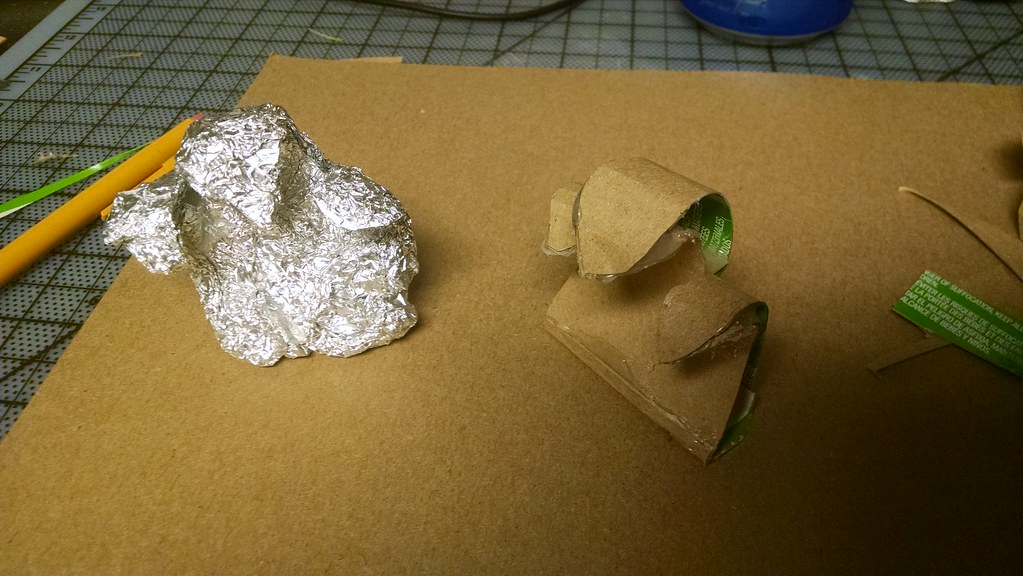 |
|
|
|
Post by bobtheskull on Jun 1, 2017 4:38:50 GMT
Nice work, curufin. The little white crests look really cool. Sometimes, it's the easiest crafts that come out the best.
|
|


 )
)


 Cheers!
 Cheers!