


Widow of the Web (with walkthrough) [Extra tile added]
Jun 28, 2014 19:14:56 GMT
DMScotty, tauster, and 25 more like this
Post by curufin on Jun 28, 2014 19:14:56 GMT
This is a Krull inspired tile and should be for a lower party level so spells like fly and teleport cant circumvent the obstacle. Enjoy!
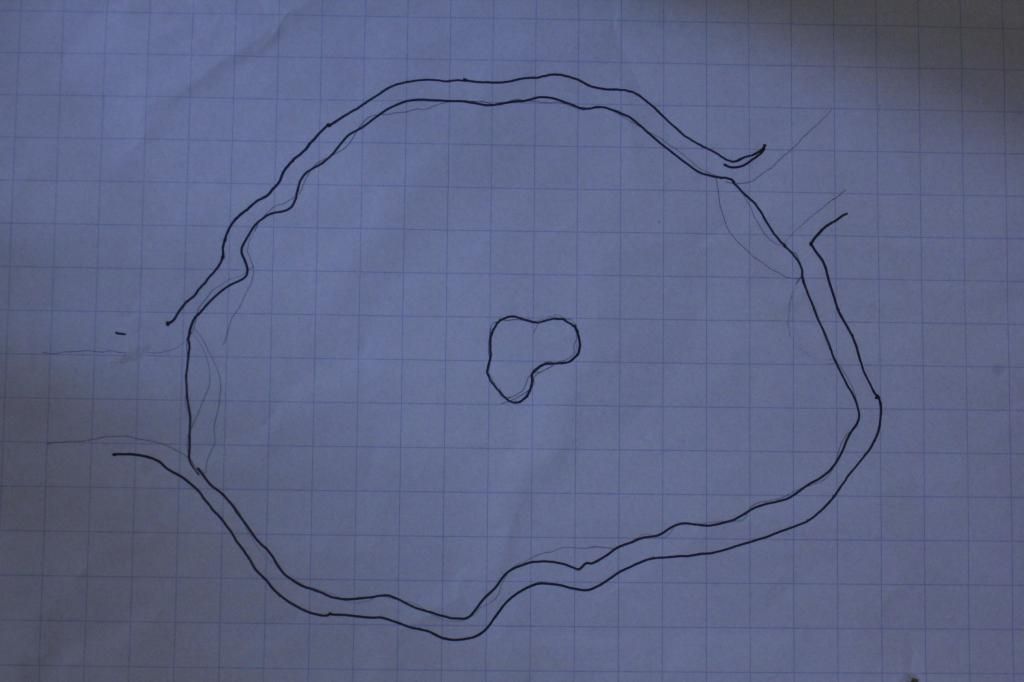
Like most ideas, it start with a room drawing.
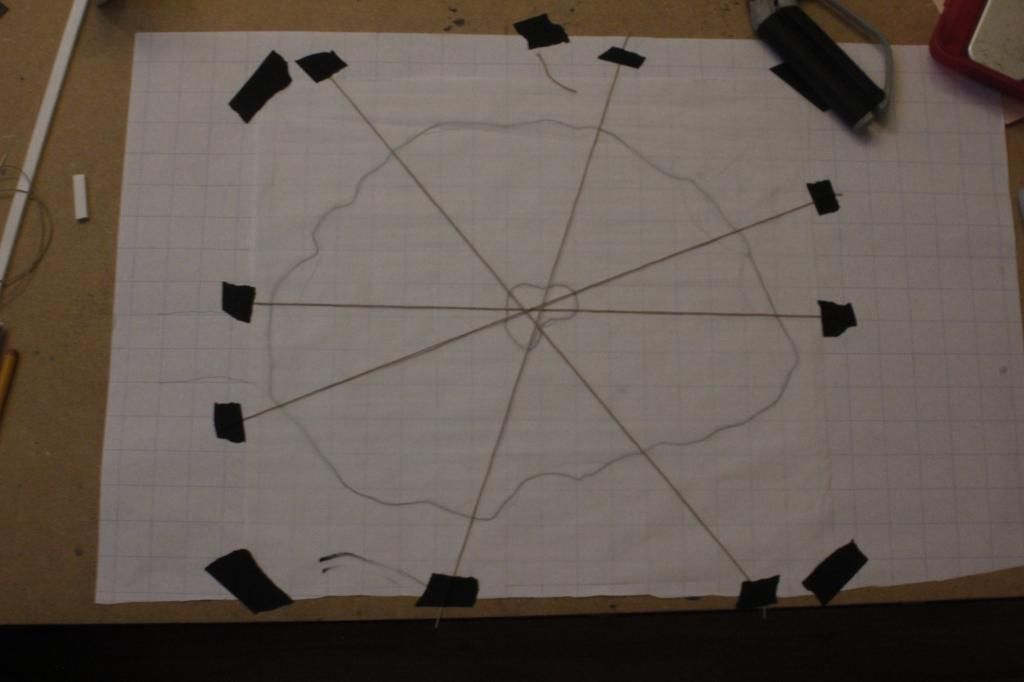
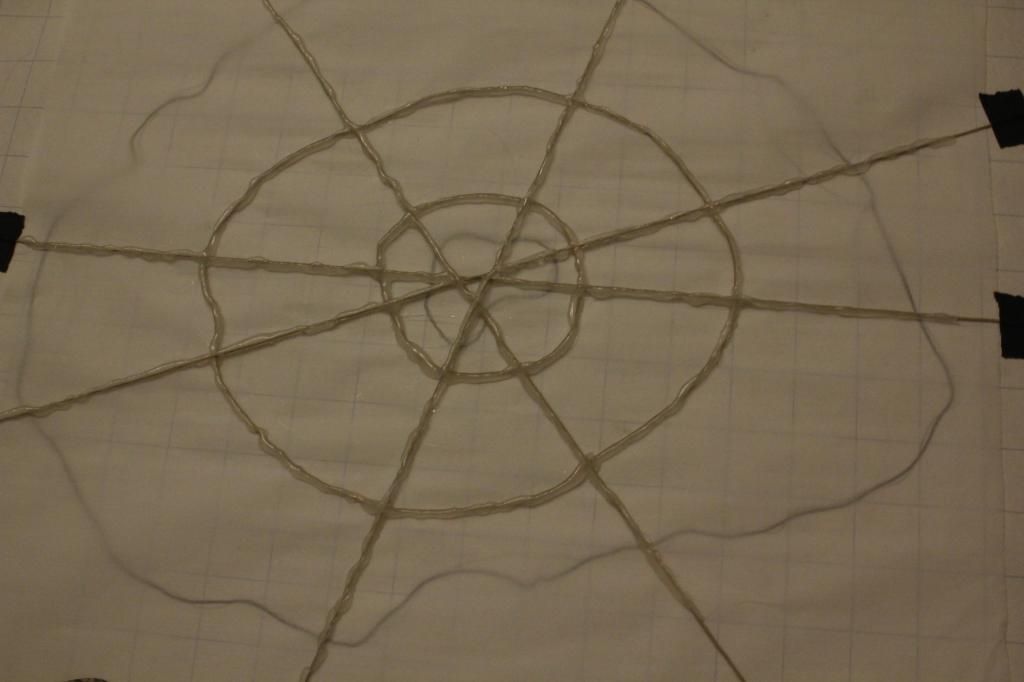
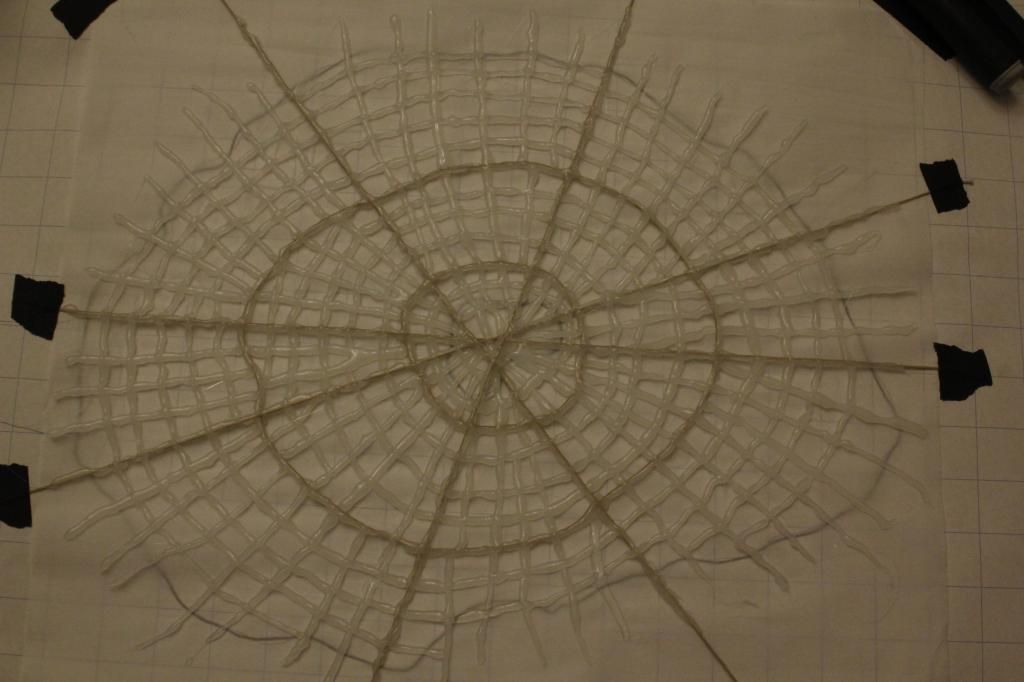
I covered the drawing with a sheet of parchment paper and taped down some thin pieces of string. This is the start of the web. HINDSIGHT: Adding a few more strings certainly would not have hurt.
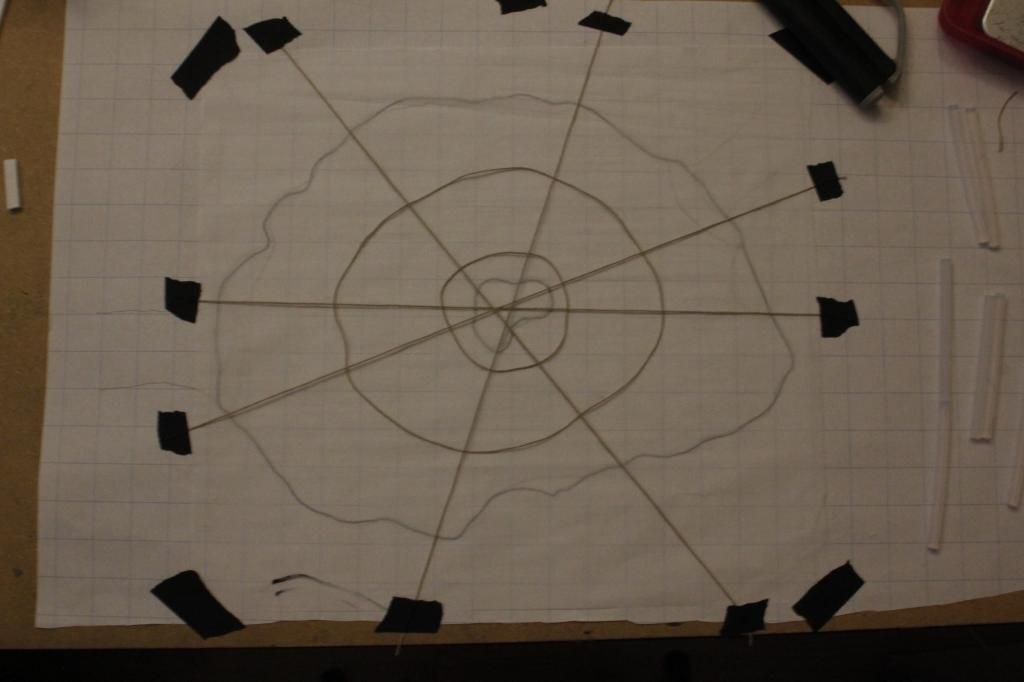
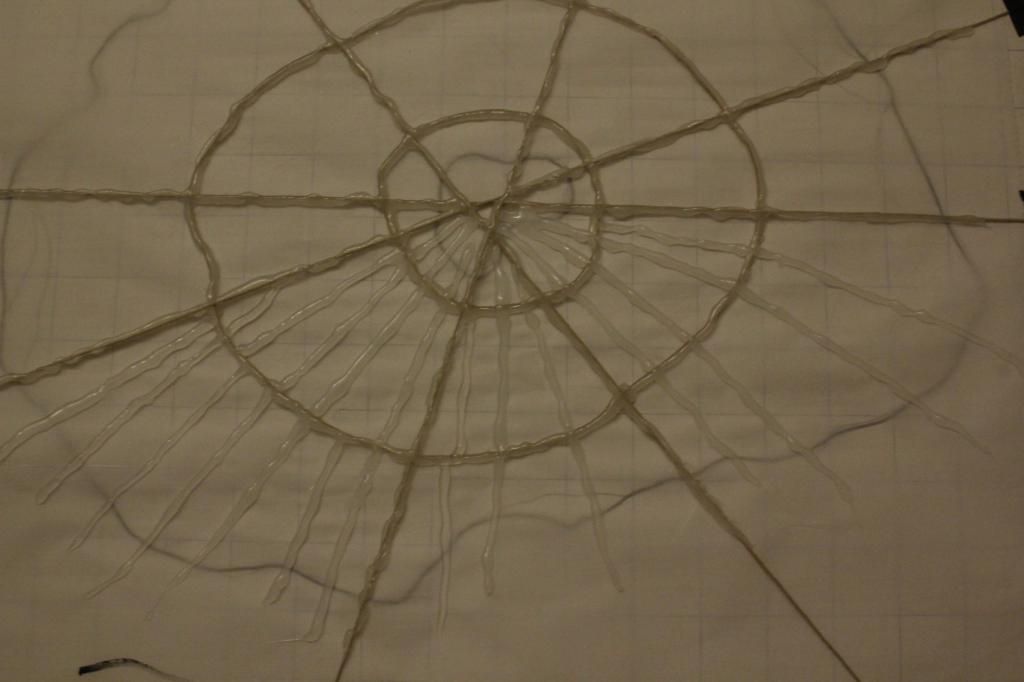
Using the same string, create a couple of circles and slide them under the crossed strings from the precious picture. HINDSIGHT: Adding a large circle of string nearly the size of the room would not have hurt.
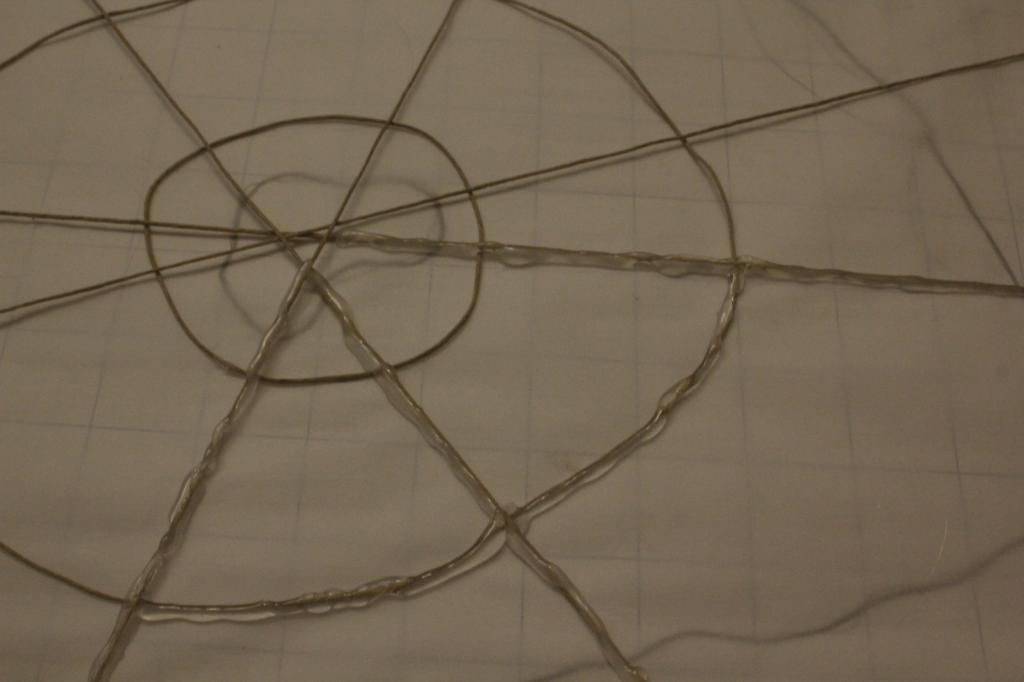
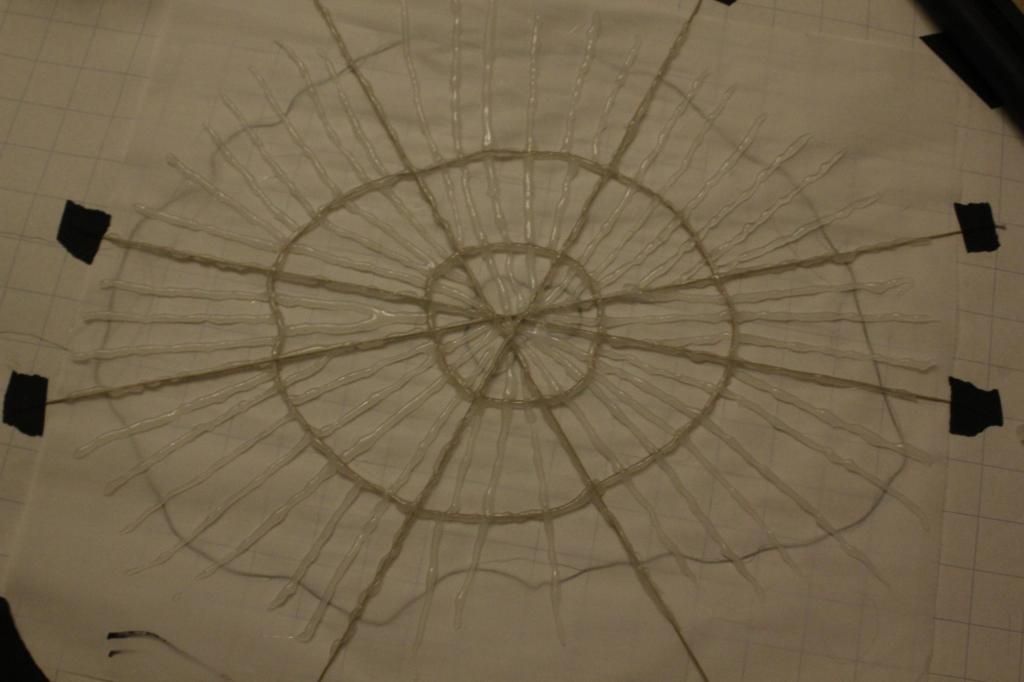
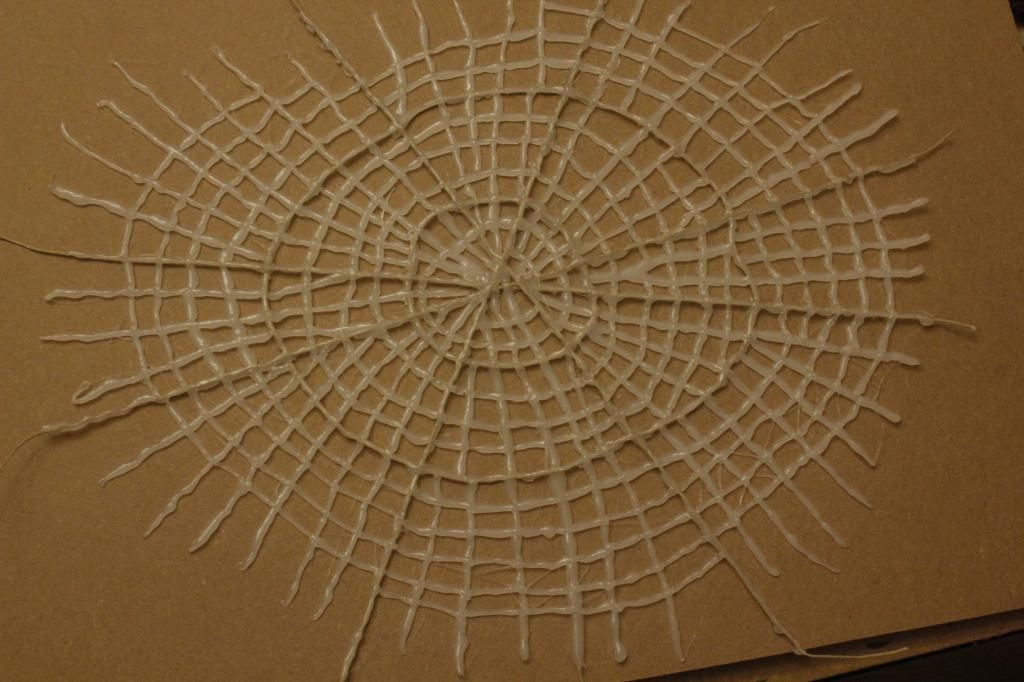
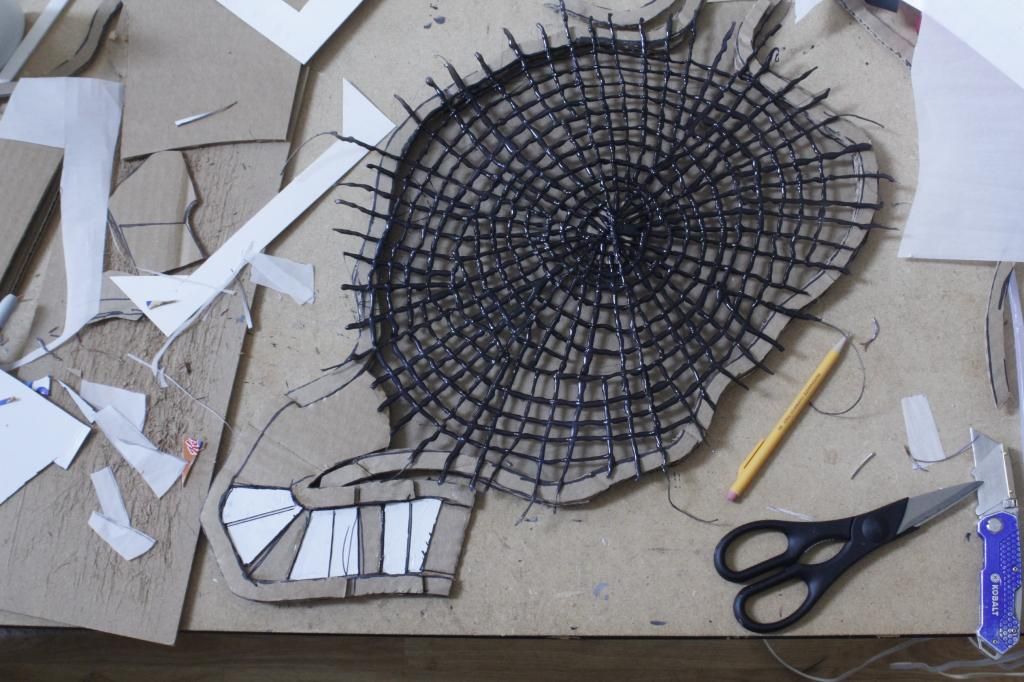
Using your mini hot glue gun, trace all of the strings. If you only have the short glue sticks, spent a few minutes hot gluing a few sticks end to end. This makes the web lines much easier to apply. And remember "wisps" are a good thing.
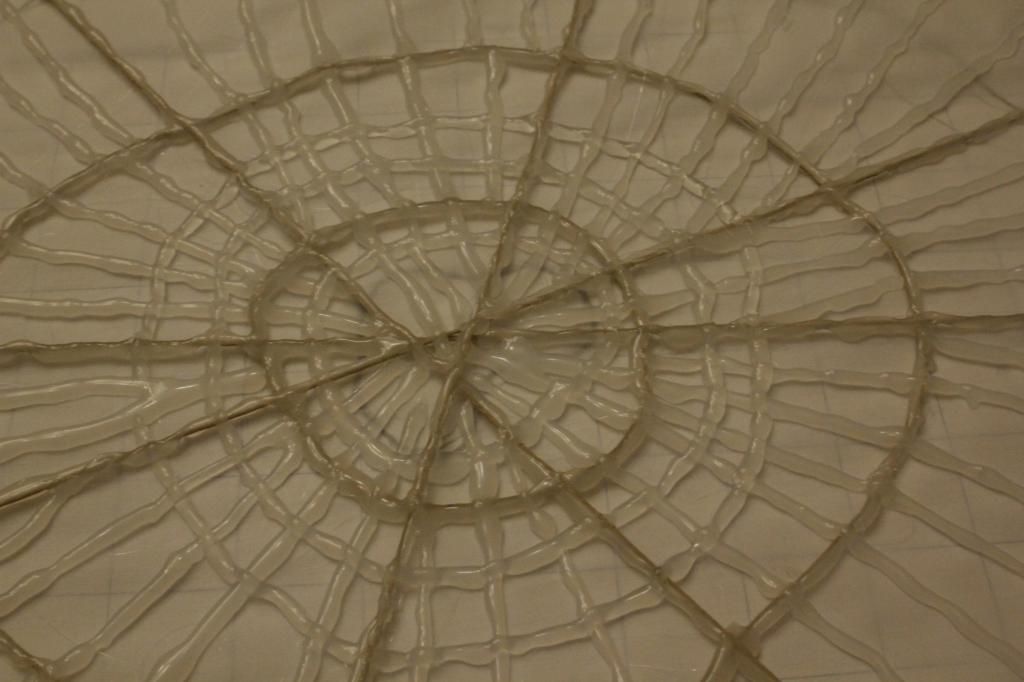
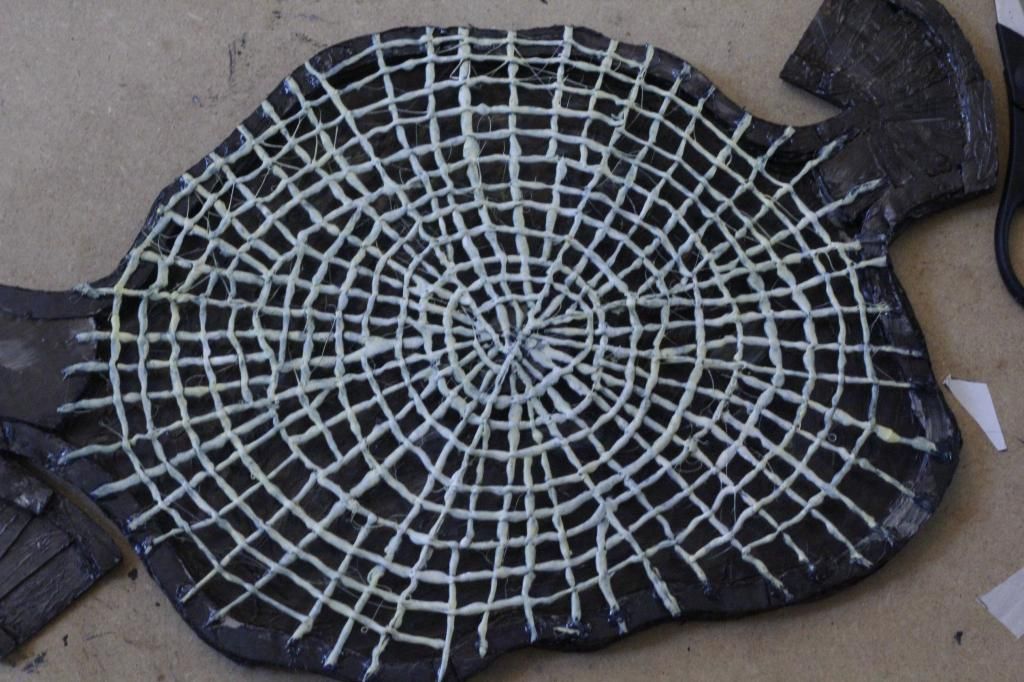
Begin filling in the rest of the web with the mini hot glue gun. Start in the center and pull lines to the edge.
Continue filling in the web by adding circles.
The finished web, ready for undercoat.
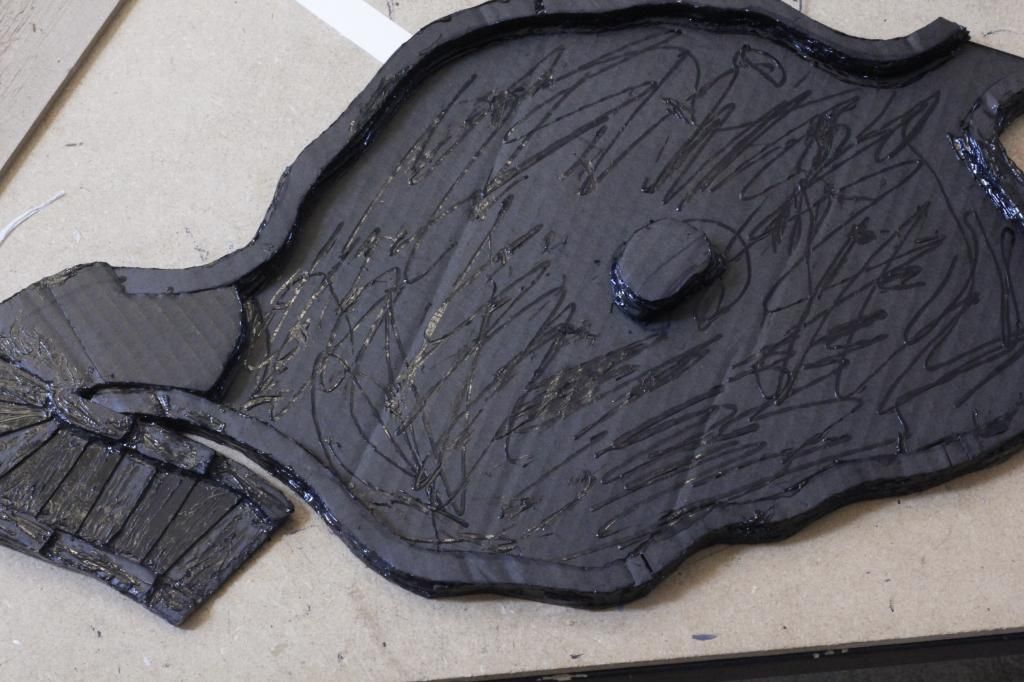
Cut out the room floor and several wall sections (four layers total).
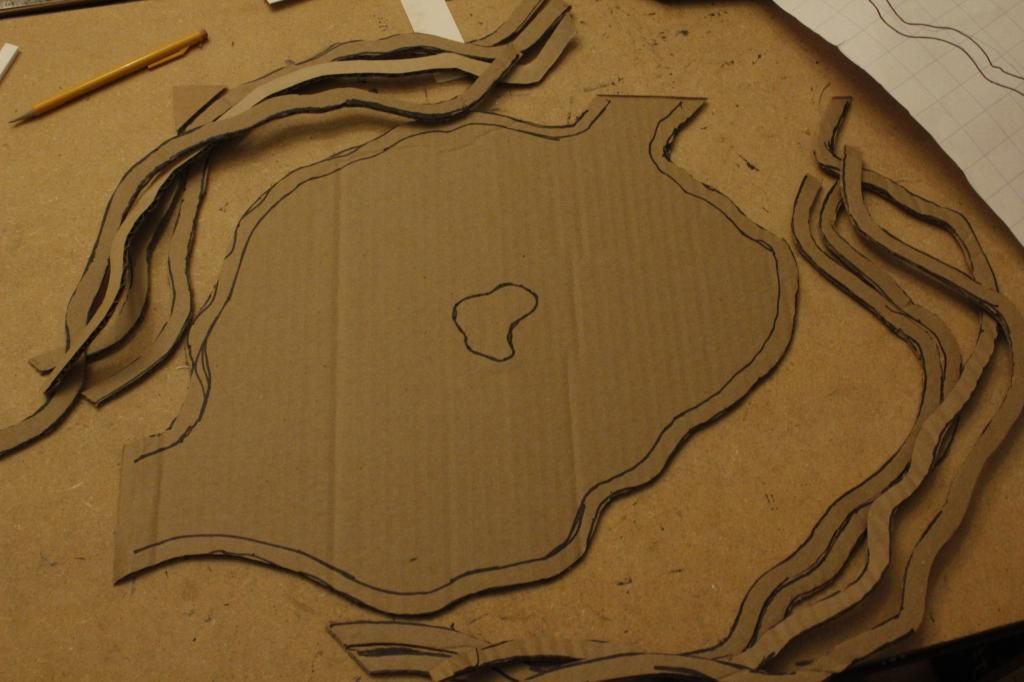
Glue three layers of walls to the floor. I also added a stair approach.
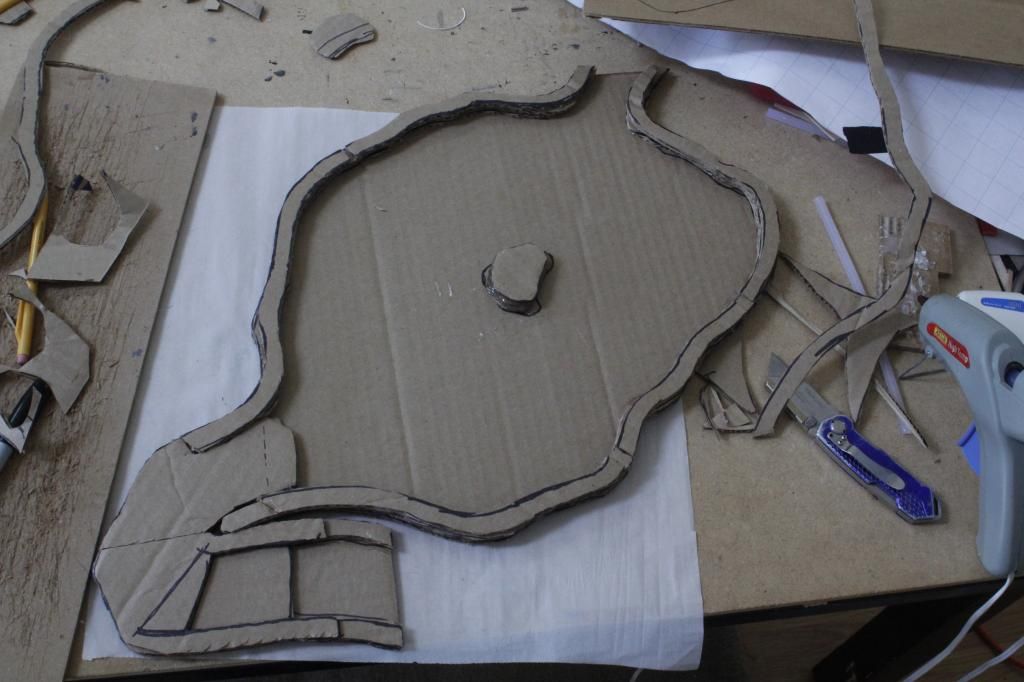
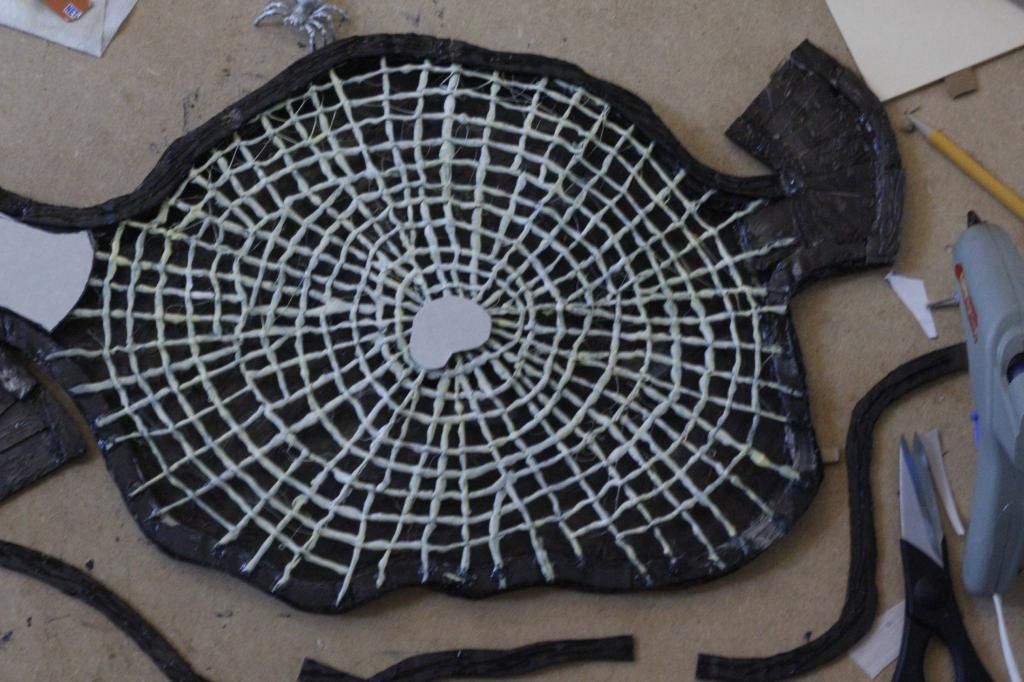
Test look at how the web fits.
Floor and stair texturing and black undercoat.
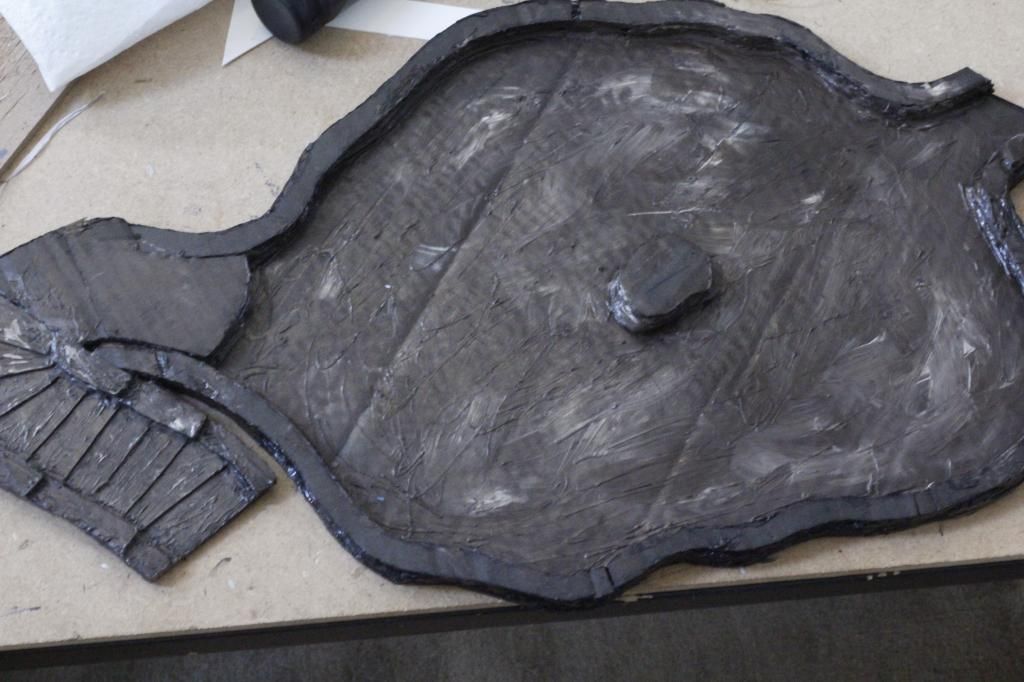
Painting the floor. Raw Umber and Warm Grey
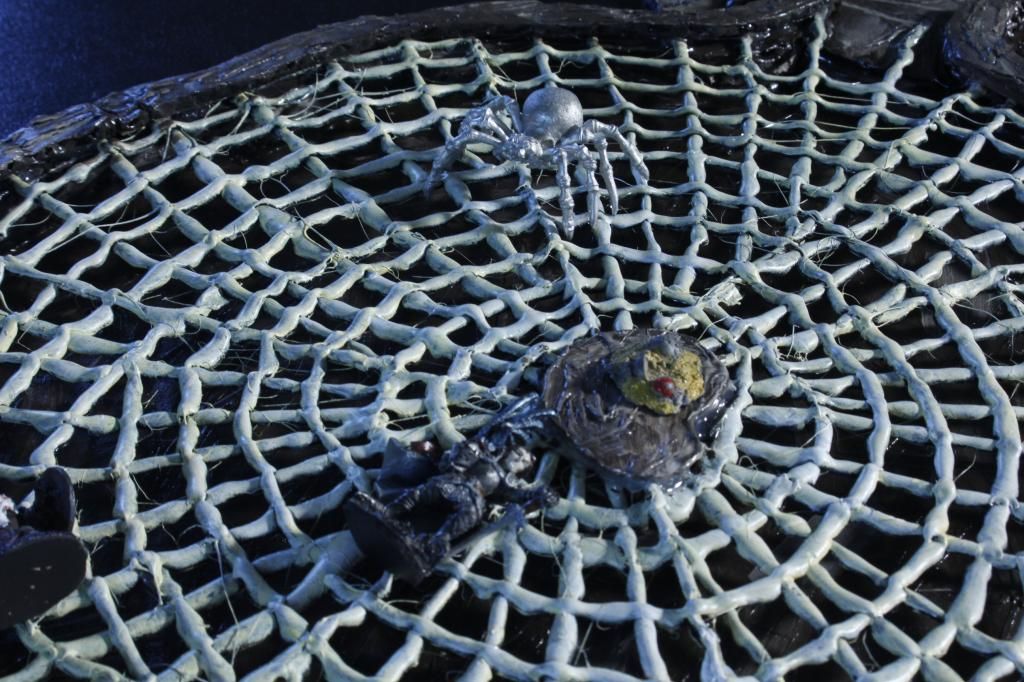
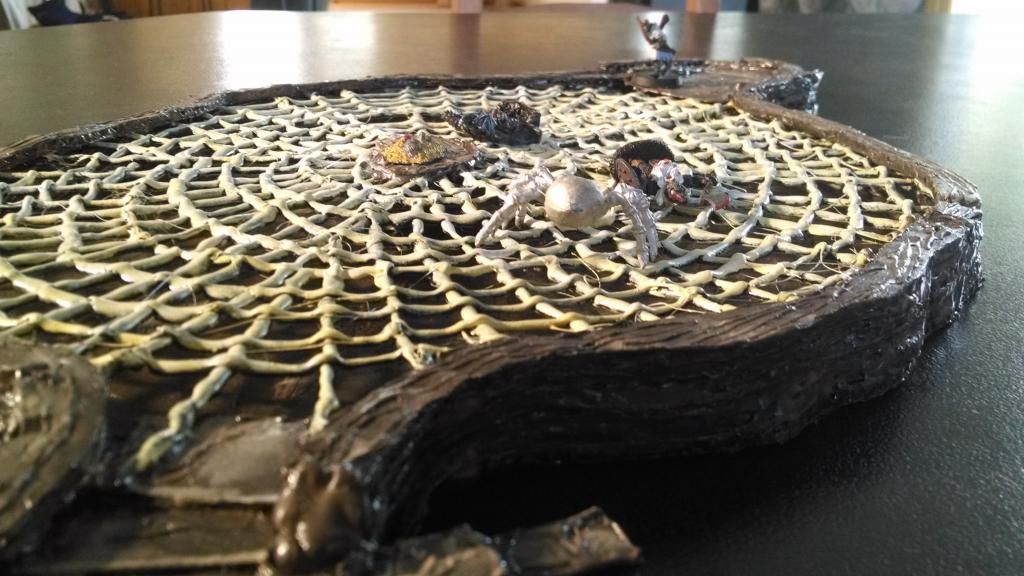
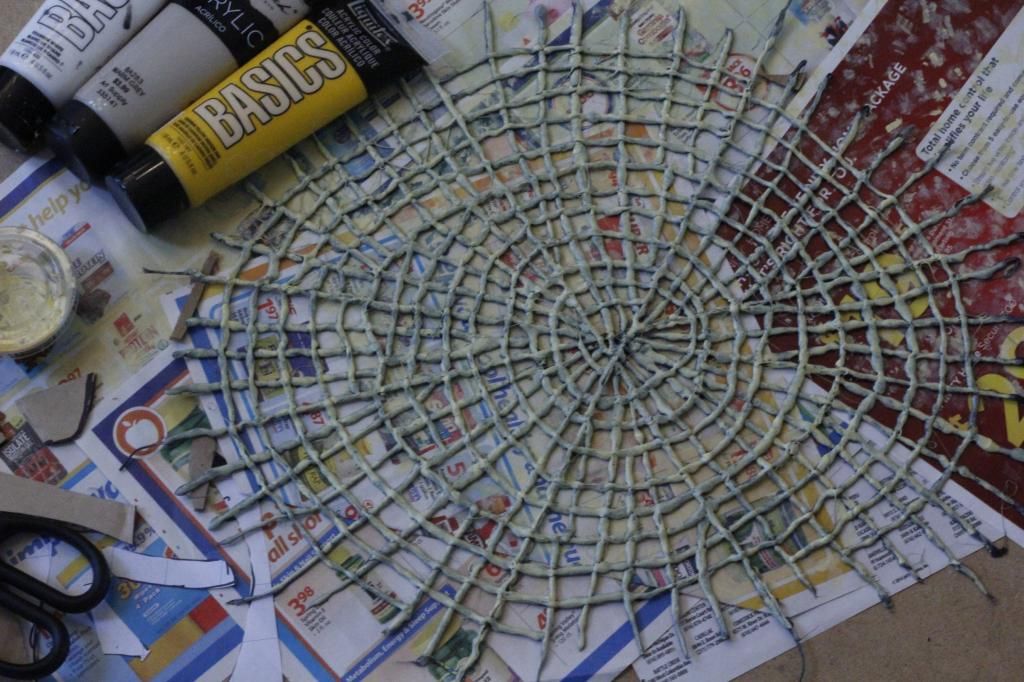
Painting the web. A mixture of White, Yellow, and Warm Grey.
I dry brushed white on the web. Then I hot glued it to the walls: Start by gluing just the center of the web to the center pillar. Next CAREFULLY pull the webs strands that contain the strings toward the walls and glue them. Then glue the rest of the web to the walls. I also added the other stair appoach which I should of done when I added the first one! DUH!
Hot glue the last wall layer on top of the web.
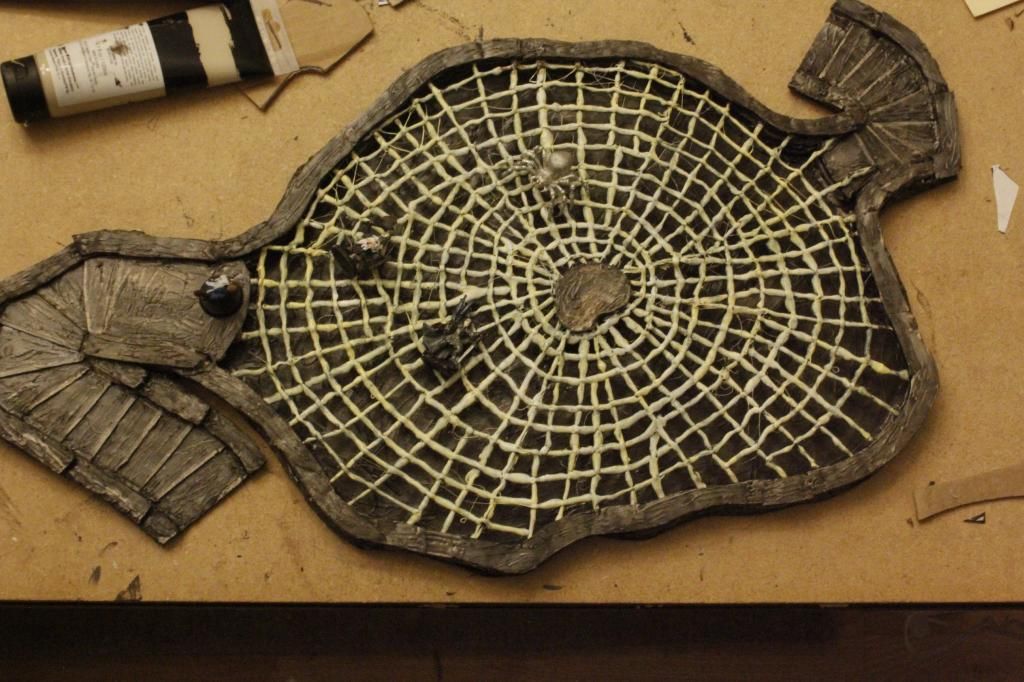
Glue the top of the center colum on. I also added another step and a ledge to one end of the room.

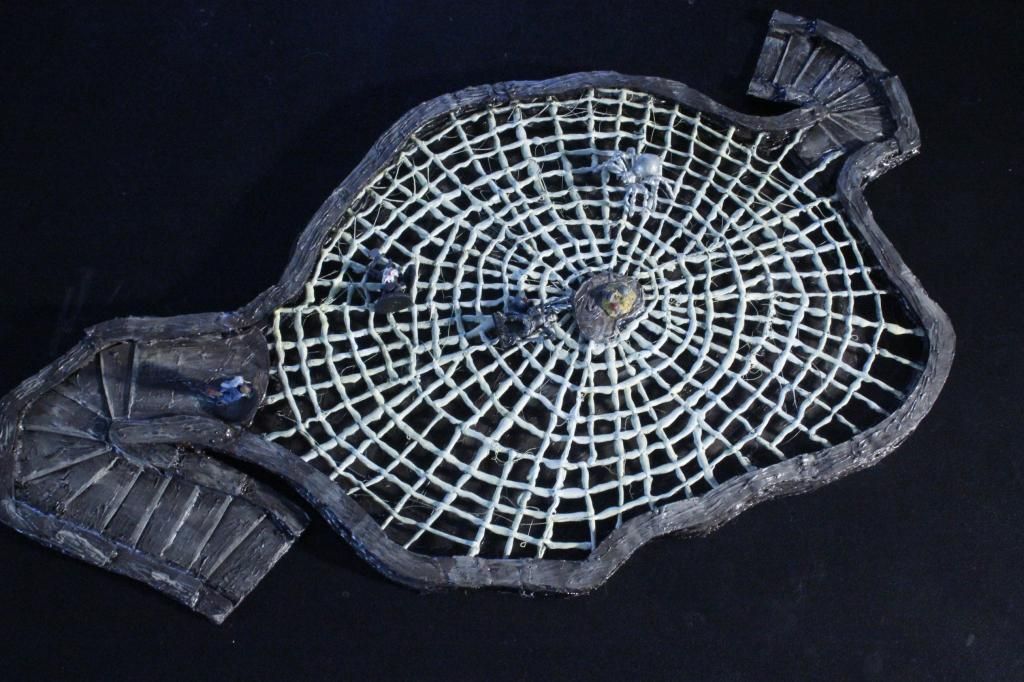
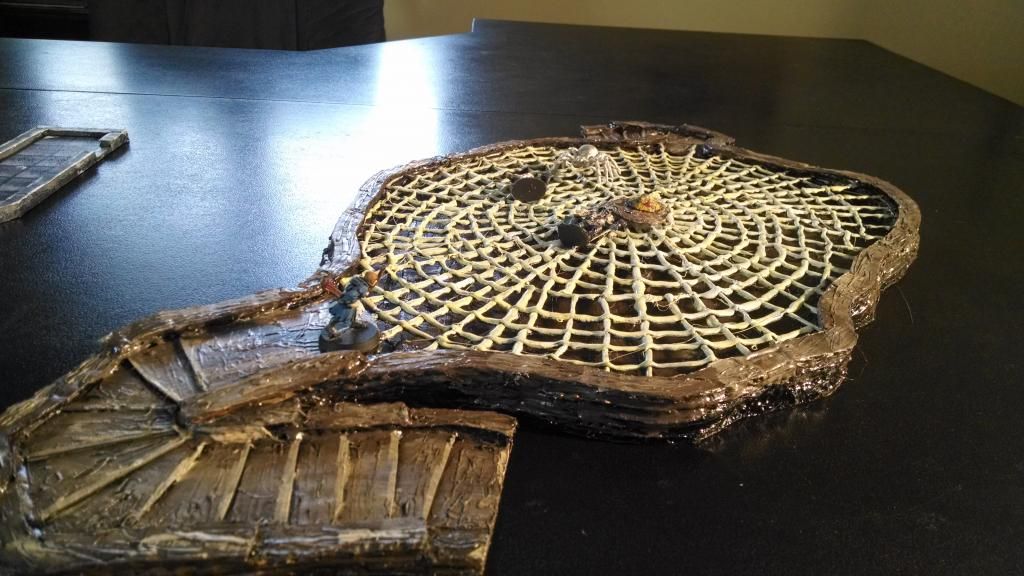
Final paint and you are ready to terrorize players.


Like most ideas, it start with a room drawing.

I covered the drawing with a sheet of parchment paper and taped down some thin pieces of string. This is the start of the web. HINDSIGHT: Adding a few more strings certainly would not have hurt.

Using the same string, create a couple of circles and slide them under the crossed strings from the precious picture. HINDSIGHT: Adding a large circle of string nearly the size of the room would not have hurt.

Using your mini hot glue gun, trace all of the strings. If you only have the short glue sticks, spent a few minutes hot gluing a few sticks end to end. This makes the web lines much easier to apply. And remember "wisps" are a good thing.


Begin filling in the rest of the web with the mini hot glue gun. Start in the center and pull lines to the edge.


Continue filling in the web by adding circles.


The finished web, ready for undercoat.

Cut out the room floor and several wall sections (four layers total).

Glue three layers of walls to the floor. I also added a stair approach.

Test look at how the web fits.

Floor and stair texturing and black undercoat.

Painting the floor. Raw Umber and Warm Grey

Painting the web. A mixture of White, Yellow, and Warm Grey.

I dry brushed white on the web. Then I hot glued it to the walls: Start by gluing just the center of the web to the center pillar. Next CAREFULLY pull the webs strands that contain the strings toward the walls and glue them. Then glue the rest of the web to the walls. I also added the other stair appoach which I should of done when I added the first one! DUH!

Hot glue the last wall layer on top of the web.

Glue the top of the center colum on. I also added another step and a ledge to one end of the room.

Final paint and you are ready to terrorize players.


 Cheers!
 Cheers!